


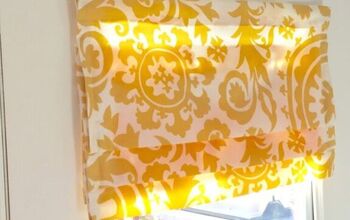
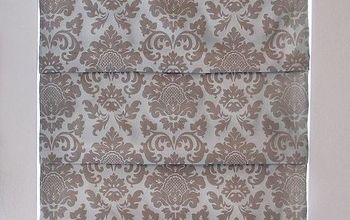
No Sew Tie Up Shades
$65
2 Hours
Easy
I love window coverings! I've spent countless hours looking for the perfect drapes/shades in almost every room in my house. When we did the bathroom remodel, I knew I needed to do something a little different because of my arched windows. What I came up with was an easy, no sew tie up shade. (You can view the entire tutorial at http://www.therozyhome.com/2013/03/16/no-sew-tie-up-shades/)
** I decided to address the most common question I've been asked over and over again. I covered the arch because I have a peeping neighbor. He's made lots of comments about work I've done in the bathroom but has never been to my house. Because our house sits on a hill, the arch part is street level and from his house you can see right in. Even though the window has frosting, the large wall of windows from the master makes the bathroom so bright that you can see into the bathroom as if there were barely any frosting. And at night... well same problem but you can actually see quite a bit more. These drapes hang exactly where I need them to be to cut out his view. At some point I may try to arch the drapes, but for now they serve my purpose. :-)
What You Will Need:
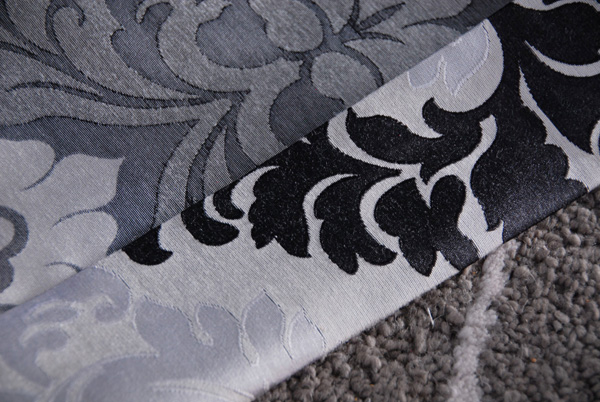
Fabric
Iron
Fabri-Tac
Ribbon
1 X 2 piece of wood or scrap wood (I used old casing)
The amount of fabric and ribbon you need depends on how big your windows are. My windows are 44 inches wide and I made the shade 40 inches long and I ended up using 3 yards of fabric and 2 3 foot spools of ribbon.
Step 1: Measure your windows
Measure the width of your windows from edge to edge. Add an additional 8 inches to the measurement (This will make the final curtain 4 inches wider than the window. This was a good width for me, but you can make it wider or narrower as needed. Just be sure to add at least 4 inches to account for seams).
Step 2: Determine the length you would like the curtains
My window is 48 inches long so I thought 40 inches without seams would work. Just keep in mind you will end up with 4 inches being used for the bottom seam and 4 to 6 inches for the top seam so add around 8 to 10 inches to the desired length to account for seams.
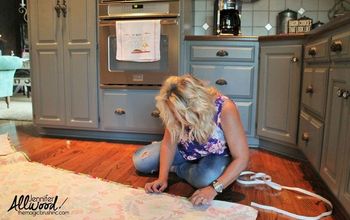
Step 3: Iron the fabric
Ugh… I.hate.ironing! But when it comes to making curtains or drapes, it is a necessary evil! Place the fabric wrong side up and iron the fabric. Ironing will help get the true size of the fabric (after the wrinkles are out the fabric is wider) and you don’t have to worry about the final curtain being too narrow (I learned this one the hard way).
Step 4: Cut the fabric
Cut your fabric based on your measurements.
Step 5: Create the seams
Ok… this is where the most amount of work comes in. Luckily it’s super easy and not nearly as hard as you may think.
Make sure your fabric is still laying wrong side up.
** I decided to address the most common question I've been asked over and over again. I covered the arch because I have a peeping neighbor. He's made lots of comments about work I've done in the bathroom but has never been to my house. Because our house sits on a hill, the arch part is street level and from his house you can see right in. Even though the window has frosting, the large wall of windows from the master makes the bathroom so bright that you can see into the bathroom as if there were barely any frosting. And at night... well same problem but you can actually see quite a bit more. These drapes hang exactly where I need them to be to cut out his view. At some point I may try to arch the drapes, but for now they serve my purpose. :-)
What You Will Need:
Fabric
Iron
Fabri-Tac
Ribbon
1 X 2 piece of wood or scrap wood (I used old casing)
The amount of fabric and ribbon you need depends on how big your windows are. My windows are 44 inches wide and I made the shade 40 inches long and I ended up using 3 yards of fabric and 2 3 foot spools of ribbon.
Step 1: Measure your windows
Measure the width of your windows from edge to edge. Add an additional 8 inches to the measurement (This will make the final curtain 4 inches wider than the window. This was a good width for me, but you can make it wider or narrower as needed. Just be sure to add at least 4 inches to account for seams).
Step 2: Determine the length you would like the curtains
My window is 48 inches long so I thought 40 inches without seams would work. Just keep in mind you will end up with 4 inches being used for the bottom seam and 4 to 6 inches for the top seam so add around 8 to 10 inches to the desired length to account for seams.
Step 3: Iron the fabric
Ugh… I.hate.ironing! But when it comes to making curtains or drapes, it is a necessary evil! Place the fabric wrong side up and iron the fabric. Ironing will help get the true size of the fabric (after the wrinkles are out the fabric is wider) and you don’t have to worry about the final curtain being too narrow (I learned this one the hard way).
Step 4: Cut the fabric
Cut your fabric based on your measurements.
Step 5: Create the seams
Ok… this is where the most amount of work comes in. Luckily it’s super easy and not nearly as hard as you may think.
Make sure your fabric is still laying wrong side up.
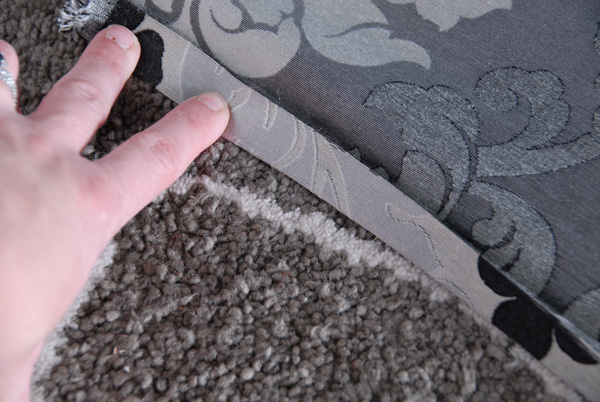
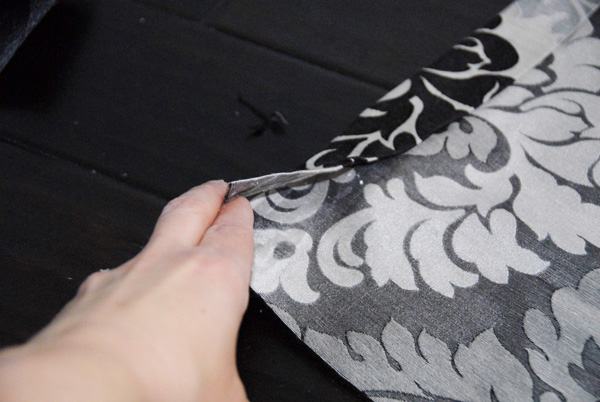
Fold the right seam over around one inch.

Press the seam the entire length of the curtain.

Fold the seam another inch and press.
After pressing the seam, unfold. You should see the fold lines and should have to hold the fabric down to keep it from folding back up.
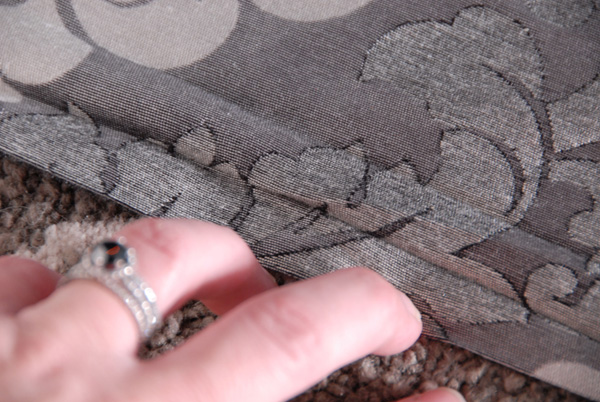
Grab your Fabri-Tac and and place a bead down the entire length of the outermost fold.Allow the fabric to fold over and press firmly on the seam.

tarting about 2 inches from the top, place a line of Fabri-Tac along the length of the fold.Fold over and press firmly along the seam.That’s it for the right side! Now just repeat the steps for left side.
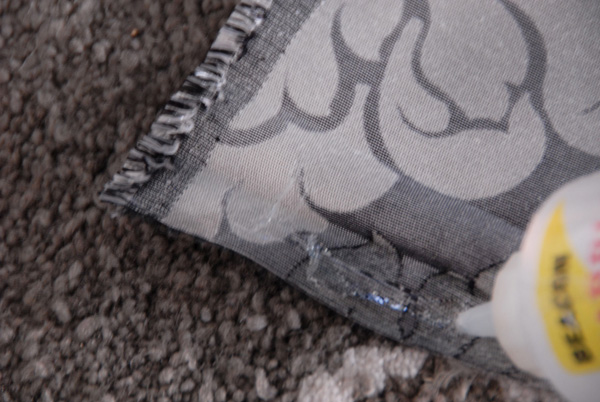
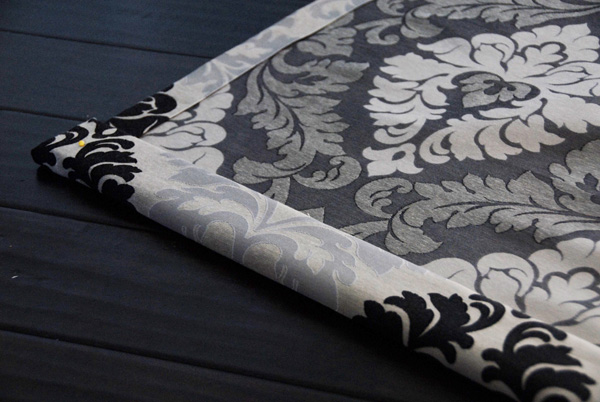
For the bottom…Fold the fabric over one inch and press.Fold the fabric over 3 inches and press.Unfold the fabric and glue the folds like you did on the side seams (outermost fold first). That's it for the bottom!
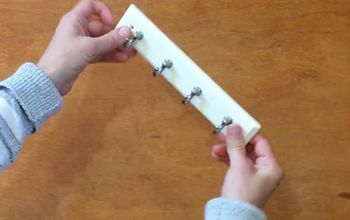
Subtract 1/4 inch from finish width of shade. Use this measurement to cut your wood.Place cut wood about 1/2 inch from the top of your fabric and inside the top pockets of the left and right seams

Place Fabri-Tac on the wood and fold the fabric over. Press.
Place Fabri-Tac on the board (both the covered and uncovered sections). Fold the board over.Fold the board over one more time.
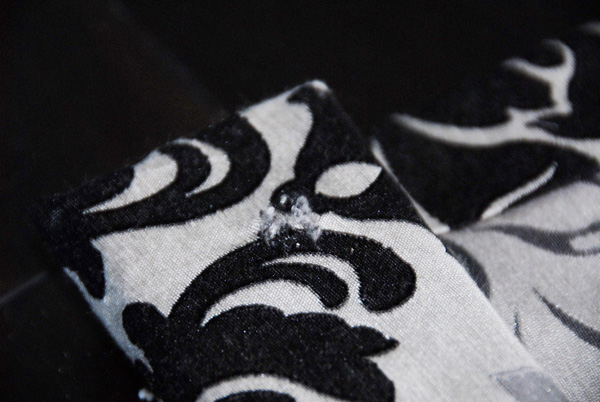
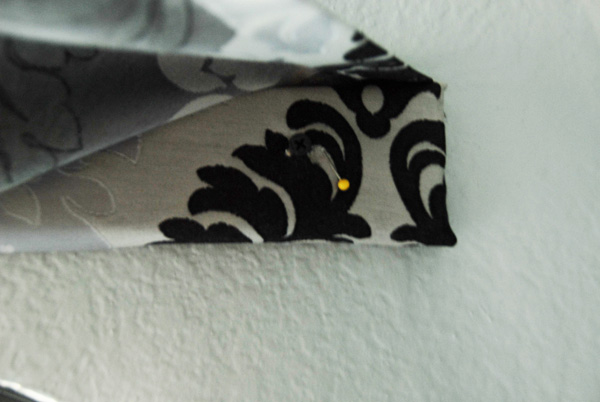
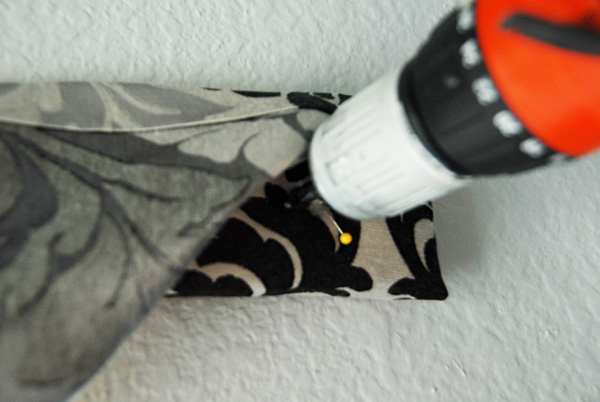
Determine where you want your screws to go on each end and mark with a pin.Using a 5/16 drill bit, drill a hole through header. Hold the header off the floor and grip the fabric tightly so it doesn't get messed up while drilling.
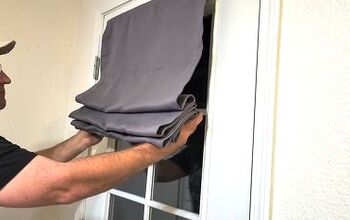
Now that you have drilled the hole, fold the fabric over the header. This should create a canopy.
Using drywall screws, mount the header to the wall. Don’t screw it in completely.
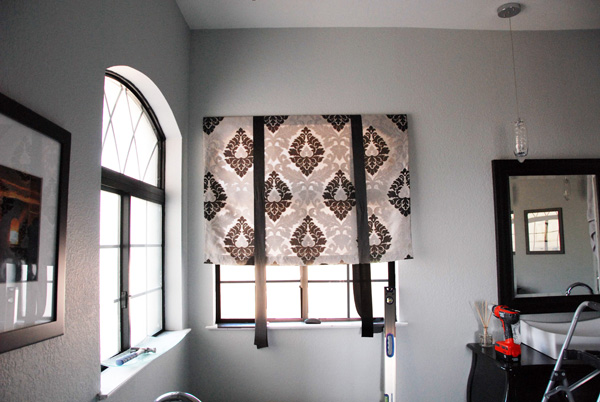
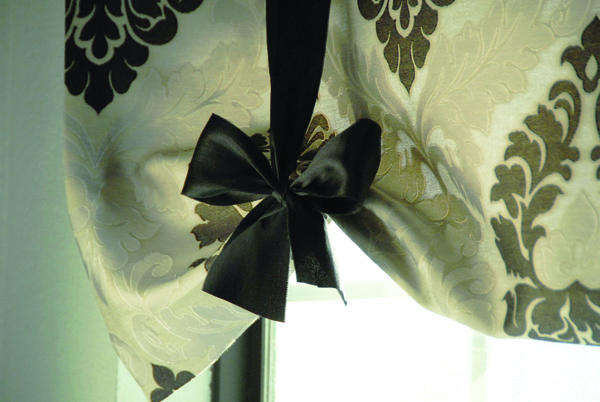
Thread your ribbon over the top of the curtain. Cut to the desired length.
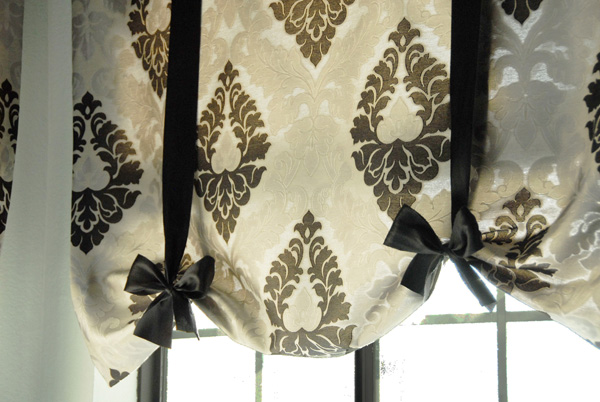
Tie the ribbon at the desired length.Tighten the mounting screw and voila! You have a no sew tie up shade!
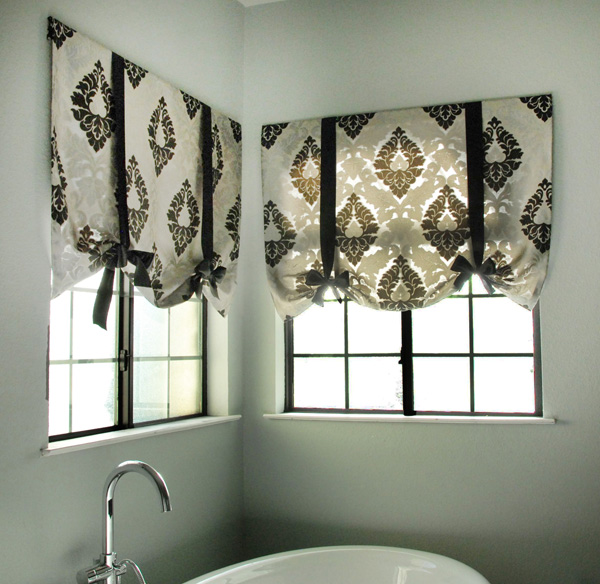
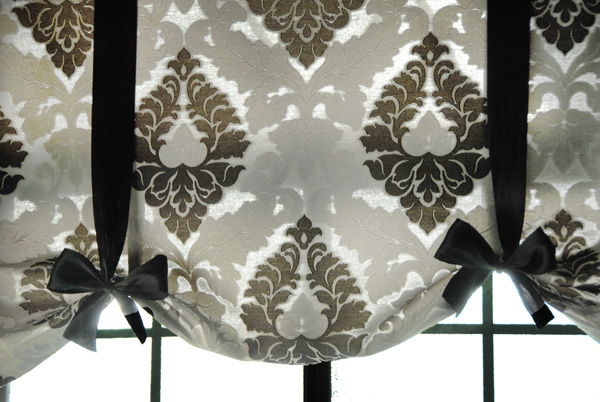
The finished product.
The finished product.

Want more details about this and other DIY projects? Check out my blog post!
Comments
Join the conversation
2 of 96 comments
-
Very nice. You did a great job. I love the color and they look highend.
-
Beautiful job indeed!


Frequently asked questions
Have a question about this project?
I am doing this. It's perfect for my large bathroom window, who cares about otherside
you cant see threw, using Light fabric to let the west sun shine In. Love the DIY.
Very cute! I was wondering if you velcro, how would that work?
Are the 2 lengths of ribbon attached to the fabric, or are they just thrown over the top and tied at the bottom?