


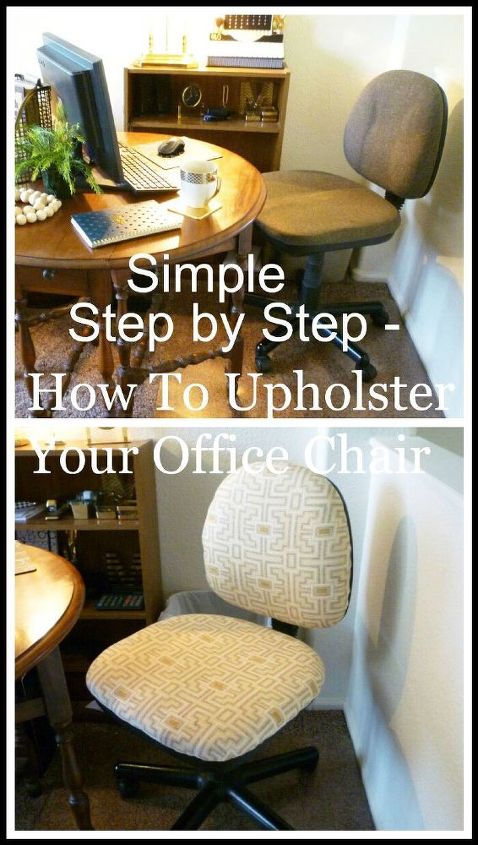
Simple Step by Step - How To Upholster Your Office Chair
Finding a comfortable office chair is the first problem, then finding one that has some character is even a bigger problem. I have been using a $15 office chair from Goodwill for the past few years, it is comfortable and does the job, however it is really vanilla. Just a gray tweed fabric and that is all. It is a secretary's chair with no arms and I love that it just rolls wherever I need it to be. "But" (you knew there was going to be a - but) - it is really plain jane. I found several really fabulous chairs with chic tufting and beautiful fabric, but the price tags kind of didn't fit my budget. We have so many things on our renovate list and a new office chair wasn't one of them. Since I have a nice new office in the loft (you can see my reveal post of the loft and office here) I thought maybe I could spruce up my goodwill chair a little. Now it is a $15 chair, so what have I got to lose.
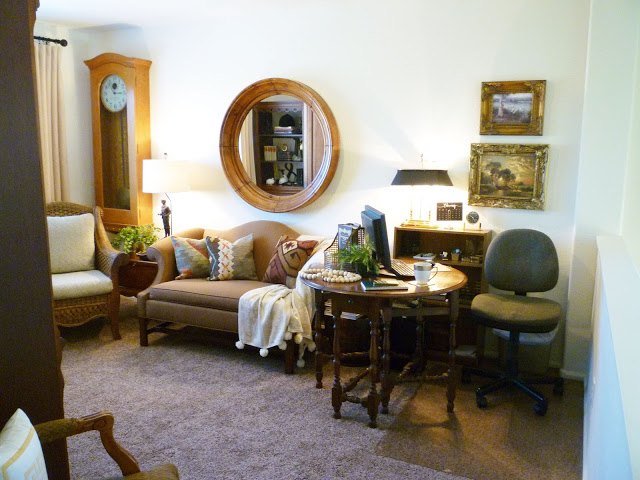
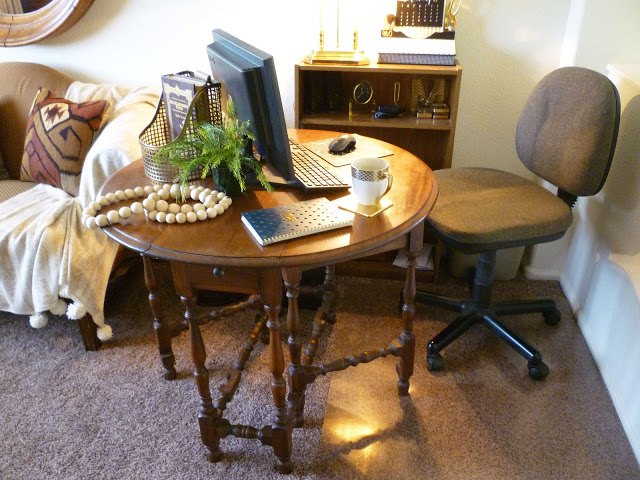
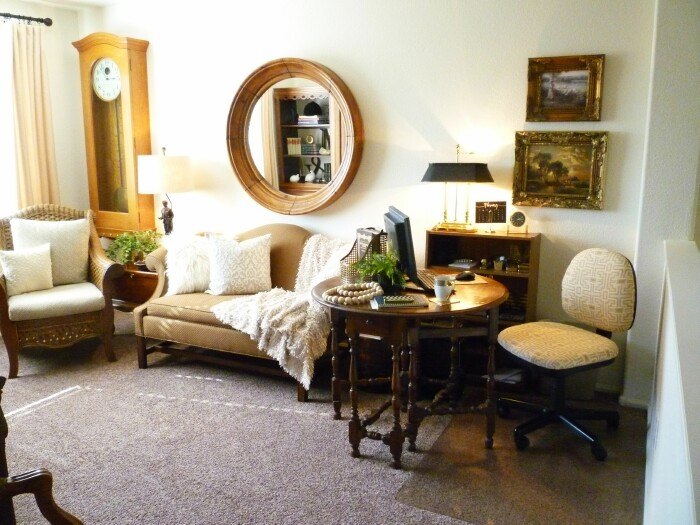
Here is a picture of the office with the original gray fabric chair. - pretty, but not very chic in the chair department.
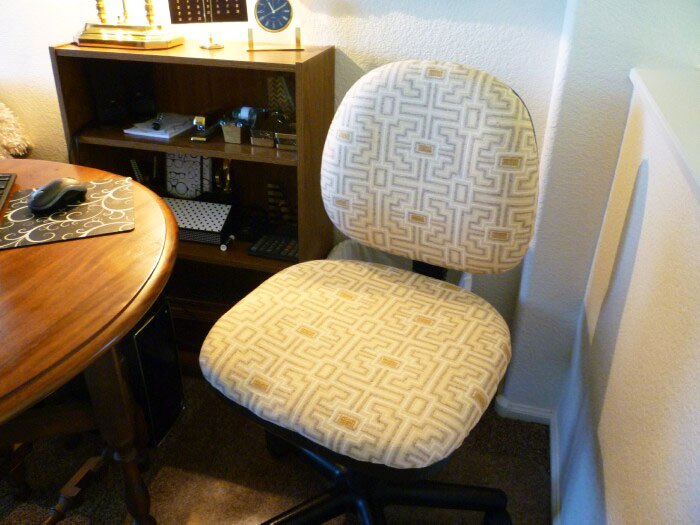
A yard of $15.99 fabric and a few staples and it looks totally different. Since everything in the room is brown, I wanted something light and with a little pattern - nothing screaming, but a little pattern. I loved this fun fabric. It has a little bit of yellow and a little greige, Just enough to brighten up this corner.
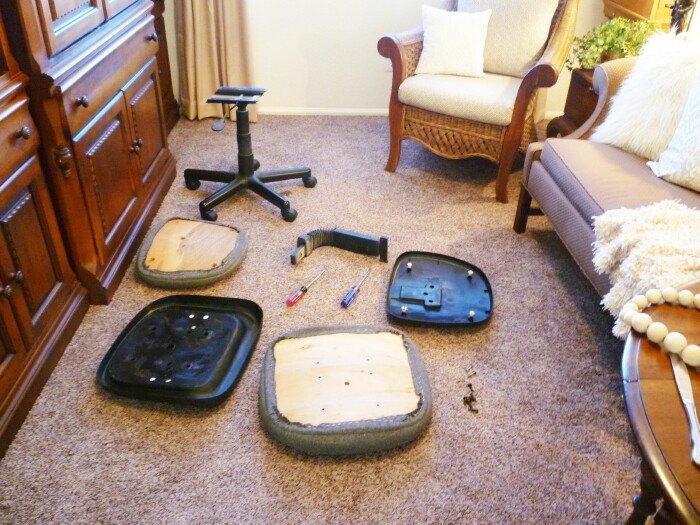
I can't believe how easy it was. I looked on line and there were a ton of videos on how to upholster an office chair. I found one that looked similar to mine, so that was a huge help. Just take the back off the bottom of the chair and then remove all the screws that hold the back and the seat on. You will need to use a screw driver or something to help pry the back cushion out of the back plastic cover. There are some dowels that snap into the wood part of the back. That's all the pieces there are to my chair.
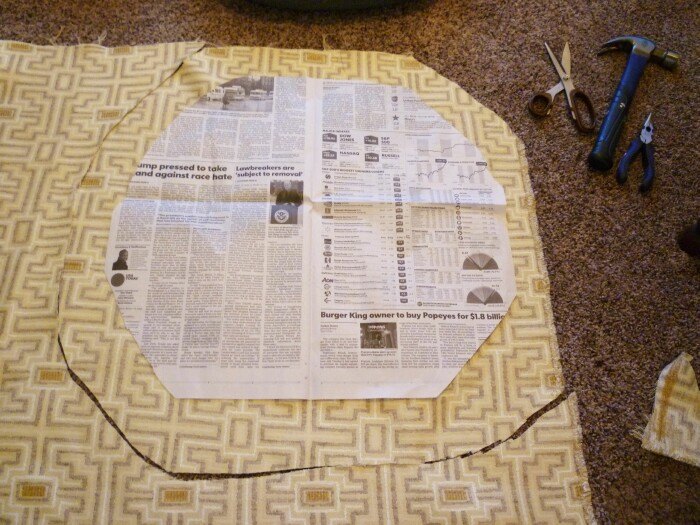
I took a newspaper and made a sort of template of the back and then allowed a couple of inches to pull the fabric around and staple.
I actually had way more than I needed, but it is nice to have some fabric to pull and work with. Trim off all the excess close to the staples and make sure to leave the holes open for the screws and the dowels to snap back into.

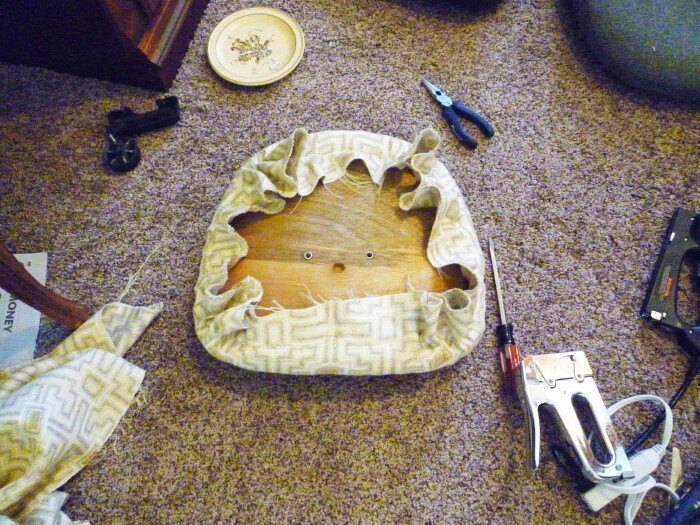
Both pieces done and ready to screw the chair back together. This was so simple. I should have done it years ago.
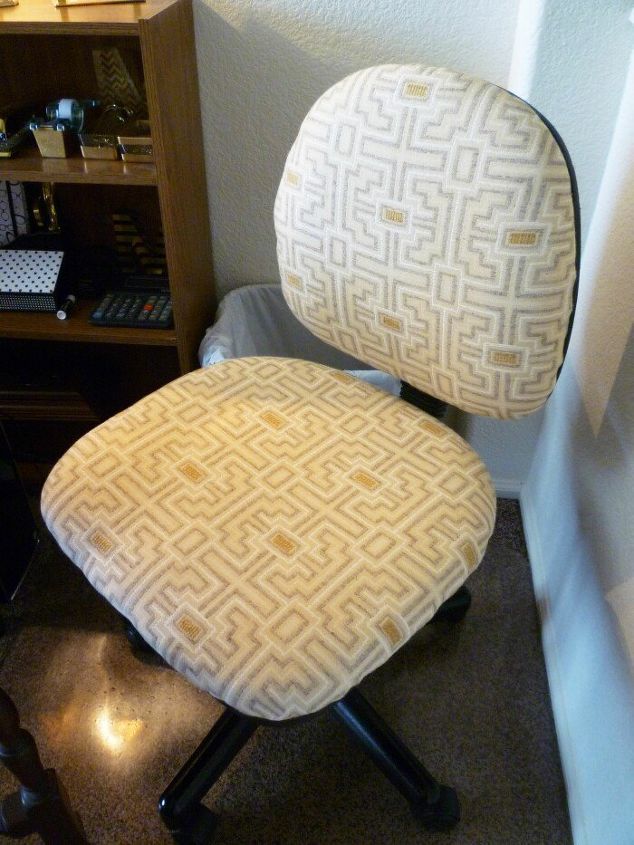
This looks so much better than the gray and it really was so easy.
Plus I think it makes my desk area look so much better too.

Want more details about this and other DIY projects? Check out my blog post!
Comments
Join the conversation
3 comments
-
Good idea. I hate giving up that "just right" chair. Thx!
-
Love this idea!! Looks super chic :)


Frequently asked questions
Have a question about this project?