


Kitchen Utensil Holder Makeover
6 Materials
My utensil holder was in need of a makeover. I was looking for a updated look. Something that was clean and more modern looking.
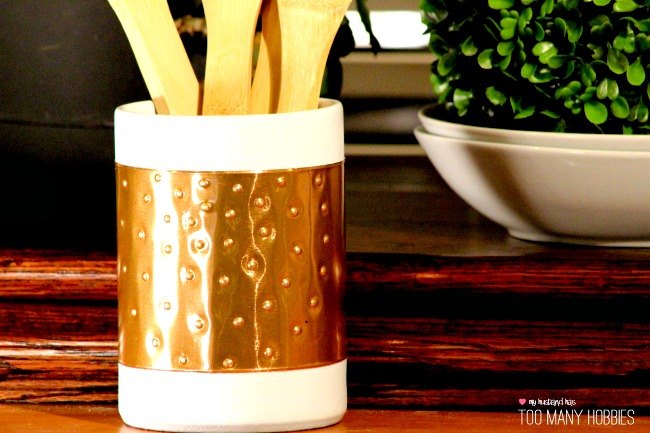
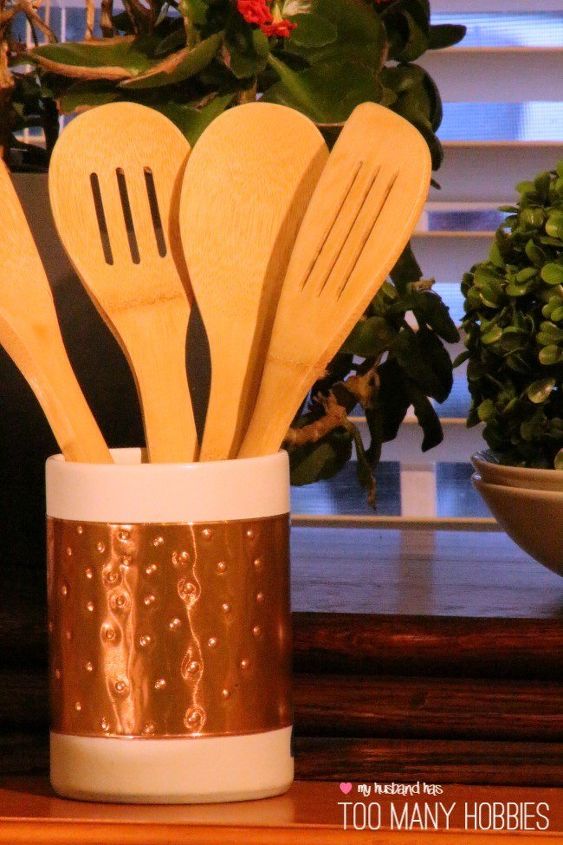
I received this utensil crock in the 80's from my Grandma for Christmas one year. It was typical 80's country. Cream colored with a big country goose printed on it. Remember those? This crock has been through several makeovers over the years.
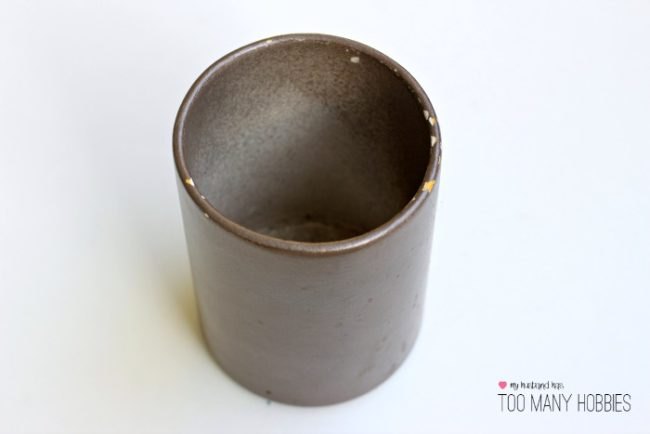
The last makeover I did several years ago, was to paint it an oil rubbed bronze color. You can see that the paint had started to chip around the rim from use. The first thing I did was to sand down the rim and sides with fine grit sandpaper. This smoothed out the rim for painting. I cleaned and dried it.
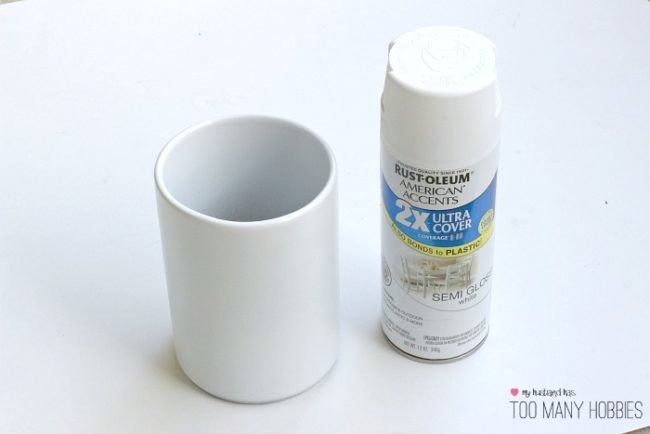
I used Rust-Oleum 2x Ultra Coverage in white and gave the crock 2 coats of paint. I allowed each coat to fully dry. It was looking pretty clean now, but I wanted more . .
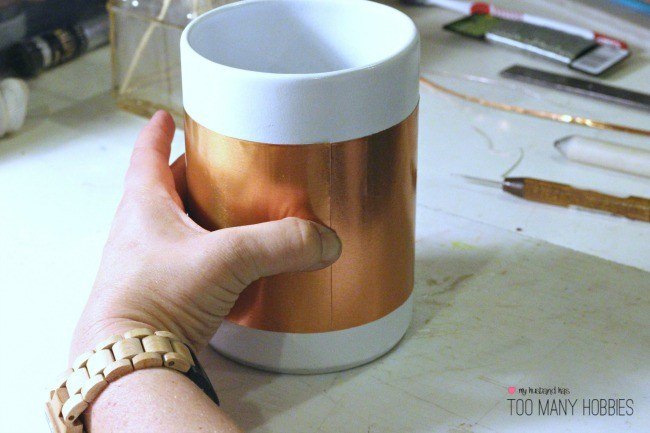
I know these next couple steps are going to intimidate some of you because I used metal embossing foil for this project. This metal is a light-weight, pliable metal, no thicker than craft paper. It can have a sharp edge, just like paper can. It is easily cut with household scissors. In other words, it is a crafting metal. Cut a strip of copper colored tooling foil to fit around the crock. Be sure to test the fit by wrapping it around to make sure it fits around and the ends overlap nice and evenly.I could have put a simple edge on this, glued it on, called it done, and it would have been perfectly fine . But I wanted more . .
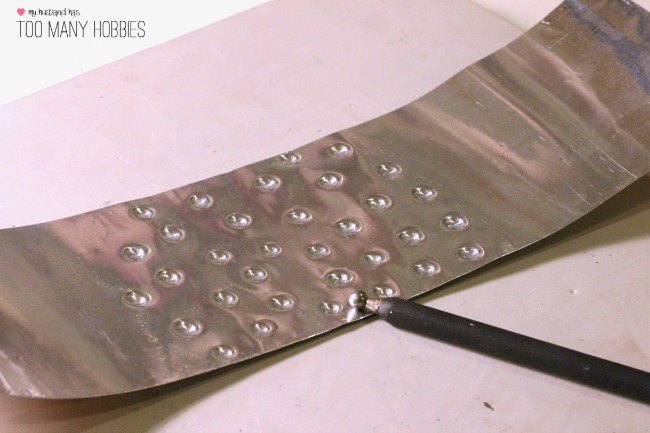
Using a cup and ball embossing tool and a soft surface (a stack of newspaper or a magazine is a great soft surface), I pressed circles into the metal with very little pressure and a tight circular motion. This metal is very soft and pliable. Creating these raised circles only takes a minute or two. You can see that the back side of this metal is silver.
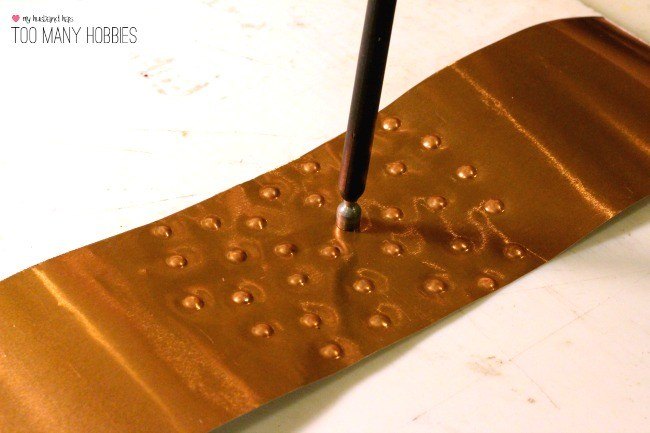
Turning the metal over onto a hard surface, I used cup end of the same embossing tool, to press the cup over each circle. This defines the circles.
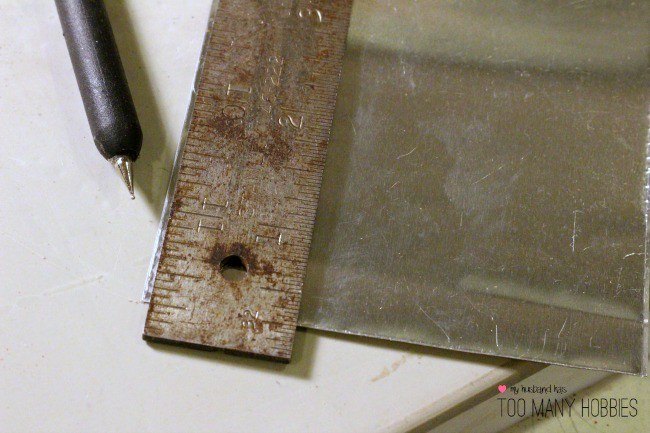
To finish off the edges, I turned the metal over again and placed it back on my soft surface. Using a ruler and an embossing stylist, I embossed a line very close to the top and bottom edge of the metal.
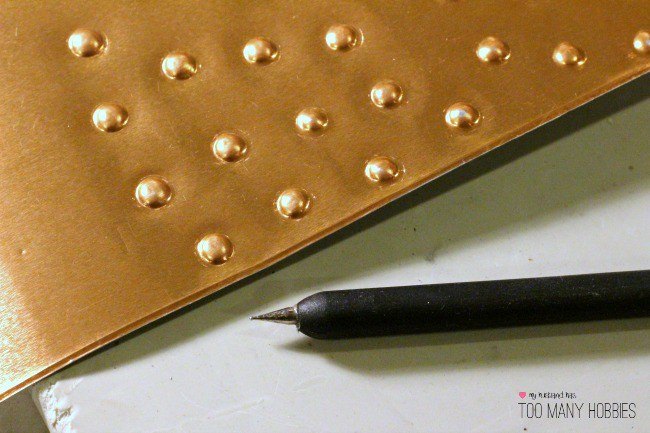
This is what the finished edge looks like. Using E6000 glue, I attached the metal to the crock.
It is really hard to take a picture of shiny metal. Sorry, I guess I don't have the proper technique or tools to do this project justice. The pictures are reflecting a lot of light and make it appear as if there are lines down the front of the project. I can assure you that is not the case.
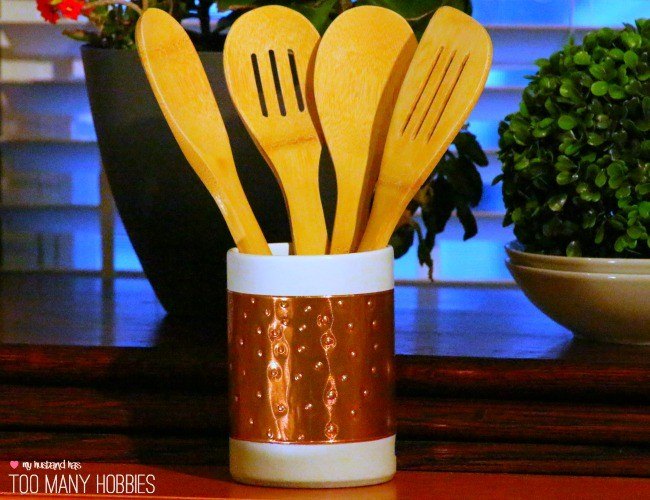
It is clean, modern and high-end looking. An amazing difference and I love it! This project took less than 20 minutes of actual time to complete - not including dry time. Now I am eyeing my knife block . . .Find more information on this project and the supplies I used on my blog. Stop by and say hi!

Want more details about this and other DIY projects? Check out my blog post!
Comments
Join the conversation
3 of 28 comments
-
Thanks so much. I wish I had a little more counter space too :)
-
That's really cool. Your picture is great, I think. Nothing wrong with it. Way to go.


Frequently asked questions
Have a question about this project?
what did you use to glue your foil paper to your crock? Thanks! And great job!