Framed Magnetic Chalkboard DIY

by
Diana
(IC: blogger)
8 Materials
$50
5 Hours
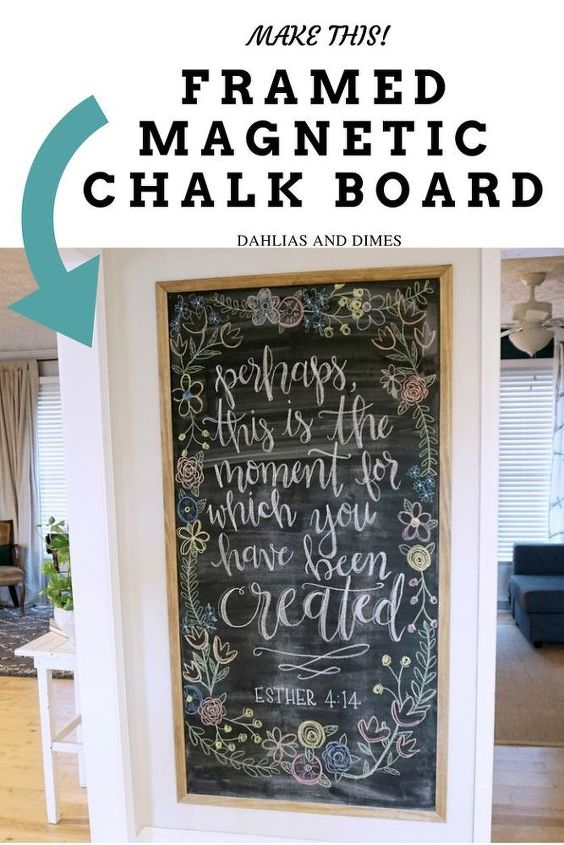
Here's an easy, inexpensive way to create a large, framed magnetic chalk board for any empty wall in your home. Customize the size to fit your needs!
Having a blank wall in your kitchen leaves you with so many options. You can:
- Add additional shelves
- Create a family picture collage
- Hang a cork board, mail sorter, and key rack for a makeshift command center
You’re options are endless. For me, I wanted something with that was practical, large enough to fill up the entire wall, and magnetic since I’m not a fan of cluttering up the front of my fridge.
Prep Your SurfacePrep your surface by filling in any holes with drywall putty, sand uneven surfaces, and wipe down your wall with a gentle cleaning agent.
Tape it OffOnce your wall is clean and dry, tape off your chalkboard area. I wanted mine to cover the majority of the wall, so I made it 3′ x 5-3/4′.
Magnetic Primer and Chalk PaintThis is the step that never ends. Magnetic primer only works properly if you apply 5+ coats. Roll it on with a foam roller in thin, even coats. Make sure the primer is dry before applying a new coat. You’ll want to test it after each coat to make sure your magnets are sticking. I just ended up using the entire quart, which was 7 coats! This stuff is not cheap (per quart) either, so make sure you get your money’s worth and keep testing it before apply your chalk paint.Once your magnetic primer is dry and in working order, apply a couple coats of chalkboard paint with a new, clean foam roller. Allow paint to dry between coats.
Creating the FrameI used 1.5″ x 1/4″ lattice strips because I just wanted a simple frame that didn’t take away from the doorway trim or the chalkboard. Feel free to use your favorite trim piece and customize it in a way that suites you. I measured and cut each piece at a 45 degree angle using our miter saw. You can also use straight cuts as well, but if you’re using a 45 degree cut, measure each piece at the longest point.Stain or paint each piece before attaching it to the wall. You can always touch it up once it’s attached, but it’s much easier to prepare the wood first.Using a level, tack each piece of lattice on the wall with 1-1/4″ finishing nails.
Prepping Your ChalkboardBefore you get too excited about a finished chalkboard, you ABSOLUTELY need to prep it first. Use the side of a piece of chalk and rub it on the chalkboard. Once you’ve covered the entire surface, clean it off with a damp sponge. If you skip this step, the first thing written on the board will be there permanently, so take the time to prep it first.It doesn’t matter what color chalk you use. I went through several pieces to cover this large surface.
Now you can enjoy it!I love changing my board for each season, and I’ve also used it for random pregnancy updates as well. You can also use the space for grocery and to-do lists or jotting down coming family events. There are so many ways you can use your chalkboard including using it as a piece of art.
Enjoyed the project?
Resources for this project:
See all materials
Any price and availability information displayed on [relevant Amazon Site(s), as applicable] at the time of purchase will apply to the purchase of this product.
Hometalk may collect a small share of sales from the links on this page.More info

Want more details about this and other DIY projects? Check out my blog post!
Published March 28th, 2017 2:02 PM
Comments
Join the conversation
2 of 35 comments
-
-
 Mary Coakley
on Mar 31, 2018
Lovely the art is fantastic
-








Frequently asked questions
Have a question about this project?
Could you paint a wall or a part of a wall with the magnetic paint then cover it with regular paint that would match the rest of the wall? It would be great for kids to hang their posters on, and in an office be able to put notes on a wall without having it look like a magnetic board. It could be expensive, but it also give the opportunity to change the use of the room.
Did you draw the art freehand
Did you draw the art freehand