


Little Sideboard, Big Redo!

6 Materials
I had been looking for a small sideboard (they're not easy to find) when I came across this little beauty at a swap shop and got it at a great deal! It was obvious that the side doors and bottom drawer had been added on afterwards and thankfully I'm married to a handy man and he was able to make some amazing changes to the sideboard!!!
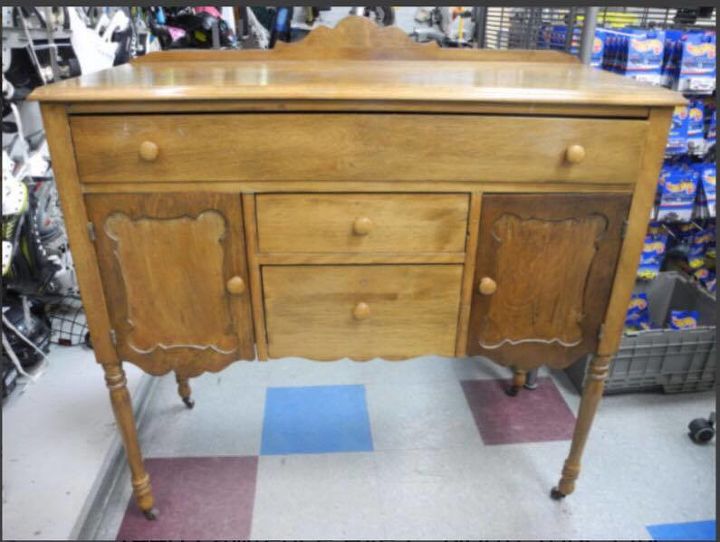
BEFORE: This is what she looked like when we brought her home (yes...I just personified a piece of furniture)
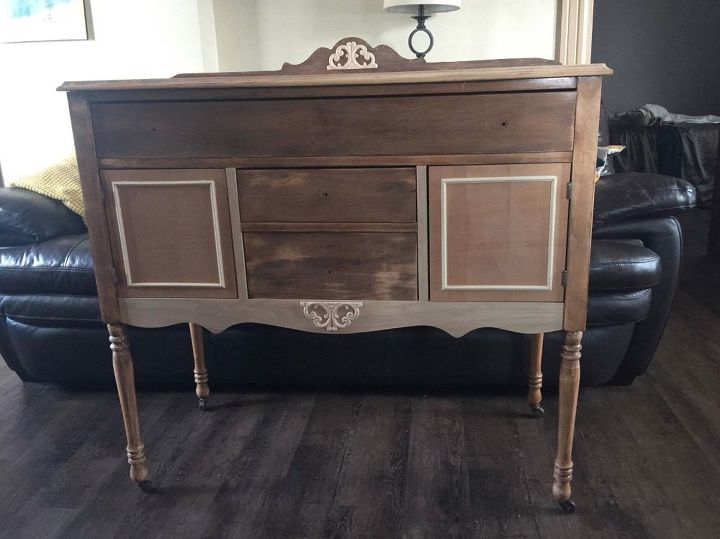
STEP 1: This is what my amazing husband was able to change her into! He added a curved skirt to the bottom, made new side doors and added molding, cut off the bottom drawer and then added wooden filigrees and I sanded her down in prep for painting.
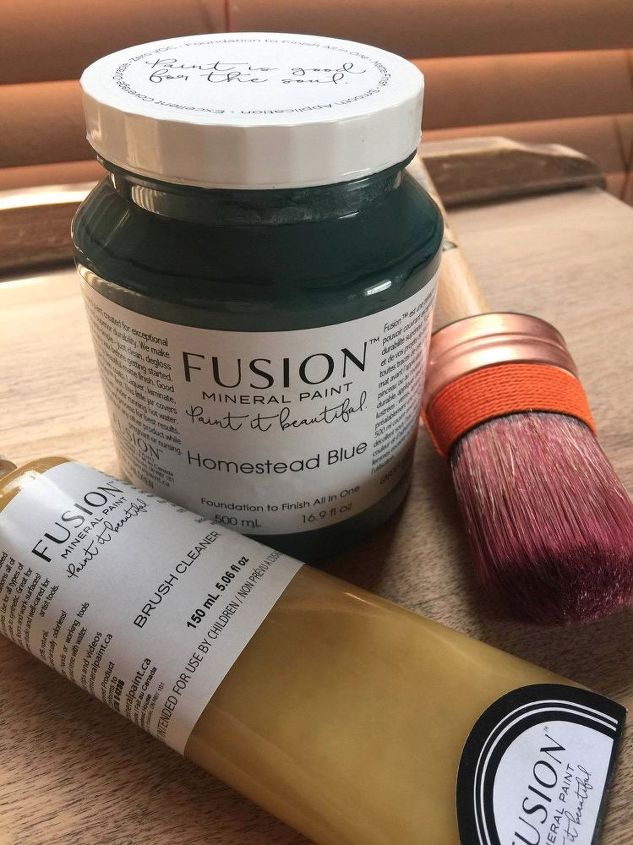
STEP 3: I decided on Fusion Homestead Blue (gorgeous colour!!!!!) and my AMAZING Fusion retailer/consultant/patience of a saint, Janice Slater from Fred & Bessie's in London, ON lent me her Staalmeester brush for this project and I LOVED IT!!! I will return it to you but not without pouting.
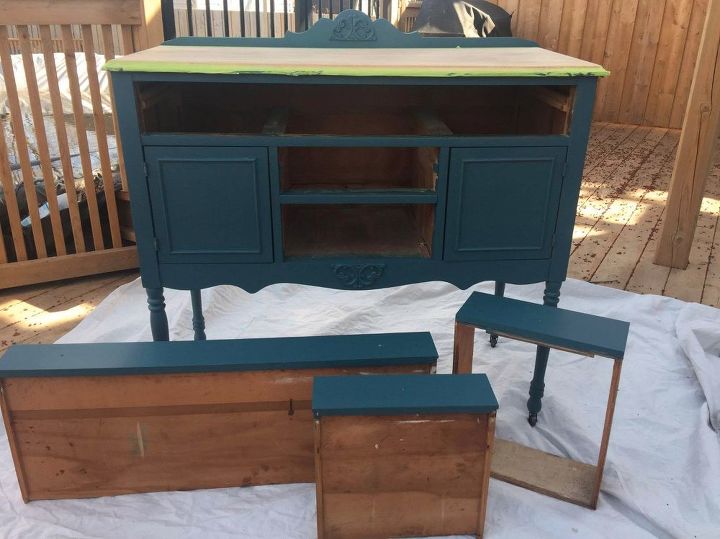
STEP 4: After I used painters tape to tape off the top, it only took ONE coat of Fusion Homestead Blue to cover this baby!! Even with all the different wood types on this piece, it went on beautifully and I used less then a 1/3 of the jar! AMAZING! Yes...you read that right...less then a 1/3 of a jar!
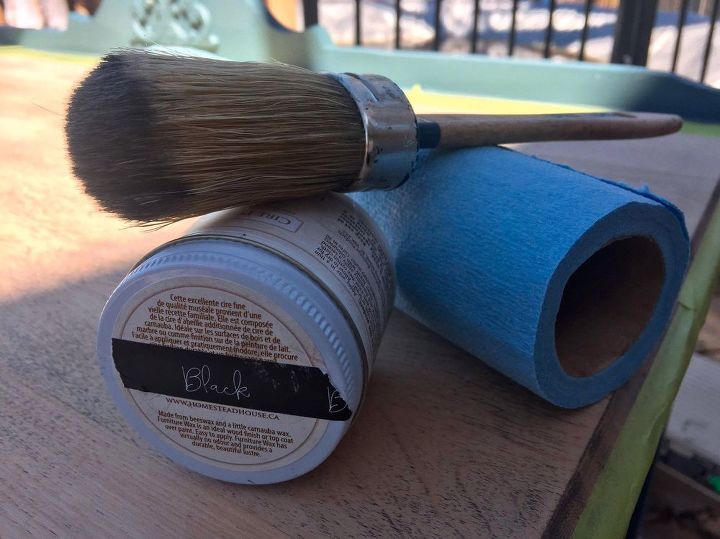
STEP 5: Next was black waxing time! I used the Fusion Black Wax and Fusion brush to apply and then wiped off with lint free paper towels
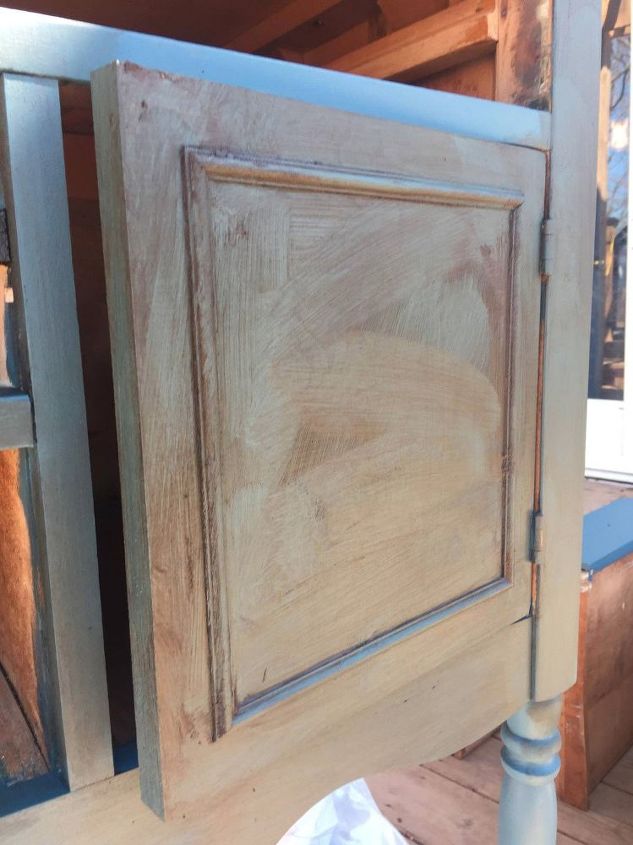
STEP 6: I have a very specific/technical way of apply the wax....as in I just "paint" it all over the place. Honestly.....love love love Fusion waxes! White wax gives a beautiful provincial look while black & espresso wax give an aged look.
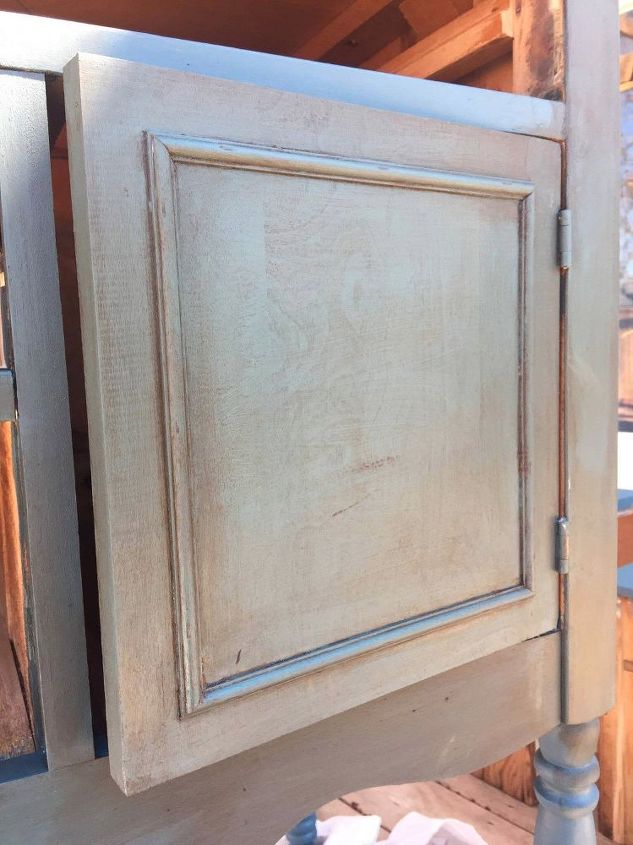
STEP 7: After about 5/10 minutes then I wipe off the wax and leave the wax along the edges and grooves of the piece and then lightly buff in to give it a finished aged look. If you add too much wax and want to remove some from your project just rub a little clear furniture wax!! Works like a charm...trust me :)
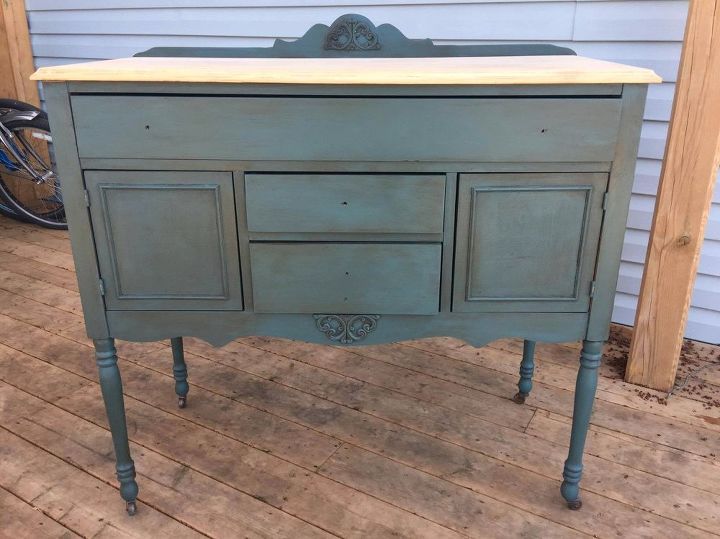
STEP 8: Here she is all painted and black waxed and now I'm ready to tackle the top now!
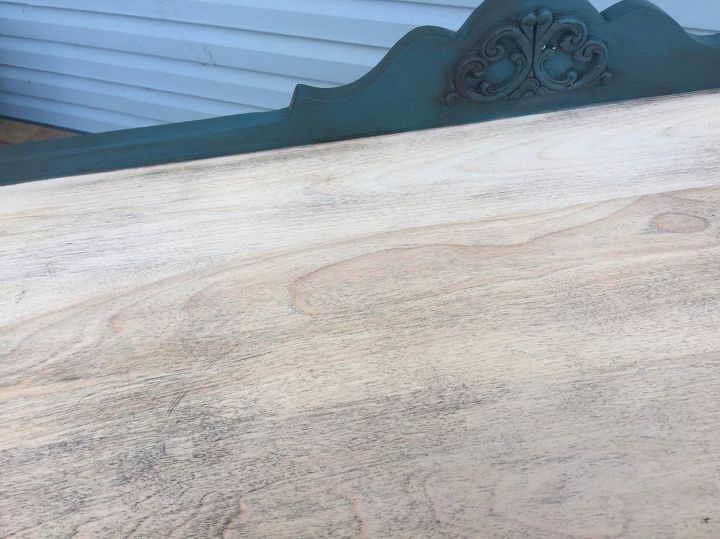
STEP 9: The wood on the top of the sideboard was very white and had a black grain running through it. I brushed on the hemp oil for an even application and then buffed it in with a lint free cloth.

STEP 10: This is after one application of Fusion Hemp Oil...so beautiful but I wanted a slightly darker/richer finish.
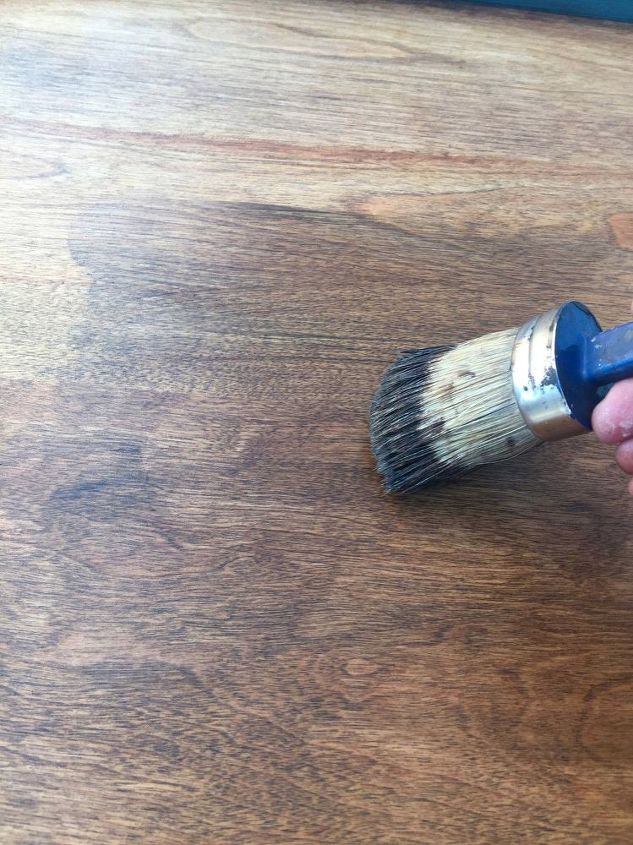
STEP 11: After the hemp oil had been applied and buffed in I brushed on Fusion Black Wax and only let it sit for a couple minutes before buffing in. Such a gorgeous finish and was exactly what I wanted!!!!
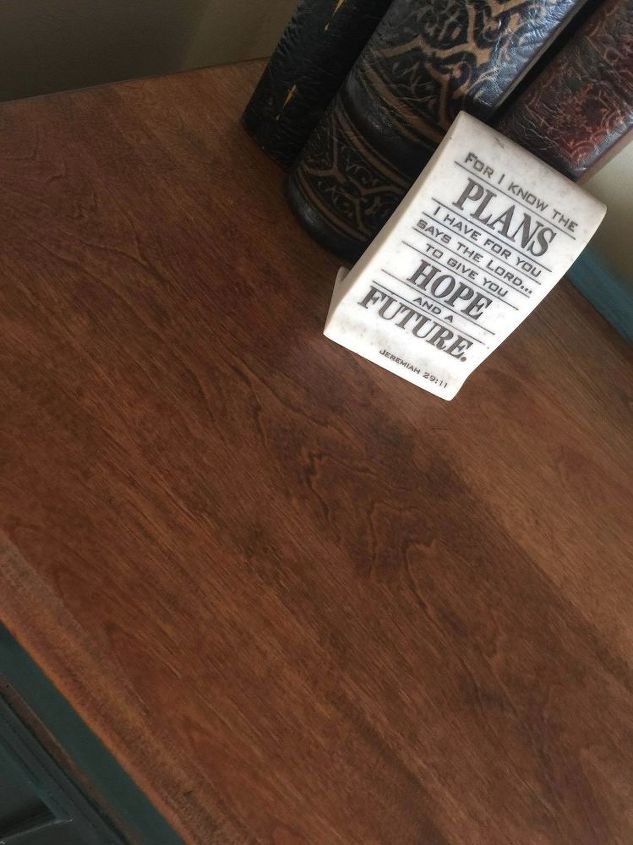
STEP 12: Here's a close up of the top....seriously???!!! So gorgeous and so easy!!!
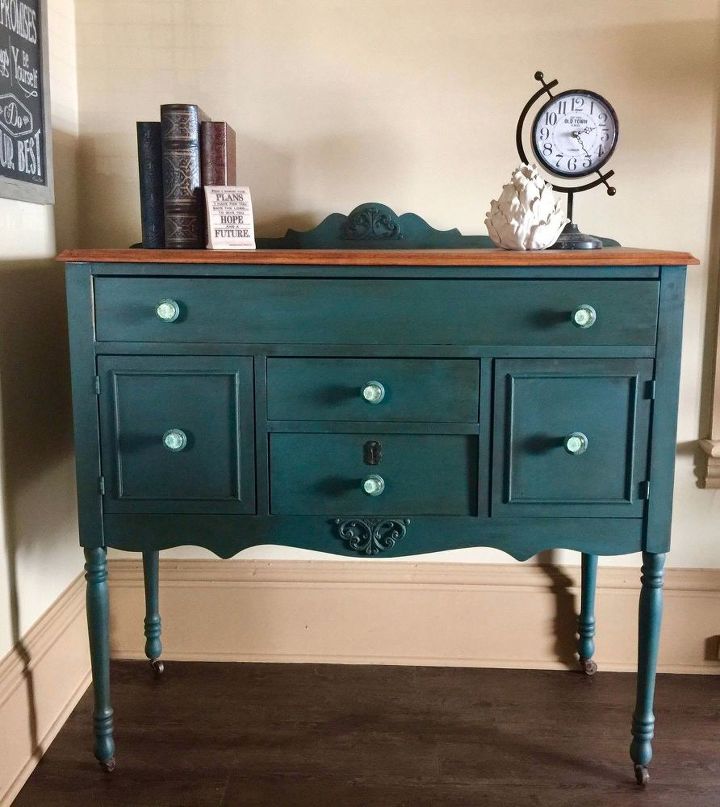
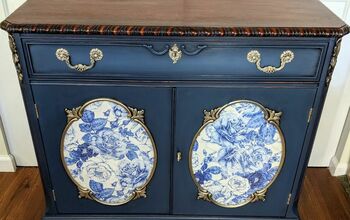
STEP 13: Here she is all finished!!!! Just added the perfect glass/vintage knobs and added a keyhole for a more aged, authentic look! This little piece was a labour of love for both my husband and we but we couldn't be happier with it!!!
Comments
Join the conversation
3 of 17 comments
-
I do love the final results. Absolutely lovely. The Bible verse is one of my favorites also.
-
It's beautiful Corinne!!!! Absolutely love it!!!!


Frequently asked questions
Have a question about this project?
You mentioned having cut off the bottom drawer. I don't understand that. I did see that one drawer had no bottom in one pic, Did I miss something?