


Entryway Book Case
$200.00
12 Hours
Medium
Need more great storage?
Due to having Tennis Elbow and the pain it creates - I cannot build for a couple weeks - so I wanted to share A build we did back in August with you guys. I promise as soon as the arm is moving again my hammer will be too :-)
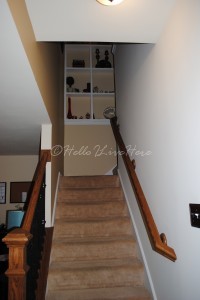
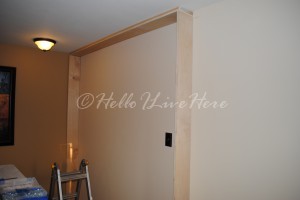
Today’s post will show you how hubby and I have been working hard on a new entryway book case going into the entryway of our new Villa home built by F & F Homes here in St Louis. When you enter the front door, there was a large wall/door system leading down to the basement. We had F&F Homes remove this wall/door when we bought the unit (our’s was the model villa) to open up the entryway. Once down, it left a large blank wall, and 8×8 ledge along the back side going down the stairs to our finished basement area.
Every day one of us passed this space and yelled out – “we really need something on this wall.” Finally, the idea came to me, we drew a plan and started the process to fill this blank, but lovely canvas. What could be better than some extra storage – Right?
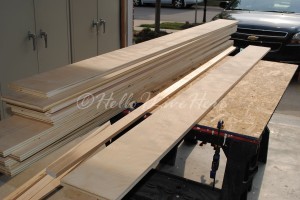
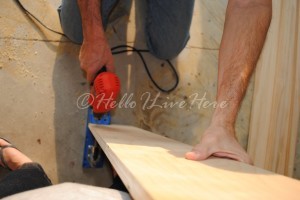
1. After we completed the plan, we took a trip to our favorite place, Home Depot, (we should have upfront parking by now with our name on it), and strolled the wood isles. We purchased 3/4″ PureBond Plywood. We love this wood because it’s a product that’s Eco-friendly and promotes healthy indoor air quality with no formaldehyde. We also purchased Select Pine 1×2′s and 1×4′s, Kreg screws, and used our Ryobi Nail gun and screw drivers.
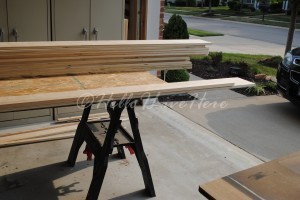
2. You will also need a Craftsman table, circular, miter Saw, Black and Decker mouse sander, Ryobi nail and screw drivers, Kreg Pocket Hole Jig and our saving grace, our Little Giant Ladder system. Make sure your batteries are fully charged for your Ryobi tools -there is nothing worse than running out of battery life in the middle of a project. -)
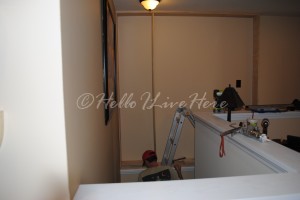
3. We cut all the wood to fit our opening (an 8×8 square) – blank canvas about to be constructed.
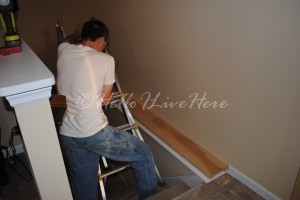
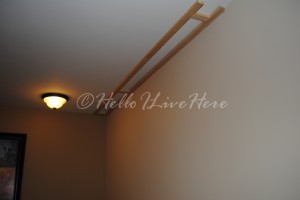
4. Next, we measured and cut our 1×2 stringers and attached them briefly to the studs with 2″ nails. This will form the frame for our Entryway Book Case. We then used wood screws to attach the stringers to the studs. This was all reached using our Little Giant Ladder to keep us safe on the stairway.
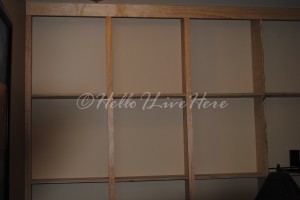
5. We next ripped PureBond plywood into 8″ pieces for the top, bottom and sides. The top and bottom were secured by nailing to the 1×2′s. We caulked all the open gaps after adhering with 1 3/8″nails.
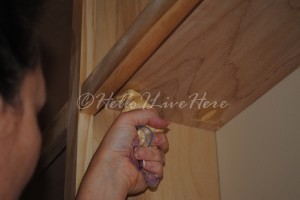
6. When the frame was complete, we used our Kreg Pocket Hole Jig to place pocket hole into both the top and bottom of the PureBond used to construct the center for shelving. We then attached with Kreg screws. We also mounted to studs in the back wall. We decided to mount shelves as were were going along just encase we needed to remeasure any of the openings.
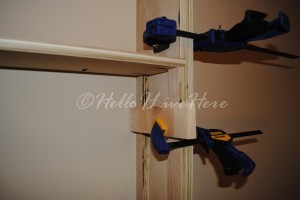
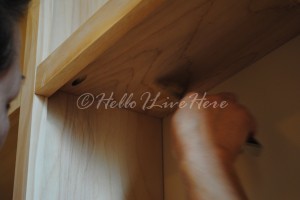
7. To ensure each shelf was equally spaced us cut four scrap stringers using the remaining PureBond, each 21″. We held the stringers temporarily in place using a small wood scrap and our trusty Irwin clamp. We rested the shelf on the stringers and used a level for accuracy. It turned out we had one shelf (there’s always one), not level, just off a small amount. To level, we shimmed by placing a quarter and a small tag under each side and leveled. It worked like a charm. A girl trick but you’re welcome to use it ;-) We continued the process until we had all the shelves mounted.
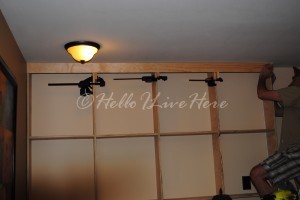
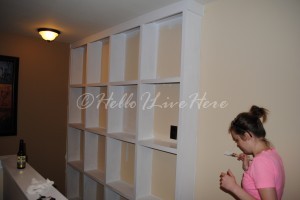
8. Each row of shelves were cut using a Craftsman Miter Saw. The first three rows were cut using a guide stop to ensure a consistent shelf length. The final row of shelves were measured one by one, just in case there was a slight adjustment (which there was). We used Irwin clamps and scrap wood to hold the shelf in place prior to attaching with Kreg screws. Then we trimmed our Entryway Book Case using Select Pine 1×2′ s. The top was trimmed using 1×4′s and attached with nails using our Ryobi nail battery operated nail gun (she does have power). We chose 1×4 trim because we plan to add crown molding in the future. We then stood back and admired our handy work before going on to the finish work and we got to painting.
9. Before we started painting we made sure we filled every nail and screw hole with wood filler and caulked the gaps. Kreg holes are deep and take extra wood filler, so I came up with system. I took a baggie that you would use to frost a cake, and filled it with 3 large scoops of Elmer’s Wood putty. I then cut the end just like you would with frosting, and placed the edge into the holed areas. Squeeze, fill, and use a putty knife to scrape the excess. No fuss, no mess, easy clean up,–our patent on this procedure is pending :).
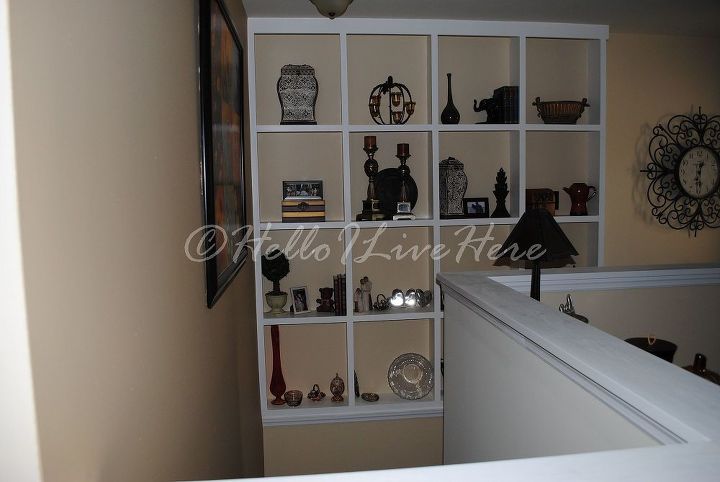
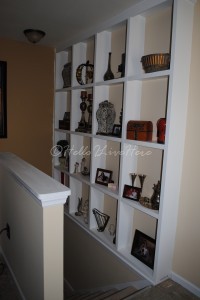
10. Once all the prep was completed, and sanded, we used Behr Marquee Paint and Primer in Polar Bear White. To make the Entryway Bookcase stand out, we painted the inside wall to the butter yellow we had left from our villa being built (thank you F&F Homes for leaving us the extra paint behind-another great customer service provided!)
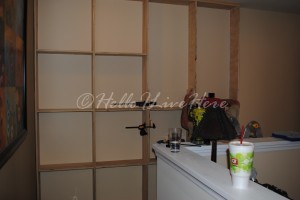
Over all, a pretty easy build of about 12 hours including prep and paint!
The result, a beautiful, useful entryway. Storage it’s a great thing, but even better when it becomes a functional, and helps raise your properties value! The price you ask, total, no kidding $195! That’s right – under $200. :-) We were told by a company who gave us a bid that if we had them install the shelving, we would pay a good $1,500 – Doing it ourselves saved us a whopping $1305! That’s right readers, sticker shock can make you a DIYer in no time ;-)
Well, that’s our post for today. Hope you enjoyed our Entryway Book Case – Happy Building and thanks for stopping by!
-Linda
Due to having Tennis Elbow and the pain it creates - I cannot build for a couple weeks - so I wanted to share A build we did back in August with you guys. I promise as soon as the arm is moving again my hammer will be too :-)
Today’s post will show you how hubby and I have been working hard on a new entryway book case going into the entryway of our new Villa home built by F & F Homes here in St Louis. When you enter the front door, there was a large wall/door system leading down to the basement. We had F&F Homes remove this wall/door when we bought the unit (our’s was the model villa) to open up the entryway. Once down, it left a large blank wall, and 8×8 ledge along the back side going down the stairs to our finished basement area.
Every day one of us passed this space and yelled out – “we really need something on this wall.” Finally, the idea came to me, we drew a plan and started the process to fill this blank, but lovely canvas. What could be better than some extra storage – Right?
1. After we completed the plan, we took a trip to our favorite place, Home Depot, (we should have upfront parking by now with our name on it), and strolled the wood isles. We purchased 3/4″ PureBond Plywood. We love this wood because it’s a product that’s Eco-friendly and promotes healthy indoor air quality with no formaldehyde. We also purchased Select Pine 1×2′s and 1×4′s, Kreg screws, and used our Ryobi Nail gun and screw drivers.
2. You will also need a Craftsman table, circular, miter Saw, Black and Decker mouse sander, Ryobi nail and screw drivers, Kreg Pocket Hole Jig and our saving grace, our Little Giant Ladder system. Make sure your batteries are fully charged for your Ryobi tools -there is nothing worse than running out of battery life in the middle of a project. -)
3. We cut all the wood to fit our opening (an 8×8 square) – blank canvas about to be constructed.
4. Next, we measured and cut our 1×2 stringers and attached them briefly to the studs with 2″ nails. This will form the frame for our Entryway Book Case. We then used wood screws to attach the stringers to the studs. This was all reached using our Little Giant Ladder to keep us safe on the stairway.
5. We next ripped PureBond plywood into 8″ pieces for the top, bottom and sides. The top and bottom were secured by nailing to the 1×2′s. We caulked all the open gaps after adhering with 1 3/8″nails.
6. When the frame was complete, we used our Kreg Pocket Hole Jig to place pocket hole into both the top and bottom of the PureBond used to construct the center for shelving. We then attached with Kreg screws. We also mounted to studs in the back wall. We decided to mount shelves as were were going along just encase we needed to remeasure any of the openings.
7. To ensure each shelf was equally spaced us cut four scrap stringers using the remaining PureBond, each 21″. We held the stringers temporarily in place using a small wood scrap and our trusty Irwin clamp. We rested the shelf on the stringers and used a level for accuracy. It turned out we had one shelf (there’s always one), not level, just off a small amount. To level, we shimmed by placing a quarter and a small tag under each side and leveled. It worked like a charm. A girl trick but you’re welcome to use it ;-) We continued the process until we had all the shelves mounted.
8. Each row of shelves were cut using a Craftsman Miter Saw. The first three rows were cut using a guide stop to ensure a consistent shelf length. The final row of shelves were measured one by one, just in case there was a slight adjustment (which there was). We used Irwin clamps and scrap wood to hold the shelf in place prior to attaching with Kreg screws. Then we trimmed our Entryway Book Case using Select Pine 1×2′ s. The top was trimmed using 1×4′s and attached with nails using our Ryobi nail battery operated nail gun (she does have power). We chose 1×4 trim because we plan to add crown molding in the future. We then stood back and admired our handy work before going on to the finish work and we got to painting.
9. Before we started painting we made sure we filled every nail and screw hole with wood filler and caulked the gaps. Kreg holes are deep and take extra wood filler, so I came up with system. I took a baggie that you would use to frost a cake, and filled it with 3 large scoops of Elmer’s Wood putty. I then cut the end just like you would with frosting, and placed the edge into the holed areas. Squeeze, fill, and use a putty knife to scrape the excess. No fuss, no mess, easy clean up,–our patent on this procedure is pending :).
10. Once all the prep was completed, and sanded, we used Behr Marquee Paint and Primer in Polar Bear White. To make the Entryway Bookcase stand out, we painted the inside wall to the butter yellow we had left from our villa being built (thank you F&F Homes for leaving us the extra paint behind-another great customer service provided!)
Over all, a pretty easy build of about 12 hours including prep and paint!
The result, a beautiful, useful entryway. Storage it’s a great thing, but even better when it becomes a functional, and helps raise your properties value! The price you ask, total, no kidding $195! That’s right – under $200. :-) We were told by a company who gave us a bid that if we had them install the shelving, we would pay a good $1,500 – Doing it ourselves saved us a whopping $1305! That’s right readers, sticker shock can make you a DIYer in no time ;-)
Well, that’s our post for today. Hope you enjoyed our Entryway Book Case – Happy Building and thanks for stopping by!
-Linda


Want more details about this and other DIY projects? Check out my blog post!


Frequently asked questions
Have a question about this project?