


Shabby Chic Side Table

11 Materials
$25
6 Hours
Easy
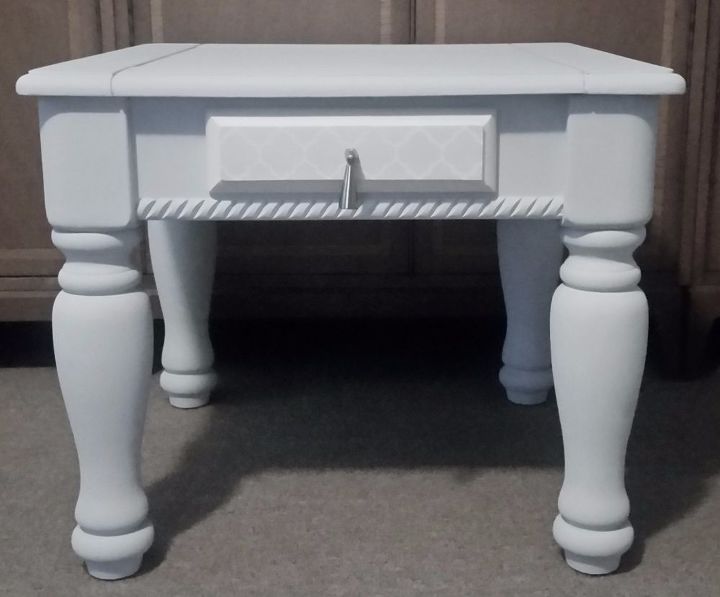
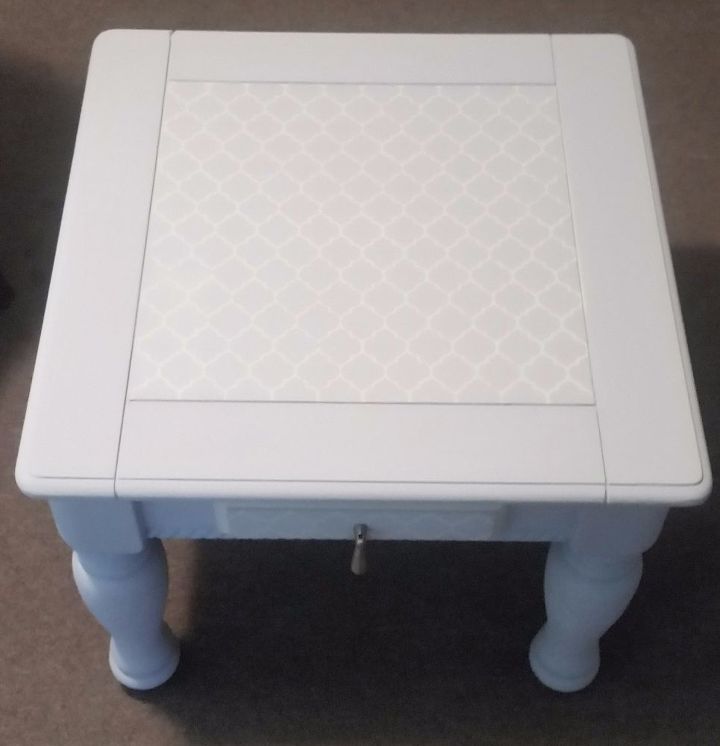
Road side find turned into shabby chic with a french quaterfoil design.
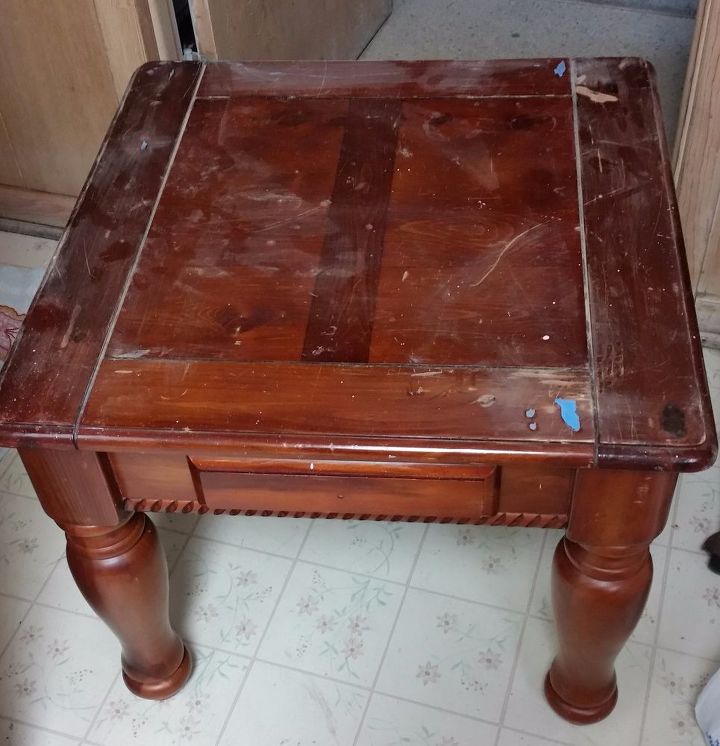
I found this table by the side of the road. And while it had some damage, it still had plenty of charm!
Step 1
Clean the furniture piece. I used a scraper to remove the splotches of old paint.
Step 2
Use wood filler and scarper to fill in any large scratches or dents. Let dry and then sand until even. If you are using chalk paint, there is no need to sand the entire piece, simply smooth out the areas you filled in. Wipe down the piece several times with a clean, damp, lint free towel.
Step 3
Once your piece is clean and dry, begin painting. Always use long, even strokes, making sure to keep your layers thin. It typically only takes two layers of chalk paint to cover thoroughly, though a third might be required, depending on the color used.
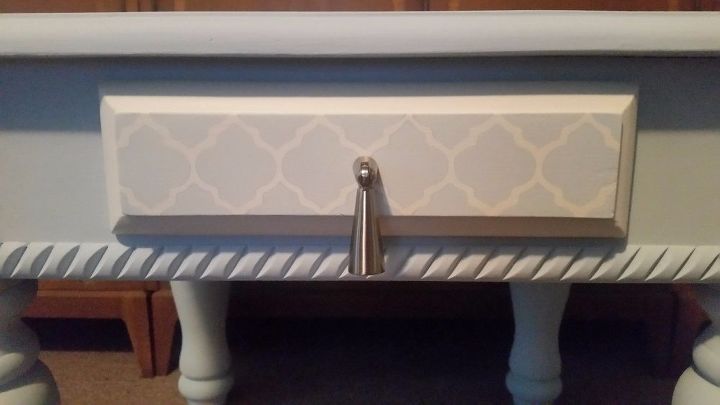
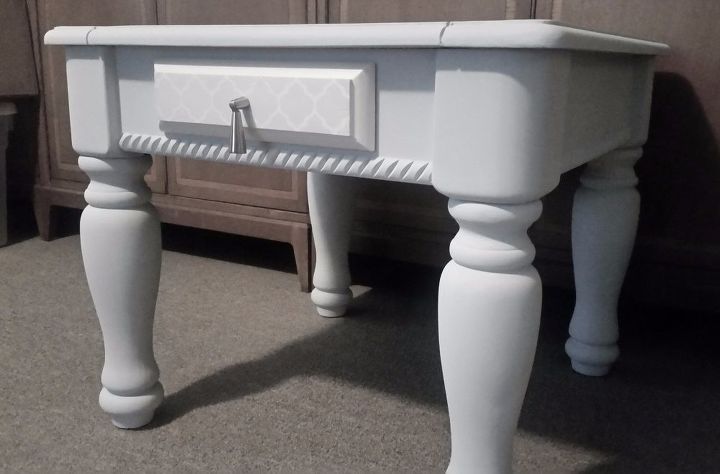
I painted the middle square of my table in antique white, then used a stencil I made, with the custom chalk paint color, to make the quatrefoil pattern on the top and drawer face. I prefer to let each stencil layer dry before the next.
Step 4
I chose a water-based polyurethane, over wax and oil-based polyurethane, simply because of the ease of use. It gives a great seal, when finished, but will require 4-6 coats, at minimum. Always remember to read the directions and to stir your poly, not shake!!! (This isn't a martini) Shaking will put visible air bubbles on your finished product. You simply brush on the polyurethane, using long, even strokes. A little goes a long way! I find that using a bright light and looking from different angles helps to find where I may have missed a spot. You want a thin, even coat for each layer. I allow mine to dry about 2 hours between coats. If you have to wait a day between layers, give a light sand and wipe down before adding your next one. I recommend letting your piece cure for 24-48 hours.
Step 5
Add you hardware and enjoy!
Comments
Join the conversation
2 comments
-
Nice job! I especially like the tone on tone effect of the stencil. Subtle, but it makes the piece. :-)
-
So nice.....wish the one who threw it out could see it now.


Frequently asked questions
Have a question about this project?
how did u make your stencil ?
what colours did u use on this pls