


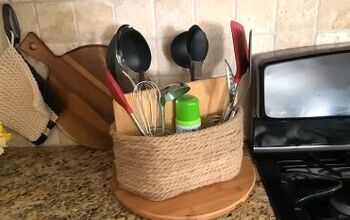
How to Customize a Utensil Crock
Medium
I love creating small projects around the house that are unique and show some personality. A couple years ago, I tried my hand at using Waterslide Decal Paper to customize an otherwise boring old utensil crock. The results were fabulous. It takes just a bit to get the hang of using waterslide decals...but the projects you can create with this technique are so fun and professional looking!
There is a lot of detail...please see the blog post and also remember all waterslide decal paper has slight variations in application - read the directions thoroughly!
There is a lot of detail...please see the blog post and also remember all waterslide decal paper has slight variations in application - read the directions thoroughly!

To make your own customized crock you need the following:
-Crock; Image; Bowl with lukewarm water; Oven; Decal squeegee and/or paper towel
-bowl with lukewarm water
-oven
-decal squeegee or paper towel

Follow the instruction on your waterslide decal paper - all brands differ slightly; Print the image - using MIRROR IMAGE - and let the ink dry thoroughly; Cut to size; Clean the crock with a swipe of rubbing alcohol.

Fill a small bowl with lukewarm water; Place the decal into the water, face up, for 1 minute; The paper slides off the back; Place image on the crock and gently squeegee out water.

Remove air bubble by blotting; Bake according to package directions. This took 3+ hours at varying temperatures.
It takes some time but looks great and totally professional!

Want more details about this and other DIY projects? Check out my blog post!


Frequently asked questions
Have a question about this project?