


Nautical Style Mason Jar Totes

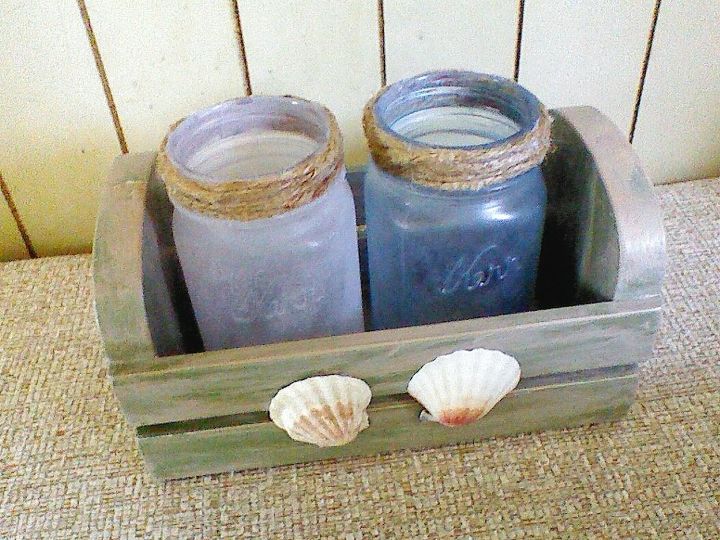
When you eat spaghetti as often as our family does the sauce jars certainly start to pile up! Here's the latest project I created using a tote I previously owned and a new one that was simply made with scrap boards. The first is the makeover one as seen here in its original form.
Best mason jars!
Break it Down
Seashells were removed and the lower height mason jars were donated to the thrift store. The tote received a coat of ivory chalk paint while that dried I rumaged through my supplies for handles. a.
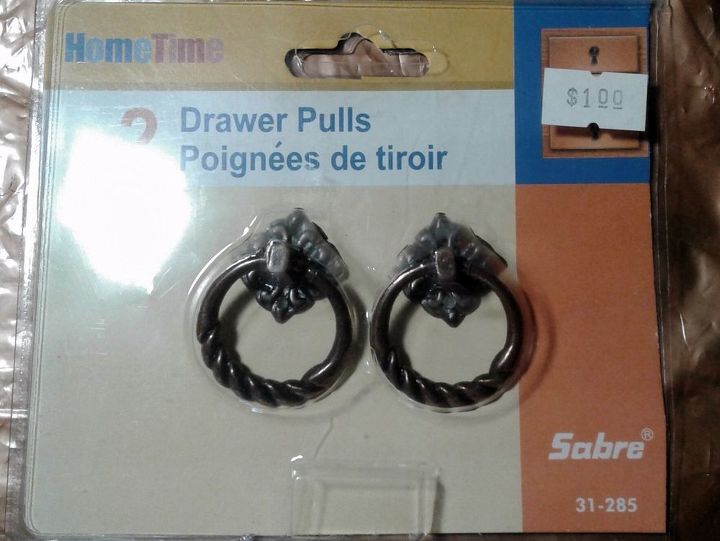
Drawer Pulls
I came up with a pair of drawer pulls which I added at the top to feed the rope through.
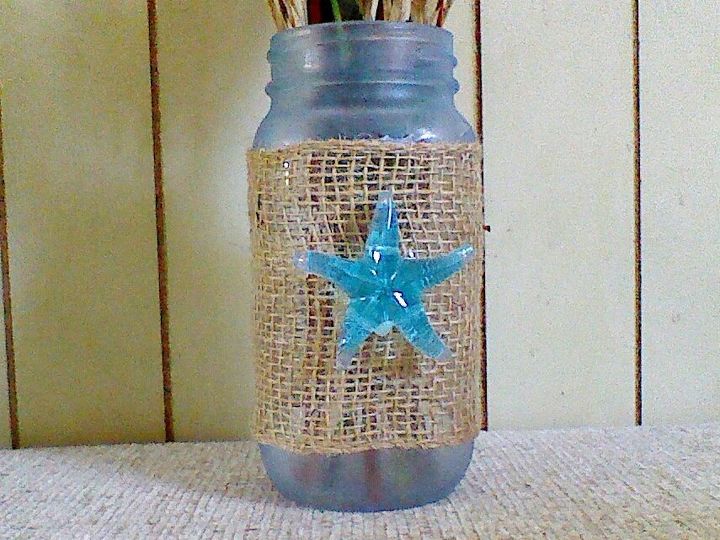
Bottle Updated
My spaghetti jars were also repurposed to give this project a new look, here's the original look. I simply removed the burlap mesh and the starfish. The jars were originally painted top and bottom with Martha Stewart Frosted Glass paint. I purposely left out the middle because the mesh ribbon would cover that area. So as before I used burlap ribbon to conceal the unpainted area of the jars, this time the ribbon was more tightly woven.
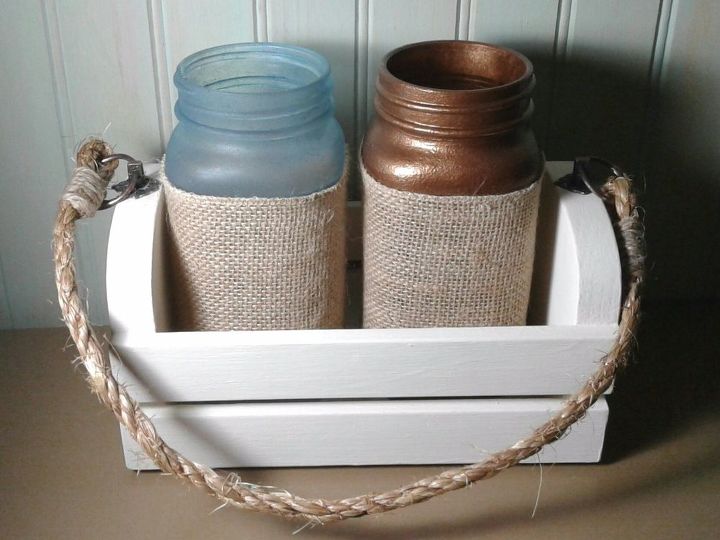
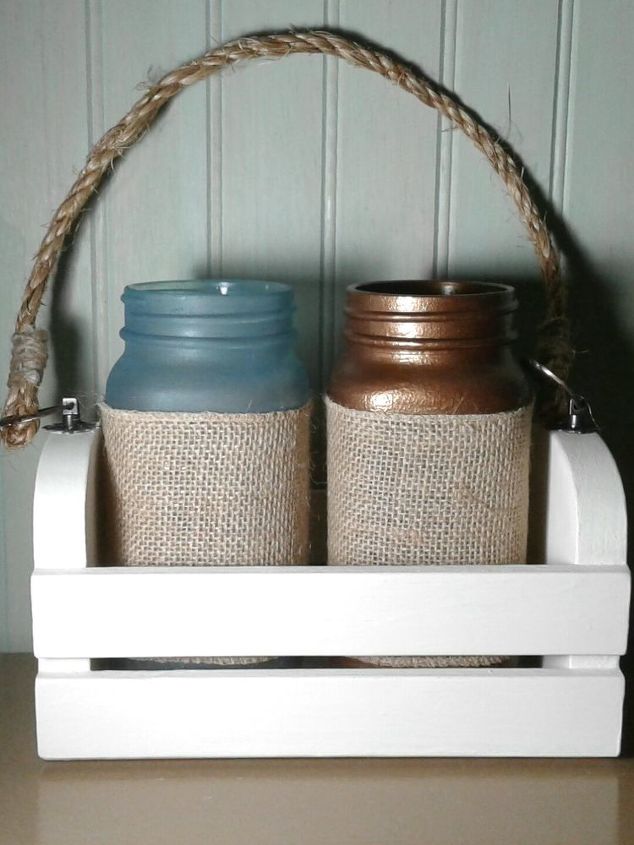
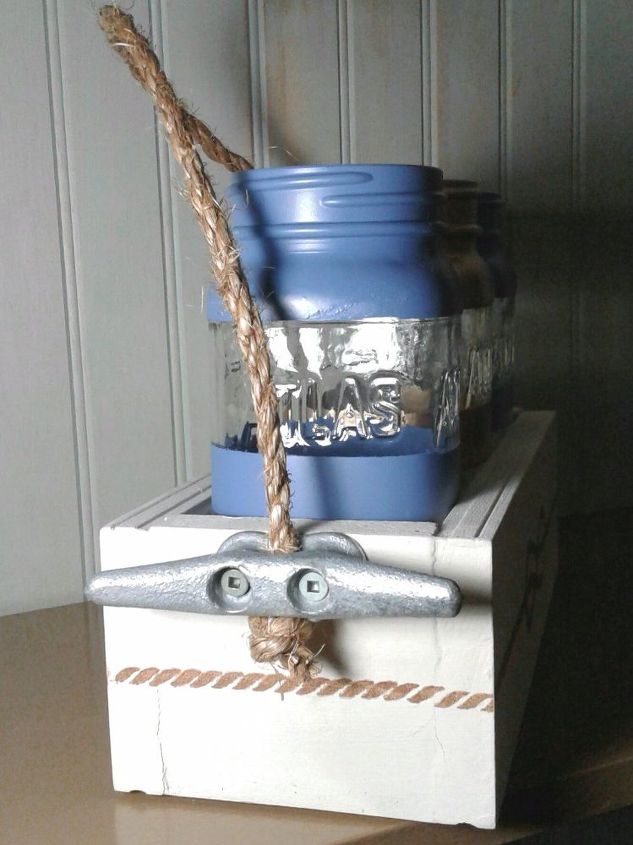
Putting it all Together
Heres the project all assembled and looking fresh and new! It may be used for wedding decor so other embellishments may be added to suit their vision!
Securing the Rope Handle
The rope ends are protected from fraying by wrapping the end after it passed through the handle loop with jute string and a dab of hot glue to seal it in place.
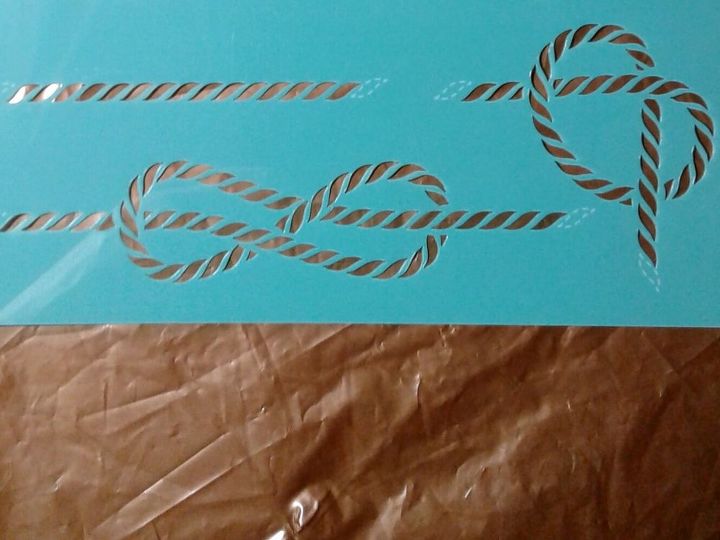
Stencil Time
The next tote was started from scratch with new pine boards, painted again with the chalk paint. The next step was to stencil a rope pattern on the sides using Martha Stewart stencils.
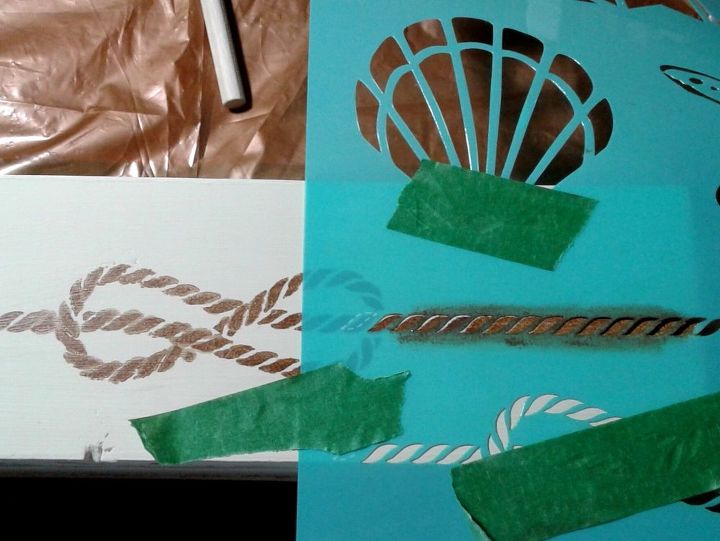
Secure Stencil First
A few pieces of painters tape held the stencil in place while I paint gold paint onto the cutout.
Bottle Painting
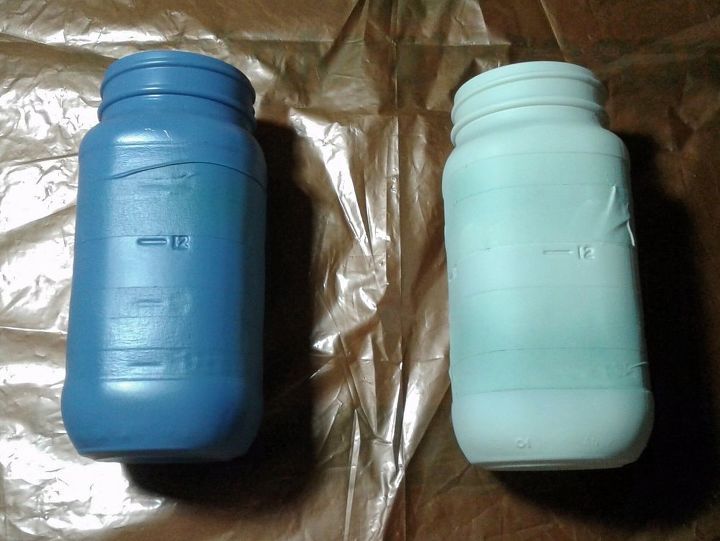
The box was custom made to accept three mason jars which I taped up in a stripe pattern and spray painted in gold and periwinkle blue
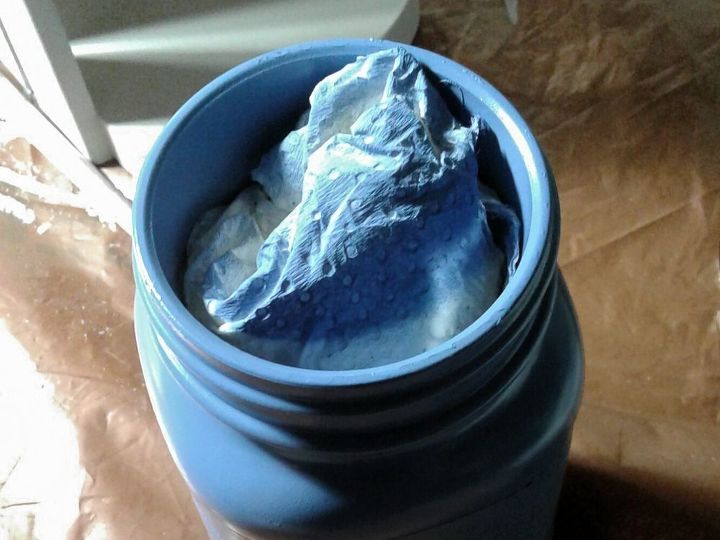
Protect from Overspray
I stuffed the inside of the bottles with rags, paper towel, etc. to prevent the inside from any over spray. While the coats of paint were allowed to dry, I planned on how to add a rope handle.
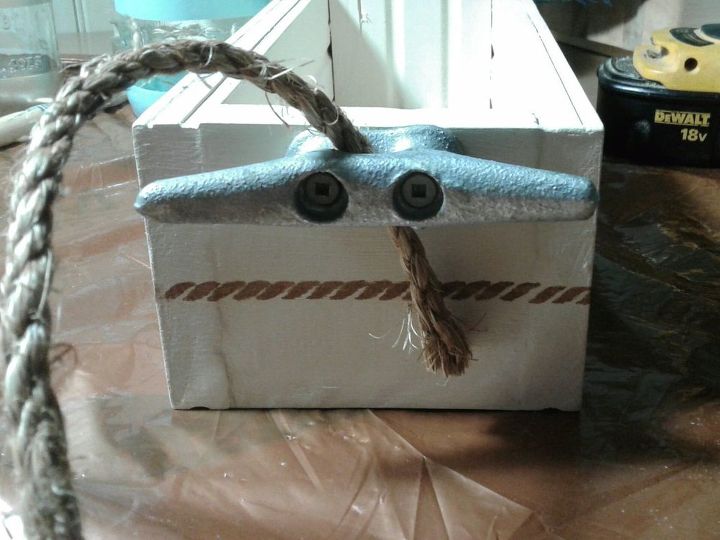
Adding Rope
To do this I needed to get creative, I'm not sure what its called but its used to secure rope on boats. Cha-ching it worked perfect! The rope is fed through the center hole and knotted to keep it secure.
Rope Secured
Here's the closeup of the rope secured into the boat cleat.
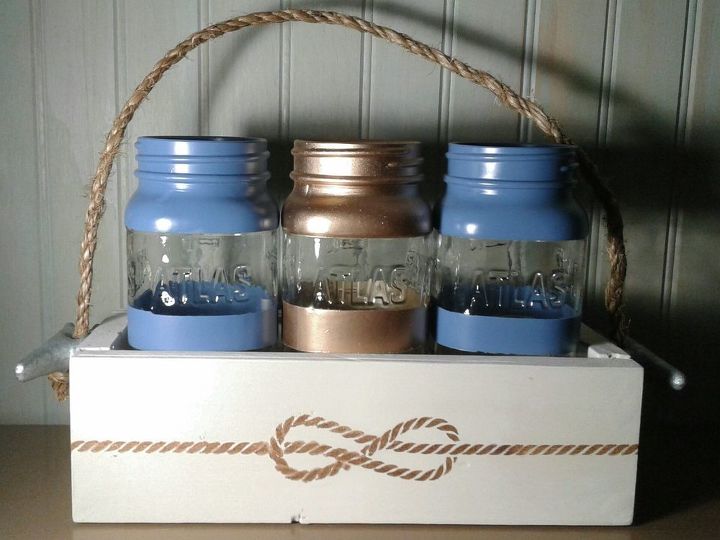
Final Reveal
Heres the the finished view of the tote from the front angle. Nautical, beachy, rustic style call it whatever you want but I'm keeping them all for my home even if they do get used for wedding accents!
Comments
Join the conversation
-
Looks great!
-
Love it! Need more ideas like this for my upcoming gift shop. Beachy and cheap, want to make things affordable


Frequently asked questions
Have a question about this project?