


How To Make A Rustic Farmhouse Wall Decor Bin
5 Materials
$2
15 Minutes
Easy
Rustic farmhouse wall decor is never a bad idea, right? I love any excuse to pull out my power tools. So, you wanna make one? Let’s get to it.
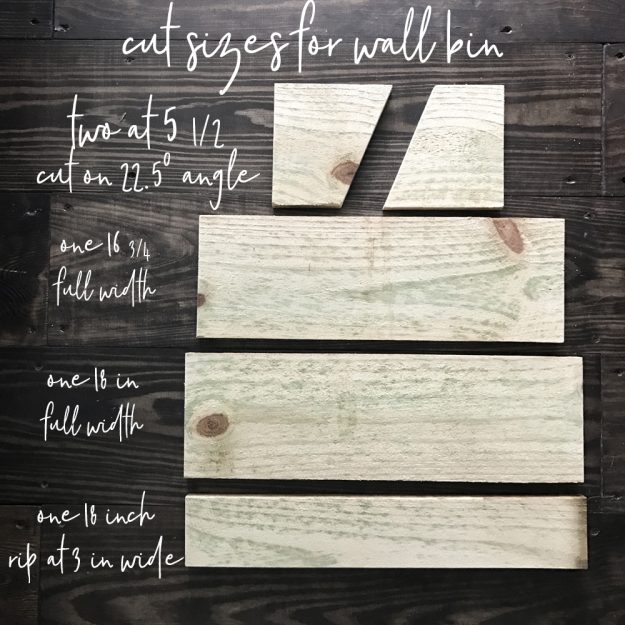
First you’ll need to cut the pieces. Using the reference above, you’ll need two 5 1/2 inch long pieces with a 22.5 degree angle cut on one end of each. You’ll also need one piece cut at 18 inches long + one at 16 3/4 inches long cut at full width, plus one 18 inch piece cut & ripped at 3 inches wide. The angled pieces are the ends, the 18 inch pieces are the front & back, then the 16 3/4 inch is the bottom.
Use wood glue along all seams, and nail them together with 1 1/2 inch pin nails. Drill a hole on the back in each corner to hang to the wall with screws.
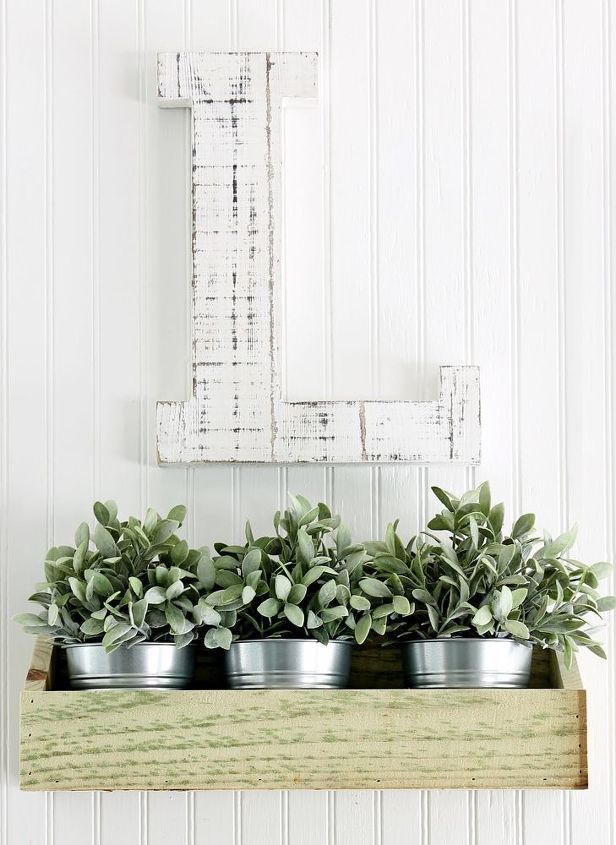
Of course you could paint it, but I love the texture of these boards as is – they give that “farmhouse wall decor” vibe so well. They are somewhat rough, and you could sand if you prefer, but I only sanded the ends of the cut areas. It’s such a simple little build, but I love how it turned out.
That's it!!! You are done...$2.00 in 15 minutes, not too "Shabby" 
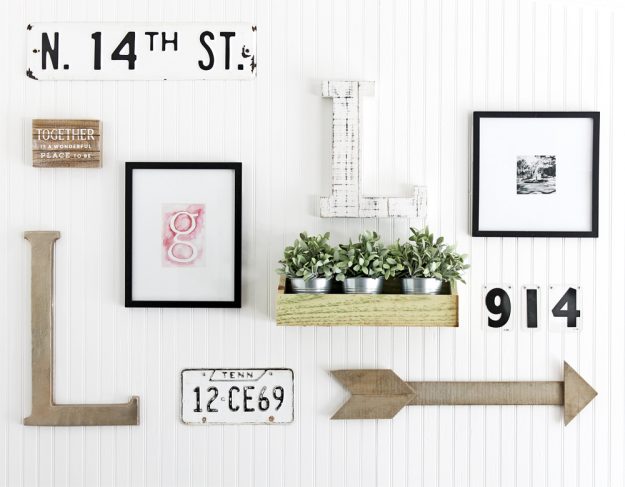
You could fill it with almost anything, but I’m kinda digging these Ikea planters on our living room gallery wall… whatcha think?

Want more details about this and other DIY projects? Check out my blog post!


Frequently asked questions
Have a question about this project?