


Fairy Night Light (With / On- Off Switch)

by
Lily Ardor
6 Materials
$15
2 Hours
Easy
Make your own magical fairy lantern.

Okay if you haven't heard of glow jars or fairy jars then you should probably check them out. I love glow in the dark stuff especially glow in the dark fairy jars. This week I set out to make one and I was ssso excited. YEY!! Ok fast forward..So my attempt at making the glow in the dark paint glow enough for a fairy jar failed!! What I didn't know at the time was that it was a blessing in disguise. I feel like the best things come unexpected and with DIY'S it's exactly that. Although this fairy night light wasn't a planned project it was a pleasant surprise. Don't worry I didn't give up on the glow jars!! I'll be attempting those again soon.
The list of things you need for this project is a bit long, but most of the stuff you can find around your house. I only invested a total of $15 into this project which is a fair price to pay for this whimsical fairy jar. :D
This night light has an on and off switch and is easily portable. :D :D
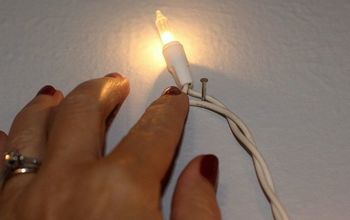
To start off I cut a hole in my lid and glued on my light making sure the switch is easily accessible.
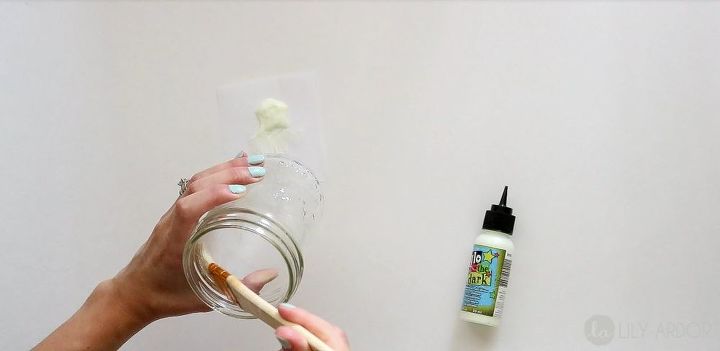
Then I painted my jar with some glow in the dark paint.. NO this did not make it glow in the dark. It gives the jar a very faint glow. I did this just to add texture. Then I used cardboard for the base of the jar and added some moss and a fairy to it. I also antiqued the jar using some gray/copper paint and a special plastic brush technique.
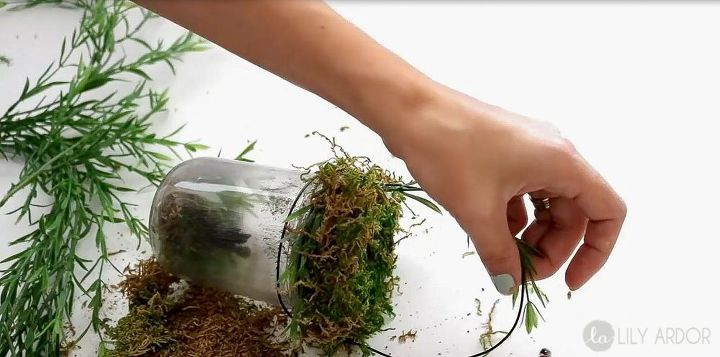
Then I simply added moss and greenery. Oh and a glass vial with a key that makes an interesting magical sound when moved.
There you can see the key and glass vial. :D I added a bit of glitter to my glass vial.
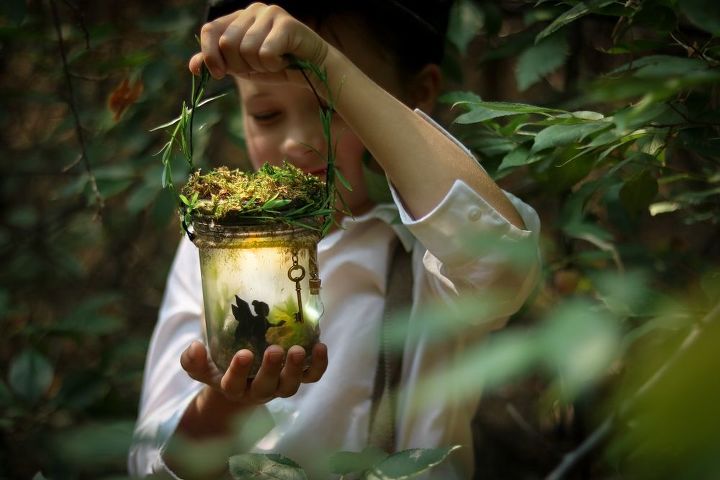
There you can see the key and glass vial. :D I added a bit of glitter to my glass vial.
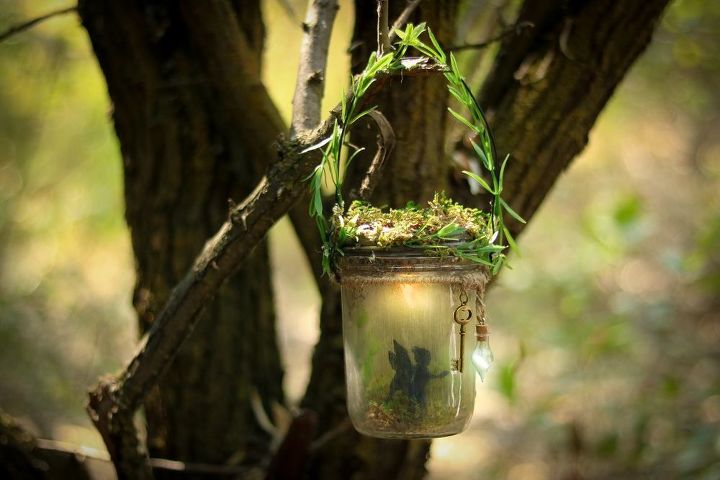
Here's our Fairy Lantern at night (we added some fairy dust  )
)
)
Here's our Fairy Lantern at night (we added some fairy dust )
)
If you guys like this tutorial you can see more awesome DIY's on my blog at the link below
----------------------------------------------------------------
To SIGN UP for our newsletter click this link and 'Follow' along to be sure you don't miss a DIY!'
_________________________________________________
Thank you for Joining me today.  I hope you liked this DIY
I hope you liked this DIY
{
"id": "4173610",
"alt": "",
"title": "",
"video_link": "https://www.youtube.com/embed/ZMK1jp4v4o8",
"youtube_video_id": "ZMK1jp4v4o8"
}
{
"width": 634,
"height": 357,
"showRelated": true
}
Here's a video for you guys. This was a fun video to make. Our little guy enjoyed it so much he keeps asking to watch it over and over again.
VISIT THE LINK BELOW FOR THE FULL TUTORIAL 
We want to help you DIY, so some of the materials in this post are linked to sellers. Just so you know, Hometalk may collect a small share of sales from the links on this page.


Any price and availability information displayed on [relevant Amazon Site(s), as applicable] at the time of purchase will apply to the purchase of this product.
Hometalk may collect a small share of sales from the links on this page.More info
Want more details about this and other DIY projects? Check out my blog post!
Comments
Join the conversation
3 comments
-
Loved your tutorial and you did an amazing job in your instructions too.
-
YES. I have always noted to do these. Thank you


Frequently asked questions
Have a question about this project?