


Wooden Stained Sign With Original Wood Color for Lettering

by
Lisa Cain
3 Materials
$10
1 Hour
Easy
Here's one way to make a sign, where your wood shows through on the lettering. There are many many ways to do signs, colors, stains, etc, but here is one quick method for those that may want to achieve the old wooden, antiqued look ~!
I didn't have a picture of my piece of wood I started with, but basically just sand down a piece of wood. Use your Silhouette or Cricut machine to make lettering for your project. Once you have the letters cut in vinyl, your going to transfer them onto the wood.
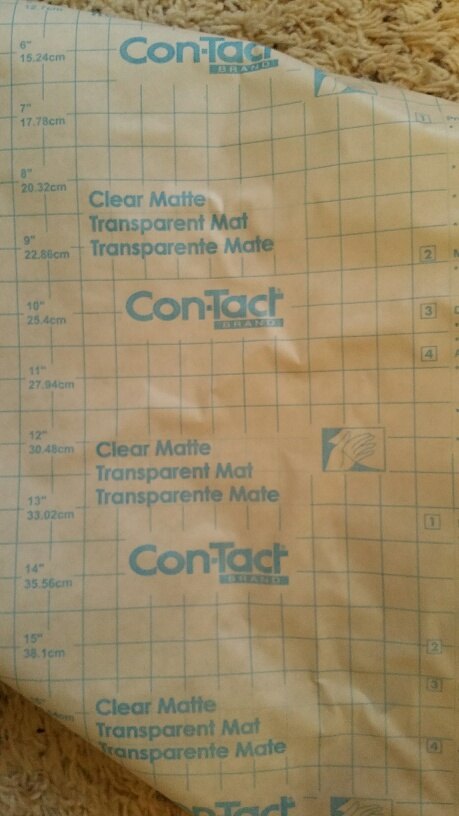
This is the "transfer paper" I use to transfer the vinyl lettering. It's cheap, at Walmart, Shopko, etc and you can reuse over and over. Less then $5.00 a roll.
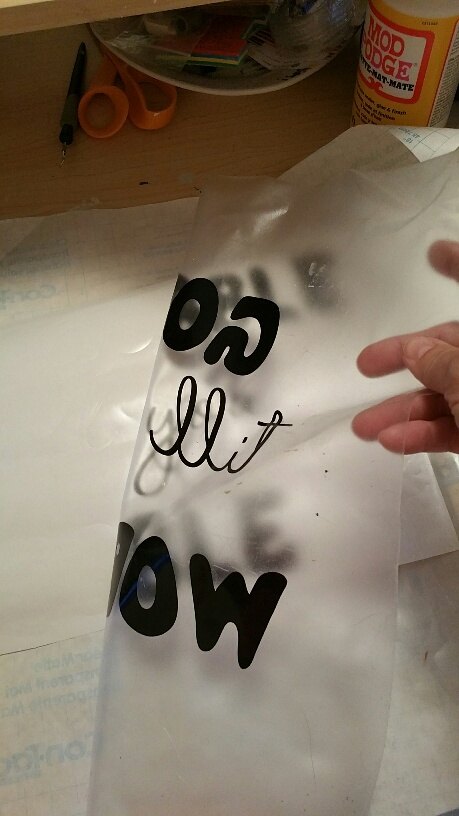
You lay the transfer tape over the lettering, smooth down with credit card type tool all over the letters. Pull back the transfer tape and the letters should come off as you pull and "transfer" on to the sticky tape. Sometimes you may have to put it back down and smooth over a letter again to make it pick up.
Next lay your transferred letters onto your piece of wood. Take your smoothing tool again and go over each letter, semi hard, to attach them to the wood. After going over every letter, slowly pull your transfer tape up so that the letters stay on your board.
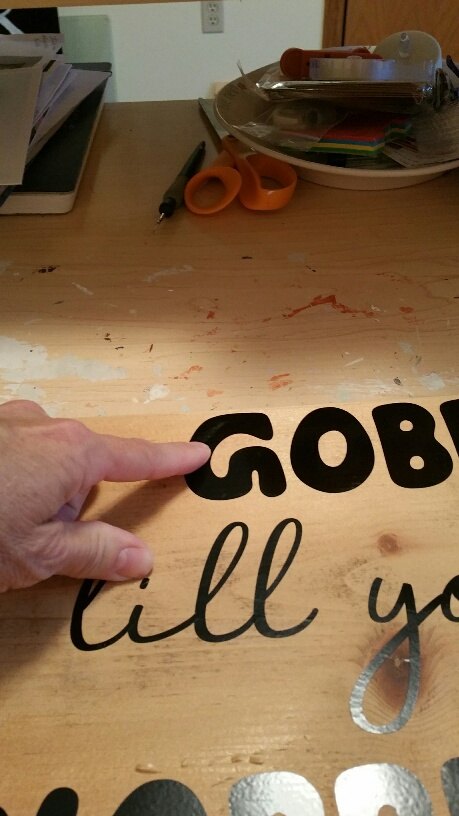
After the letters are on the board, I take my finger and just go over each one to make sure they are all the way down on the board, with no gaps showing or creases. This helps so the paint/stain doesn't bleed underneath.
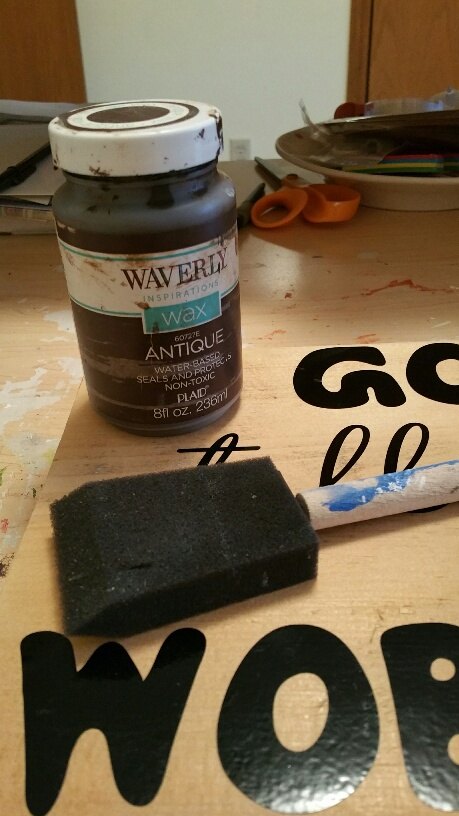
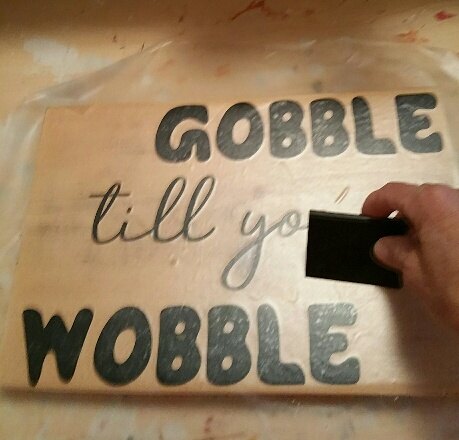
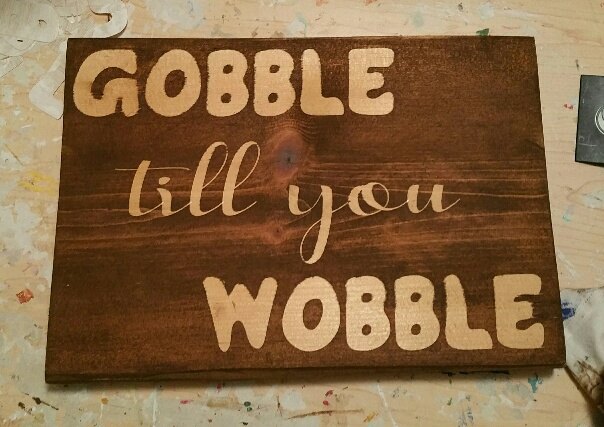
Next I use a Antique Wax and coat the whole board with a sponge applicator. This will make the board a nice brown color, but the vinyl letters will protect underneath so they come out the same color as original board.
(note: I got taken away while doing above project, and did not finish taking pics, so I did another one and finished the picture process, note the different color vinyl lettering). This is what your board looks like after applying the wax. I also took a rag RIGHT AFTER applying the wax, and took off some of it, so it looked more natural instead of so dark. You could also take a small amount of water on a sponge and take it off that way too, if you forgot too right after applying and want it lighter.
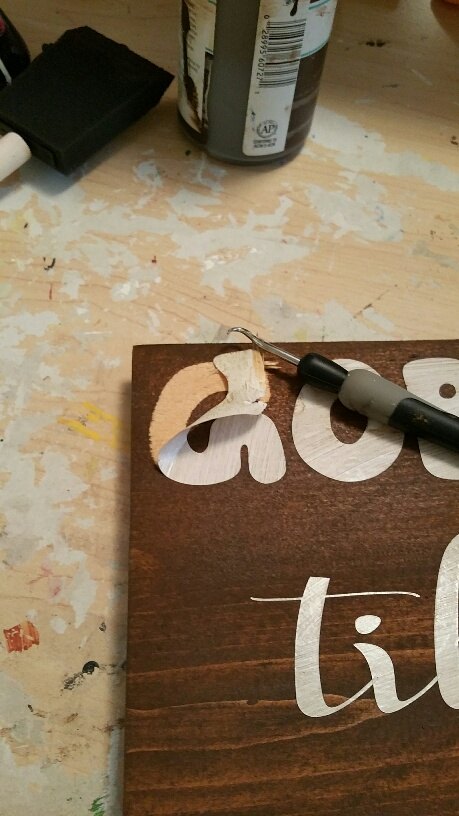
Next take a tool that has a pick on the end, and pull up the vinyl lettering. I like to do this slowly just to make sure I get all of the vinyl off.
Here is a picture with part of the vinyl pulled off to show you what it looks like. The "G" in gobble had a few wood strings pulled up, but at the end, I just took some antique wax on a brush and applied it lightly around the lettering where it came up.
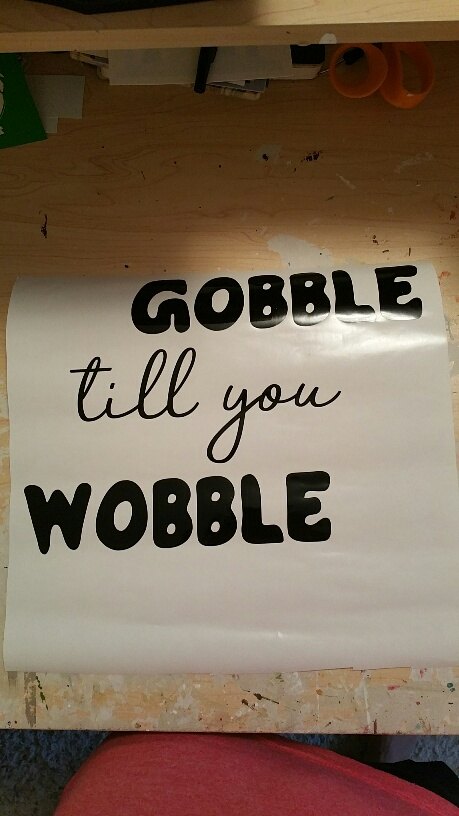
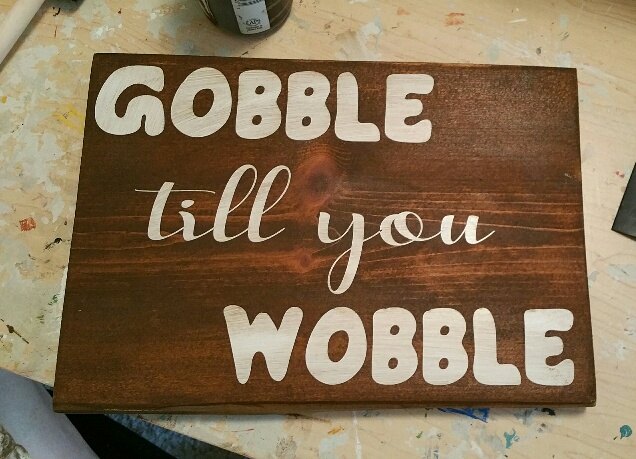
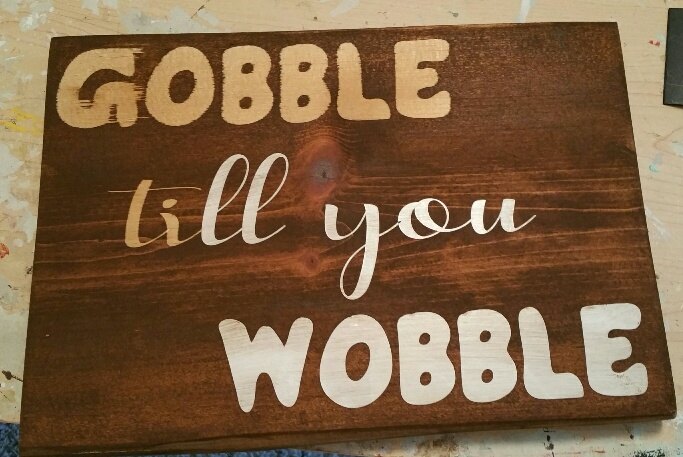
And final outcome. Stained wood piece with original wood color as letter background. I love the simple and antique look of this process. If you want, you could sand off around the edges a little too, or lightly over the top so make it look more dated and worn. GOBBLE...GOBBLE...
Comments
Join the conversation
2 of 4 comments
-
I do every year!

-
GREAT!


Frequently asked questions
Have a question about this project?