


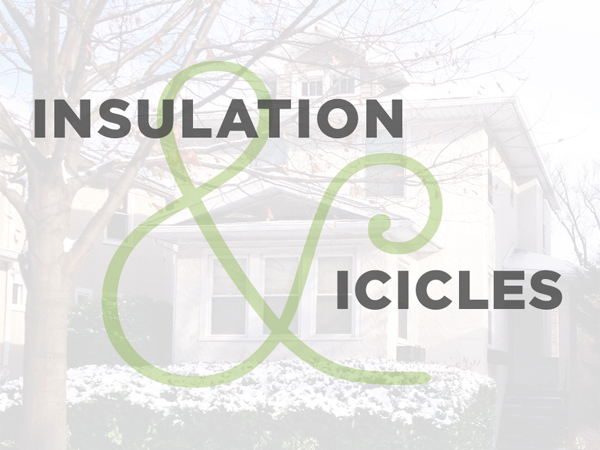
Winterizing a 1920s Home
Old houses have so much charm, but often no modern insulation. This winter, our 1920s American Foursquare house has been a little chilly! We've been exploring long-term ways to keep the cold out. Click on our blog post below for more details.

Want more details about this and other DIY projects? Check out my blog post!
Comments
Join the conversation
4 of 7 comments
-
Your on the right track getting the energy audit performed. Be sure its a true energy audit and not one of those sales gimmicks called a home energy assessment. The things the audit professional should be doing in your home is performing a CAZ test which is where they put the home in the worst case condition to create a draft from the basement and then check the ability of your heating and hot water appliances to draft up the chimney. They then should be doing a gas leak check on all the pipes, assuming you have gas in the home. The next thing they should be doing is looking for materials such as asbestos, mold or other materials that could become airborne during the next test they are about to perform. This next test is called a blower door test. They measure the square footage of the home, the cubic footage of the home. The amount of exposure of outside walls of the home and use this information in the calculation that is used to determine how leaky your home is. A properly performed audit will take around three hours give or take. Recommendations following the inspection will be determined by what they find when doing the inspection part of the test and the results of the blower door evaluation. These normally include air sealing. Adding insulation, Upgrading HVAC equipment and hot water heating appliances. If there really into this, lighting, appliances will come into the audit as part of the equation. I do not suggest changing the heating or cooling system until you do some of the many things that are suggested. As the home is improved, so will the capacity requirements needed to heat and cool it. No sense putting in a furnace that will be to large and over sized if you improve the rest of the house. Same holds true for AC. The trick to making a old home, and for that matter any home more energy efficient is to stop the natural drafting that occurs in a home. In your case you will see major improvements in comfort as soon as you do just a few things. Start on the top first. Pull back all old insulation or completely remove it. Ideally this is a great time to use a shop vacuum and get rid of all the rodent droppings and dust that has collected over the years. Then using spray foam that comes in the cans, seal around every wire, pipe and opening including ceiling boxes that are exposed from the attic. I would assume you have a chimney that runs into and out of the attic through the roof? There is most likely a large space around that chimney that simply connects all the way to the basement. IN this area you need to purchase thin sheet metal and seal the metal tight to the chimney from the surrounding framing. Use silicon calk, not foam to seal the metal to the chimney, AS much as you would like to use foam boards or wood, do not do this. Not safe. Only metal. you can purchase this in sheet form or in coil form used for siding work. Once that is done, Look around in the attic for the wall sections. you will see the top plate that is nailed to the bottom of the attic floor joists. While these areas appear tight, you would be amazed on just how leaky these areas are. Using the foam again, lay a bead on both sides of the framing to seal it tight to the plaster or drywall materials. Pay close attention to the area where the outside walls are located. Of course this is the hardest part to work on, but its the most important part. Use lots of light and a plywood to lay on and carefully seal those areas. If you have light fixtures that come up into the attic area, you need to build foam boxes to cover them to prevent air leakage out of them. These boxes should be at least the width of the joists spread and not come into contact with the lighting fixture. Ideally this is the time to install CFL or LED fixtures to keep the heat out as you want to keep the fixture as cool as you can. The next thing to do is look at the basement, much like the attic you need to seal any opening that connects the basement to the living area. Pipes, wires, again around the chimney etc. Very important. Pay close attention to the sill areas. This is where most of the air that enters into the basement and up into the home comes from. Spray foam around the entire area sealing all of the spaces between each bay. Using foam boards, cut them to fit as tight as you can between each bay and foam them into place. Put at least four inches worth of these boards in each bay if possible. Then you can install fiberglass on the remaining area to increase the R value. But the trick is to stop any air from flowing up into the wall cavity and from the outside of the house. One thing that the blower door may show up, is leaking walls in the basement. In many older homes, more so with stone foundations, a lot of air flows through the walls, Painting them, foaming them all helps a lot with keeping the cold out of the house. In any case, once you have done the basement sills and air sealed the attic, you then can insulate it. How you do this is dependent upon what your plans are for the attic. Normally attics are not used due to light framing sizes, but there are those who want to store things in them. In that case, you should construct a platform that will not flatten or crush any insulation that you install. When we do attics we like to blow insulation in them. It gets into all the nooks and crannies assuring us that everything is evenly insulated. Of course we can spray foam but that is only for attics that have AC equipment in them and that's another entirely different topic. Prior to doing any blown in material we need to prevent this material from dropping down into the soffit areas, which if they have not been modified to allow air into the attic by installing vents, this is the time. We do several things. We hang marker strings above any electrical splice boxes that are in the attic. We of course make sure that these boxes are properly covered and that there is no issues with the amount of wires and splices in them. We hang strings were ever there is something that some day if we need to find it, we can locate that spot by going to the string. Remember, the loose insulation will be close to two foot thick and you do not want to move to much around if you need to find that one wire or splice. We then using 1 inch foam board, cut groves in it along the long side that matches each floor joist. We then push this foam board down to it goes to just the outside edge of the exterior wall plate. Sometimes we need to bend the boards a bit to get them to fit, but in any case the idea is to be able to insulate on top of the plate without the insulation falling into the soffit area. We use roofing nails and or screws with large washers to hold the foam boards in place. Where gaps are created, we foam them closed. Then when that is done on both sides we blow in insulation. They sell paper rulers that are stapled to the floor joists which are placed in various areas so we know that were keeping to the same height and R value as we work, but after doing this for a few years, we normally can eyeball the depth as we go. Just doing this work in your old home, you can expect to see about a 25% if not more increase in savings and a great improvement in the home as far as comfort. All of this work should be done after the blower door test is done, and once again after the work is completed. Hope this helps
-
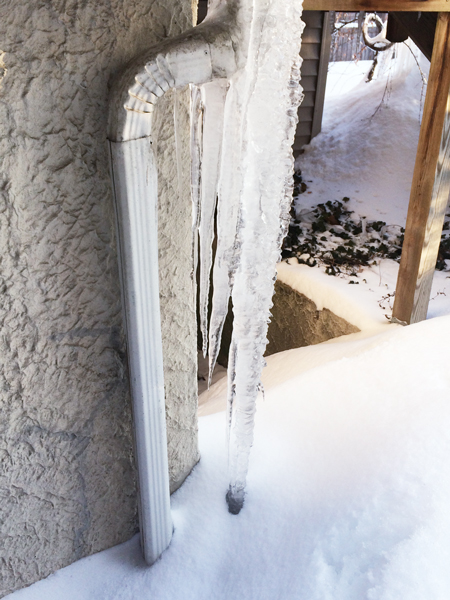
Too bad I can't see the original post, I have a 1910's house, I live in Outaouais region and let me tell you that I do have lots of Ice on my roof! Thanks


Frequently asked questions
Have a question about this project?