


"Dirty Pour" Marbled Pumpkin

by
Abbey D
7 Materials
$25
1 Day
Medium
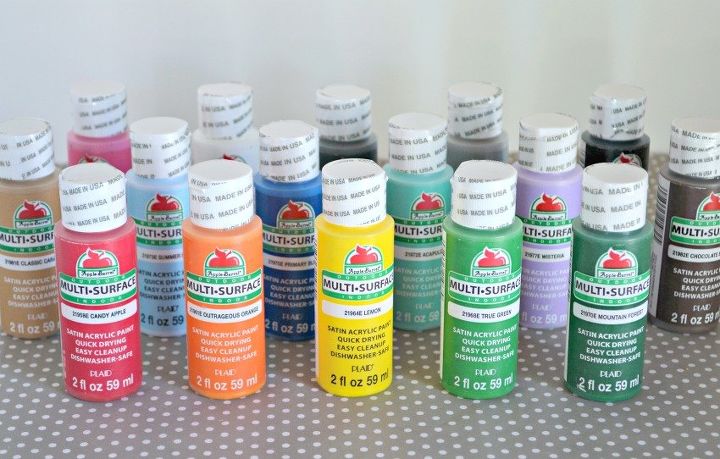
When I was at the Plaid Crafts Headquarters in Atlanta in June I got to do one of my FAVORITE crafting projects to date! I was taught how to “Dirty Pour” with acrylic paint. The idea is really easy, but there is an art to this, so I encourage you to practice a few times before doing anything large or expensive. But for starters, I’d suggest starting with an acrylic paint like this Apple Barrel® Multi-Surface Satin Acrylic Paint KIT from Plaid Crafts! It contains SIXTEEN Apple Barrel Paints for just $19.99, which is 25% off retail. This will give you all the basic colors you need to do and practice the art of the “Dirty Pour”.
Here’s what you need:
1 tsp. Safer Paint Thinner
3-4 squirts ArmorAll Original Protectant
3 squirts Black Magic Tire Wet
1 tbsp. FolkArt Glazing Medium
Apple Barrel® Multi-Surface Satin Acrylic Paint Kit (3 colors of choice)
Dowel Rods
Tin Tray to catch paint
Plastic Pumpkin
4 plastic cups
Next, I went outside on my back walkway to do this project. It’s MESSY you guys. So either be prepared with a plastic tablecloth and newspaper inside or just do this outside.
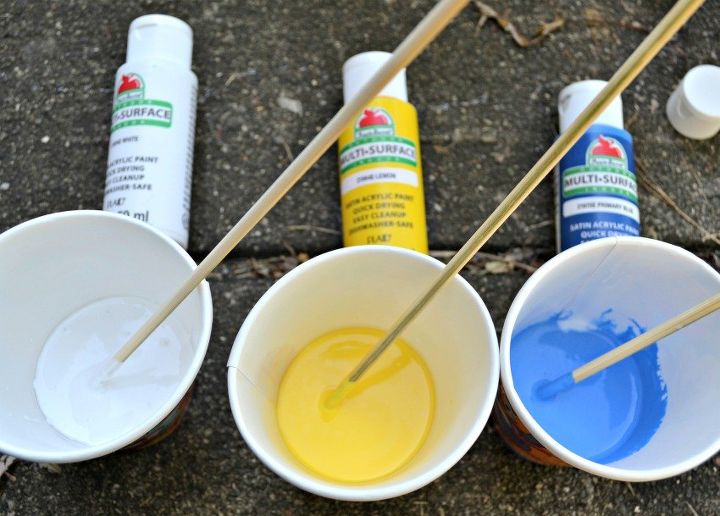
Get four cups ready, you’ll put paint in three and set one aside to combine all the paint. Start by pouring FolkArt Glazing Medium into each cup. Use about one tablespoon of medium in each cup. Next, add about 1/2 the bottle of paint into each cup, so you’ll have three cups full of paint.
Next, in one cup pour the thinner, in another use the Tire Wet, and in another use the ArmorAll (amounts listed above in instructions). Then use a dowel rod and stir each cup well. The paint should run fairly easily, so if it’s too thick, add more glazing medium.
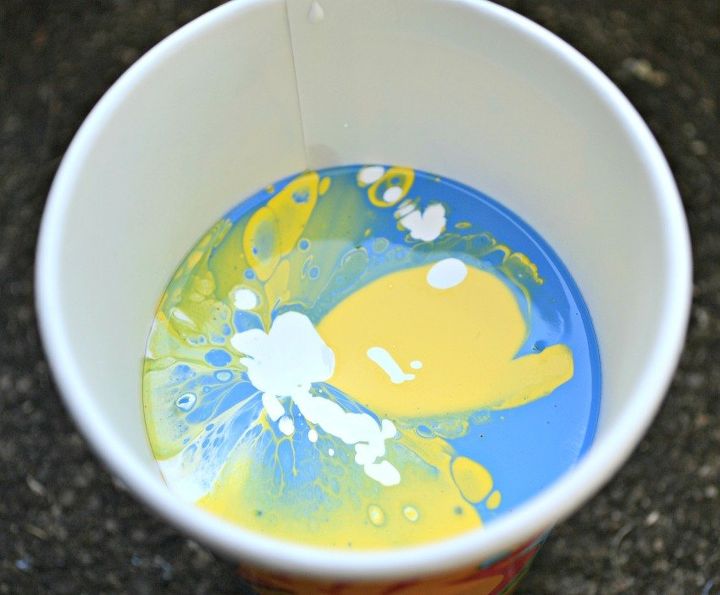
Once mixed, use the fourth empty cup to combine all three paints. They should NOT mix too much because of the ingredients added into them…it should look something like this:
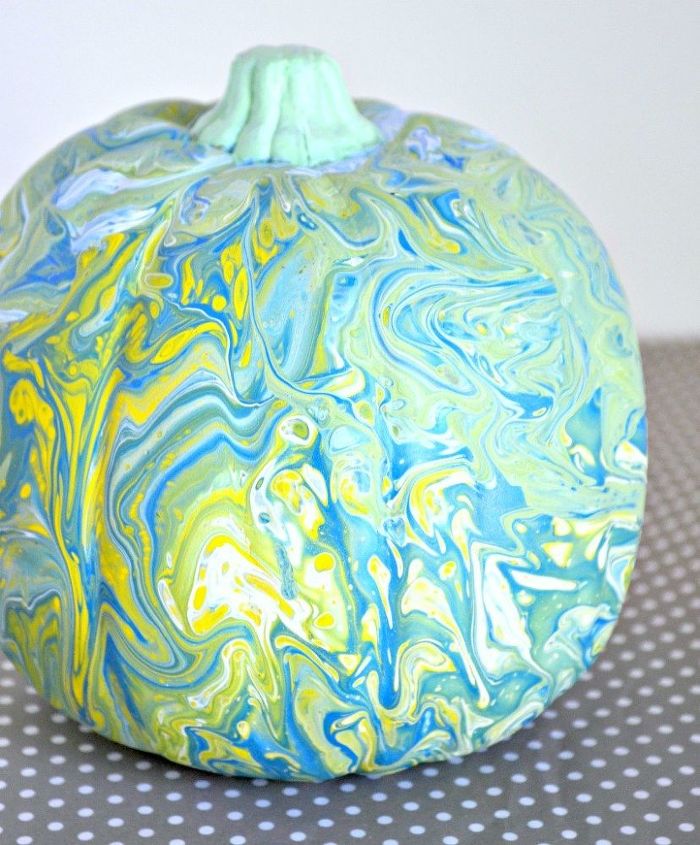
Then prepare your pumpkin. I stuck a dowel rod up through the bottom and then poured the paint over top of my pumpkin, gently spinning the pumpkin as I went to spread the paint evenly across. The paint creates a great marbled look. You can even gently reuse the paint at the bottom of your pan if you’re running low.
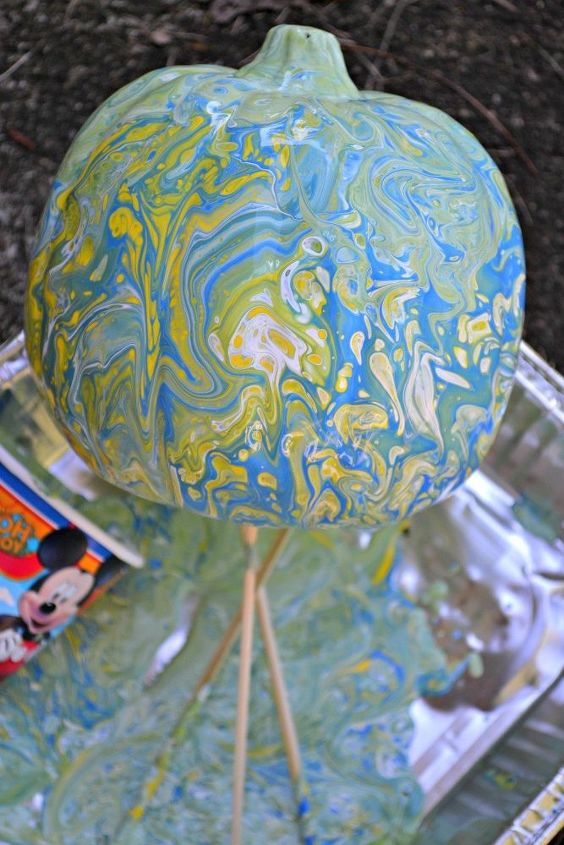
Once you get the desired look, use your dowel rods to let your pumpkin drip dry.
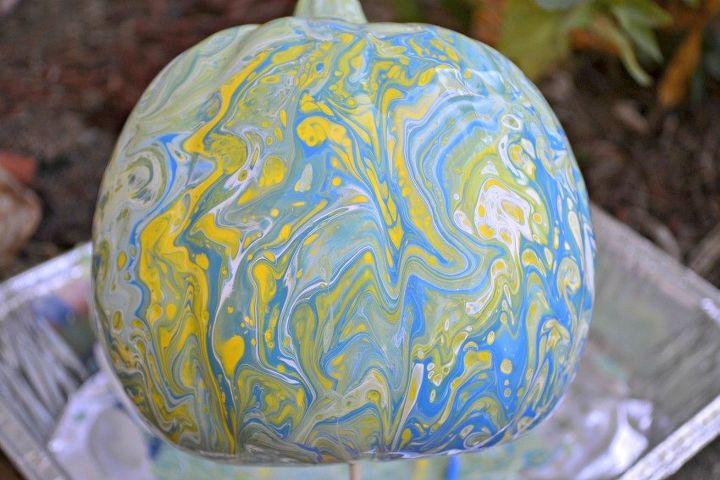
I let mine dry for 24 hours, then painted the stem light green to match the pumpkin.
Check out my Facebook Page for a full video on the “pour” for this project (it’s pretty cool!).
Want more details about this and other DIY projects? Check out my blog post!
Comments
Join the conversation
2 of 21 comments
-
so cute, love marble design
-
It’s beautiful!


Frequently asked questions
Have a question about this project?
What is Black Magic Tire Spray? If a cleaning solution can another kind be used?
Will this technique give the same result on a plastic or glass pumpkin?
Has anyone here tried this technique with these materials on regular canvas? I'm looking to use specific colors and get the effect of a geode or agate stone. I think this might be fun way to try. Even if it isn't what I'm looking for for that particular wall, it might be a fun addition to another space.