


Photo Gallery Wall
3 Materials
$35
2 Days
Easy
Create a timeless look in your home with pictures you took on your phone and frames from Goodwill!
I celebrated my birthday weekend with my spectacular husband and family. Brian gives the most thoughtful gifts, but he’s too excited to give them. I could only handle two days of, “You’re going to love your birthday gift,” before I couldn’t take it anymore. I needed to know what it was. So he went upstairs got the gift, made me close my eyes, and when I opened them I saw……
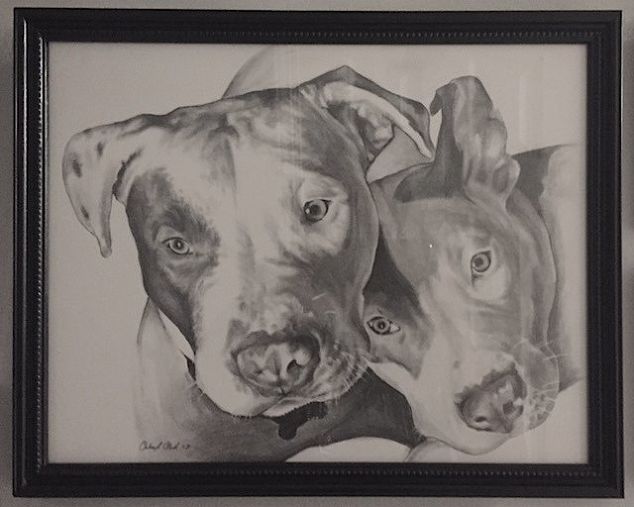
This is my absolute favorite picture of Duke and Duchess. Brian had it hand drawn by an artist! It’s gorgeous and even more beautiful in person.
I was so inspired by the classic black and white shades of the picture I knew I needed to give it a prominent place in our home. I decided to do a black and white photo gallery, which I nick-named “The Dog Wall”.
My rules for the wall were simple. 1. All pictures must be black and white. 2. At least one dog must be present in each picture. That’s it!
I started by scrolling through my albums and editing photos using my iPhone to change the image to black and white. Once I chose the pictures I printed at a Rite-Aid. I ordered 11 photos in different sizes. The total cost for printed pictures was $18.
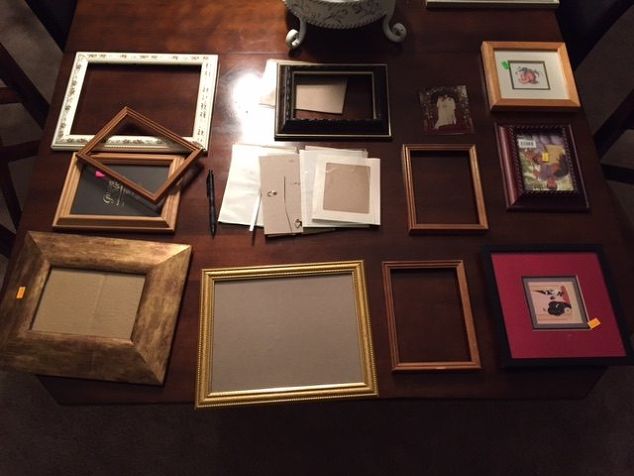
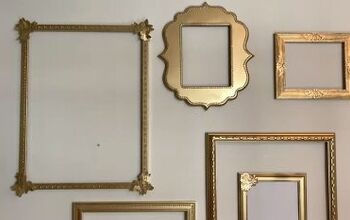
Aside from the idea of having 12 pictures of our 3 dogs (of course Lady was included!) on the wall, the most exciting part of the project was the assortment of frames! My mom had a few old frames that were in a box in the attic. For the remaining frames, I went to Goodwill and picked out some extremely tired frames that needed a sexy new look! 6 frames cost $10 at Goodwill.

I removed the glass and the backs from all of the frames in order to spray paint them. I did this in our basement because it was raining outside and I was too impatient to wait until it stopped. Our house smelled like paint for a few hours. So I’m probably not going to do that again. Most likely.
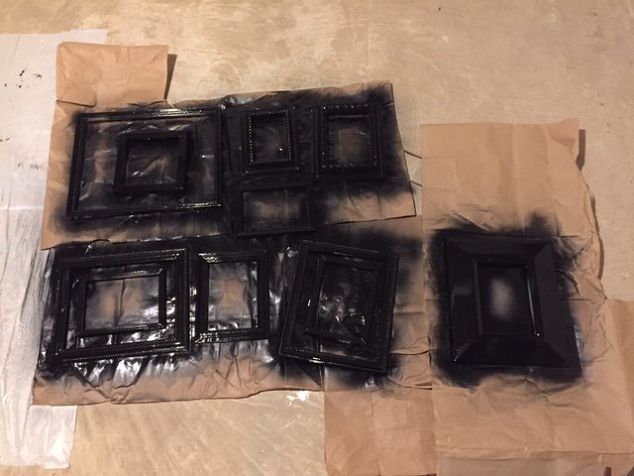
I went over the frames with two healthy coats of black spray paint. I could not contain myself while I was waiting for these to dry. I waited a full 24 hours before touching the frames to avoid having finger prints on the wood. But it was tough keeping my hands to myself!
Once they were completely dry, I put the glass back in and added the pictures!

Here’s the wall the pictures went on before they were up. My little helper wanted to be in the picture. I’m not kidding. She posed as soon as I took my phone out.
Gallery walls can be tricky, especially when you have 12 different frames. I recommend How to Hang Stuff, Like a Girl. I’m very visual and I need to plan out how the wall is going to look and make adjustments.

Here’s the finished look!
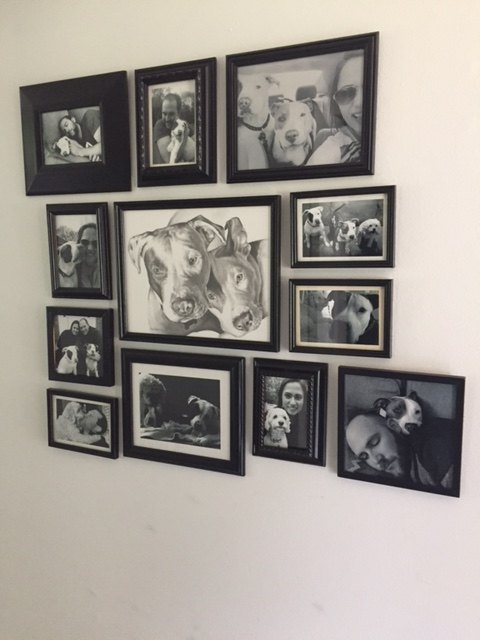
It’s tough getting a picture of this wall because it’s in a hallway, but I crawled inside the coat closet across from the frames so you could see how it looks up close!
We love our dogs!
Resources for this project:


Any price and availability information displayed on [relevant Amazon Site(s), as applicable] at the time of purchase will apply to the purchase of this product.
Hometalk may collect a small share of sales from the links on this page.More info

Want more details about this and other DIY projects? Check out my blog post!
Comments
Join the conversation
2 of 74 comments
-
Super idea! I intend to copy using my recently deceased partner's racing car and memorabilia photos to make a homage!
-
Ideas to do up 13 y/o girls bedroom very small room


Frequently asked questions
Have a question about this project?
What type paint did you use for the frames?
How cool, how did the artist get the pose of the dogs, did he work from a photograph? I have 3 Labs & a Pittbull Boxer & I can't even get them together for a picture let alone a portrait .