


Headboard Repurposed Into a Coat Rack
12 Materials
$40
1 Day
Easy
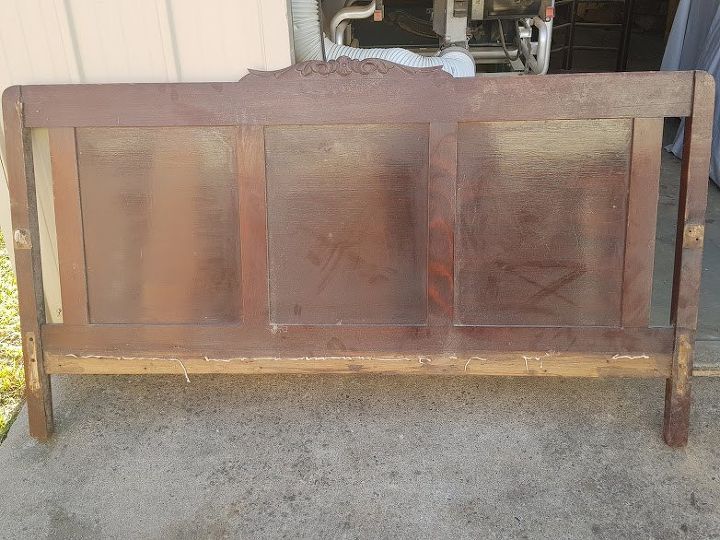
Turning a headboard into a bench is one of the most popular ways to repurpose an old headboard. I had this one sitting in my shed for years and when a friend asked if I could make her a hat rack I thought this one would be perfect.
Headboard Repurposed Into a Coat Rack
This headboard was not very heavy because the panels in the center were a thin plywood and the legs would be removed. I was going to cut them off but I found that they were already loose so a few taps with a hammer and the legs popped off.

Headboard Repurposed Into a Coat Rack
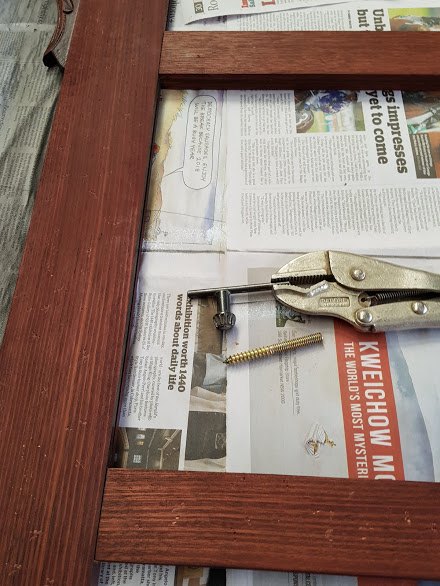
Because I needed to sand the inside panels to get rid of all the old varnish I found it was easier to take the whole headboard apart. It was all just slotted together so It would be easy enough to put back together.
Headboard Repurposed Into a Coat Rack
I sanded down all the wood and notice that it had quite a few dents in the wood, to hide the dents I distress the wood further to blend in the dents. It was at this stage I thought the headboard might still be a bit big.
Headboard Repurposed Into a Coat Rack
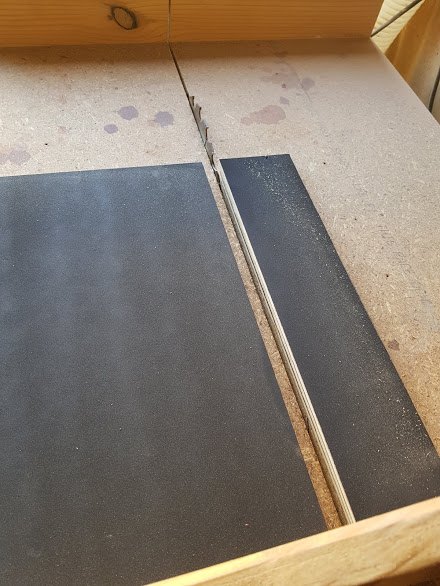
Because it was all ready apart it was easy to cut about 10cm off each of the panels as well as the frame.
Headboard Repurposed Into a Coat Rack
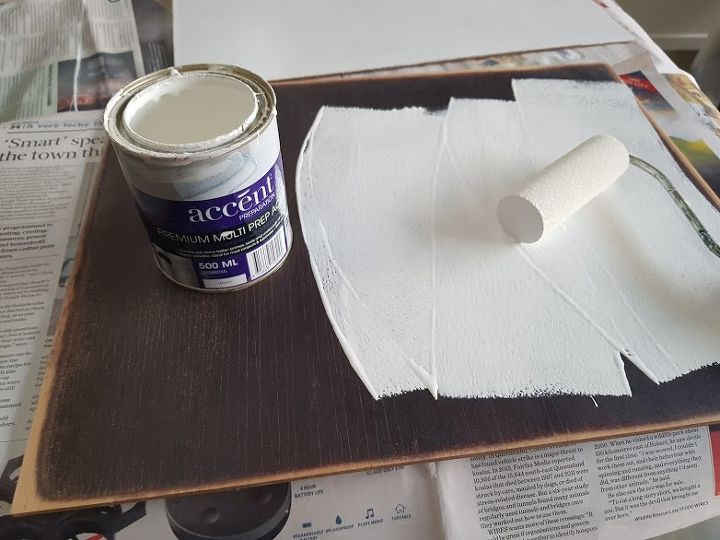
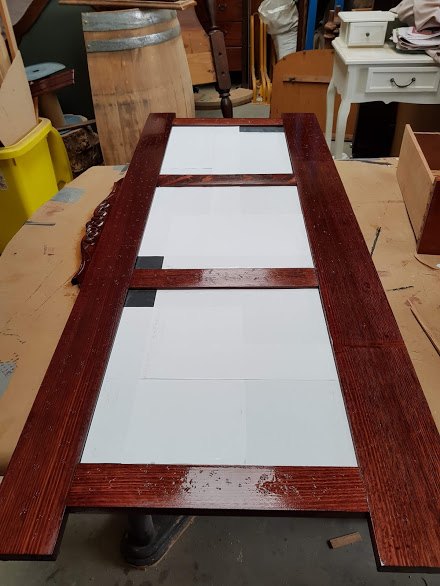
I had planed all along to make the middle panels chalkboards that you could write messages on. Once they were all sanded down I added a coat a white primer and left it to dry. I used chalkboard spray paint and added 2 coats as per instructions on the can.
Headboard Repurposed Into a Coat Rack
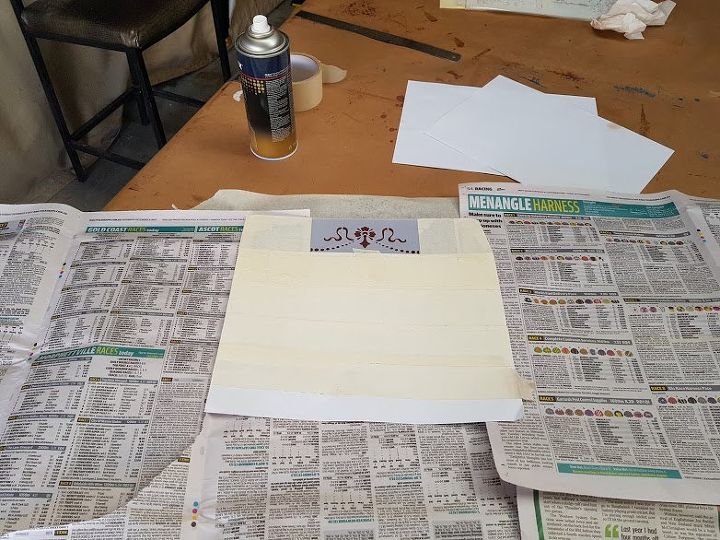
The wood was stain a dark mahogany and given 2 coats of clear polyurethane. I glued the headboard back together and used ratchet straps to hold it all tight while the glue dried. I wanted it add a bit of detail to the wood. I covered all the boards to protect them from any overspray.
Headboard Repurposed Into a Coat Rack
I used a stencil and some copper spray paint to add a design to the top. This took awhile because it was a single stencil and I had to wait for the one to dry before I started the next.
Headboard Repurposed Into a Coat Rack
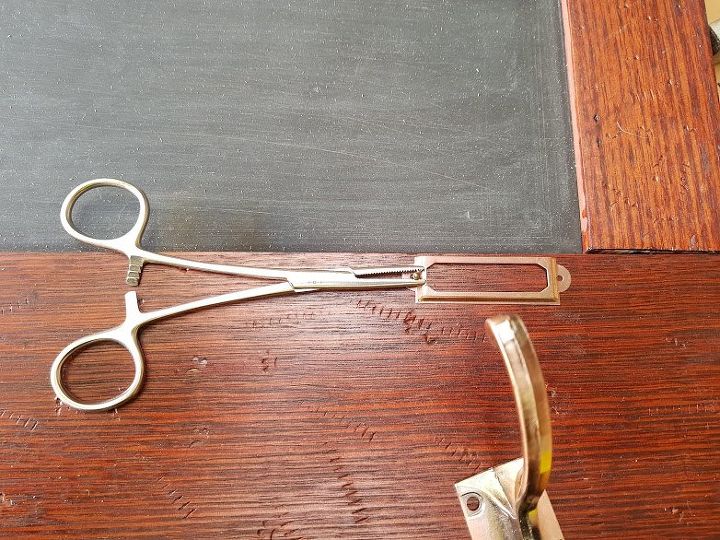
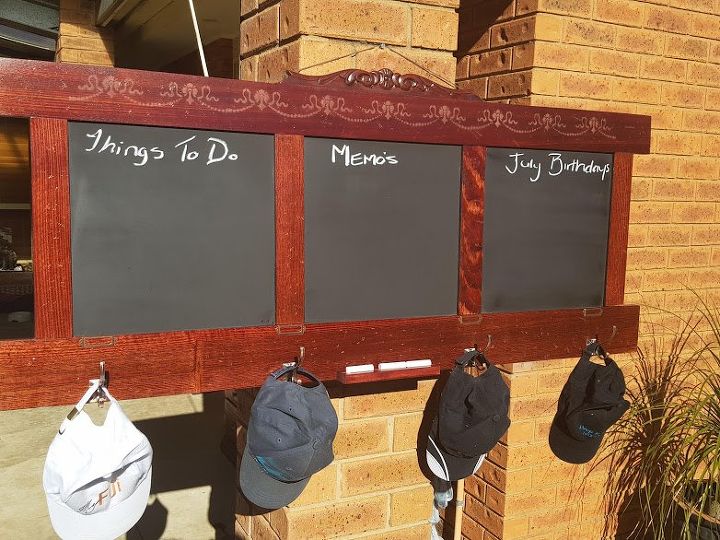
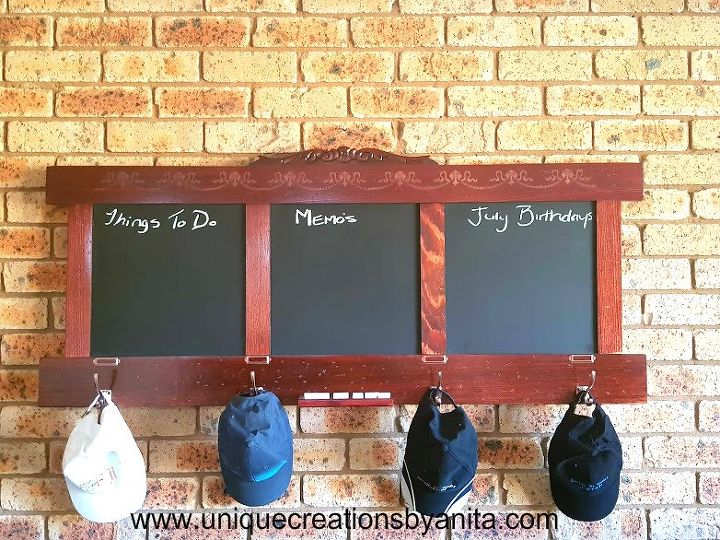
I added some hat and coat hooks to the board and some copper name tag holders for added decoration. And cut a small piece of wood to add to the middle for the chalk to rest on.
Headboard Repurposed Into a Coat Rack
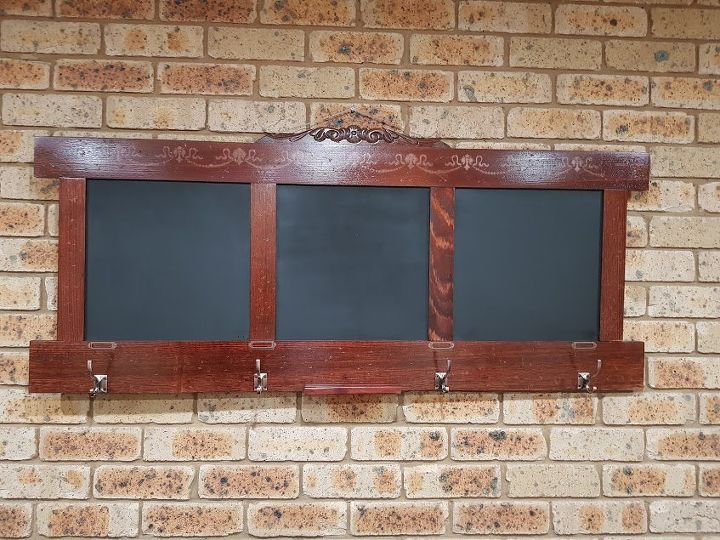
This was the rack complete. Because of the bad lighting in my house I took the rack outside to get better pictures.
This rack would be great in a kitchen or a entrance hallway.
If you are a pet lover and live in a hot area check out this cute cold water dispenser for your pet.
Headboard Repurposed Into a Coat Rack
More detail step by step tutorial available on my website listed below.
Resources for this project:
See all materials


Any price and availability information displayed on [relevant Amazon Site(s), as applicable] at the time of purchase will apply to the purchase of this product.
Hometalk may collect a small share of sales from the links on this page.More info

Want more details about this and other DIY projects? Check out my blog post!
Comments
Join the conversation
4 of 44 comments
-
Well done.
-
Great job. Beautiful! I bet your friend loves it.


Frequently asked questions
Have a question about this project?
Super nice! Love the copper stenciling. It's just beautiful! Ooh! Idea! Mirrors in the chalkboard areas on the next one! 🤗