« View Post
Photos

Oops! Leave without saving?

If you leave this page, the information you have entered will not be saved!
Are you sure you want to leave this page?

Leave this page Stay on this page

Hometalk.com

  • Sign Up
  • or
  • Log In
  • Professionals
  • Community
    • All Members
    • Professionals
    • Bloggers
  • About
    • About Hometalk
    • Blog
    • FAQ
    • Guidelines
    • Resources
    • Support
    • Press
    • Contact
    • Terms of Use
    • Privacy Policy
  • Following
  • All Topics
    • Cleaning & Organization
    • Crafts
    • Design & Décor
    • DIY Projects
    • Gardening
    • Home Maintenance & Repairs
    • Outdoor Living
    • Painting
    • Remodeling
    • Repurposing & Upcycling
    See More Topics »
  • Questions
    • All Questions
    • Open Questions
    • Unanswered Questions
  • Clips
Post & Ask
Join Now Log In

Hometalk is where people share and help with everything home & garden

10
Carla K
Carla K Blogger Ouray, CO on Jun 22, 2012
Like Clip

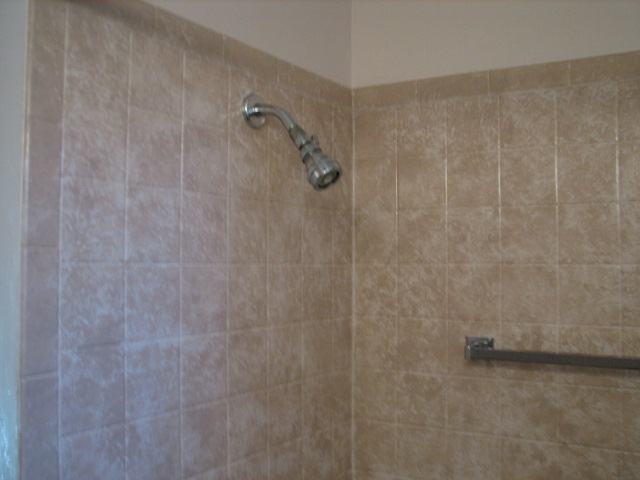
I put a faux finish on my ugly, old, mustard yellow bathroom tiles, including the sink.

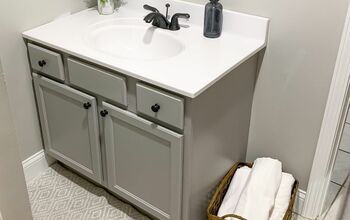
first cleaned the tiles. 2. put grout into places where needed. 3. used latex semi gloss and natural sponge to create the faux finish. 4 covered the tiled area with several coats of polyurethane (water based ) 5. caught the area around tub. It's holding like a charm, taking showers, splashing water on it and cleaning it. Just make sure the polyurethane is covering EVERY AREA of the tiles.
  • Like Clip
    Looks like brand new, and it's so simple.
  • Like Clip
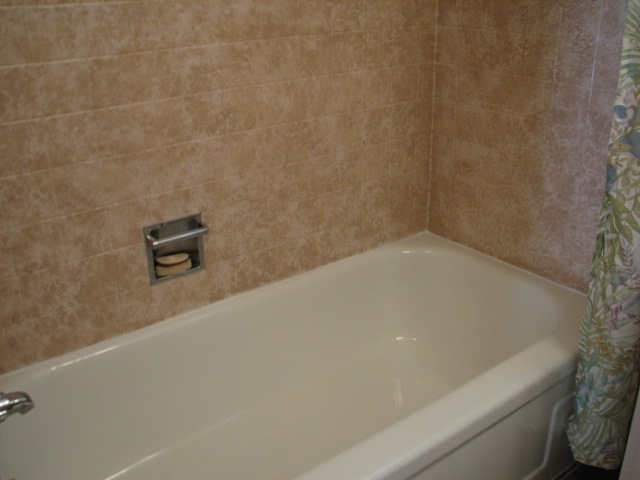
    From ugly mustard yellow to faux finish
  • Like Clip
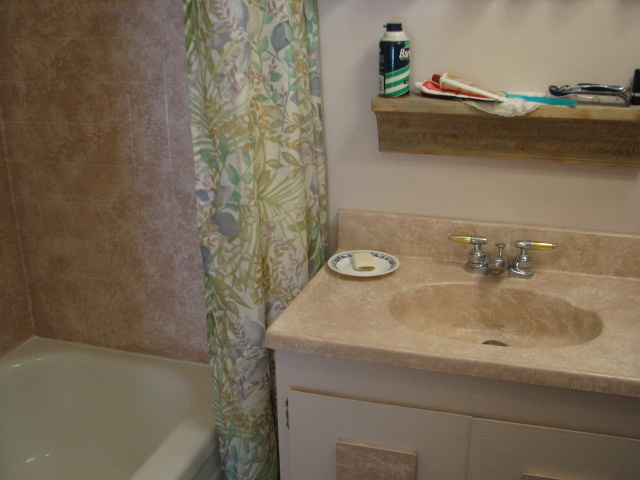
    including the bathroom sink
  • Like Clip
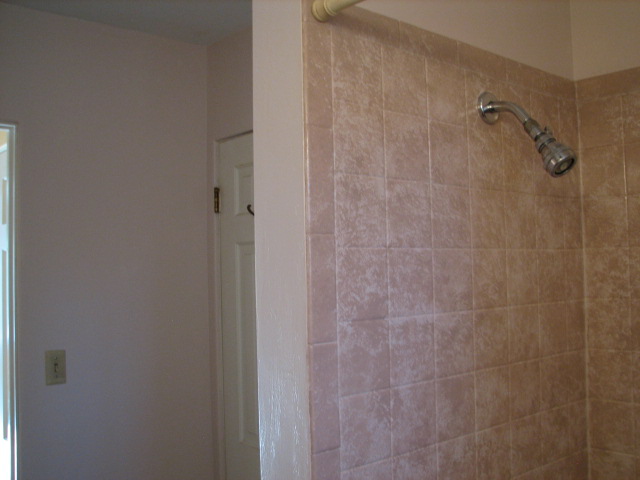
    just don't use abrasive cleaners on the polyurethane finish
Post Comment | Like | Clip | Share
1564 Views
18 Comments
  • Dee W Rock Creek, OH
    I didn't know that was possible-great job and I love the colors you chose! You must have been without this bathroom for about a week letting everything dry?
    on Jun 22, 2012 · Like 0
  • Carla K Ouray, CO
    Thanks Dee, no I didn't wait that long! That water based Polyurethane dries actually rather fast. I live in Colorado and the air is not humid. So drying paint is no problem. I let the paint dry for one night and then put several coats of the polyurethane on. You can't wait long between several coats of the stuff because if you wait over 24 hours, you will have sand the surface lightly and then apply another coat of polyurethane. I was able to use the sink and shower the next day. ...»

    The paint colors I used I bought from True Value. The darker paint is called "Inspiration" the lighter paint "Sandbox" I believe. Both are in the reddish brown color palette. If you do faux finished the best matches all come from the same color palette.

    on Jun 22, 2012 · Like 0
  • Pam D Alexandria, LA
    Great job and look Carla. Pat yourself on the back. I have painted formaica and ceramic tiles 10 years ago and it still looks great. Don't let anyone tell you something can't be done. That's when I will do it just to show it can. Looks beautiful. It matches the cramic tiles I have on my floors perfectly.
    on Jun 22, 2012 · Like 0
  • Carla K Ouray, CO
    Thanks Pam. No one told me yet that this can't be done. I am sure someone will pretty soon. Lol ... but I am not trying to prove anything. The tiles were so ugly and this was just an experiment. I marbled my counter top in the Master Bathroom black and white. with epoxy. looks equally great and the floor is painted too in black looking marble faux finish ... and that's just the particle board that was beneath the pink tile floor. Have a great weekend Pam
    on Jun 22, 2012 · Like 0
  • Pam D Alexandria, LA
    Thanks Carla. Keep on creating beautiful things. Have a great weekend too.
    on Jun 22, 2012 · Like 0
  • Jeanette S Atlanta, GA
    Wow! I had no idea you could do this! It will be interesting to watch and see how it wears! Great idea! Great Job....as usual for you Carla!
    on Jun 23, 2012 · Like 0
  • Sandy N Trevor, WI
    Great job!
    on Jun 23, 2012 · Like 0
  • Carla K Ouray, CO
    Thanks Janette and Sandy. So far it's wearing great.
    on Jun 23, 2012 · Like 0
  • Rhonda D Groves, TX
    I am so glad you did this. I have ugly yellow and black ceramic tiles and blue bathtub and sink. I dont know what the previous owners were thinking. and i have been working on a solution without gutting the whole thing. thank you for posting.
    on Jun 23, 2012 · Like 0
  • Rhonda D Groves, TX
    Pam and Carla, how did you paint ceramic tile? and how did you do a marble faux finish with epoxy?
    on Jun 23, 2012 · Like 0
  • Carla K Ouray, CO
    Hello Ronda, I am artist, so things like that come easy for me/ The epoxy is hard to work and the fumes can overcome you when working in a small space, even if the windows are open. I would not do it again. I just had a black and white can of high gloss epoxy sitting around and thought I am going to try it. I first put fresh grout over the existing tiles because they were laid about 40 years ago. I had to replace some of them. The instruction for using grout is on the bucket you buy. It's ...»
    not a big deal at all. Matter of fact I didn't even buy all the tools they say you need. A rubber spatula like you use in the kitchen to scrape out dough will do. Then I made sure the entire surface was super clean and dry. I applied the epoxy in sections. Black for the base color and the white I just used a very fine brush to put into the wet, black epoxy the stripes to give it a marble look. A little sponging over some of the stripes to sort of get them to disappear in the black (turning a little gray while doing it) and then waited a couple of days for the epoxy to dry. I am going to put up some photos for you so you can see it.

    You can do this with about any colors you have. Just study some of the stones or marble and see how those veins run. I not only did the counter top that way but the bench that goes around the soaking tub, the toilet tank cover and seat and, yes the floor too. As I said, today I would do this with acrylics or simple latex paint and use the polyurethane instead. I have done my kitchen counter with stone look wallpaper and 5 coats of the polyurethane a year ago and it still looks like new and like stone. People simply can't believe that such treatment will do on a kitchen counter top.

    If you have any more questions, I'll be happy to assist.

    Wishing you a wonderful Sunday, Carla

    PS: I am going to post some photos for you too.

    on Jun 23, 2012 · Like 1
  • Denise W Birmingham, AL
    great idea for tiles! We were having company at our house, and the marble bathroom sink had become so stained that we did the same technique on marble. So far, it has been great! we will still have to replace the vanity at some point, but for now, we can save our pennies
    on Jun 24, 2012 · Like 0
  • Pam D Alexandria, LA
    Rhonda, I started with cleaning the ceramic tile with TSP to remove any oil or greasy residue before beginning my painting project. I sanded just a bit with a fine sanding block and wiped away any sanding dust with a slightly damp cloth. Once it was totally day, I painted a coat of oil based solvent primer which gives the slick surface some tooth for the paints to adhere to. Let that dry for 24 hours. Onec I decided if I wanted a granite finish with a dark background, I painted a latex ...»
    black coat over the primer. Let dry for a few hours. Then I used artist acrylic paints for my faux finish. To make sure that it did not get wiped off with any water that may spill on the surface before I was completely finished, as I used each coat of faux paint finish, I mixed my acrylic paint with a little water based polyurethane in a styrofoam plate and a sea sponge to sponge on my first color. I like to start with lighter colors like tan and working to darker colors usually using 3 colors. This is easy as you can add and play with your colors until you get the look you want. Once it's the result you want to live with, put at least 3 coats of poly (I like satin finish as gloss shows oily fingerprints) over your work of art. Let dry for a day or two before placing anything on it. It will actually take a couple of weeks to fully cure, but once it does it's nearly indestructible.

    on Jun 24, 2012 · Like 2
  • Nancy Rhodes C Bessemer, AL
    My daughter did that once and it held up with two boys in the house.
    on Jun 24, 2012 · Like 0
  • Rhonda D Groves, TX
    Ladies thank you for all your help. would love to see the pictures.
    on Jun 24, 2012 · Like 0
  • Carla K Ouray, CO
    Pam this is what I did too. Thanks for explaining it so well.
    on Jun 24, 2012 · Like 0
  • Shirley W El Paso, TX
    Carla, how would you clean the area?
    on Jun 24, 2012 · Like 0
  • Carla K Ouray, CO
    I don't use a harsh abrasive but liquid cleaner and wipe down. Works like a charm.
    on Jun 24, 2012 · Like 0

NOTE: You can drag and drop your photos to reorder them
Required
Comment Saving...

Related Posts

  • The Easiest Toilet You'll Ever Install
  • Interior Storm Window: One Option & a DIY How To
  • How to Clean a Front Loader Washer
  • 13 Likes

    Pat Cummings WsSbee Liza Ramirez Janice B Vicki M Lulu D Brenda B Rhonda D Tracie M Jeanette S Jerri T Vicki T Pam D

Clipped to 10 Boards »

  • WsSbee
    With Liv n Barb in Mind
    by WsSbee
  • Yair S
    Tiling Tips
    by Yair S
  • Liza Ramirez
    Home Decor Craft Projects
    by Liza Ramirez

Related Topics

Home Maintenance & Repairs, Tiling

Recent Questions »

  • Lynn C.
    How to clean film from newly installed...
    14 hours ago
  • Monica Maroney
    Linoleum floor
    18 hours ago 4 answers
  • Have a question?
    Ask now & get answers»
Back
to top
Feedback