


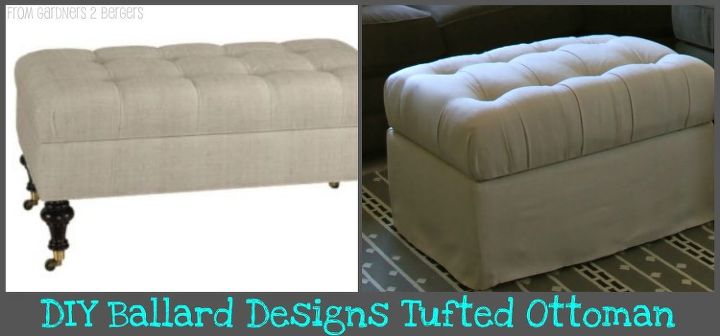
Ballard Ottoman Knock Off- Outdated Ottoman rehab w/ Drop Cloth, Tufting Tutorial & No-Sew Tips

by
Becca B
$20
3 Hours
Medium
I am 100% certain that I'm more stoked about this project than anyone else could be! See, Z and I are ottoman people. Some people are ottoman people. Others are coffee tables peeps. In theory I wish I could be the coffee table type- sporting an old railway cart as the centerpiece to my room. But it isn't practical for the way we live, especially while we're living in a small space.
When I sold our couches last June-ish I kept the ottoman. Then it sat in the middle of our room in all it's corduroy and tapestry glory. I am super excited to have something we use every day look like it belongs in my room!
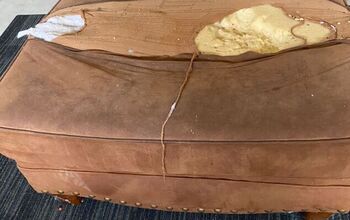
It was pretty easy for me to get from this before pic to my after. I put this project off- forever- because of the sewing issue. See, I can't, and I knew I would need to sew the bottom portion to make this look like something I would buy- not something I made.
I used a drop cloth to make this after happen AND with minimal sewing- if you can sew a button, you can do this project!!
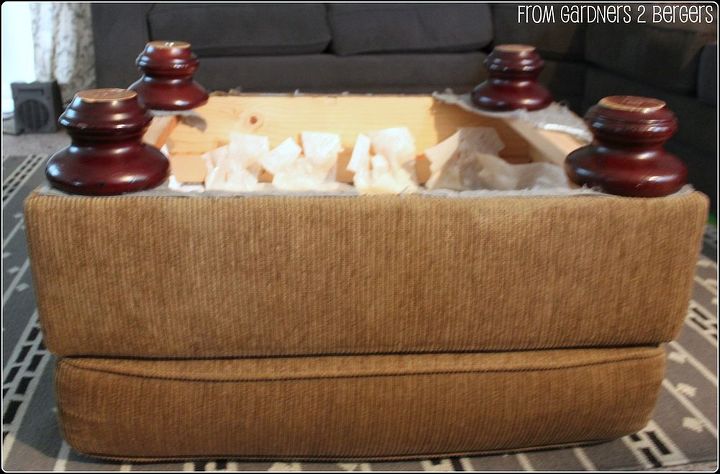
1] To start- flip your ottoman over and use some pliers to pull out the staples, so you can take the fabric off. Don't worry about keeping the original fabric in tact- this can easily be done without it as a template.
2] Once you ottoman is naked- you'll need this stuff to get'er done. If your foam and batting are in good shape, then you can reuse them. I reused mine. I had everything on hand except the button kits, peg board, and upholstery needles- so it was a cheap makeover.
3] Purchase a drop cloth that is long enough to be wrapped around the entire base of the ottoman. This is a crappy pic- but if you follow the arrow, I wrapped the fabric around the base so it would meet up in one place. Also- make sure the cloth is wrapped inside out!
4] Pin it where the fabric meets up. You should try to pin it in as straight a line as possible. When I got to this point I decided to make it a skirted ottoman, instead of following the inspiration pic 100%. So it is more like a combo of Ballard's slipcovered ottoman and their tufted one.
If you're making one like mine, then make sure you use the finished edge of the drop cloth as the edge that touches the floor- less sewing, you know.
I somewhat followed this tutorial to do the tufting- it is very comprehensive, with lots of photos- so pop over if you need things clarified.
5] Cut the pegboard the same size as cushion. Use the grid to plan out the button spacing.
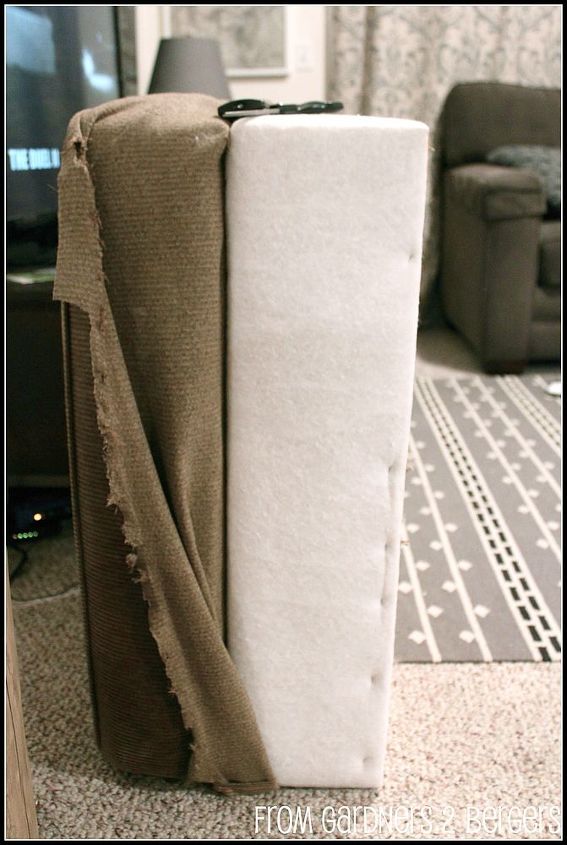
6] Wrap your foam in batting, then cut holes in the foam where the buttons/tufting will go. I kinda skipped this cutting step- but you should totally do it! ;-)
7] Make your buttons using the directions that come with your kit.
8] Thread your needle with the twine and create the tufting. Make sure the buttons are seated down as far as they will go.
Stop by for the rest of the tutorial!!
This makeover cost me maybe 20 bucks. The drop cloth cost me $11 {I bought a 6x9} and I used coupons when I bought all the supplies- this really kept costs down.
Even though I had an ottoman- you could easily do this with a thrifted one or something you found on Craigslist!
http://gardenberger.blogspot.com/2012/03/ballard-designs-tufted-ottoman-knock.html
When I sold our couches last June-ish I kept the ottoman. Then it sat in the middle of our room in all it's corduroy and tapestry glory. I am super excited to have something we use every day look like it belongs in my room!
It was pretty easy for me to get from this before pic to my after. I put this project off- forever- because of the sewing issue. See, I can't, and I knew I would need to sew the bottom portion to make this look like something I would buy- not something I made.
I used a drop cloth to make this after happen AND with minimal sewing- if you can sew a button, you can do this project!!
1] To start- flip your ottoman over and use some pliers to pull out the staples, so you can take the fabric off. Don't worry about keeping the original fabric in tact- this can easily be done without it as a template.
2] Once you ottoman is naked- you'll need this stuff to get'er done. If your foam and batting are in good shape, then you can reuse them. I reused mine. I had everything on hand except the button kits, peg board, and upholstery needles- so it was a cheap makeover.
3] Purchase a drop cloth that is long enough to be wrapped around the entire base of the ottoman. This is a crappy pic- but if you follow the arrow, I wrapped the fabric around the base so it would meet up in one place. Also- make sure the cloth is wrapped inside out!
4] Pin it where the fabric meets up. You should try to pin it in as straight a line as possible. When I got to this point I decided to make it a skirted ottoman, instead of following the inspiration pic 100%. So it is more like a combo of Ballard's slipcovered ottoman and their tufted one.
If you're making one like mine, then make sure you use the finished edge of the drop cloth as the edge that touches the floor- less sewing, you know.
I somewhat followed this tutorial to do the tufting- it is very comprehensive, with lots of photos- so pop over if you need things clarified.
5] Cut the pegboard the same size as cushion. Use the grid to plan out the button spacing.
6] Wrap your foam in batting, then cut holes in the foam where the buttons/tufting will go. I kinda skipped this cutting step- but you should totally do it! ;-)
7] Make your buttons using the directions that come with your kit.
8] Thread your needle with the twine and create the tufting. Make sure the buttons are seated down as far as they will go.
Stop by for the rest of the tutorial!!
This makeover cost me maybe 20 bucks. The drop cloth cost me $11 {I bought a 6x9} and I used coupons when I bought all the supplies- this really kept costs down.
Even though I had an ottoman- you could easily do this with a thrifted one or something you found on Craigslist!
http://gardenberger.blogspot.com/2012/03/ballard-designs-tufted-ottoman-knock.html

Rip off the old fabric
Keep the batting and the foam (if it's in good shape)
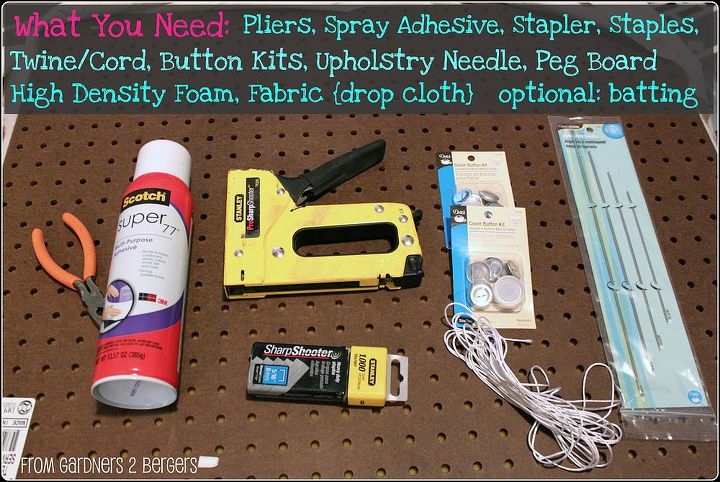
Supplies
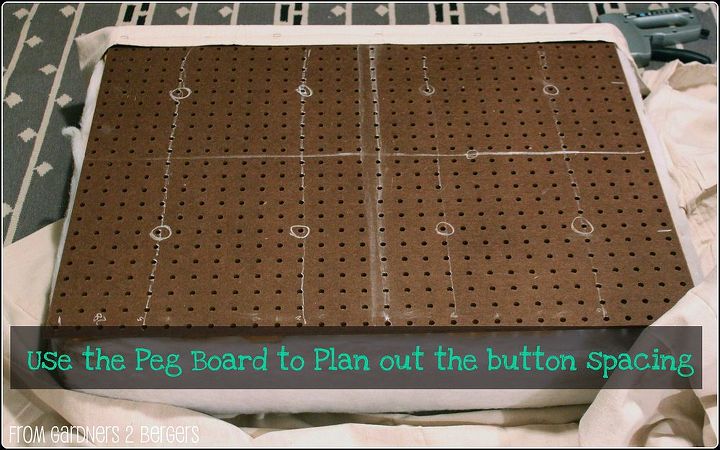
Use a peg board to mark out the spacing of the tufts
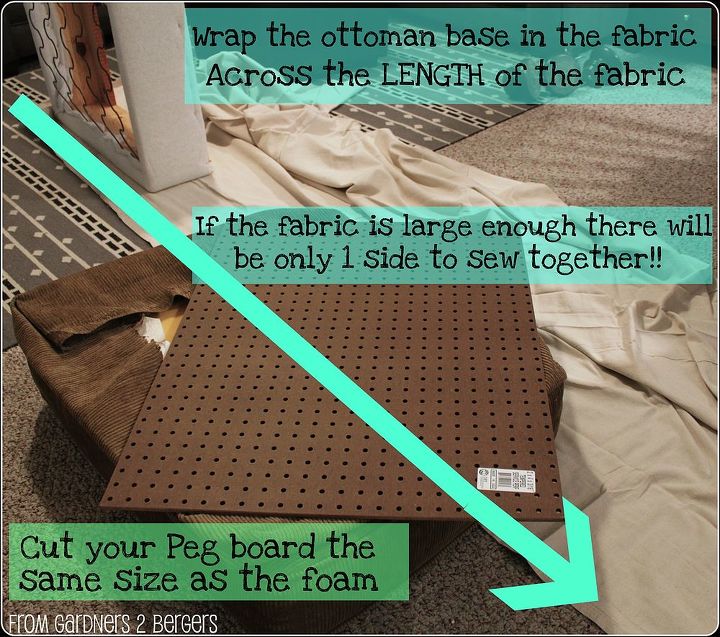
Use the length of the Drop Cloth to utilize the longest hemmed side
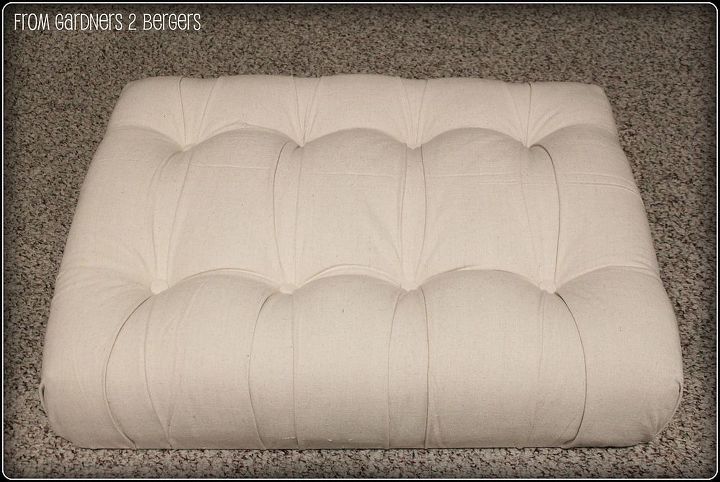
What the tufts look like before ironing
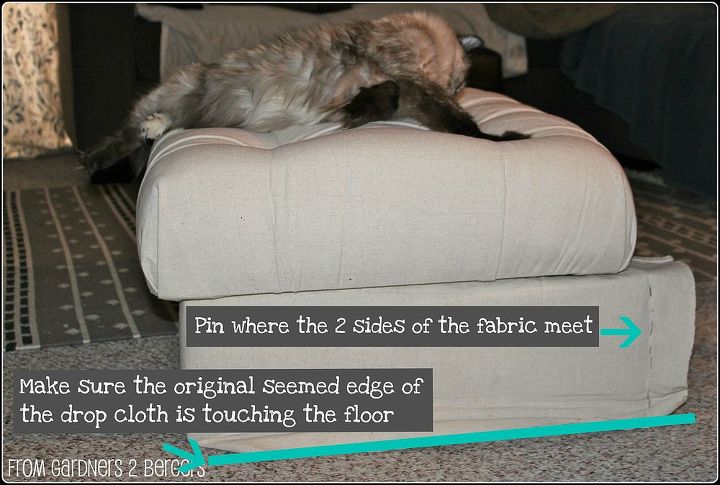
Wrap the length of drop cloth around the base and pin where the 2 sides meet. Make sure the prehemmed side is towards the ground
Also- I used "L" brackets to attach the top to the base
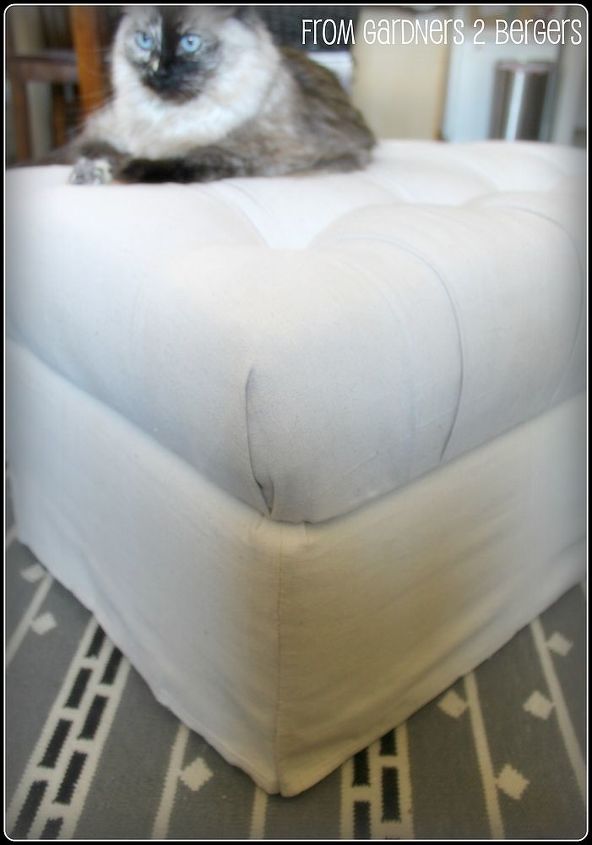
I hand stitched the pinned side together, here you can see it turned out straight
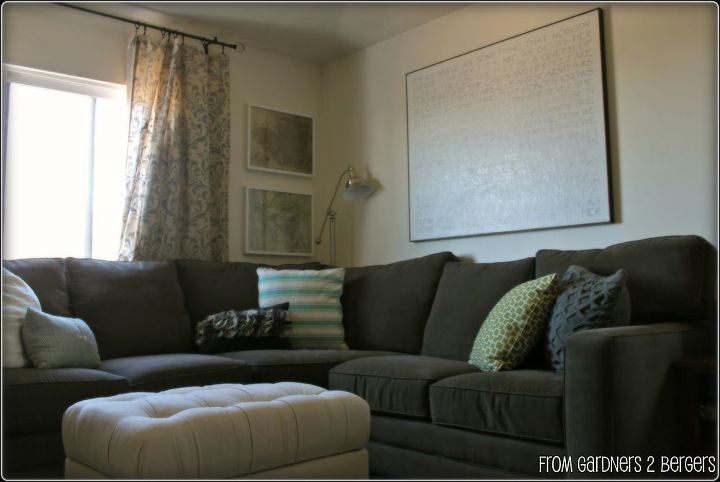
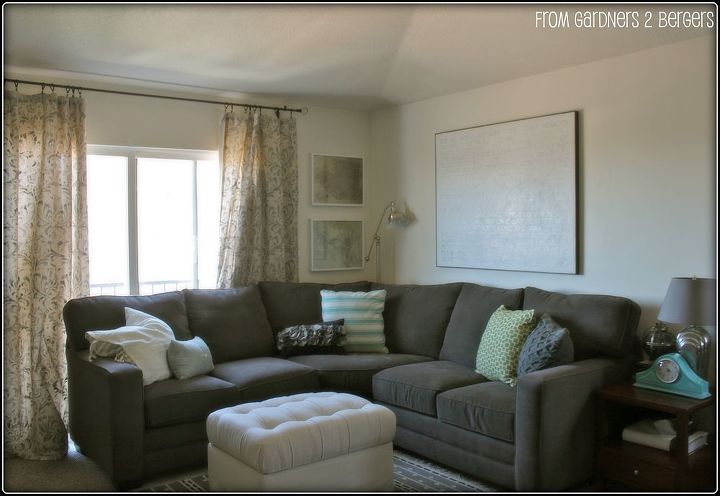
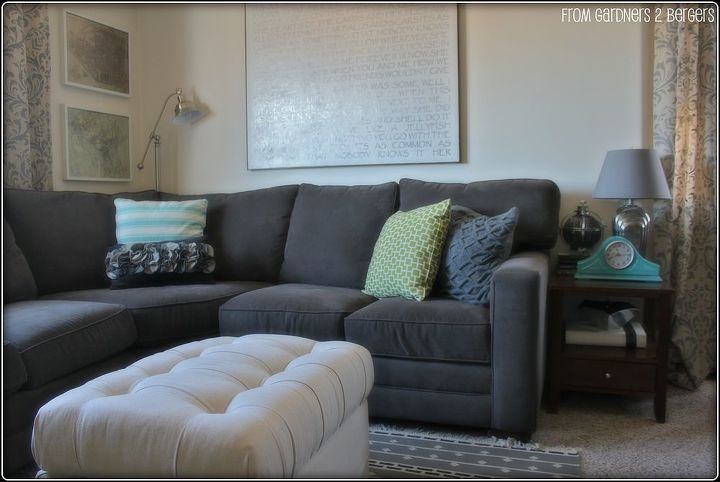
finished shots in my space
Want more details about this and other DIY projects? Check out my blog post!
Comments
Join the conversation
2 of 19 comments
-
This is great!! I have an ottoman that needs rehab!!
-
How do you make the tufts, I know you sew them- need a visual pplease. Looks awesome.


Frequently asked questions
Have a question about this project?
What if mine needs fresh cussion. How to add foam and buttons
This a cute redo!! How did this redo holdup after time? Did you treat the drop cloth so it would resist stains?