


Clothespin Napkin Holder
I use clothespins from the dollar store to hold some of my craft projects together while drying. When I was showing my craft class how to make a newspaper bowl and lid, one of the ladies mentioned she hadn't seen a wooden clothespin in over forty years. The lively discussion that followed got me to thinking about clothespin crafts. I remember making a clothespin napkin holder years ago and decided to try my hand at making another one.
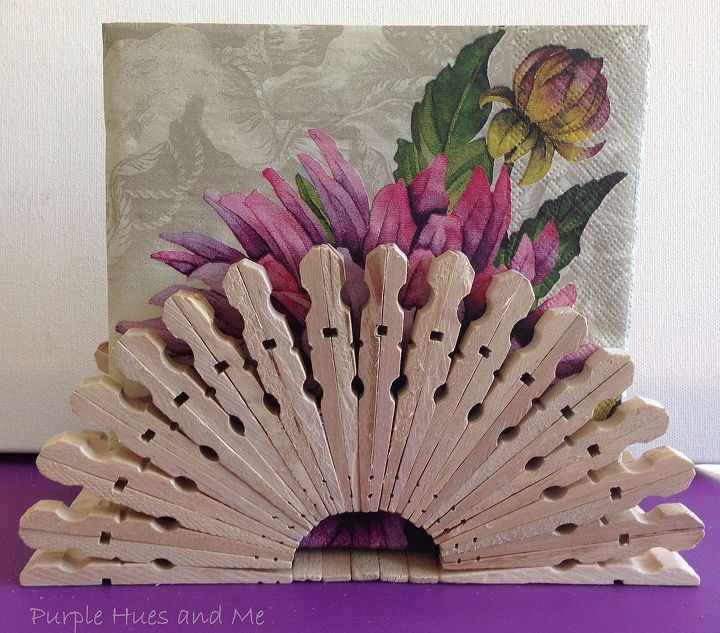
Here's what I came up with:
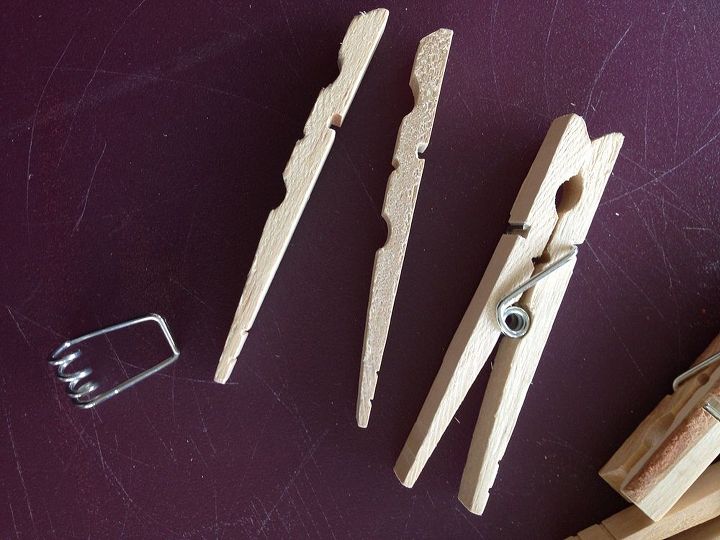
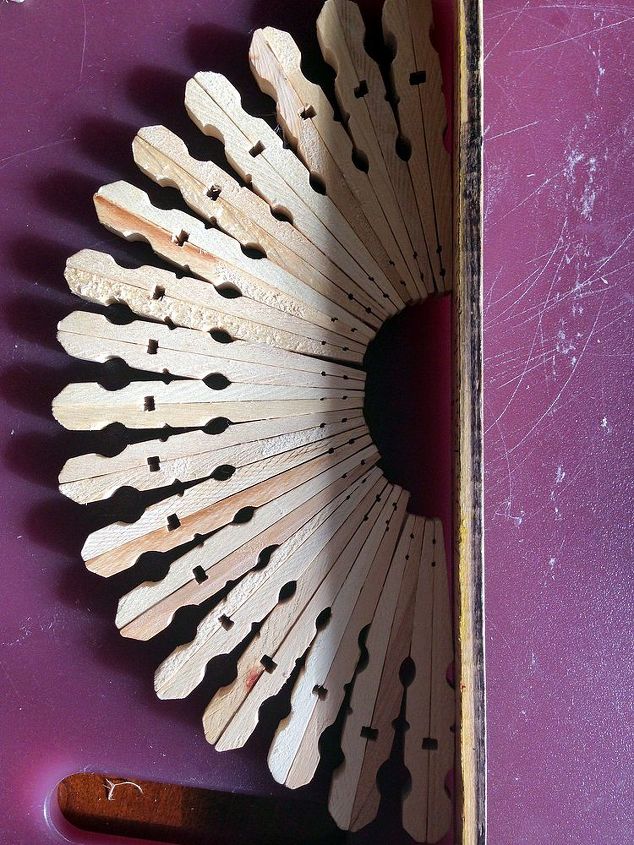
Glue together the flat sides of two pegs using tacky or wood glue.
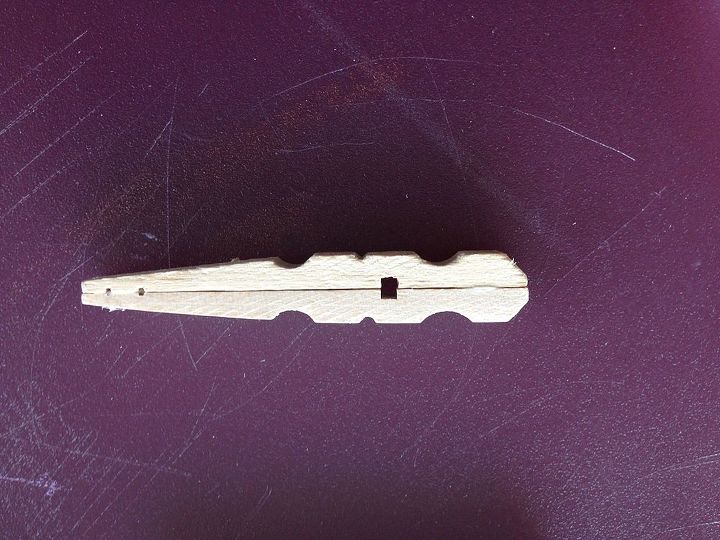
Continue gluing the flat sides together until you have 30-32 sets of two pegs.
Use a ruler to make sure the base of the semicircle is flat.
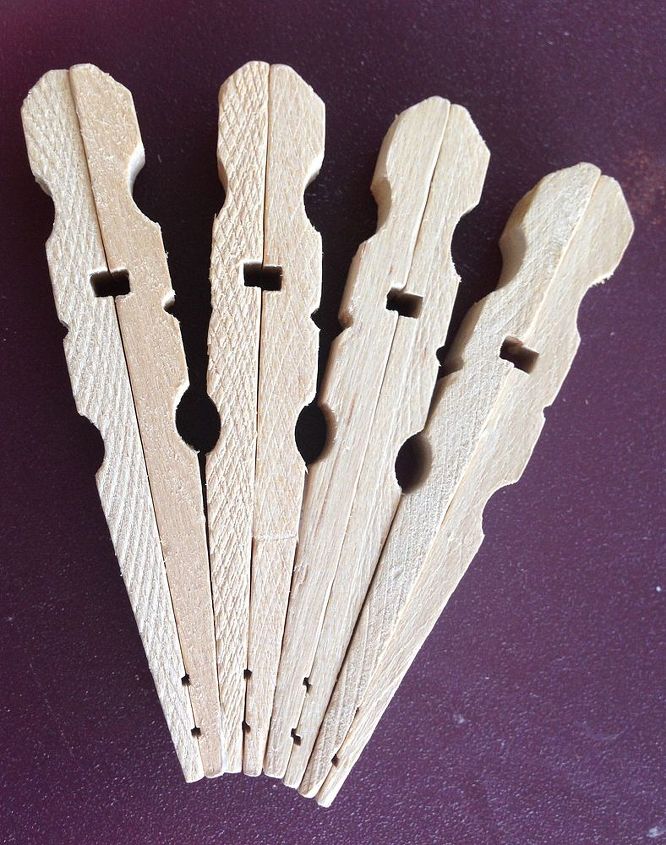
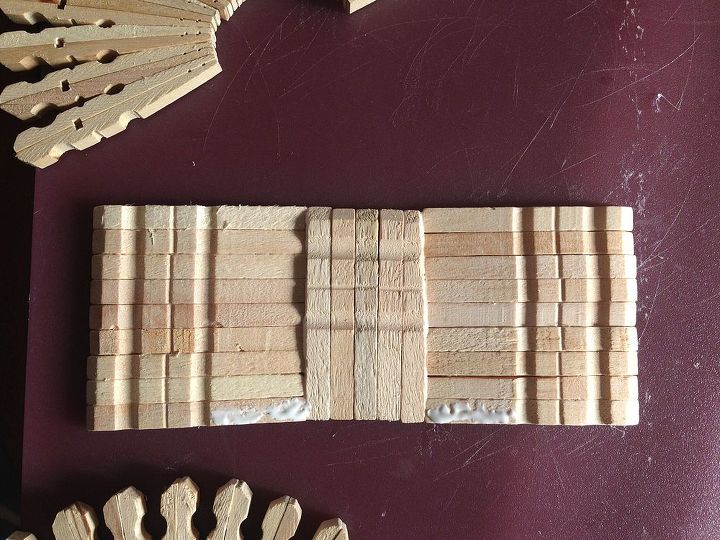
To make the napkin holder base, glue five pegs together, flat side down, side by side. Glue nine pegs together and attach to the first set of five, as pictured. Glue nine more to the opposite side.
Once dry, glue the semi-circles onto the flat panel base.
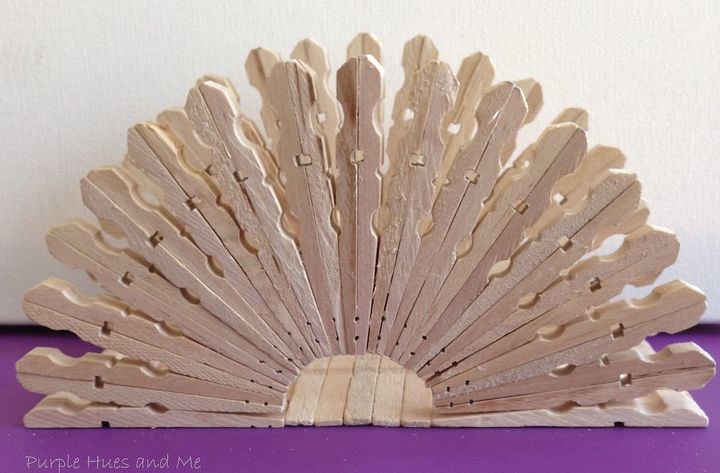
The wood definitely needs to be sanded for a smooth finish. The final piece can be left natural, painted or stained. Just remember, with usage, how the old clothespins turned gray so a sealer is needed.

Want more details about this and other DIY projects? Check out my blog post!
Comments
Join the conversation
3 of 34 comments
-
Merry Christmas Gail, and yes I'm going to do this with some kids one day soon, I just have to buy the clothes pins and find 2 or 3 kids to entertain, or just by myself, which ever. I think it will be a fun project I haven't tried before. Thanks for the post Gail. Always enjoy your projects.
-
I’m going to try to make thank you 👍️


Frequently asked questions
Have a question about this project?
Can I use the photos in a children's newspaper with credit?
Can it be used hot glue gun?
Love it. What length are the pins?