


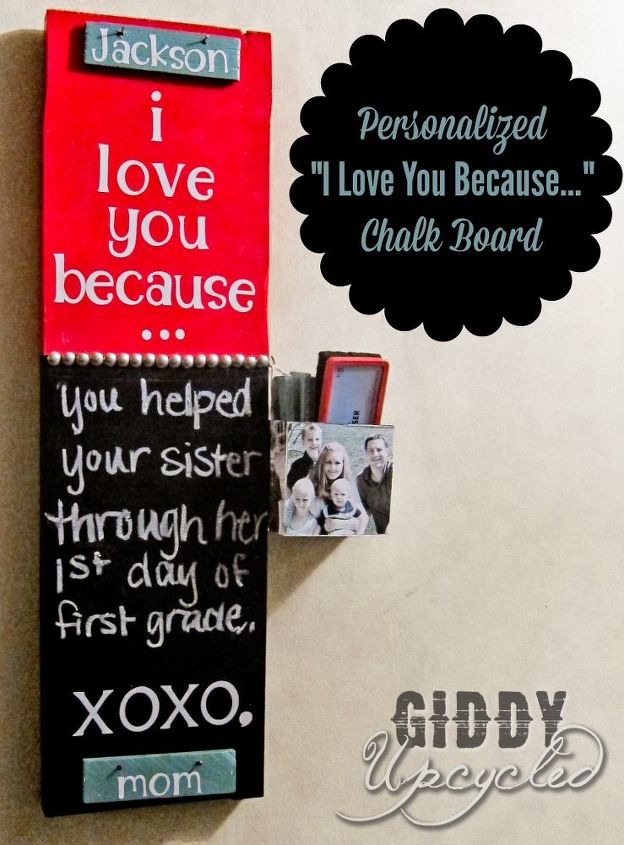
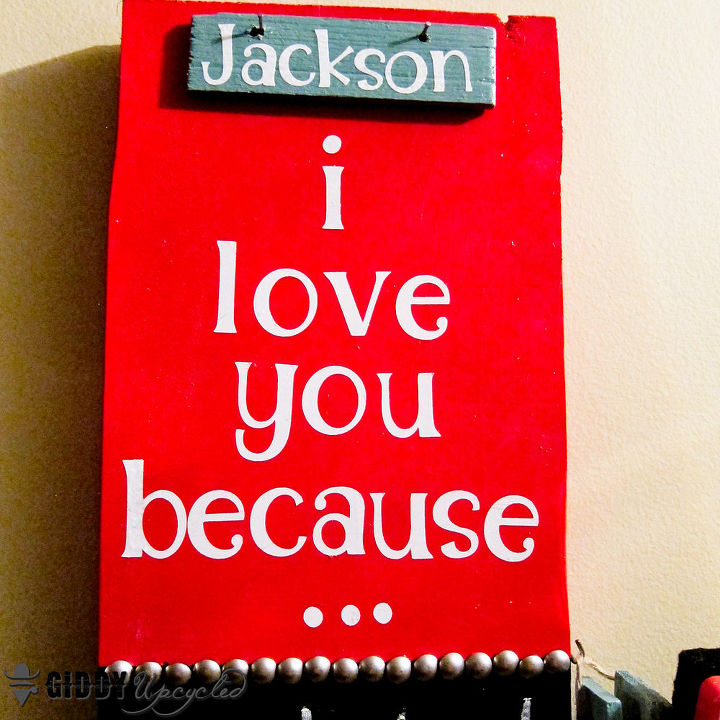
DIY “I Love You Because” Chalkboard With Interchangeable Tiles
$10
2 Hours
Easy
My family is big on “filling buckets” which is a common term in preschools and grade schools nowadays – the basic premise is that we fill other people’s “buckets” when we compliment them, or do a nice thing for them, or make them feel special in some way. When people’s buckets don’t get filled regularly, they start to feel empty, and sad. Thats not to say that you should give false compliments just to build someone up, its just a way to get kids thinking about doing things for, and being considerate to others.
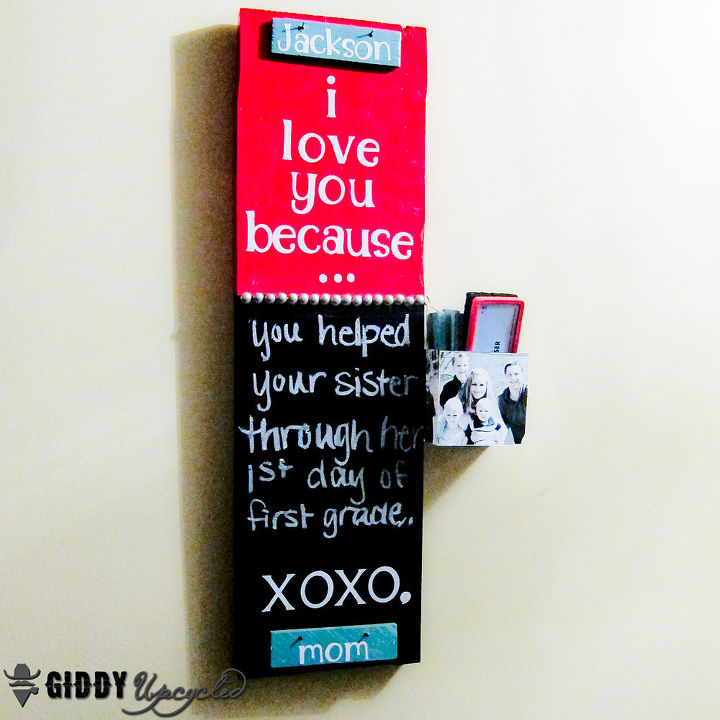
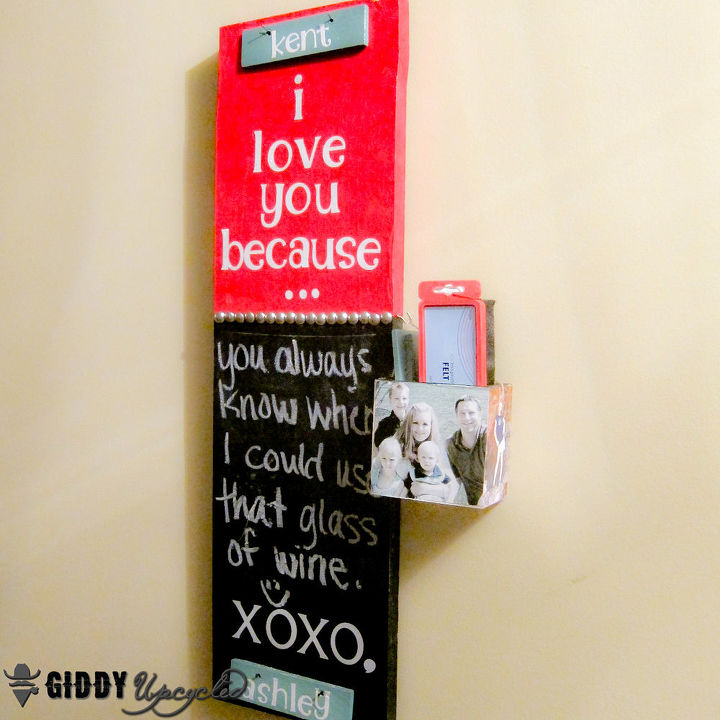
So I came up with this idea for a gift for my husband, for our 10th anniversary. I wanted to create a customized chalkboard, where we could write something we love about eachother – simple things like “I love you because… you make great pancakes” or “I love you because… you put the toilet seat down last night”, ha ha. My original idea was to find a cool old vintage aluminum can like these to hold some chalk and and eraser, next to the board.
So I came up with this idea for a gift for my husband, for our 10th anniversary. I wanted to create a customized chalkboard, where we could write something we love about eachother – simple things like “I love you because… you make great pancakes” or “I love you because… you put the toilet seat down last night”, ha ha. My original idea was to find a cool old vintage aluminum can like these to hold some chalk and and eraser, next to the board.
Materials Needed:
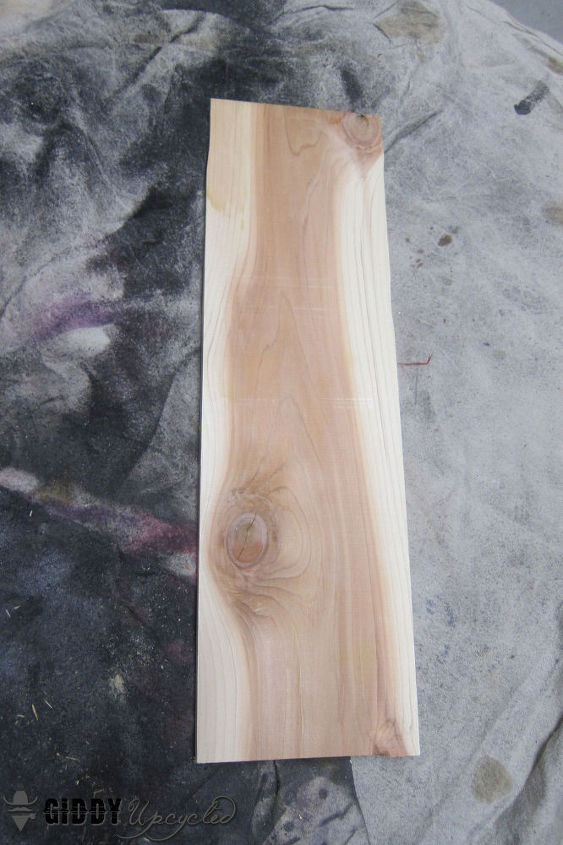
Step 1: Cut your board down to whatever size you want it to be (I cut mine to 22″), and then give it a good coat or two of Primer. I used Zissner Spray Primer.
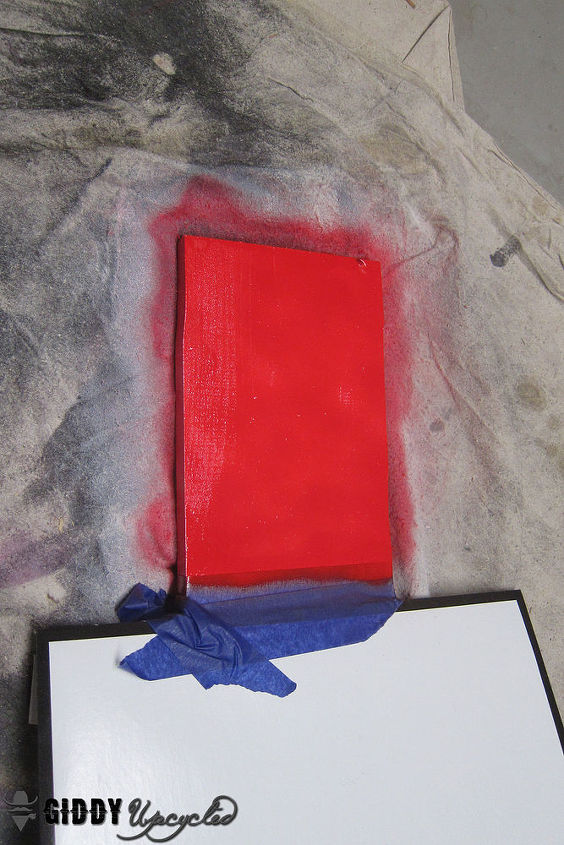
Step 3 – Once the top is dry, carefully remove the tape and retape the top portion, and give the bottom 2-3 light, even coats of the Chalkboard spray paint.
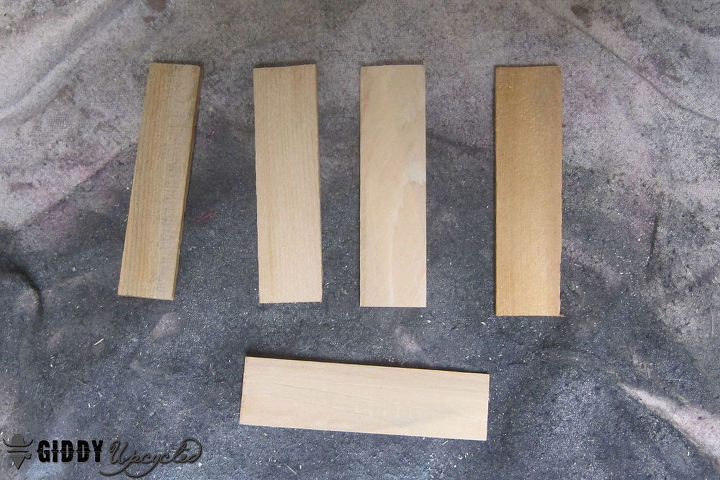
Step 4: While the chalkboard paint is drying, take some 2″ shims and cut them down to your desired width. I used the wider end and cut off the thinner part. Apply 1-2 thin coats of primer to the shims.
Step 7: Nail in 2 small nails at the top and bottom of your chalkboard. Make sure the distance between the nails is exactly the same at the top and the bottom
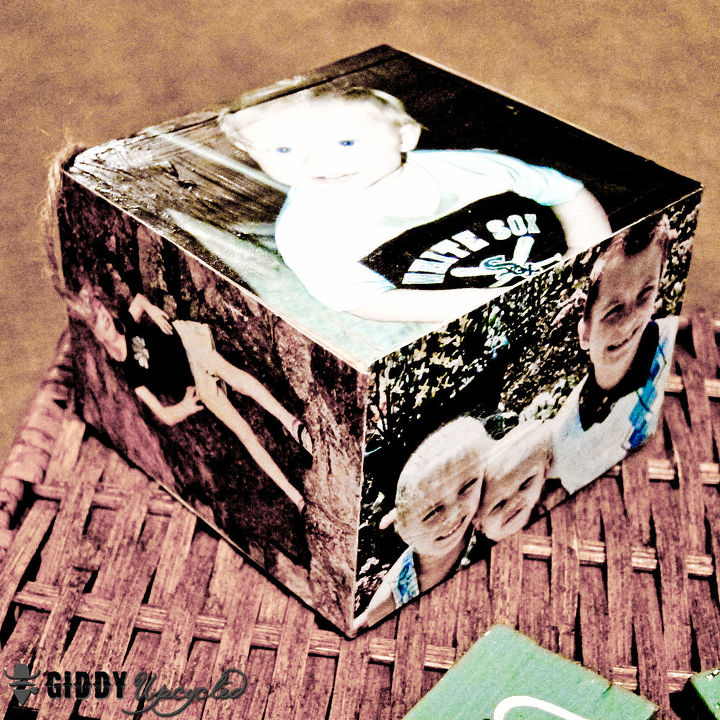
Step 12: Decorating your unfinished wooden box – Find some cool photos of your family, and using Modge Podge or Decoupage glue, adhere them and seal them to the outside of your wooden box.
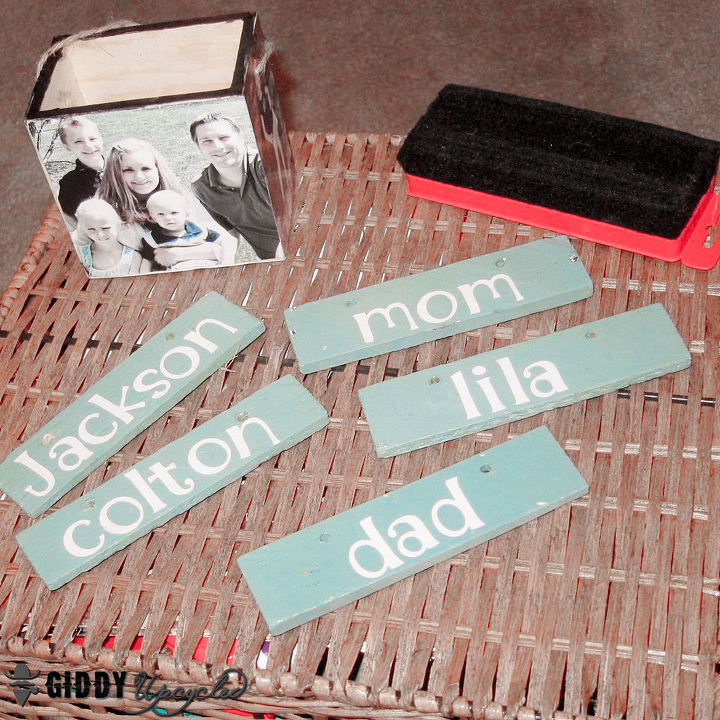
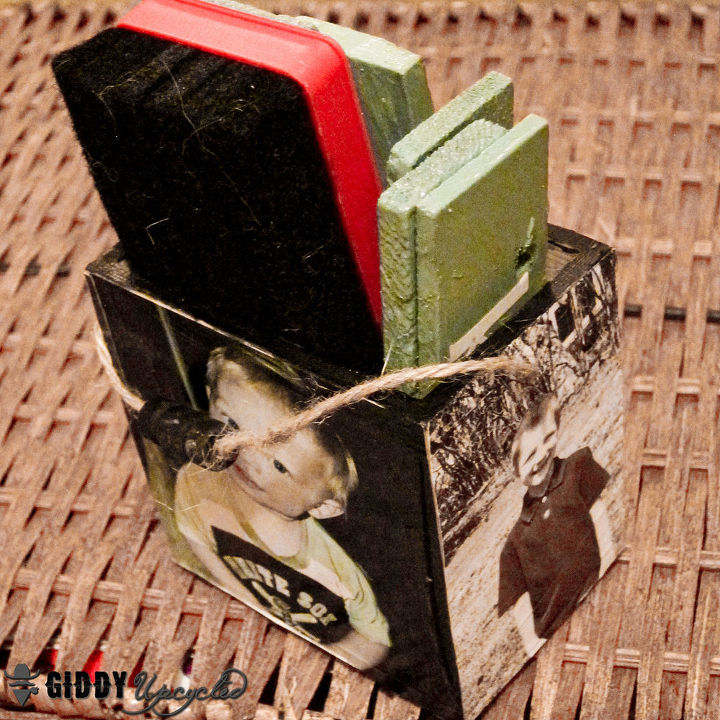
Step 13: Fill your wooden box with your name tiles, an eraser, and some chalk!
Now just hang it somewhere that the kids can reach, and try to fill eachothers buckets up on a daily basis!

Want more details about this and other DIY projects? Check out my blog post!


Frequently asked questions
Have a question about this project?