DIY Paper Feathers, 3 Ways

Craftsy
by Craftsy
Easy
By Victoria Hudgins for Craftsy
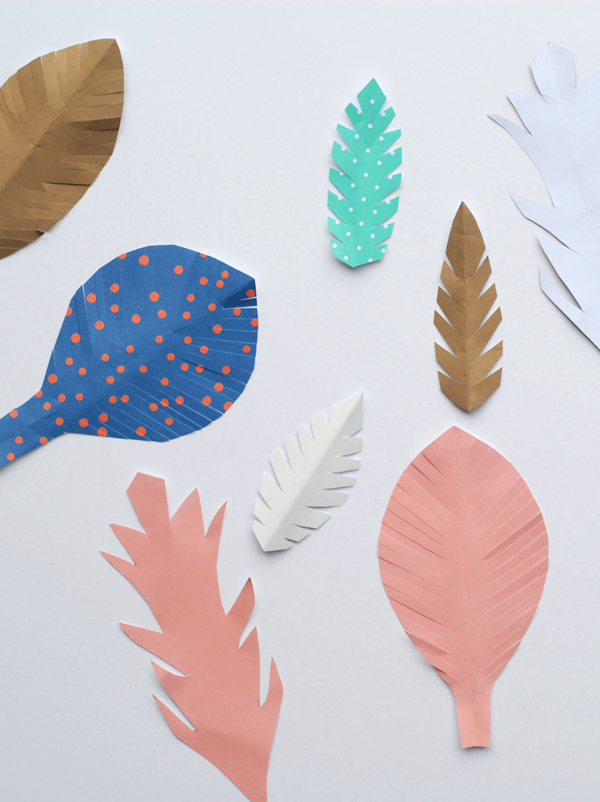
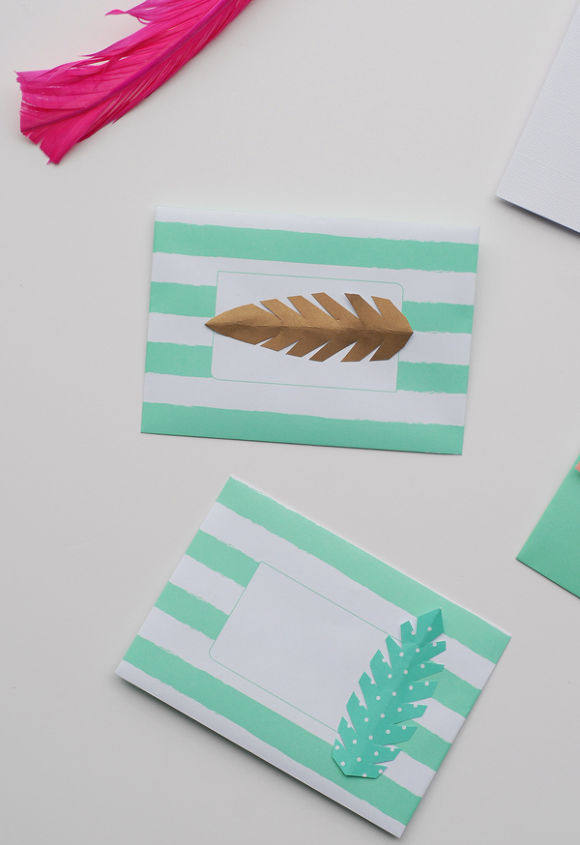
Paper feathers are one of my favorite ways to turn simple paper crafts projects into something really special. Whether frilly and sweet or graphic and stark, no two feathers are exactly alike. Follow along with this fun DIY to learn how to incorporate trendy paper feathers into your paper crafts!
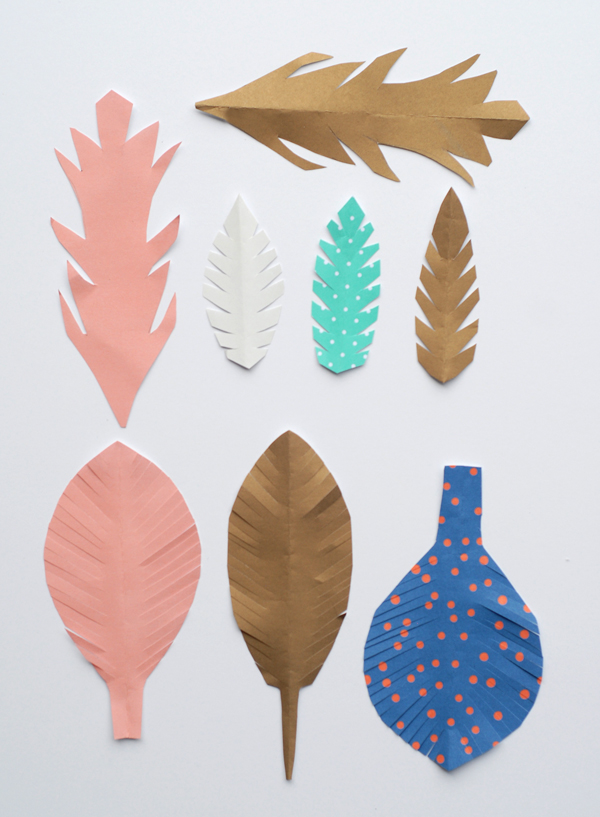
How to make paper feathers


There are limitless possibilities for making these paper feathers your own. Anyway you can cut and fringe will work. In this tutorial, I’ll share three of my favorite variations: the fringe, the cut-in, and the detailed. They are all basic with a bit of a twist.


Materials you’ll need:


Paper with fun prints and colors


Scissors
Variation 1: The cut-in


This is one of the best feathers for making a contrasting statement on a paper craft. I love it done in whites, golds and neutrals placed on a brightly colored paper. The thick cuts give it a pretty layered look, and the arrow shape provides a very modern look.
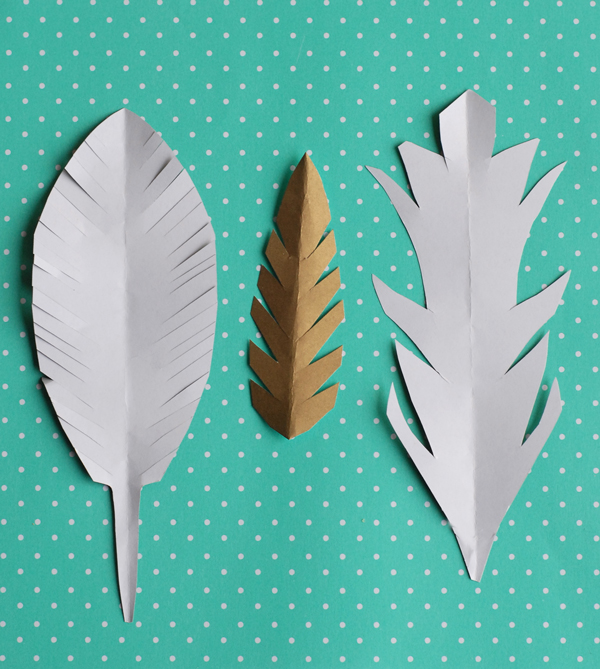
To make the cut-in paper feathers, simply fold your paper in half and cut the feather shape out. For this design, you’ll be cutting the feather with two similar angled ends.


Then, with the paper still folded, beginning at one side, cut into the paper feather with small triangular cuts. Remove the interior of each cut leaving a feather with pretty side cuts.
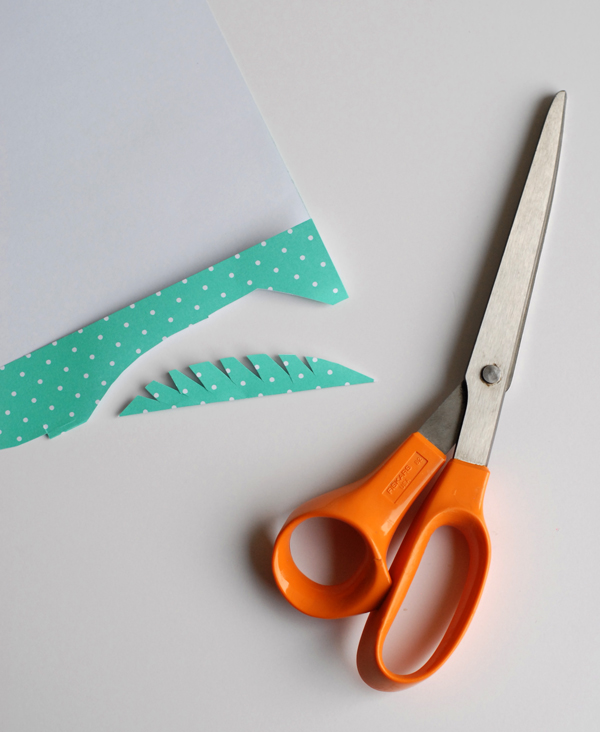
Variation 2: The fringe cut


The fringe feather is a fun one for adding oomph and style to a greeting card or scrapbook page. This feather has a gorgeous texture and is best when made with bright, colorful papers to show off its fringe and flair.
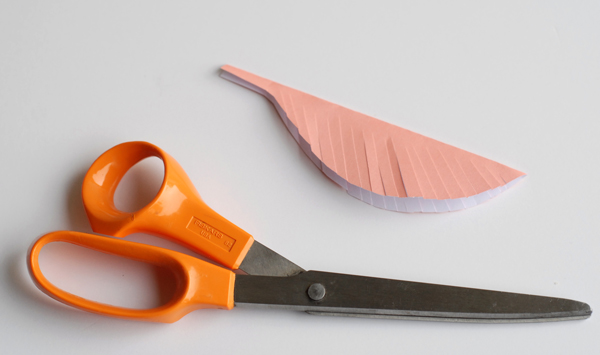
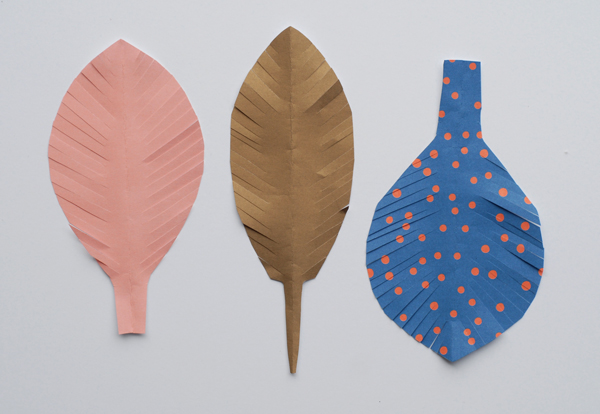
To make the fringe feathers, fold the paper in half and cut the feather shape out of the paper. This design will be more of an oval shape than the previous style, with a skinny feather end to it.


Then, starting at the bottom, begin cutting in and fringing the sides of the feather. The more cuts, the prettier the fringe! Be careful to not cut all the way through; you’ll want to go about 60-80% of the way inwards on any of the cuts. Once the fringe is made, open up the feather and gently lift some of the fringed papers up to create a more stark texture and contrast.


Although you can use these feathers in numerous ways, I love that they are wide enough to hold photos in for a pretty scrapbook page or a photo front greeting card.


Variation 3: The detailed cut


The detailed cut feather is an artistic and graphic take on the paper feather trend. Its somewhat stark look will bring a great boost of style to any paper craft. I love this feather as a detail on its own (combined with scripted text) or in a more graphic composite of multiple feathers together.
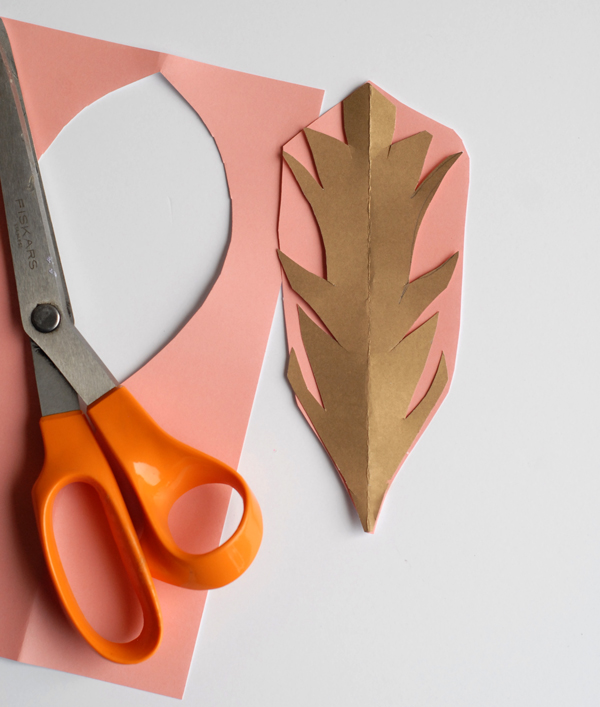
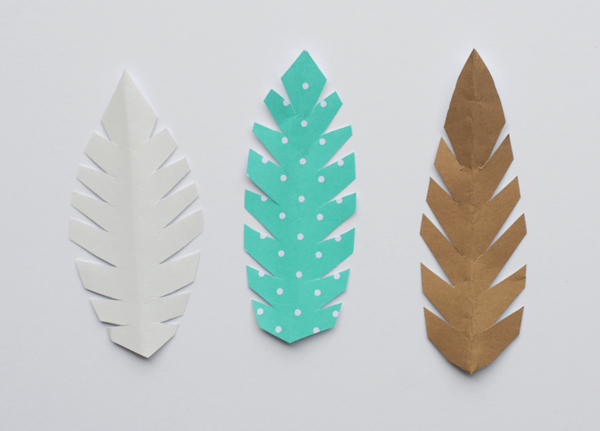
To make the detail cut feather, cut the feather shape from your paper — this shape needs to be wide enough to create good, substantial detail on the paper feather.


Then, with the paper folded, begin to cut in varied angled and straight side cuts. There’s no “right way” to create this paper feather look, as long as the ends are being angled toward the center, you’ll have a feather that becomes a graphic one-of-a-kind design.
Use Scraps for Stunning Paper Crafts


Learn 6+ ways to transform leftover paper scraps into droolworthy projects.


Get the FREE eGuide in the link below! »
Craftsy
Want more details about this and other DIY projects? Check out my blog post!
Go
Frequently asked questions
Have a question about this project?
Comments
Join the conversation
 1 comment
Next