


Wood Block Pumpkins

by
Heidi
$0.00
1 Hour
Easy
Our family was ready to get into the Fall spirit, but with an ever close eye on our budget, that meant creating something beautiful with the scrap lumber we already had laying around.
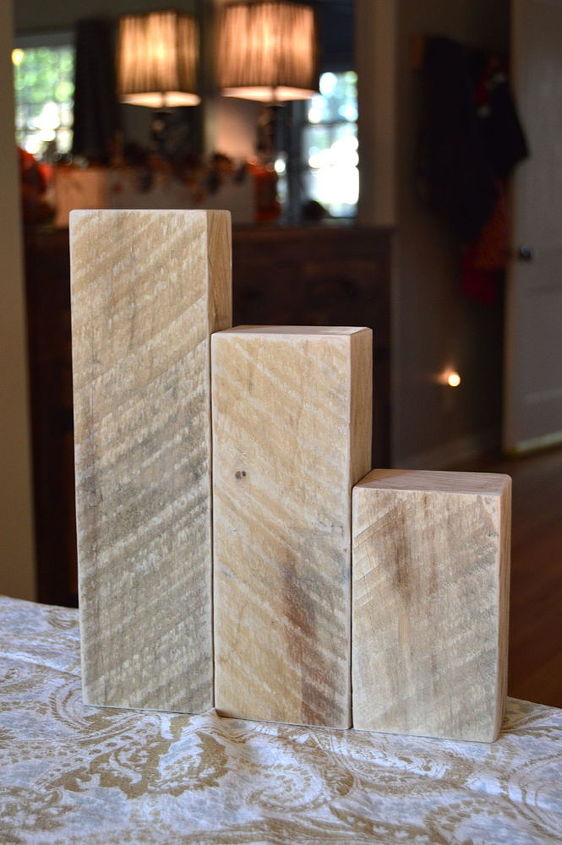
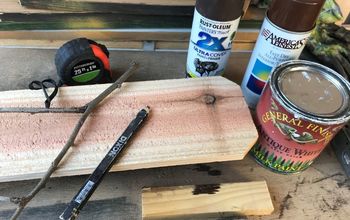
We started with these solid wood posts, cut to three different heights. We happened to have this reclaimed lumber but a person could easily substitute 4x4 posts from the home improvement store.
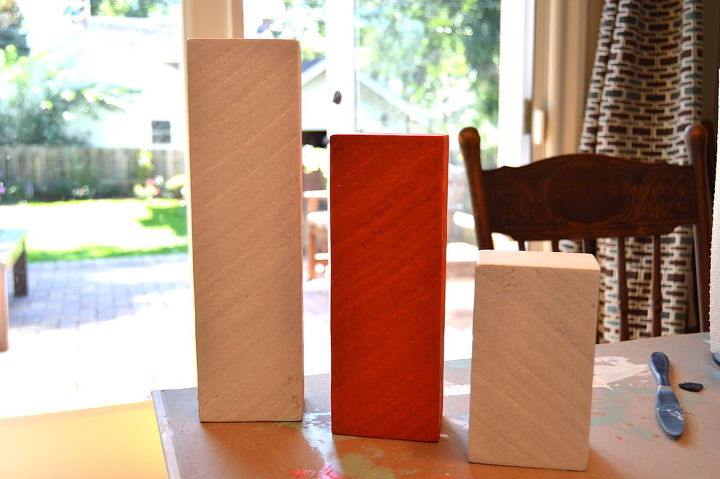
Each block got a coat of paint - the tallest and shortest are Antique White and the middle size is orange.
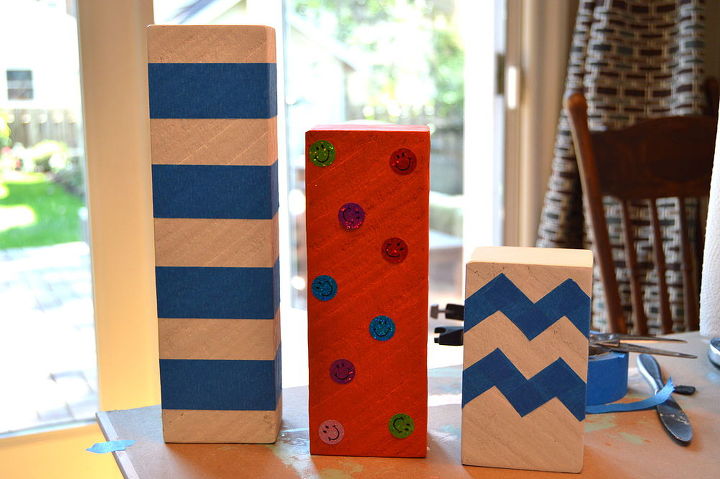
We taped off the patterns we wanted with some painters tape and smiley face stickers - the only round stickers we could find in our house! With the tape securely in place, each block got a coat of the opposite color of paint.
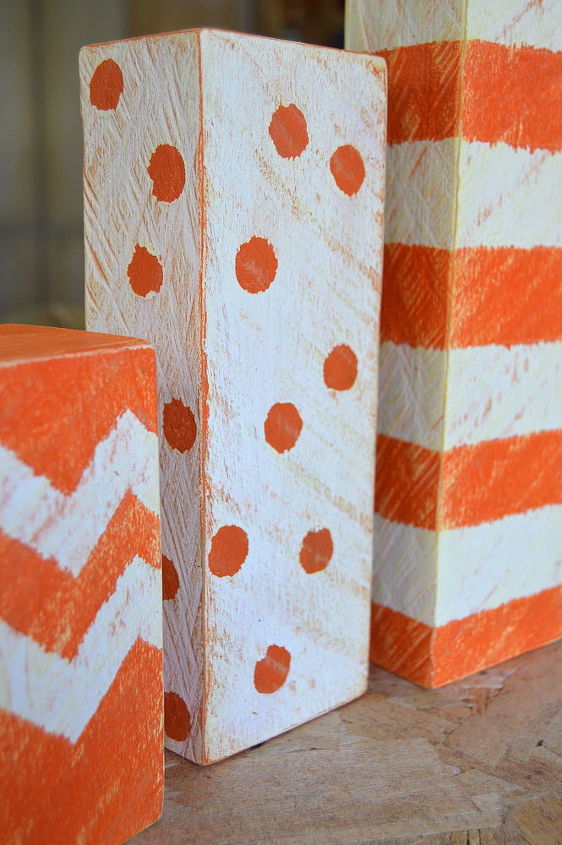
After the paint had dried, we peeled off the tape and gave each block a good sanding, followed by a coat of dark brown glaze to age the paint color.
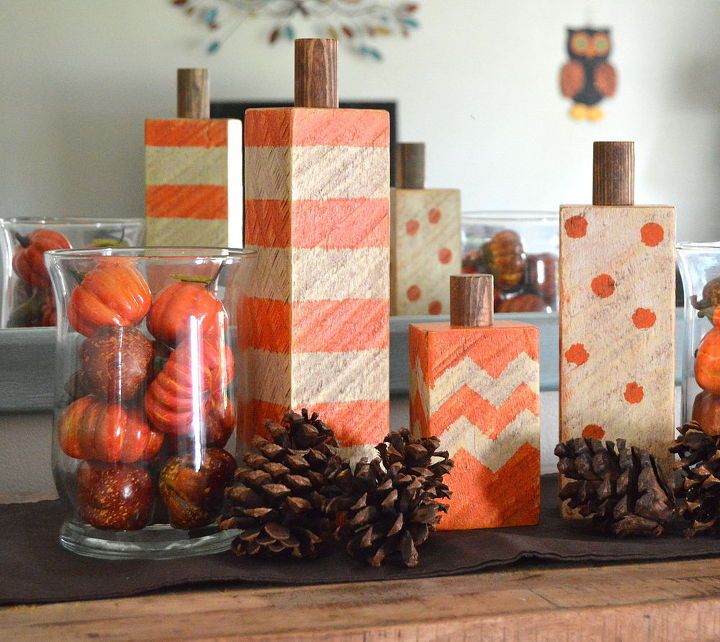
And here are our beautiful reclaimed wood block pumpkins! For more Fall projects coming soon, follow us on Facebook at https://www.facebook.com/pages/Kruses-Workshop/544083725671242 !
Want more details about this and other DIY projects? Check out my blog post!
Comments
Join the conversation
2 of 15 comments
-
Minecraft Pumpkins!!! LoL
-
Gonna make these!!!!!💝💝💝


Frequently asked questions
Have a question about this project?