


Brown Mirrored cabinet makeover
Medium
I am on a quest of sorts these days. I scour local thrift shops to find odd (and otherwise seriously left for sad ruin) pieces of furniture and decor to up-cycle and revive, because lately, dressers and side table restoration is seriously the rage. So I found this mirrored cabinet and fell in love with its rich wood and rustic look. I didn’t want to paint the entire cabinet and hide that wood, but I thought a compromise was in order because the piece (in MY opinion) was dark and uninspired. Why not paint the outside to fit in with any decor and leave the natural wood on the inside? Yep. That is what I did.
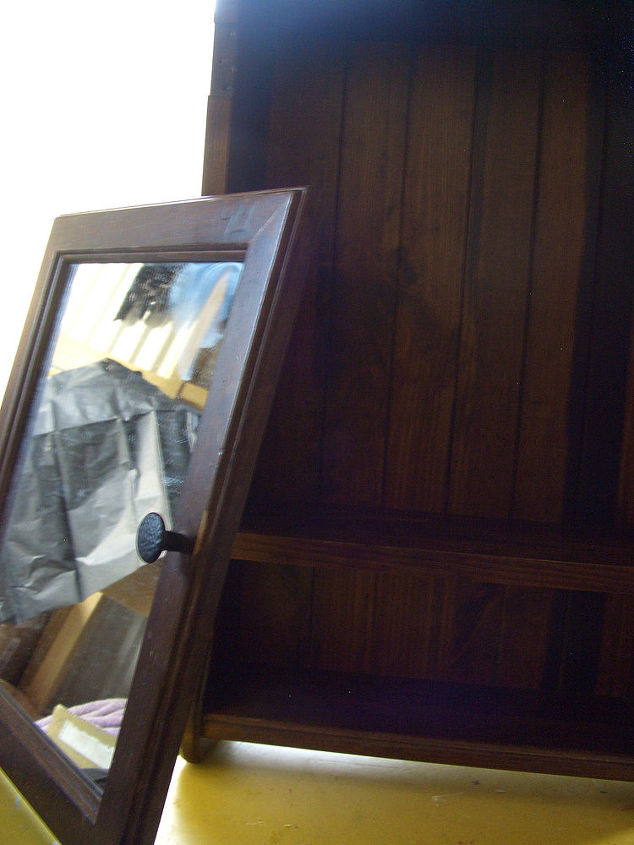
Not the greatest photo, but...
Here's the cabinet sans door. First thing I did was I took the mirrored door off, removed the inner shelving, taped the inner edges of the cabinet and then primed the outside of the cabinet.
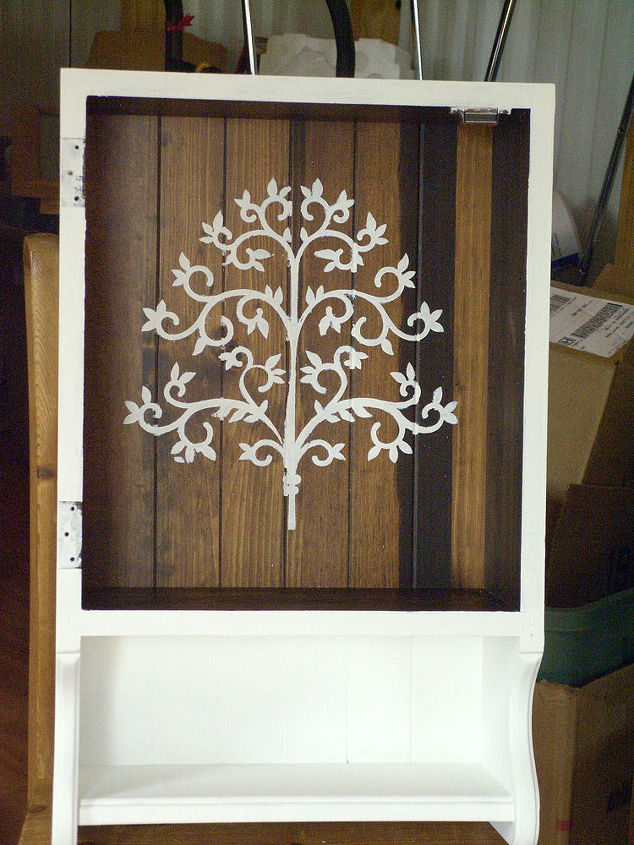
This stencil = hardest job ever! But worth it
And then I got this brilliant (ridonkulous!) idea to tie in the planned white latex (for the outside of the cabinet) with the wood inside with a reverse stencil of what I call a Tree of Life (my title; it reminded me of a family tree graphic). So I cut out my stencil on heavy card stock (using my Slhouette Cameo) and then used some tacky adhesive spray to affix it to the inner wood panel. Then this is where my great idea turned and bit me right on the behind. I used white latex on the stencil (quickly) and when I pulled the stencil off of the inside of the cabinet I had huge intricate areas of card stock left behind.
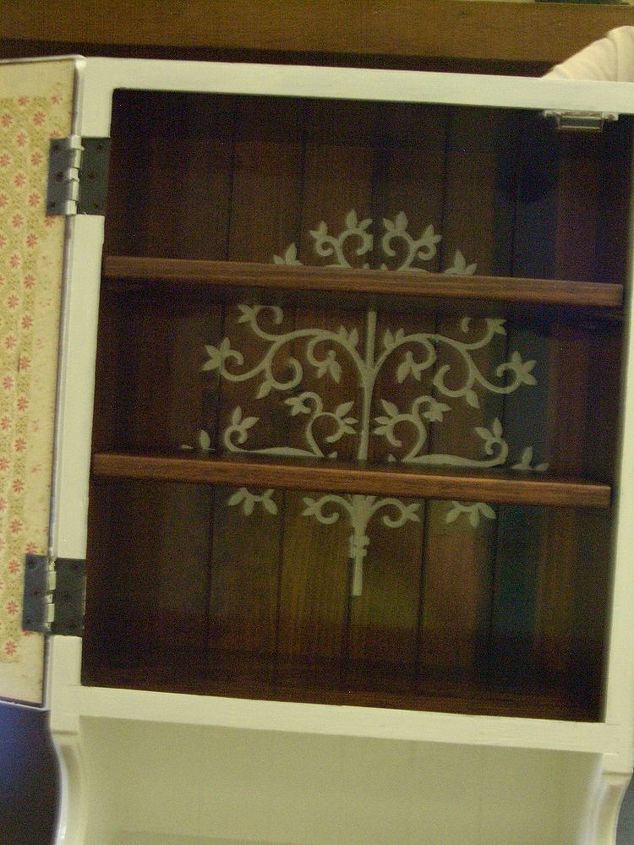
The inner cabinet with its shelving.
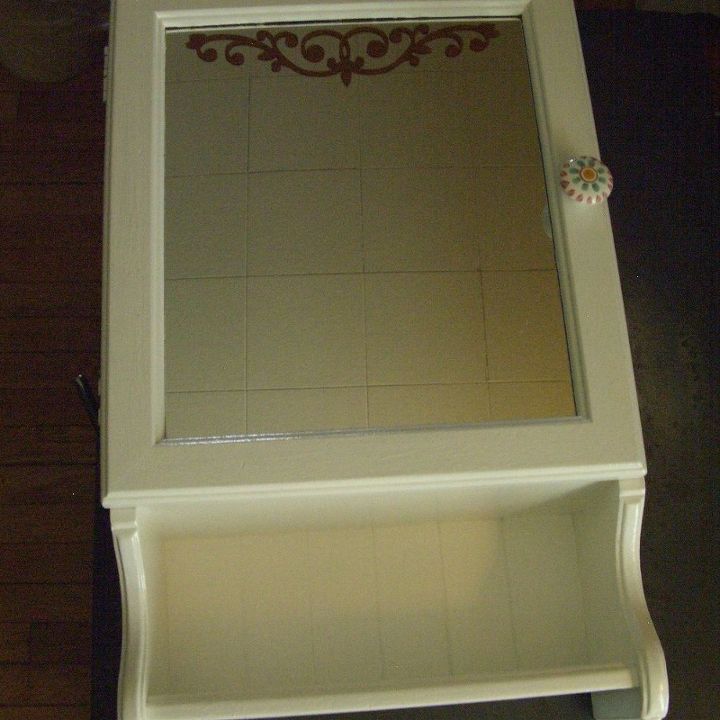
The next step was to paint the outside a rich white. I used a Sherwin Williams white called Snowbound and it worked beautifully (especially with some Floetrol to minimize brush/roller marks). (That is the mirror on the front reflecting the acoustic tiles of a ceiling).
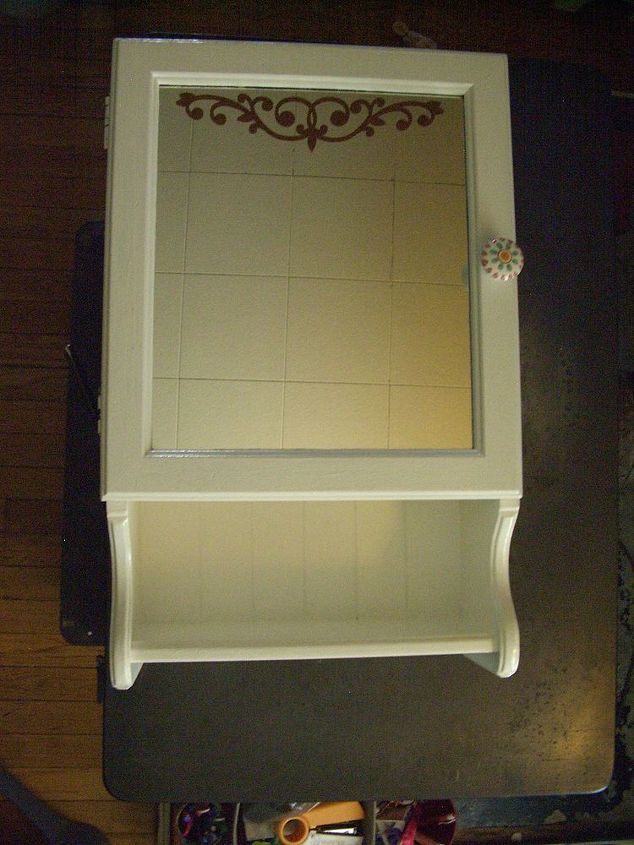
Snowy white outside.
The last detail was to tie-in the inner wood with the outside white. I cut a simple flourish out (again using my Silhouette) and placed it at the very top of the mirrored door. Isn't it cool?
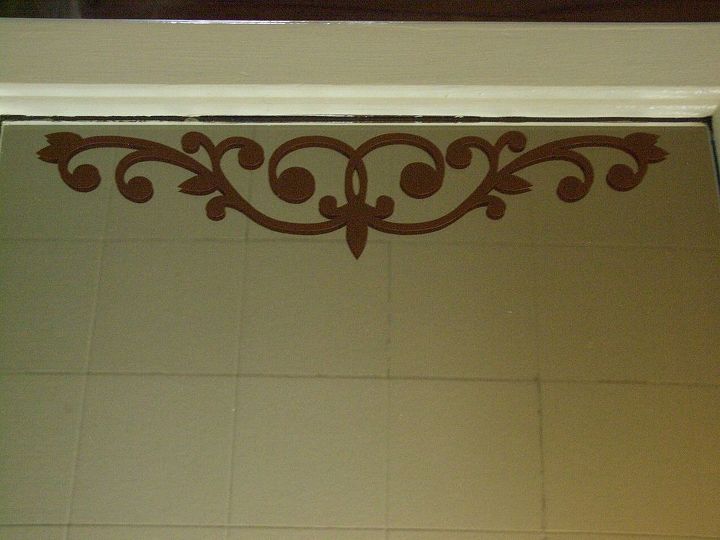
Detail of the mirror flourish.
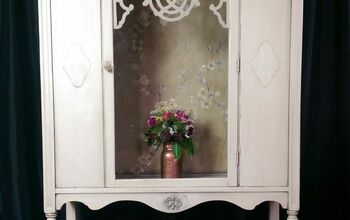
Below is the final result - (the knob came from Hobby Lobby a long time ago)... All of the work was worth it. Thanks for peeking ! (All photos are the property of Zentivity Designs).

Want more details about this and other DIY projects? Check out my blog post!


Frequently asked questions
Have a question about this project?