


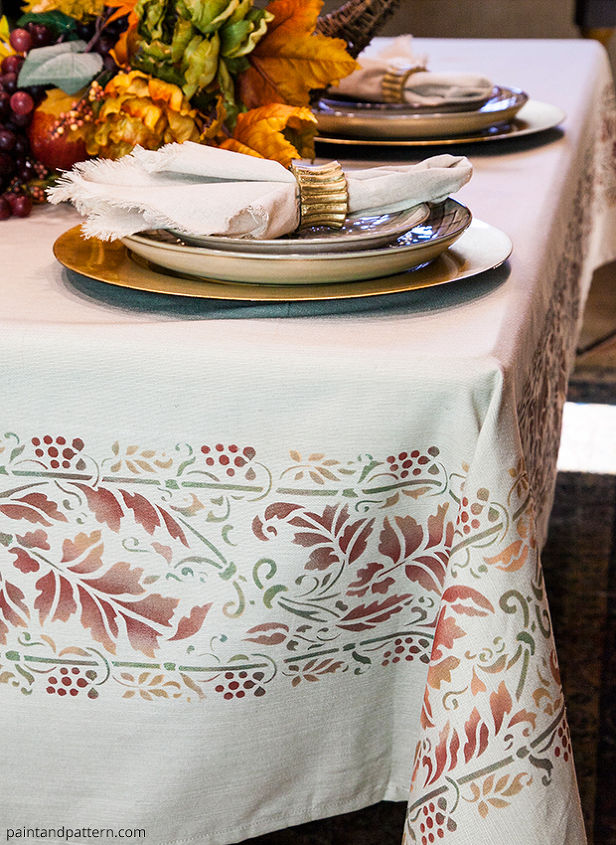
Thanksgiving DIY: Stencil a Harvest Border for Your Table Cloth

This Thanksgiving finish off your table with a personalized tablecloth that also perfectly complements your dinner ware! For our project, we chose a border stencil to add a harvest-themed trim to our otherwise plain linen tablecloth, but you could also choose an allover pattern from our Fall collection and it is just as easy and effective!
Time: Approximately 3 hours
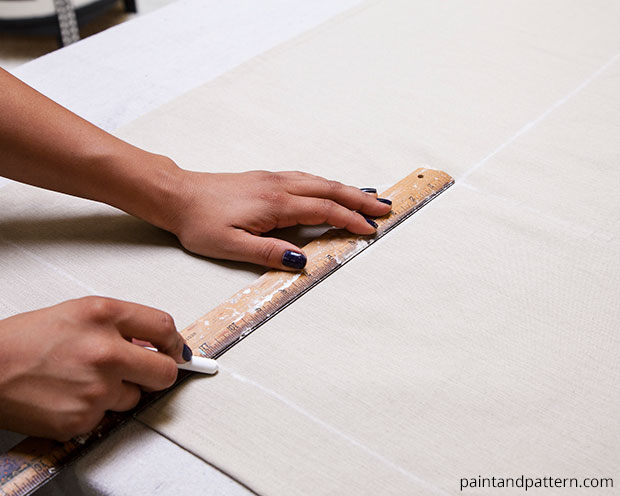
Step 1: Using a piece of chalk and a ruler, create a border inside your tablecloth that is the same size as your table. This will work as a guideline for the stencil.

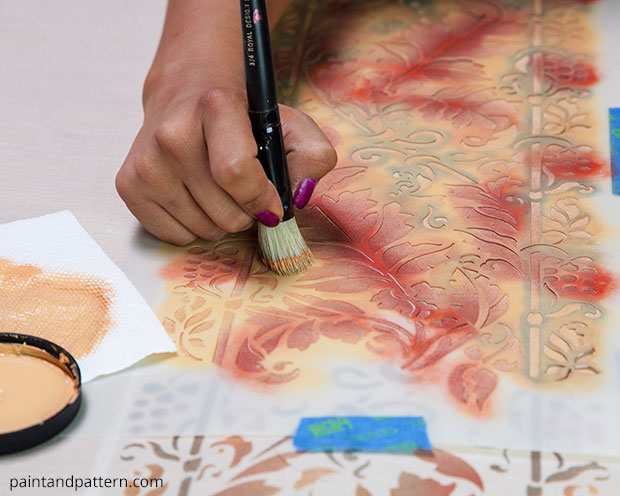
Step 3: Place the stencil between your guidelines. We recommend stenciling with the Red Chipotle Behr paint using a " Stencil Brush first. Paint along the center of the leaves on the stencil and the grapes elements. Remember to load your brush with paint, then offload on a piece of paper towel before stenciling your work.
Step 4: Now use the Stunning Gold Behr paint to stencil the remaining areas of the stencil with a clean " stencil brush. Having separate brushes for each color of paint will make stenciling a lot faster. Make sure to blend in the colors and cover all the elements of the stencil.
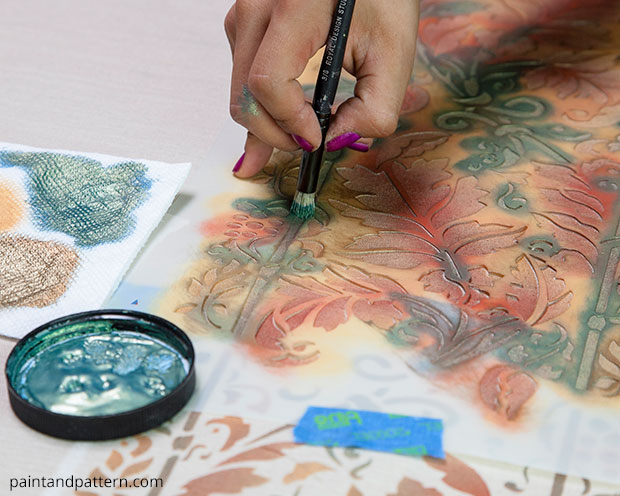
Step 5: Using the Antique Gold Stencil Creme and a " Stencil Brush, lightly stencil through the whole design to add a little shimmer and depth to the pattern.

Step 7: In this stencil, the registration marks are placed outside the stencil design. We recommend using a piece of painter's tape to mark them. As you move the stencil, simply align for the next repeat.


Frequently asked questions
Have a question about this project?