


Half-bath remodel

by
Patrick H
We have a half-bath on the first floor, underneath the stairs. It was small, cramped, kind of ugly, and the toilet was wobbly. For the first few months after we moved in, it was essentially just a containment area for our cats; however, as we all settled in, we decided that it would be much more convenient to make the bathroom more functional for ourselves and our guests, so we decided to remodel it.
Because my wife and I are both fairly handy with tools, interested in learning more about home improvement, and (most importantly) were operating on a tight budget, we opted to do the work ourselves.
The first order of business was to remove everything from the room. There was a large mirror over the sink that was glued to the wall; using a crowbar, we very carefully pried it away and managed to get it off in one piece (this was kind of nerve-wracking, but we didn't have any problems; patience and teamwork are the keys). The sink and the vanity cabinet came out next. Meanwhile, we had drained and emptied the toilet so it was ready for removal. Lastly, we tore out the vinyl flooring, the baseboards, and the light fixture.
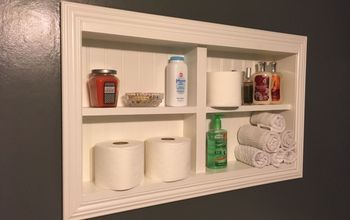
Once we had a blank slate to work with, we patched all the areas of drywall that had been damaged by the removal of the mirror and vanity cabinet. One area required us to replace an 18" x 36" section of drywall; we were able to fill in all the other areas with joint compound. Once this was all dried and sanded, we primed and painted the walls a vibrant blue color. Next we installed a click-together laminate floor (with foam and plastic underlayment) and new baseboards. With the floor installed, we were ready to reseat the toilet with a new wax ring and install a new pedestal sink. To compensate for the loss of the vanity cabinet, we installed stainless steel shelves over the sink and the toilet for storage. A new, smaller mirror was hung over the sink, a new light fixture was installed, the toilet paper dispenser and towel ring were replaced, and the project was finished!
* Cost Comments:
Through diligent research and comparison shopping, the total cost for materials was about $350.
Advice:
If I had it to over again, I wouldn't have been so quick to remove the old light fixture. I really should have had more light in that room when I was repairing the drywall. Because I was working in relative darkness, the wall is not as smooth as I would like (someday I might sand it down, re-spackle, and re-paint, but I think I'm the only one who really notices).
I wish had taken away more definitive lessons from my experience with the sink and the flooring, but I don't think there was any way I could have made it easier; some things are just not prone to work perfectly the first time, so sometimes you just have to go through that process of fine-tuning to get it right.
Prior to this project, I had virtually no experience with plumbing, drywall, or flooring. Removal of the toilet and sink was fairly straightforward, but putting them back was more challenging; it took several tries before we were able to correctly connect the sink and stop any leaks. The flooring was also something of a challenge as it required precise measurements and was rather difficult to do in such a confined space. The drywall repair was also fairly straightforward, but unfortunately I didn't sand it down as smooth as I should have.
Materials:
"Slatten" click-together laminate flooring (birch finish), plus foam and plastic sheeting - $0.00
"Ekby Mosby" shelves - $0.00
"Ekby Bjarnum" shelf brackets - $0.00
"Kolja" mirror - $0.00
Aquasource pedestal sink - $0.00
Pegasus centerset faucet - $0.00
Hampton Bay 2-Light Vanity - $0.00
4' x 4' gypsum board - $0.00
Joint compound - $0.00
Drywall joint tape - $0.00
Extra-thick No. 10 toilet bowl wax gasket - $0.00
Interior latex wall paint - $0.00
Baseboard and shoe rails (trim) - $0.00
Because my wife and I are both fairly handy with tools, interested in learning more about home improvement, and (most importantly) were operating on a tight budget, we opted to do the work ourselves.
The first order of business was to remove everything from the room. There was a large mirror over the sink that was glued to the wall; using a crowbar, we very carefully pried it away and managed to get it off in one piece (this was kind of nerve-wracking, but we didn't have any problems; patience and teamwork are the keys). The sink and the vanity cabinet came out next. Meanwhile, we had drained and emptied the toilet so it was ready for removal. Lastly, we tore out the vinyl flooring, the baseboards, and the light fixture.
Once we had a blank slate to work with, we patched all the areas of drywall that had been damaged by the removal of the mirror and vanity cabinet. One area required us to replace an 18" x 36" section of drywall; we were able to fill in all the other areas with joint compound. Once this was all dried and sanded, we primed and painted the walls a vibrant blue color. Next we installed a click-together laminate floor (with foam and plastic underlayment) and new baseboards. With the floor installed, we were ready to reseat the toilet with a new wax ring and install a new pedestal sink. To compensate for the loss of the vanity cabinet, we installed stainless steel shelves over the sink and the toilet for storage. A new, smaller mirror was hung over the sink, a new light fixture was installed, the toilet paper dispenser and towel ring were replaced, and the project was finished!
* Cost Comments:
Through diligent research and comparison shopping, the total cost for materials was about $350.
Advice:
If I had it to over again, I wouldn't have been so quick to remove the old light fixture. I really should have had more light in that room when I was repairing the drywall. Because I was working in relative darkness, the wall is not as smooth as I would like (someday I might sand it down, re-spackle, and re-paint, but I think I'm the only one who really notices).
I wish had taken away more definitive lessons from my experience with the sink and the flooring, but I don't think there was any way I could have made it easier; some things are just not prone to work perfectly the first time, so sometimes you just have to go through that process of fine-tuning to get it right.
Prior to this project, I had virtually no experience with plumbing, drywall, or flooring. Removal of the toilet and sink was fairly straightforward, but putting them back was more challenging; it took several tries before we were able to correctly connect the sink and stop any leaks. The flooring was also something of a challenge as it required precise measurements and was rather difficult to do in such a confined space. The drywall repair was also fairly straightforward, but unfortunately I didn't sand it down as smooth as I should have.
Materials:
"Slatten" click-together laminate flooring (birch finish), plus foam and plastic sheeting - $0.00
"Ekby Mosby" shelves - $0.00
"Ekby Bjarnum" shelf brackets - $0.00
"Kolja" mirror - $0.00
Aquasource pedestal sink - $0.00
Pegasus centerset faucet - $0.00
Hampton Bay 2-Light Vanity - $0.00
4' x 4' gypsum board - $0.00
Joint compound - $0.00
Drywall joint tape - $0.00
Extra-thick No. 10 toilet bowl wax gasket - $0.00
Interior latex wall paint - $0.00
Baseboard and shoe rails (trim) - $0.00
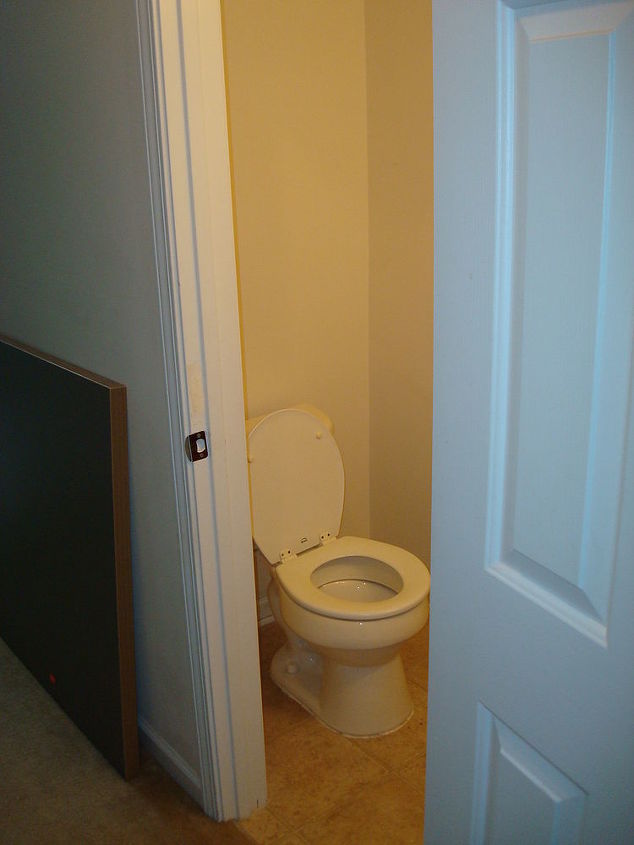
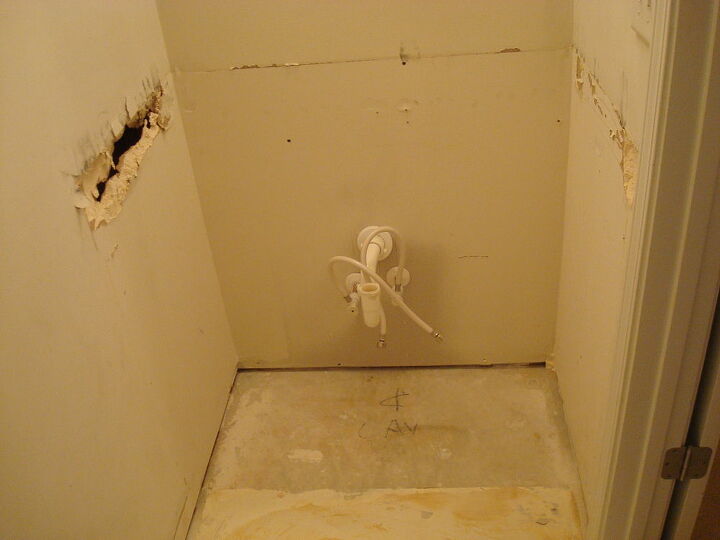
Before: toilet area.
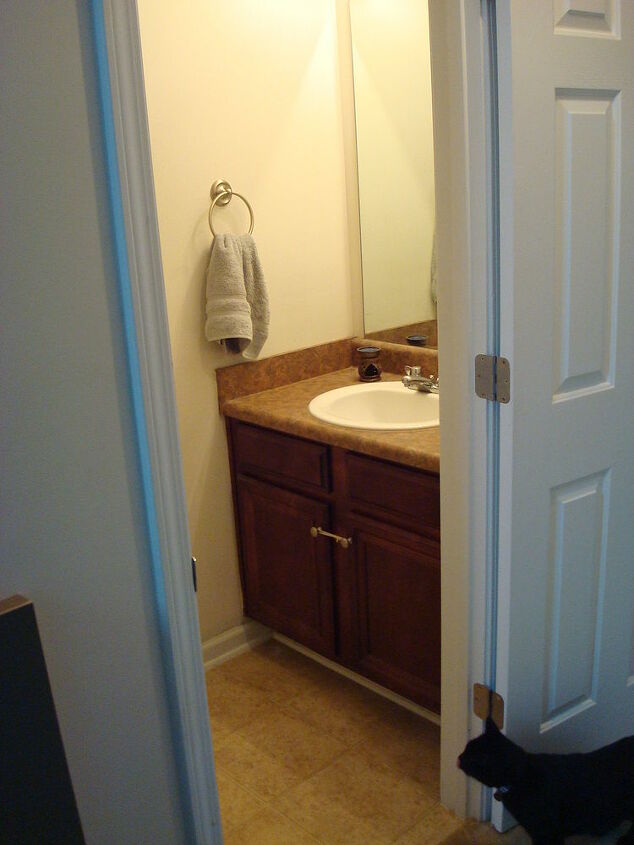
Before: sink and vanity cabinet.
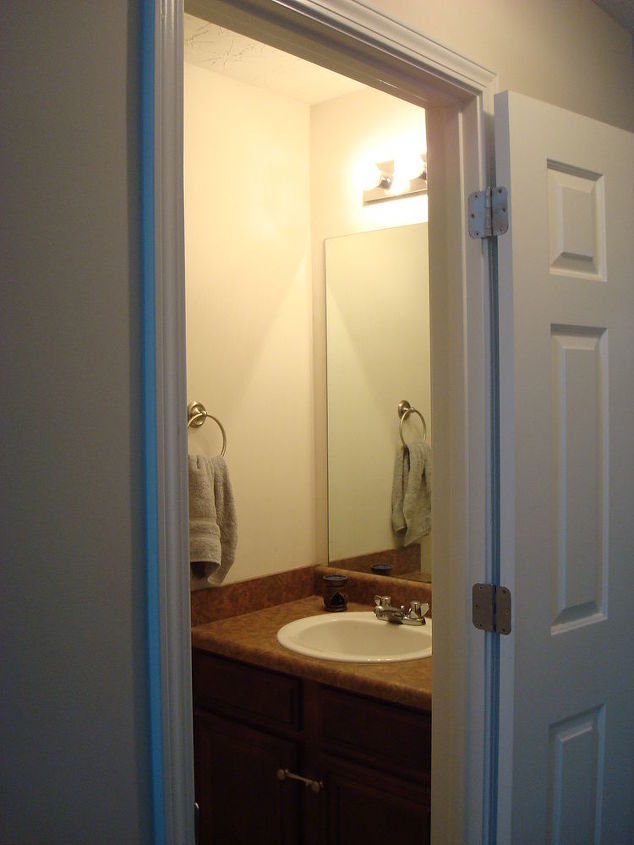
Before: sink and permanently-attached mirror.
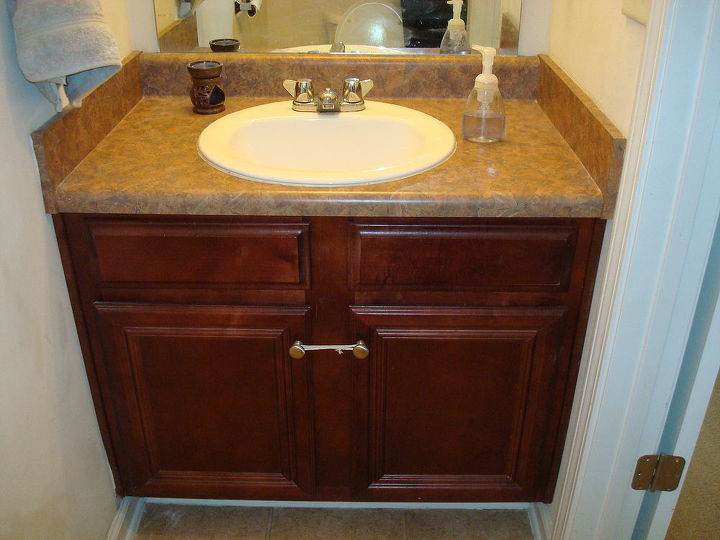
Before: sink and vanity cabinet.
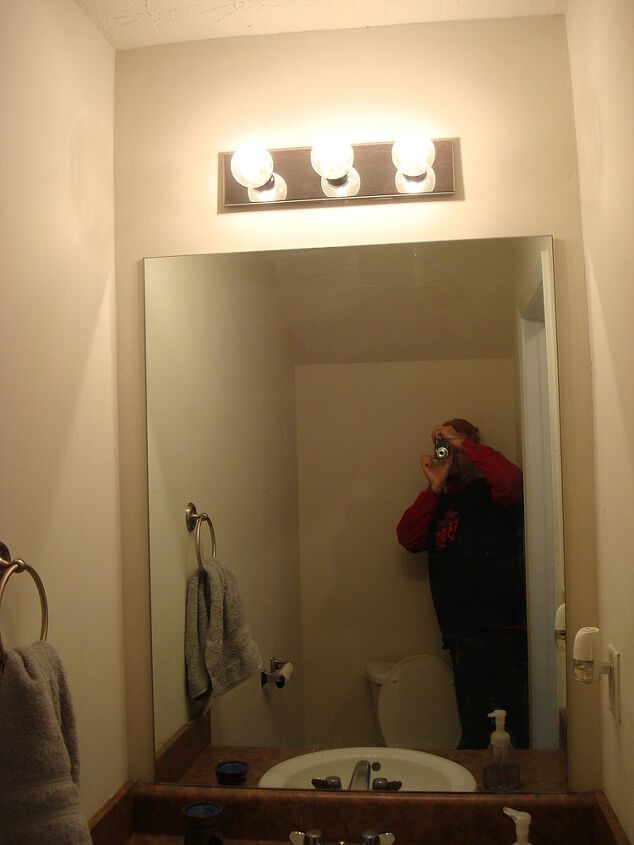
Before: mirror and light fixture.
During: toilet has been removed.
During: vanity cabinet has been removed, damaging the drywall.
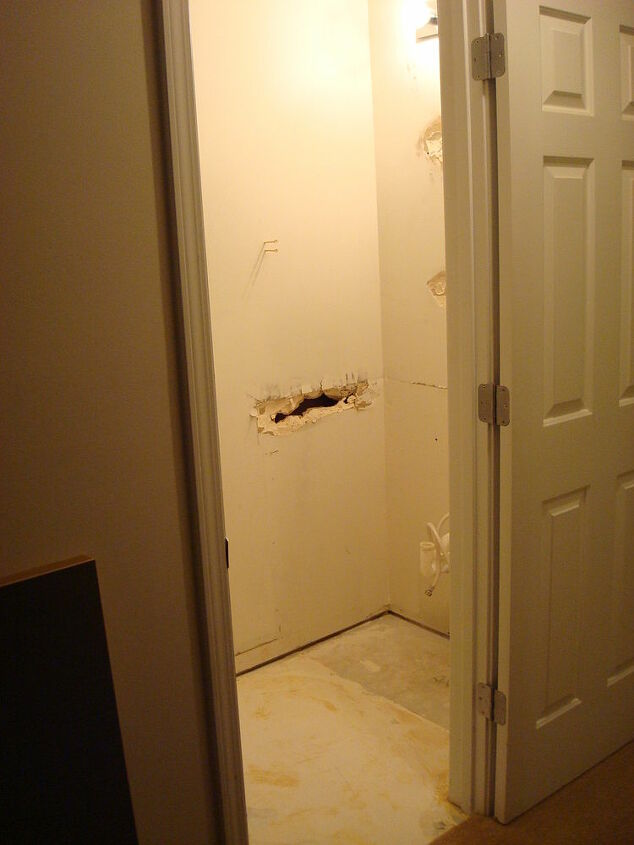
During: vanity cabinet and mirror have been removed, damaging the drywall.
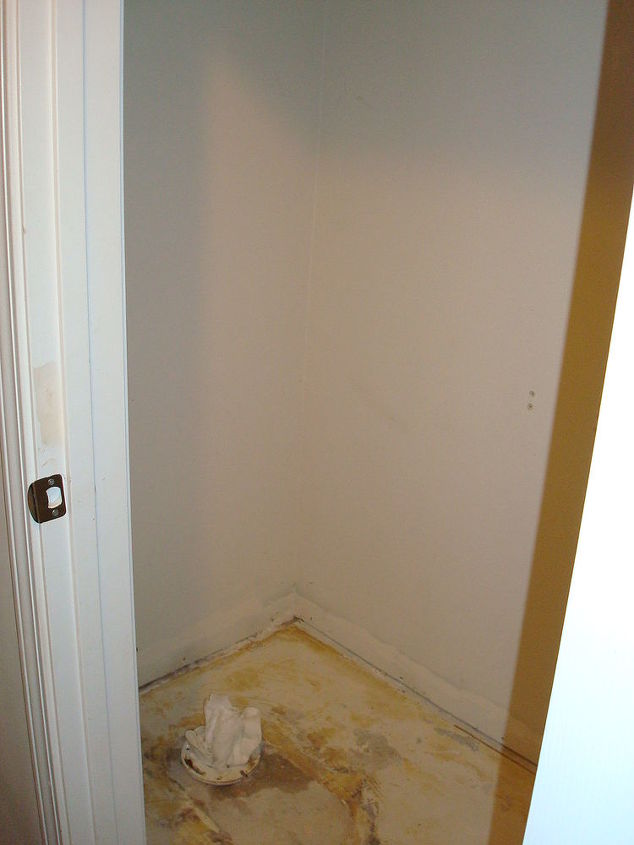
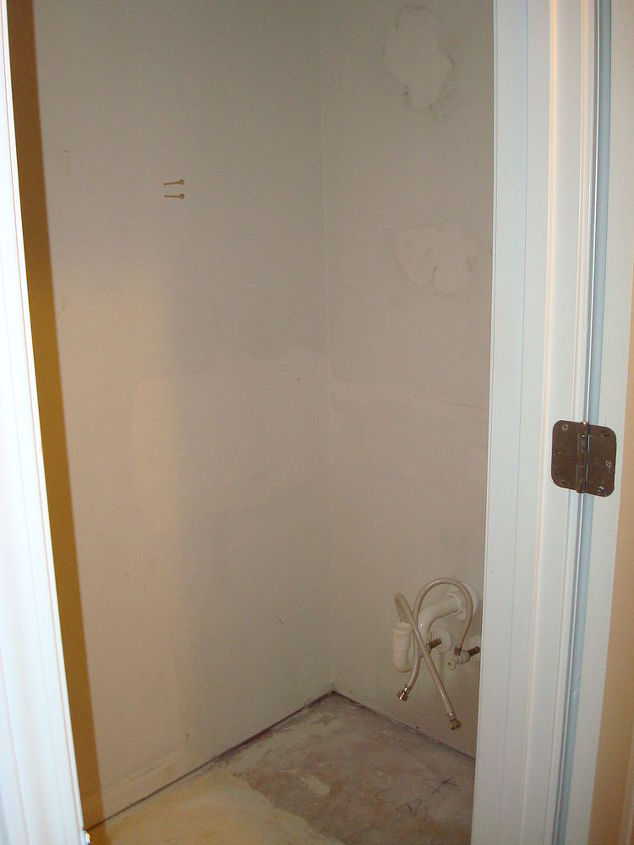
During: sink, vanity cabinet, and vinyl flooring have been removed.
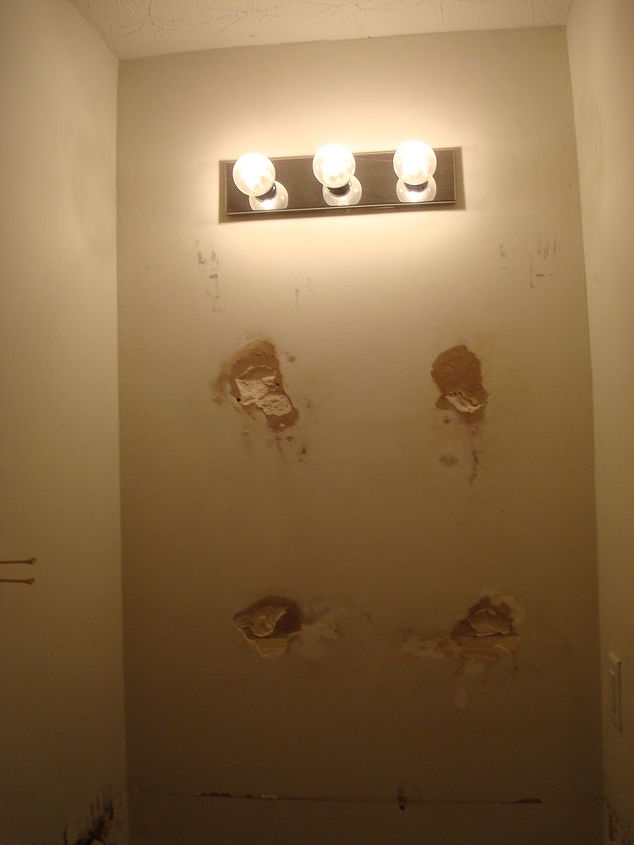
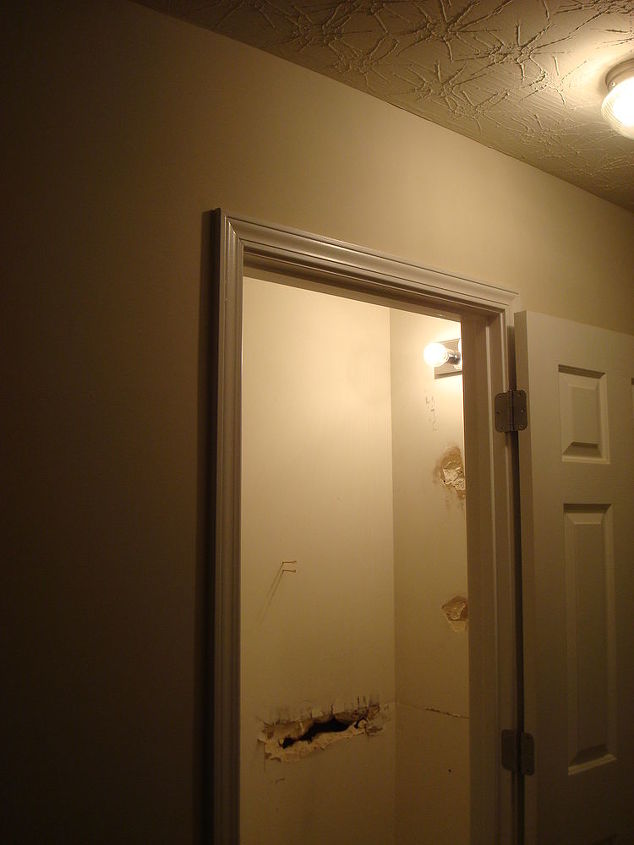
During: mirror has been removed, damaging the drywall. The old light fixture is still in place.
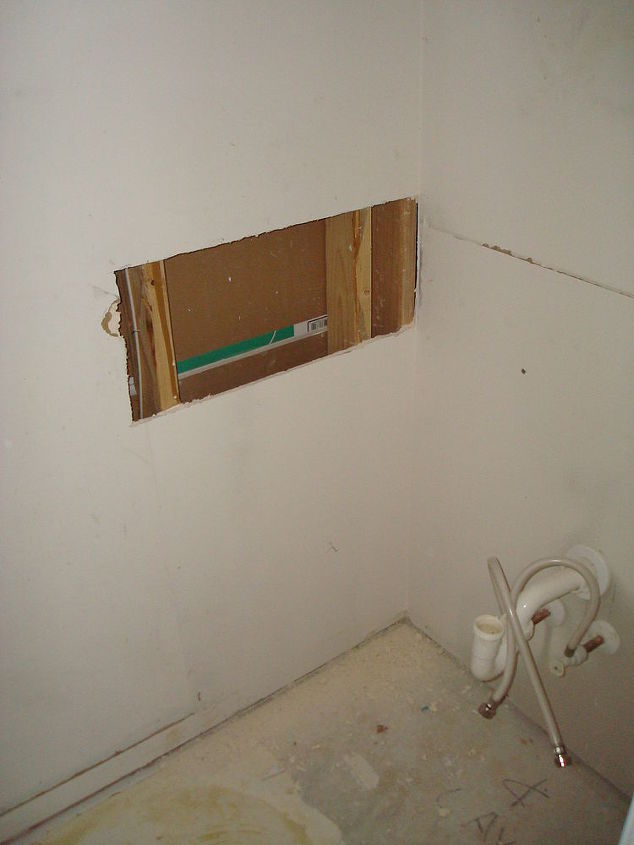
During: to repair the drywall, the damaged section has been removed to expose the studs and give a uniform area to patch.
During: a new piece of drywall (gypsum board) has been cut, inserted into the gap, screwed into the studs, and patched with joint compound.
After: the walls have been painted, a laminate floor has been installed, and the toilet has been reseated.
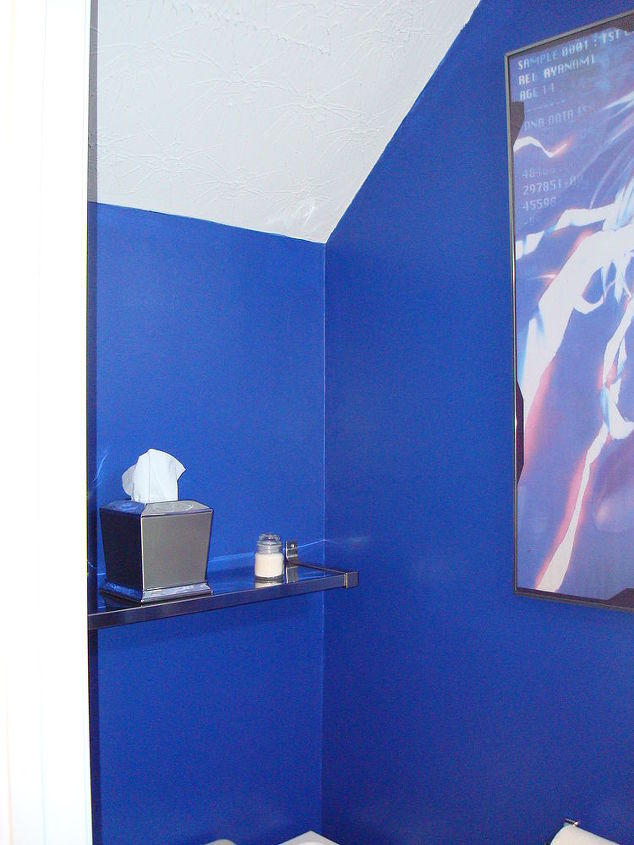
After: the new shelf over the toilet.
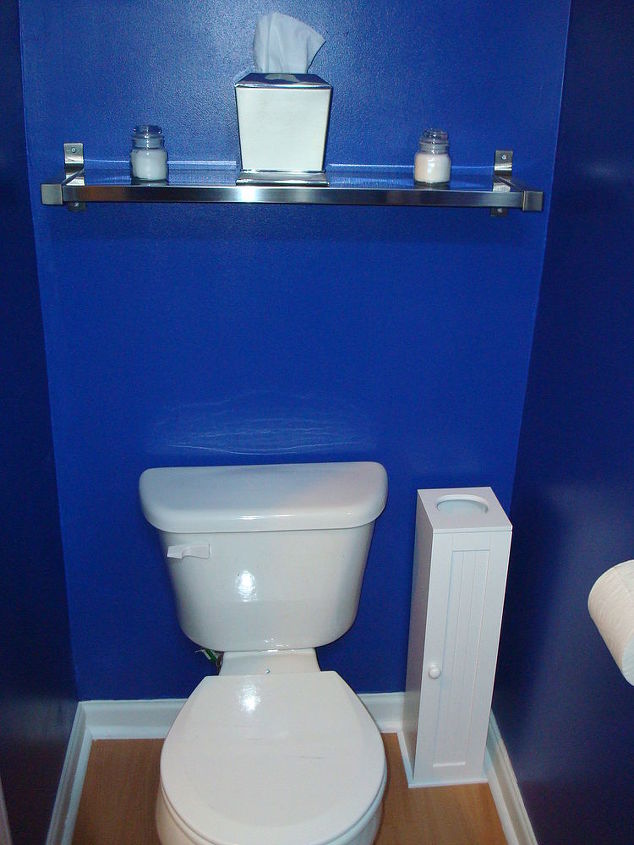
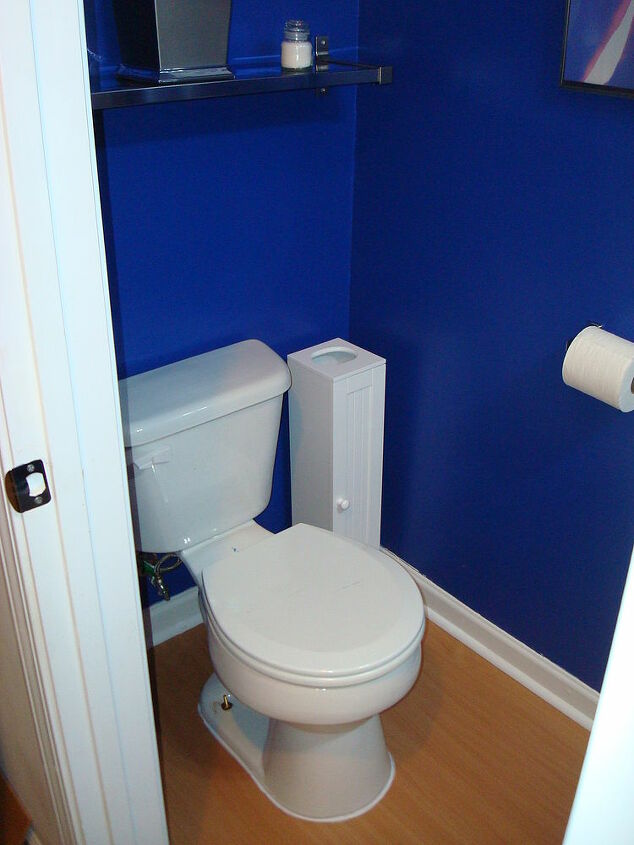
After: toilet area.
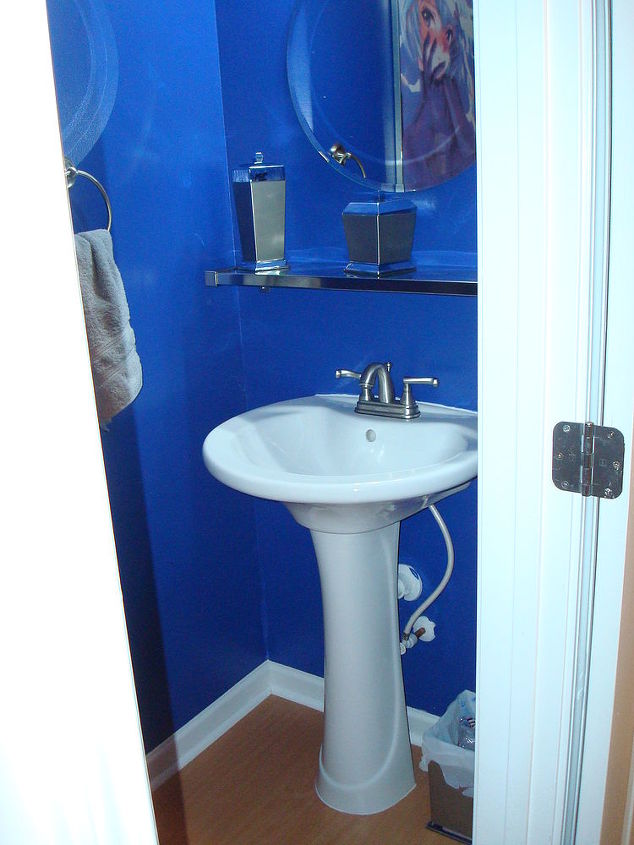
After: pedestal sink, shelf, and mirror.
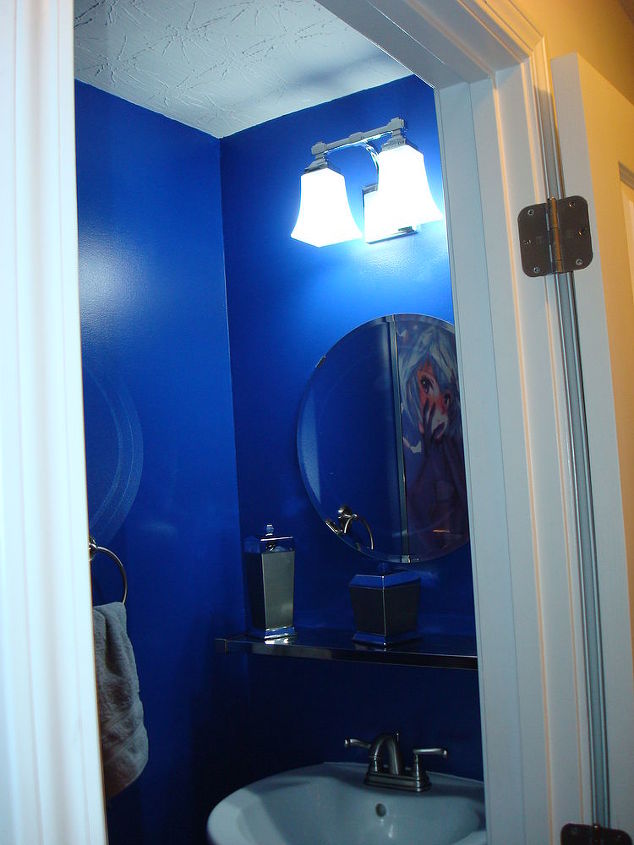
After: pedestal sink, shelf, mirror, and new light fixture.
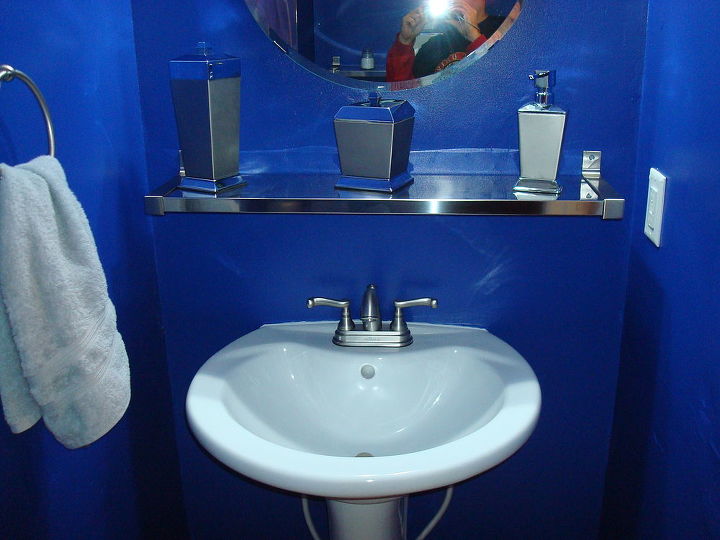
After: pedestal sink, shelf, and mirror.
Comments
Join the conversation
2 of 3 comments
-
Looking very good! Love the choice of the paint color too.Really makes the room look bigger, even tho it's a dark blue.
-
Very nice! but I would have installed pocket door instead.


Frequently asked questions
Have a question about this project?