Vintage Bicycle Advertisement Dresser Makeover #‎ShowYourGreen

Art is beauty
by Art is beauty
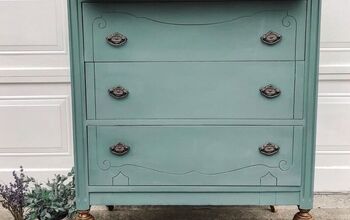
If you don't like Painted wood then turn your heads and RUN cause its PAINTED! Even down to its plastic laminate wood looking top! I have been waiting for the perfect dresser to use my vintage bike ad stencil on. THIS was the perfect dresser! Head on over to the blog to see what this gorgeous Vintage Bicycle ad Dresser used to look like!
art advertisement
I have been waiting to show you the latest makeover.


It was another one of those,


"WHERE CAN I PUT THIS IN MY HOUSE SO I CAN KEEP IT"


Kinda makeovers!


As is with most makeovers, sometimes I fall so in love with them I don't want to let them go. :) Don't worry I didn't keep it. I let it go to the booth so someone else can enjoy it.
Anywhoooo, This is what we started with.


You can kind of see from the picture that the drawer edges had a little bit of damage but not too bad.


The only thing that really was a problem on this was the dang Plastic formica style top.
I had to give it a really good sanding so that the paint would be sure to adhere to it
Once I had done that it was time for painting.


I mixed up a custom chocolate black for the top.


I gave it a couple of coats and let it dry.
While the top dried I mixed up a custom green for the base.


I painted the drawers and the base with this green.
Now it was time for a decision.


Did I want to leave it as is.....or


add a little UMPH!


I think you know the answer to that.!


Remember that vintage advertising window I did a while back.?


(I got my stencil from BROWN BAG STENCIL CO) You can find the link to the stencil on the blog. Its a free graphic from @the graphics fairy.


Well that was done so I could use my stencil while I waited to find the right dresser to use it on.


THIS was the RIGHT dresser.
After putting on the stencil and letting it dry,


I waxed and buffed the whole thing.


I changed out the hardware to fit with the new look of the dresser.
Now I think you understand why I wanted to keep it so bad.


BUT no room in the house for this piece,


so it is headed to the booth for sale.
Hopefully it will find its way to its forever home SOON!


I hope you enjoyed this makeover.


Be sure to come back tonight for the TWIRL and TAKE a BOW Link Party


that starts at 8pm every Monday night!


SEE YOU THEN.
Art is beauty
Want more details about this and other DIY projects? Check out my blog post!
Go
Frequently asked questions
Have a question about this project?
Comments
Join the conversation
3 of 6 comments
  • Sherrie Sherrie on Nov 04, 2014
    Beautiful! Drab to fab!
  • Maria Pagan Maria Pagan on Nov 11, 2014
    Awesome! 1 ?? you did not sand the rest before the paint?
    • Art is beauty Art is beauty on Nov 11, 2014
      @Maria Pagan only if there was gunk or something on it. I use the chalk style paints so no sanding required...just on those super plasticy tops
Next