


MY newly redone scrap booking area
by
Chris J
$120
3 Days
Easy
I needed a place for my scrap booking stuff and "pages in progress" where the cats wouldn't get them and I wouldn't have to clean the kitchen table when I wanted to scrap. The basic area I had to work with was approximately 10 x 15. The cut outs and ceiling angles made it hard to measure accurately, but we managed.
I spent hours looking online, checking out blogs, reading and surfing the net. I knew I couldn't build from scratch because I am not that talented. :) So when I saw the base cabinets idea from the How To Nest for Less page, I thought EUREKA!!!! So I priced unfinished cabinets at places like Lowe's and HD. Then the light went off!!!! We were looking for a window last year for the front of our house upstairs and remembered the ReStore run by Habitat for Humanity. That's where I found the bases for my desk. I think they must have come from somebody's bathroom because they have that "look" to them. But who cares. they match and they're also fairly heavy. All I did was switch out the gold drawer pulls for polished stainless steel. The cabinets were $45 each and were 55% off. I got the "bones" of my project for $45. The unfinished cabinets at HD were $75-100 each for the size I needed.
The lamp is only temporary until I can get something more functional. The black clamp light is a basking light that our turtle outgrew. It came in handy.
The storage unit on the side of my desk and on the end on top came from Michael's. They just happened to be having a 50% off all scrap storage stuff sale. Which happened to coincide with a payday. :) The tote box is only temporary until we can get some more cabinets, frame them in and then put a foam cushion on top and use it for a window seat as well as storage.
The desk top is made from a 4 x 8 sheet of birch plywood. For a couple extra dollars, we had the guy from HD do all the cuts we needed. From that sheet we got the desk top, 3 shelves, and a nice sized piece that can be used for other projects.
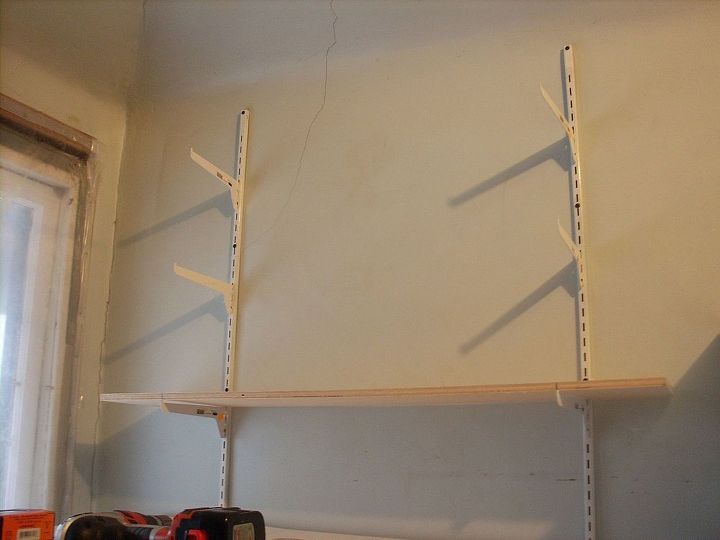
I am a firm believer in portable, so the adjustable shelf idea was another eureka moment. We decided to make the shelves straight to the human eye, as leveling them to the bubbles in the level would have made them look slanted and off kilter. Nothing in our house is square as it is 100 years old.
My husband, who is a wood worker and furniture maker, had a good idea for keeping things simple. That is why we didn't glue AND nail the top on, we just nailed it down. If we ever move, we would never get it down the narrow steps and hallway in our 100 year old house. A few taps on the underside with the hammer and it comes apart into 3 pieces; the 2 bases and the desk top.
I did the majority of the work, but my husband did the finessing of the desk top. So, between the 2 of us, we got it done in about 3 days. I am now done with the redo and am "moved in" and ready to start scrapping again. There is still a ton of stuff to do, but this was my priority.
Our total outlay for the project was approximately $120. Not bad all things considered.
I spent hours looking online, checking out blogs, reading and surfing the net. I knew I couldn't build from scratch because I am not that talented. :) So when I saw the base cabinets idea from the How To Nest for Less page, I thought EUREKA!!!! So I priced unfinished cabinets at places like Lowe's and HD. Then the light went off!!!! We were looking for a window last year for the front of our house upstairs and remembered the ReStore run by Habitat for Humanity. That's where I found the bases for my desk. I think they must have come from somebody's bathroom because they have that "look" to them. But who cares. they match and they're also fairly heavy. All I did was switch out the gold drawer pulls for polished stainless steel. The cabinets were $45 each and were 55% off. I got the "bones" of my project for $45. The unfinished cabinets at HD were $75-100 each for the size I needed.
The lamp is only temporary until I can get something more functional. The black clamp light is a basking light that our turtle outgrew. It came in handy.
The storage unit on the side of my desk and on the end on top came from Michael's. They just happened to be having a 50% off all scrap storage stuff sale. Which happened to coincide with a payday. :) The tote box is only temporary until we can get some more cabinets, frame them in and then put a foam cushion on top and use it for a window seat as well as storage.
The desk top is made from a 4 x 8 sheet of birch plywood. For a couple extra dollars, we had the guy from HD do all the cuts we needed. From that sheet we got the desk top, 3 shelves, and a nice sized piece that can be used for other projects.
I am a firm believer in portable, so the adjustable shelf idea was another eureka moment. We decided to make the shelves straight to the human eye, as leveling them to the bubbles in the level would have made them look slanted and off kilter. Nothing in our house is square as it is 100 years old.
My husband, who is a wood worker and furniture maker, had a good idea for keeping things simple. That is why we didn't glue AND nail the top on, we just nailed it down. If we ever move, we would never get it down the narrow steps and hallway in our 100 year old house. A few taps on the underside with the hammer and it comes apart into 3 pieces; the 2 bases and the desk top.
I did the majority of the work, but my husband did the finessing of the desk top. So, between the 2 of us, we got it done in about 3 days. I am now done with the redo and am "moved in" and ready to start scrapping again. There is still a ton of stuff to do, but this was my priority.
Our total outlay for the project was approximately $120. Not bad all things considered.
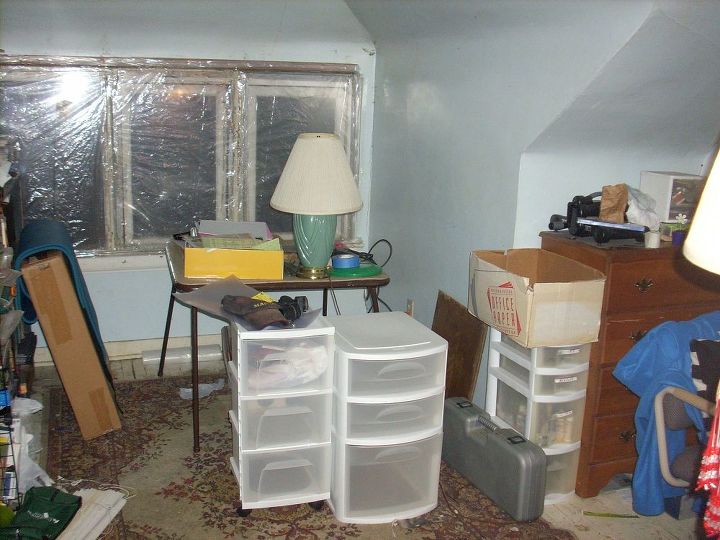
Before, quite the mess. I had an old drafting board that I put on the card table so I could apply pressure to things when gluing or stamping.
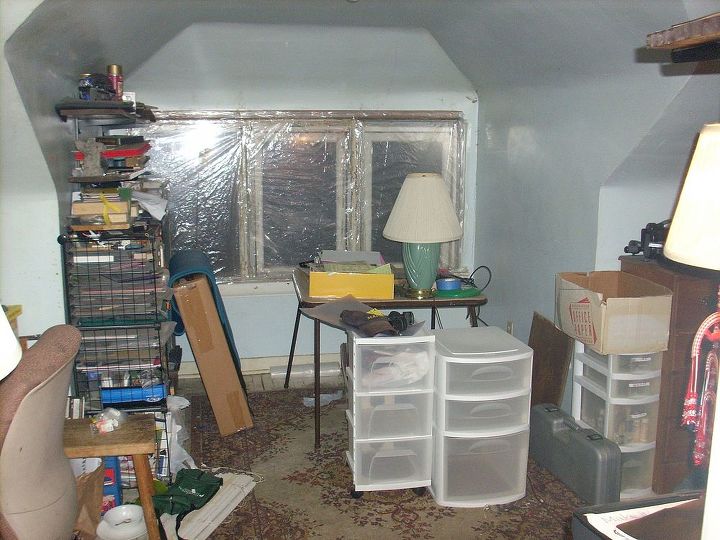
More quite the mess. On the left side is more scrap storage that was pretty worn out.
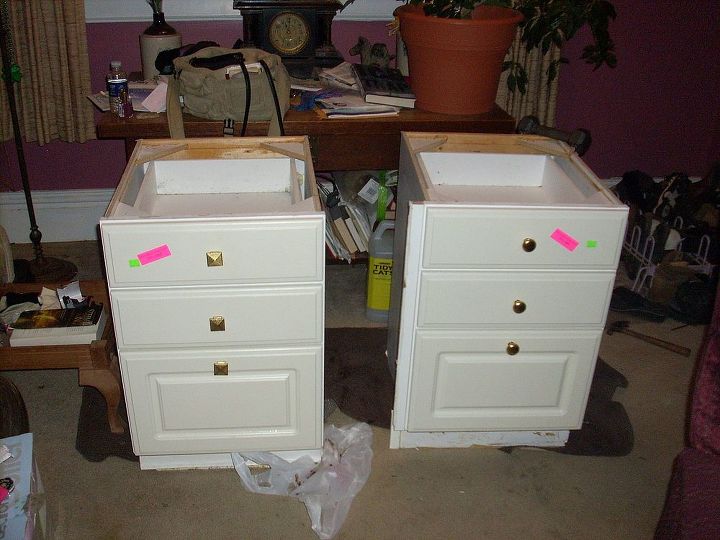
My ReStore specials. 55% off. Yeah baby!!!!
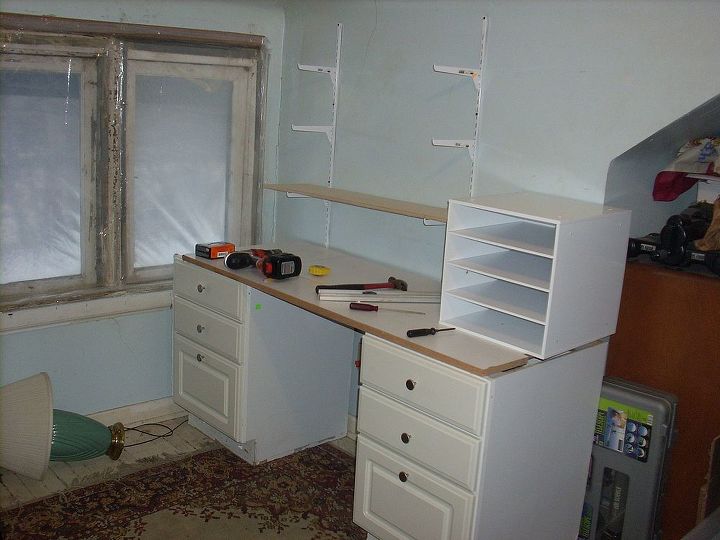
During the redo. The tops you see are just some press board laminate we had laying around. It gave is a place to put the tools.
We discovered that 100 year old horse hair plaster needs something over the area where you are drilling the hole. Keeps plaster from cracking. Painters tape to the rescue.

The REAL desk top leveled and nailed into place. Waiting for shelves to dry and then they will go up.

Finally done!!!! I am a happy scrapper. Now I am findings a permanent place for everything. And the nasty wire bins on the other side of the room are all cleaned up and ready for phase 2.
Comments
Join the conversation
2 of 17 comments
-
Valerie...Thank you. It was really easy. Once I saw the layout on @How to Nest For Less my light bulb went off.
-
Great job!


Frequently asked questions
Have a question about this project?