


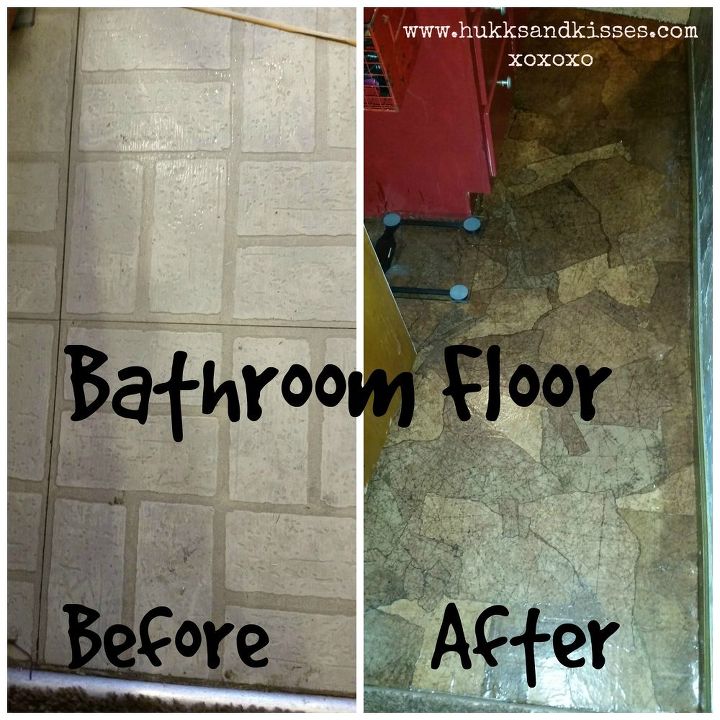
Actual Paper Bag Floor

by
Kammille
$50
2 Days
Easy
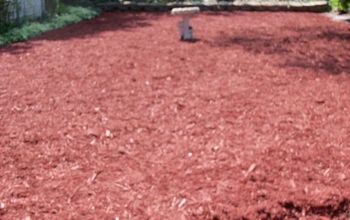
Like always, I searched and researched how I wanted to do this and in every tutorial I came across, they were using brown craft paper or something similar. The problem with that was I have a growing stash of actual paper bags and I wanted to use them.
I grabbed a handful of paper bags (we eat out way too often), I ripped them into various sizes figuring that I would need to fit them into different nooks and crannys, I then wadded them put into balls.
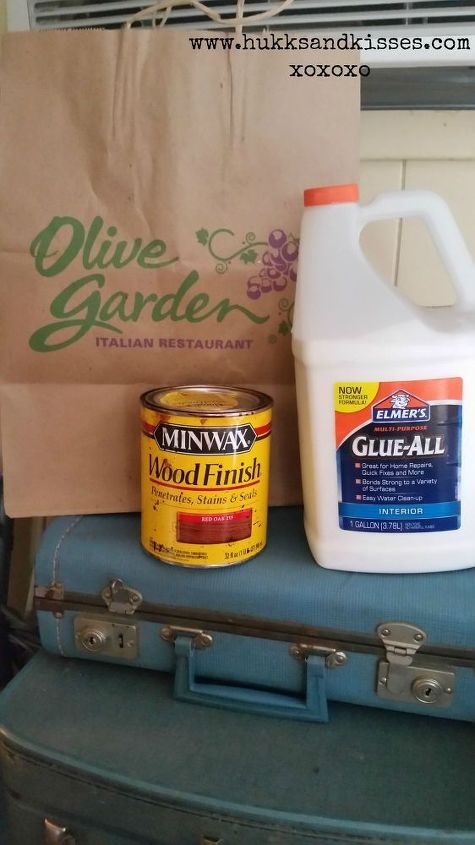
I would take about 3 balls of wadded paper and threw them in the bucket and used the stir stick to push them down and get them well coated. Then I would pull them out and wring them out. Then I unwadded them and started to lay them out on the floor and smooth them out, over lapping them a bit.
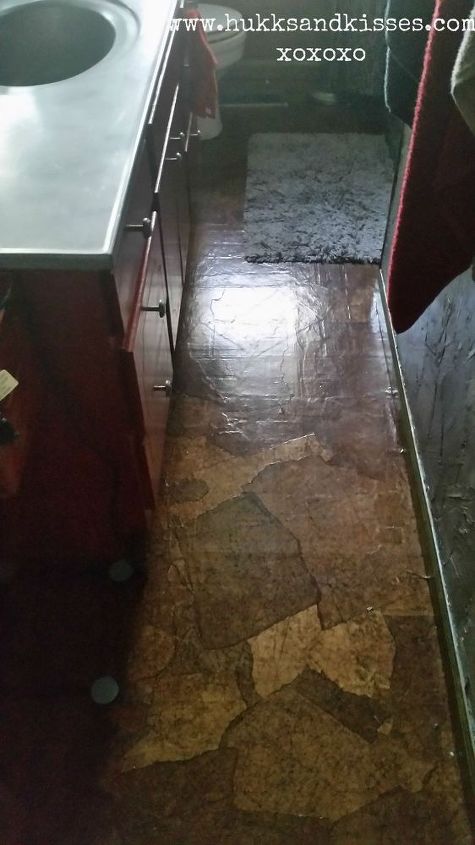
I already had some stain that I used on another project (Miniwax Red Oak). I brushed it on and wiped it off. After letting it dry, I started applying the polyurethane (about 4 coats).
Want more details about this and other DIY projects? Check out my blog post!
Comments
Join the conversation
2 of 7 comments
-
This is what I am wanting to do over my Formica kitchen counters. Do you have any experience with that type of application? Your floors are great. Thanks
-
After I finish putting the paper on the floor do I let the glued paper dry before I stain it and do I let the polyurethane dry between each coat? Do I need to sand the polyurethane between coats ? I am in need of a new floor in my half bath and find it expensive to hire a professional. Thanks.


Frequently asked questions
Have a question about this project?
Did you have to take up the old floor titles before you started?
Will this work on concrete? Our basement has radiant heat embeded in the floor I thought of painting it but yhis looks better