


100% Recycled Craft Centre
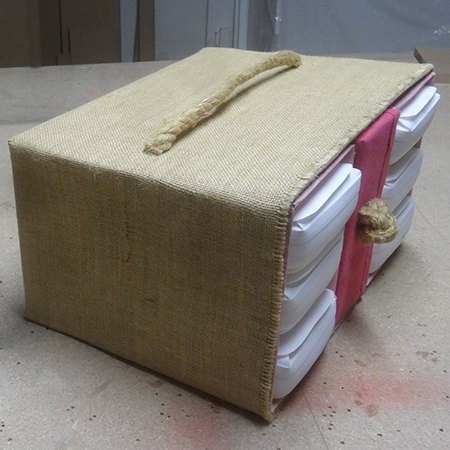
Made using recycled plastic milk containers and cardboard boxes, this craft centre has plenty of storage compartments for all your craft supplies and is easily carried around.
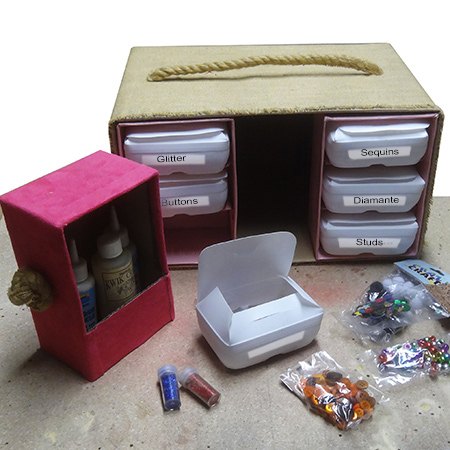
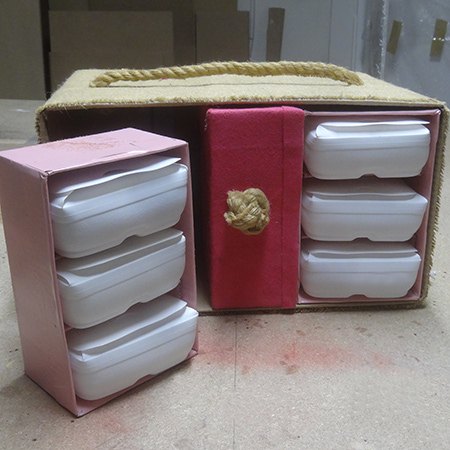
The main frame is a large cardboard box and there are 3 smaller boxes that fit within the larger box. Two of the smaller boxes have cardboard shelves for the plastic (milk container) storage compartments, and the last box is for taller craft suppliers. When it is all fitted together there is still plenty of space at the back for even more crafty stuff !
The main frame is a large cardboard box and there are 3 smaller boxes that fit within the larger box. Two of the smaller boxes have cardboard shelves for the plastic (milk container) storage compartments, and the last box is for taller craft suppliers. When it is all fitted together there is still plenty of space at the back for even more crafty stuff !
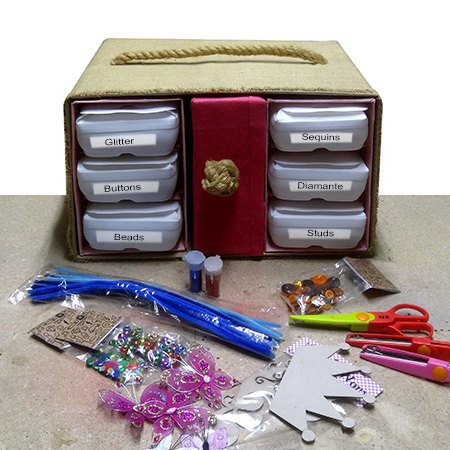
The plastic (milk container) storage boxes allow you to store more supplies neatly and have everything organised. Adding labels to your storage boxes allows you to easily find everything you need.
YOU WILL NEED:
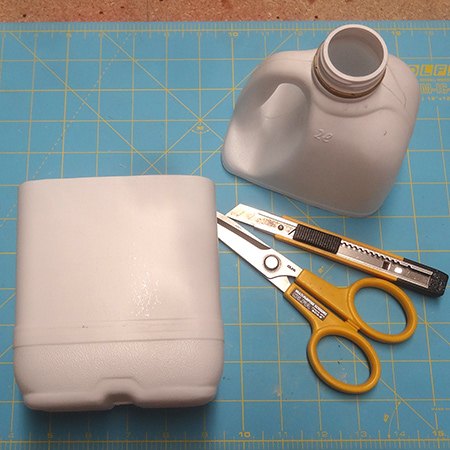
1. Cut away the top section of the plastic milk container so that you have two sections. You can throw away the top section unless you have another use for this.
2. Snip a straight line down all four corners. You can reduce the height of the sides and front flap to a length of about 3 to 4 cm. Also cut angled corners on all of these three flaps.
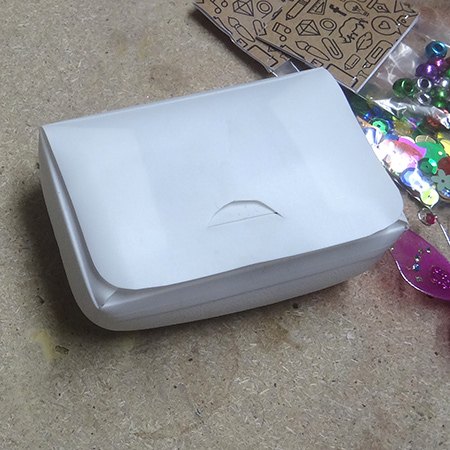
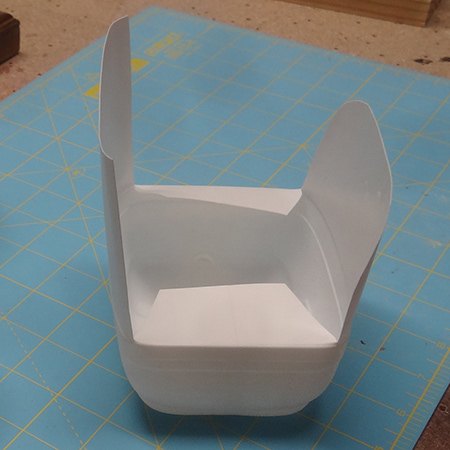
4. Fold the back flap over for the top and crease at the back. Use a craft knife to create a tab in the top, and a slot in the front flap that will hold the top in place when closed.
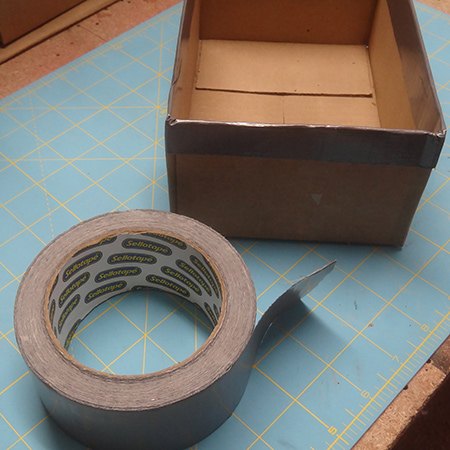
5. To make the box containers, make sure the boxes themselves are sturdy or use glue and tape to strengthen them. I added a row of tape around the edge after cutting off the flaps on top of the box.
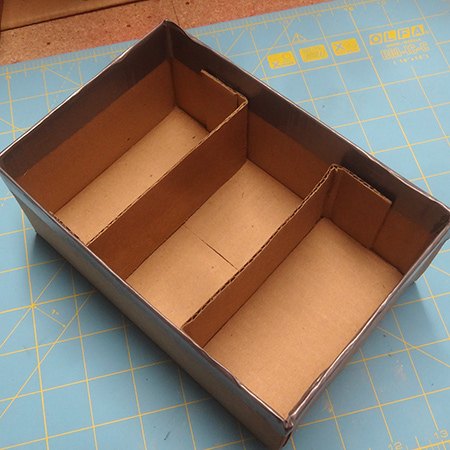
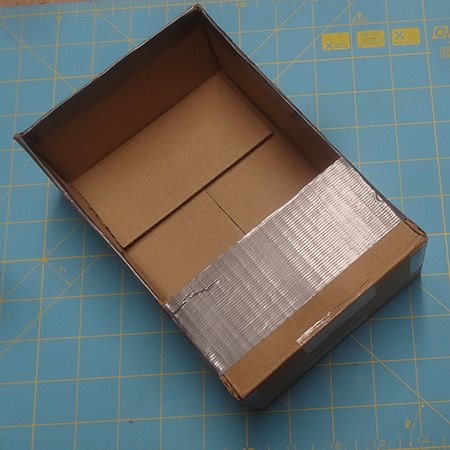
6. For the shelves in the smaller boxes the flaps removed from the lid were bent to fit and then glued in place. For the centre box that will store taller craft supplies one side flap was left in place to prevent supplies from falling out.
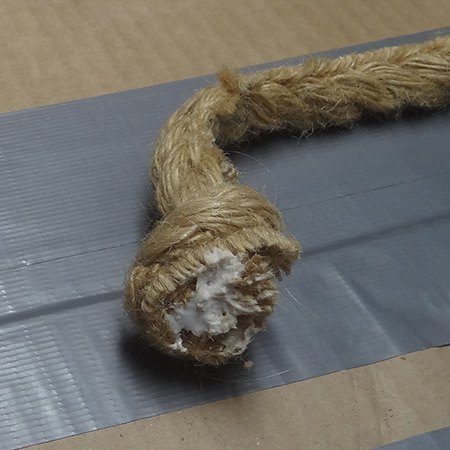
7. The larger box was also reinforced with duct tape, particularly where the holes were to be cut for the rope handle. The rope is knotted to hold it in place for the handle. Apply wood glue to the knots to prevent the rope from fraying or coming undone.
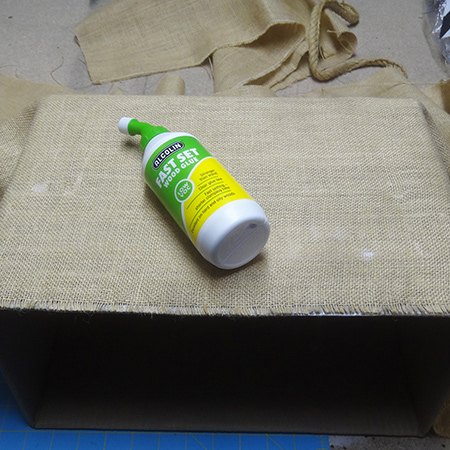
8. Glue is applied to the outside of the box before being wrapped with burlap. Spread the glue evenly over the surface. I used an expired credit card to wipe the glue over the cardboard box sides.
9. Let the glue dry and then make a couple of 'X' cuts so that you can push the rope handle through the top, with the knots on the inside of the box. Apply more glue to the knots once in place.
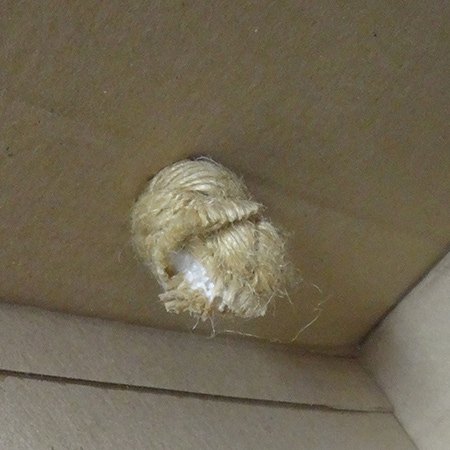
The centre box is wrapped with a pink fabric that is also glued onto the box. Another large knot on the centre box is glued onto the inside of the box.

Want more details about this and other DIY projects? Check out my blog post!
Comments
Join the conversation
2 of 49 comments
-
That’s awesome! I love that kind of really really recycled stuff! Give that stuff a second life.
-
Wow! Great ideas. Can't believe it is still posted but so happy to see this here -- (2015) -- almost a decade later! If my cats will allow me a box or two I will try to create this


Frequently asked questions
Have a question about this project?