


My Frugal Fairies Created a Delightful Space in my Herb Garden!
by
Bec1311224
$5.00
8 Hours
Easy
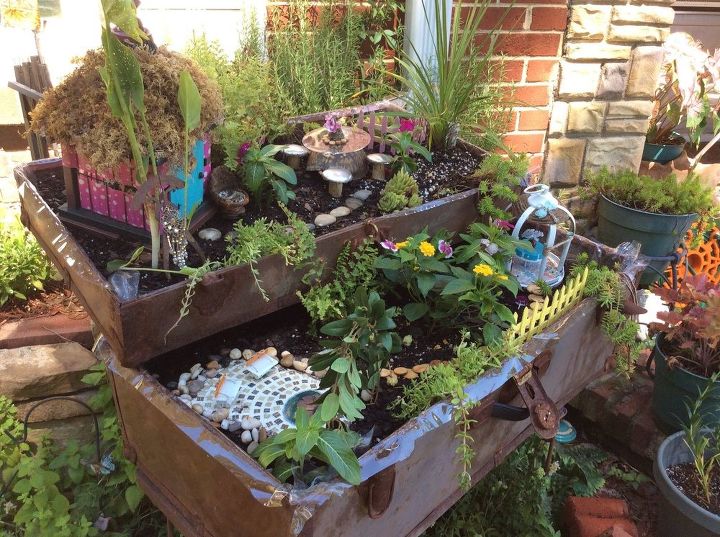
It's no surprise that any fairies living on my property would be upcyclers like me. By raiding my craft room, they created a living space to be envied by the whole fairy kingdom! They have a cozy cottage, a gazebo, a pond and a great picnic area. All nestled amongst plants from my other gardens.
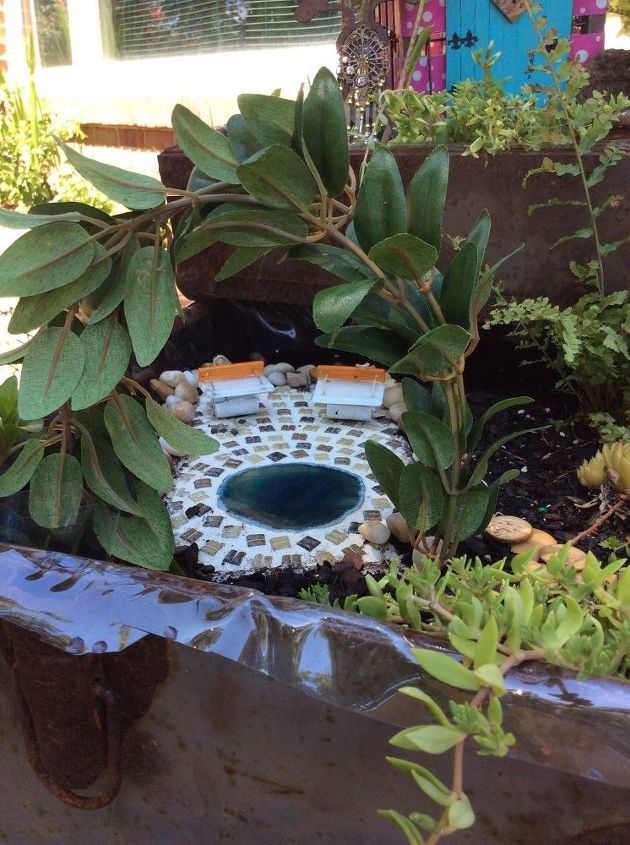
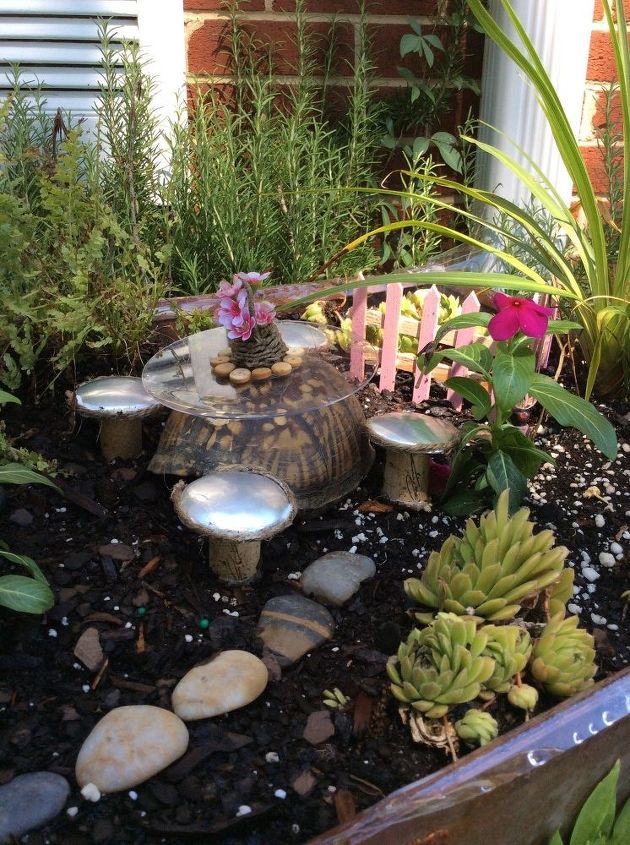
The first thing I noticed unusual was the absence of mosaic supplies. I had these on hand with the thought to try my first mosaic project. They beat me to it! With tiny stone tiles, an agate slab, the plastic top to a disposable food container, grout, grout sealer, and caulk; they created a lovely patioed pond. Complete with benches made from left over glass beads. The arbor is bent artificial plants.
They went all out for the gazebo. They used a CD spool for the bottom, attaching a lantern top with dowels. A fresh coat of paint and decoupaged CD for a floor and viola! That would have been enough for me, but my sprites weren't finished. They painted a lid from a medicine container for a table top and added tiny artificial flowers to a bone bead for the final touch.
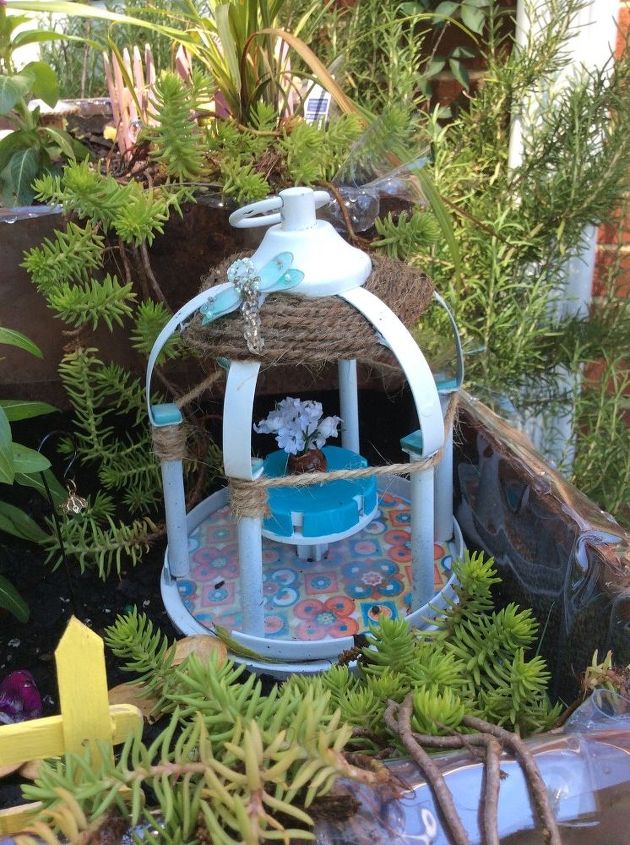
They created this gazebo
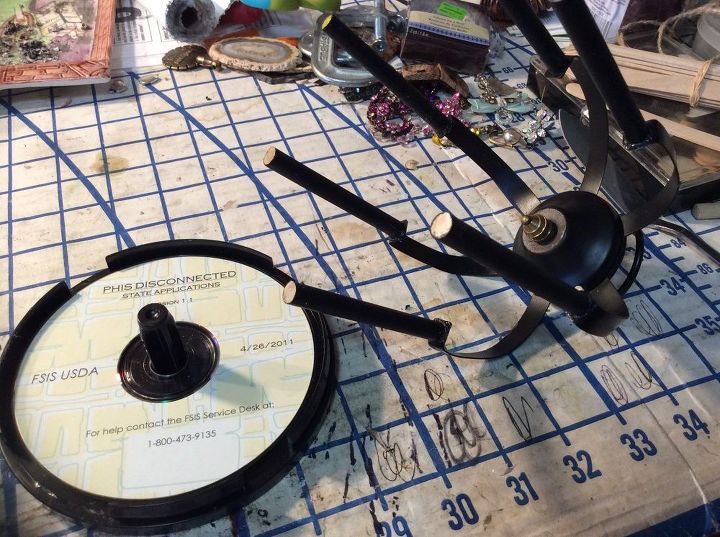
....From this junk!
I think I'm most impressed by the picnic area. Imagine using a turtle shell for a table base! The "glass" top is the blank CD that's always on the bottom of the spool. The stools are wine corks topped off with the bottoms of soda cans. A little twine gives them a nice finish. They wove their own basket and added more tiny artificial flowers. They were even clever enough to stick wires in the bottom of the corks to keep the stools in place!
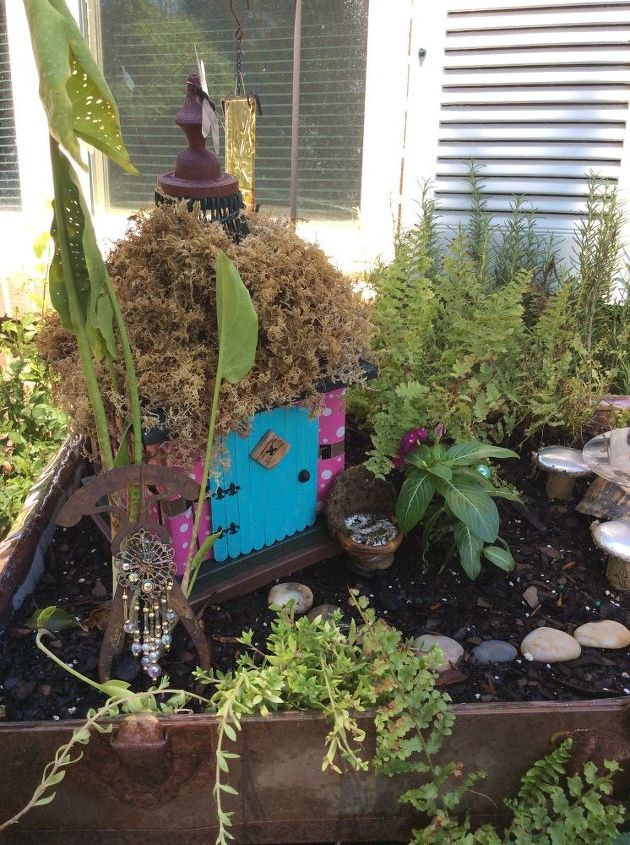
So the cottage was probably their easiest task. I already had a decorative "bird cage" in my supplies. (Not sure how they snuck that out without me noticing!) They used polka dotted duct tape for their walls and a Popsicle stick door. Of course, no fairy cottage is complete without the added moss and a dragonfly!
With the addition of some stone and wooden bead paths, some Popsicle stick fences and a few doo-dads, their garden is complete. I have to admit I spent $5.00 on a few plants to give them as a house warming gift.
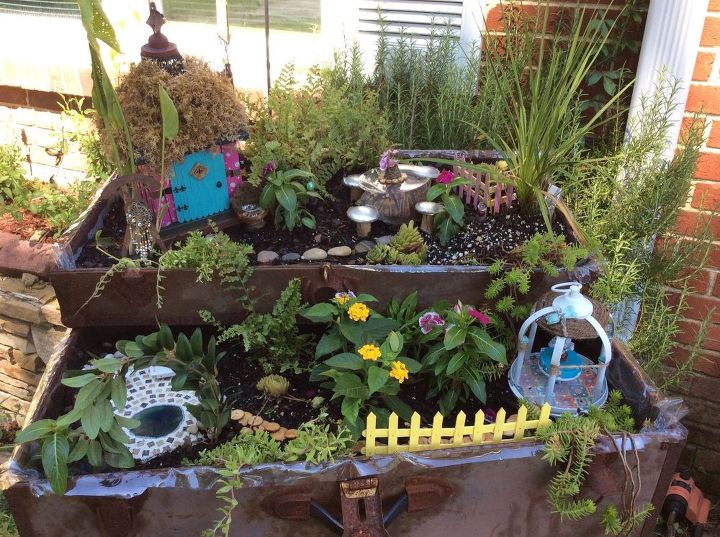
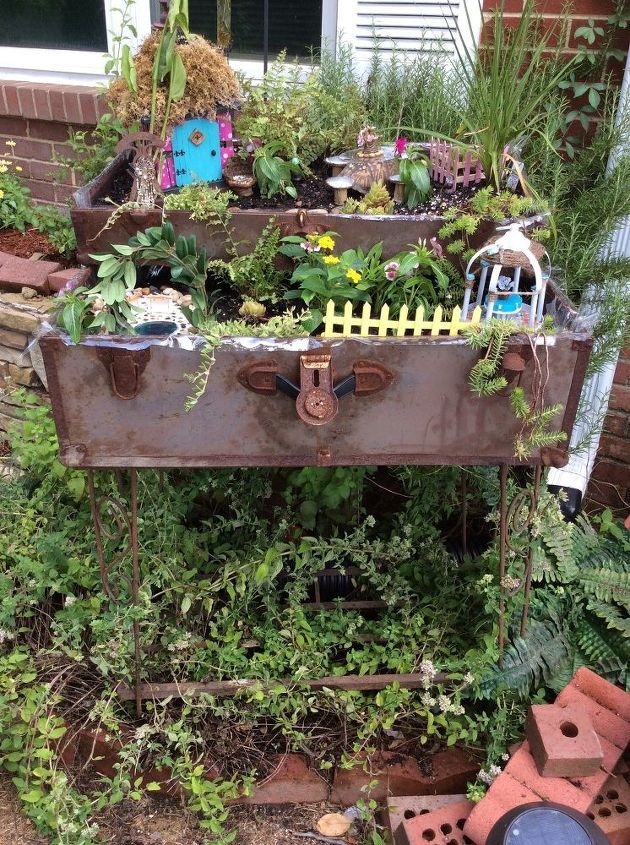
The garden is in an old metal trunk with drilled holes for drainage. There's also a layer of plastic between the trunk and the dirt to give it a little longer life. It's sitting on a rusted, but sound fish tank stand. The trunk lid was removed and placed on top to give two levels. (No stairs or ladder needed, since fairies can fly!) It's sitting over a mint plant and already looks like it's been part of the landscape for years.
All painted surfaces have a few coats of Krylon Crystal Clear Acrylic flat spray for added protection. A lesson learned from the fairies: Annie's white glue is great for indoor projects only. (What were they thinking?) So a couple of items will be re-glued with my personal favorite....E6000.
Comments
Join the conversation
4 of 19 comments
-
This is so inspirational! I will start gathering up my fairy supplies so they can start making their own fairy garden! I have caged (captured) fairies indoors. But I will start a garden as soon as I can find some kind of container first. Thank you for sharing...love it! Hugs
- See 1 previous
-
I love fairy gardens….just don’t know whereto start! This looks like a good place for ideas. You have some really AWESOMEFairy Garden ideas on here .Good website and also thanks for inspiration.Thanksso much for sharing! Thank you!


Frequently asked questions
Have a question about this project?