


From IKEA Billy Bookcase to Craft Cart
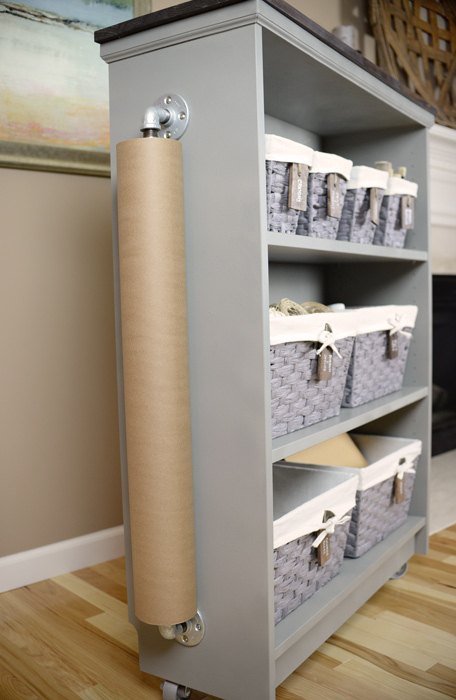
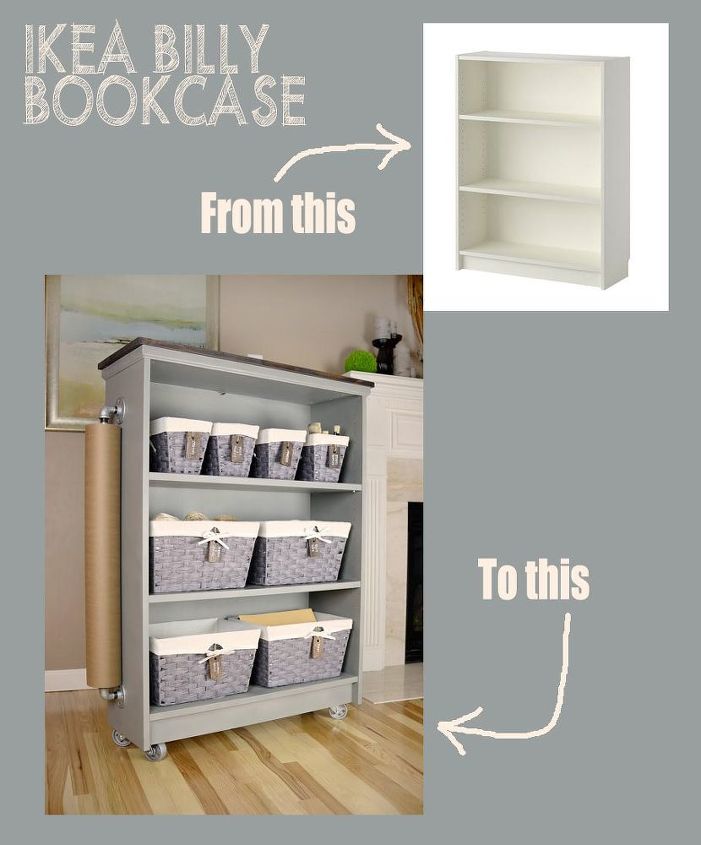
Most of us at some point or another have probably succumbed to the siren song of IKEA furniture. It’s cool, modern and – my personal favorite – dirt cheap. Recently, I transformed a basic white IKEA Billy Bookcase into a rolling craft cart to hold all our family's art supplies.
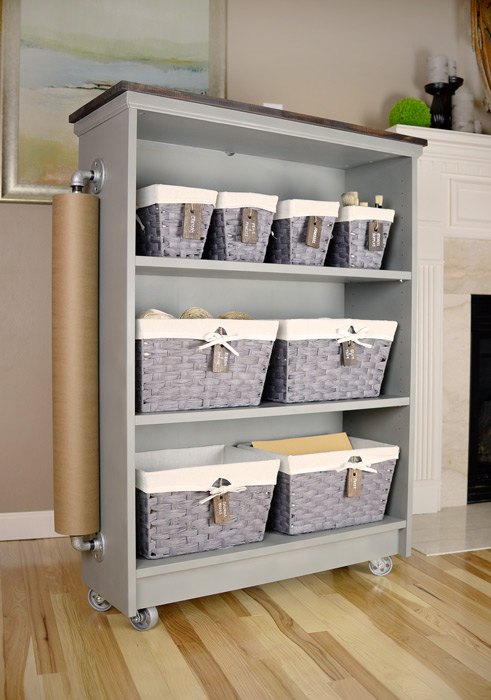
Here's a sneak peek at the final result!
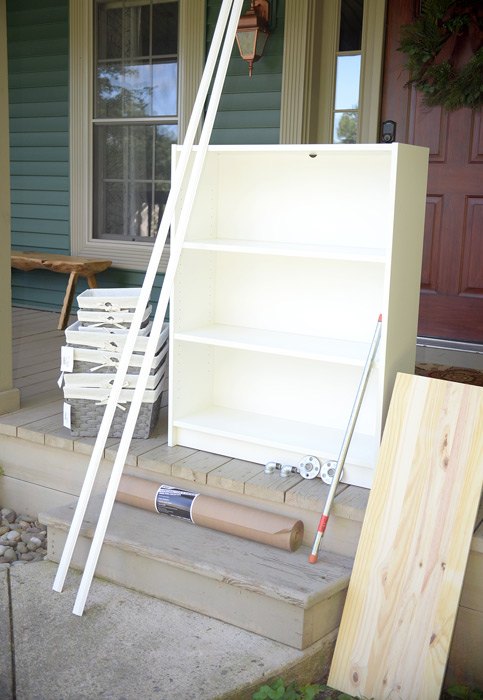
Here are the materials I picked up to complete my project.
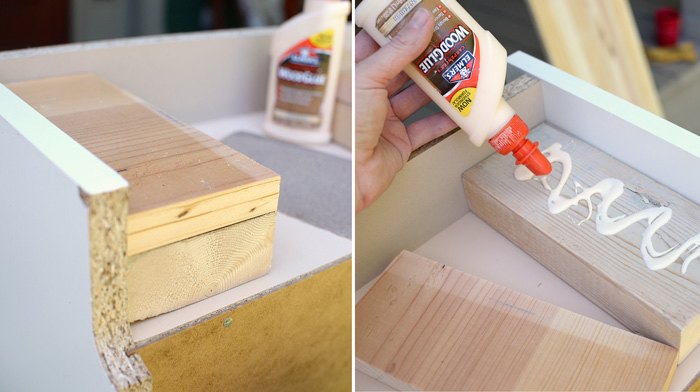
I began by flipping the shelf over. I trimmed out four wood blocks on my miter saw to serve as a base for attaching the cart wheels. I used wood glue to adhere them to the bottom of the shelf and to each other. Tip: Consider adding a plywood base that spans the entire depth of the shelf, so the wheels can be installed as far apart as possible. This will help increase the stability of the cart.
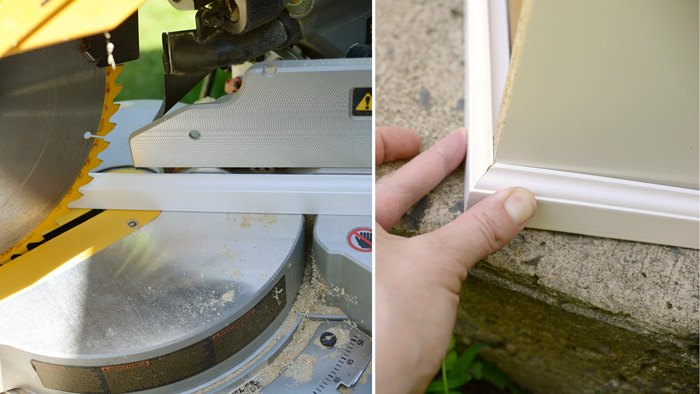
Next, I trimmed out some pieces of all-purpose molding to dress up the shelf. I attached them using a brad nailer.
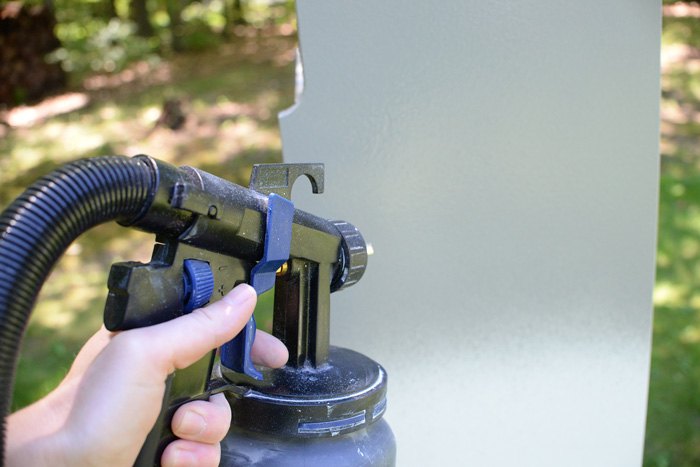
After the wheel blocks and molding were installed, it was time to prime and paint. I used a good primer and Rust-Oleum Chalked Ultra Matte paint in Country Gray for this project.
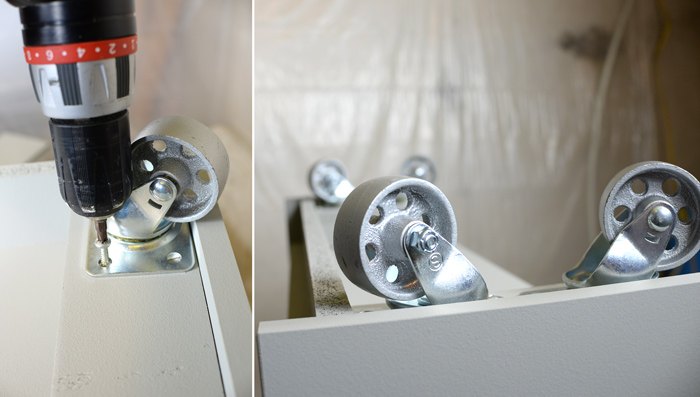
After the paint dried, I attached the wheels to the wood block bases.
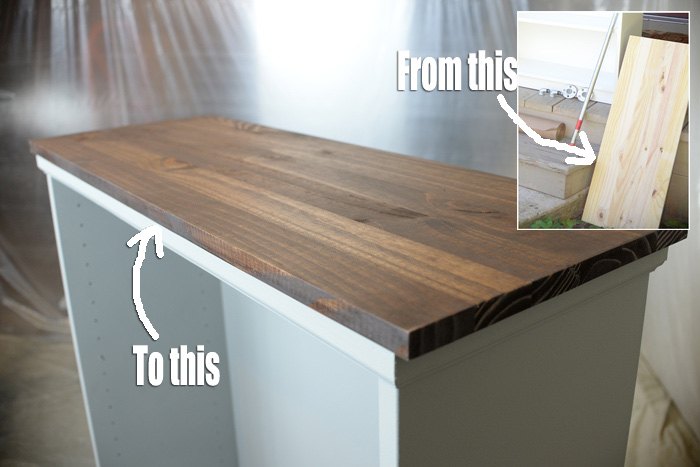
For the top of the cart, I nailed on a wood piece that I stained in a Kona finish.
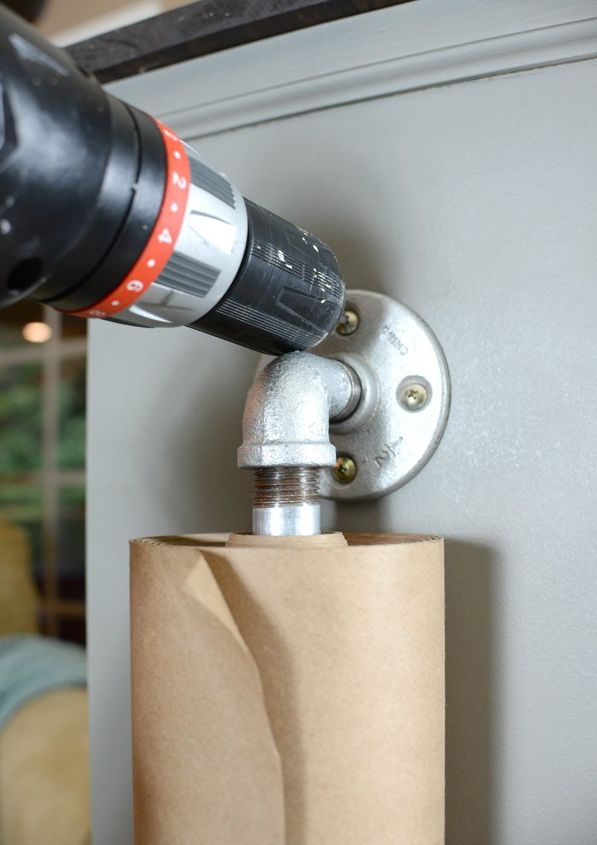
I built a rod to hold the craft paper using basic plumbing supplies: two galvanized 1/2″ elbows, two galvanized floor flanges and one 1/2″ pipe.
Done!
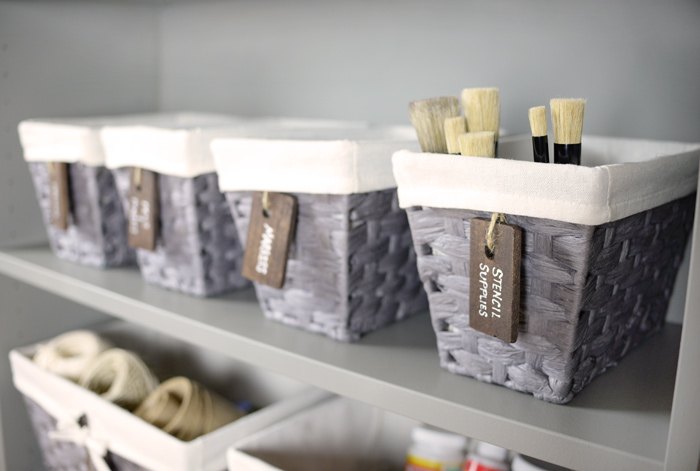
For details on how I made these DIY wooden label tags, click the full post url.
What do you think of the transformation?

Want more details about this and other DIY projects? Check out my blog post!
Comments
Join the conversation
2 of 52 comments
-
Great job, thanks for sharing
-
Just came across your project and I want to know how wide is your paper? Did you happen to add a metal yardstick to slide the paper under to use as a cutting edge?


Frequently asked questions
Have a question about this project?