


Ottoman Transformation

by
Megan Louise
$12
2 Days
Medium
Talk about a Cinderella story. This ottoman, which looked like it was plucked up from my grandmother's living room, was given a complete overhaul. The best part- we picked it up for free! Who doesn't like free furniture?
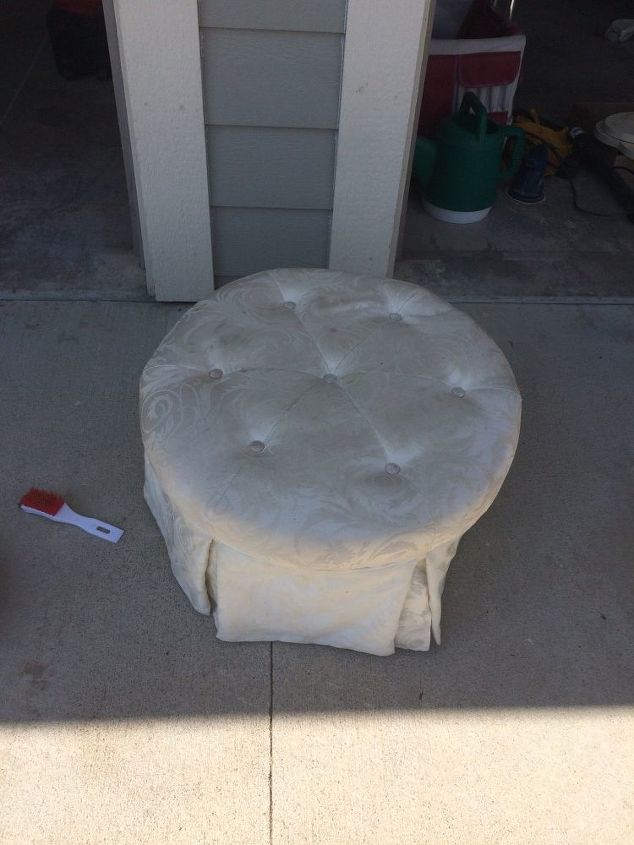
The before. It's a good, solid piece. It was made in the U.S., which can be rather hard to come by these days. It had good bones, it just needed that little something.
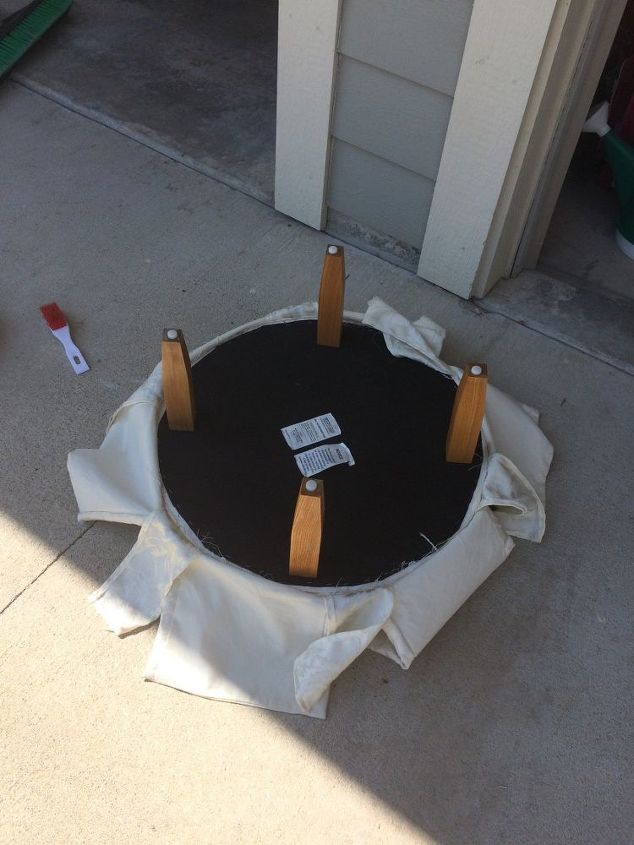
I was originally going to keep the legs. The plan was to sand them down and give them a dark stain, but in my haste of wanting to jam out another project as quickly as I could, I didn't sand the legs down enough (but for some reason I still decided to stain them). So, nix the old legs and find a new set. Easy, right? Well, in my mind I pictured birch legs. That shouldn't be too hard to find in NW Montana, but alas.
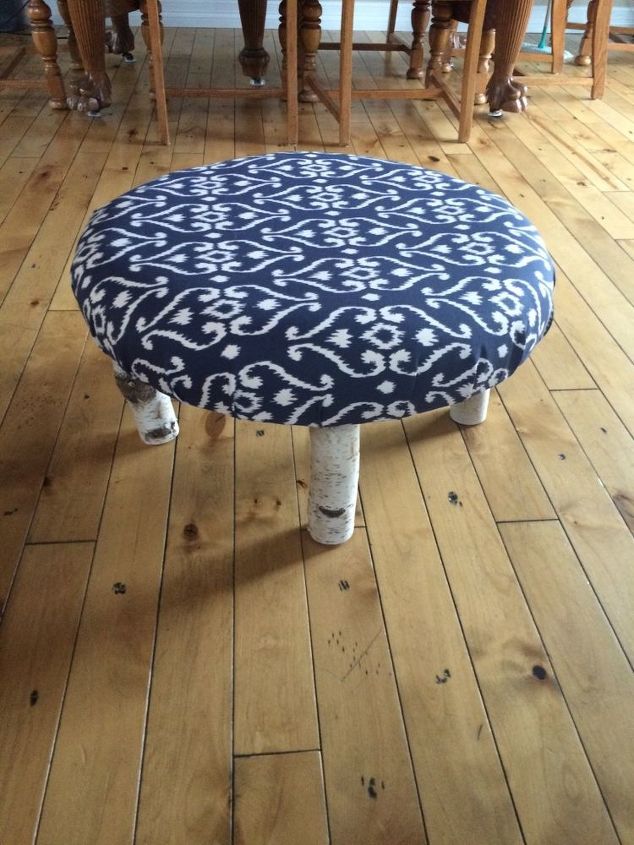
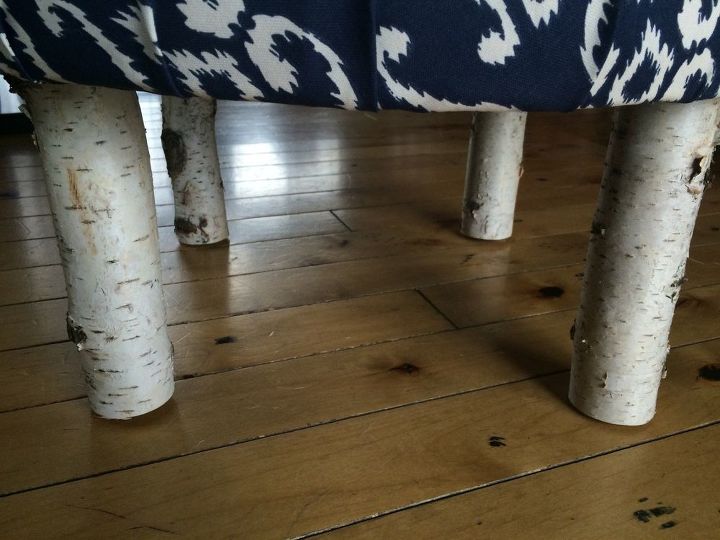
Now, I said the best part was that the ottoman was free. The even better part- we got the birch for free! My original plan of digging through a forest didn't really pan out, but my neighbor had a solid branch that she just gave to us. I picked out the fabric from Joann's. It's a durable outdoor fabric and it was conveniently 50% off! I'm a sucker for navy prints.
Comments
Join the conversation
2 of 20 comments
-
I love the "branch" legs! Will get some this summer while at my Sis in-laws in Billings!! :) Yay!
-
Using 3 legs solves the leveling issues. It's the 'milking stool' principle. Check it out. I even use only 3 when applying soft tabs under lamps, glass vases, etc.


Frequently asked questions
Have a question about this project?