


DIY Laundry Hamper-Dirty Laundry Belongs in the Basket, Not Online
Okay, so I couldn't resist with the title. I used to be on the high school newspaper staff and one of my favorite things about it was coming up with "creative," off-the-wall titles for things so you could get the readers' attention quickly. I know....I'm a nerd. I'm also have a math degree and sometimes solve problems using calculus when I could easily use algebra to get close enough. When I was in college, my engineering teacher would pick on me and make jokes about the "differences between an engineer and a mathematician." Basically the bottom line was that engineers live in the real world and eventually they say "close enough" but mathematicians live in a fantasy world and always say "but that's not exact." Whatever...I'm the best of both worlds I guess....
Okay, so enough about me...I'd much rather be building something than reminiscing about college. That being said, my latest creation was a wooden laundry hamper. A friend of mine requested this and sent me this picture as an example.
Okay, so enough about me...I'd much rather be building something than reminiscing about college. That being said, my latest creation was a wooden laundry hamper. A friend of mine requested this and sent me this picture as an example.
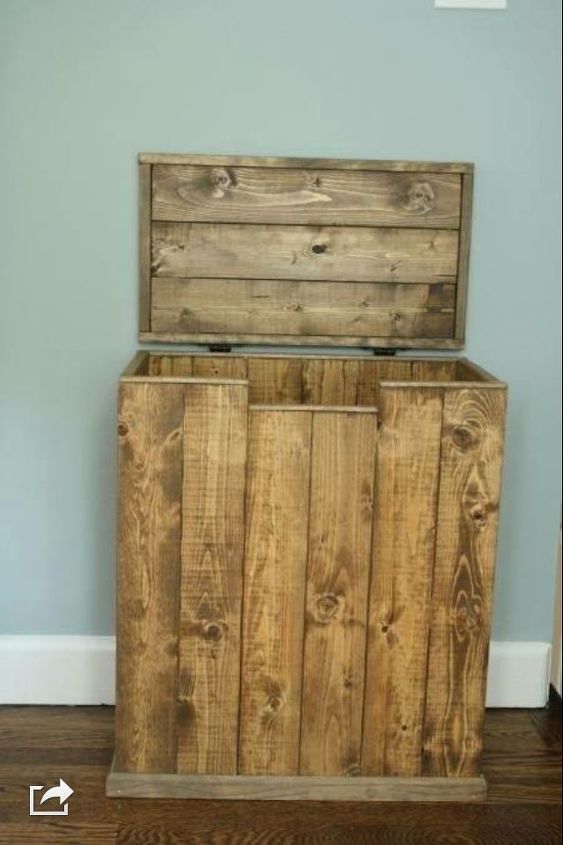
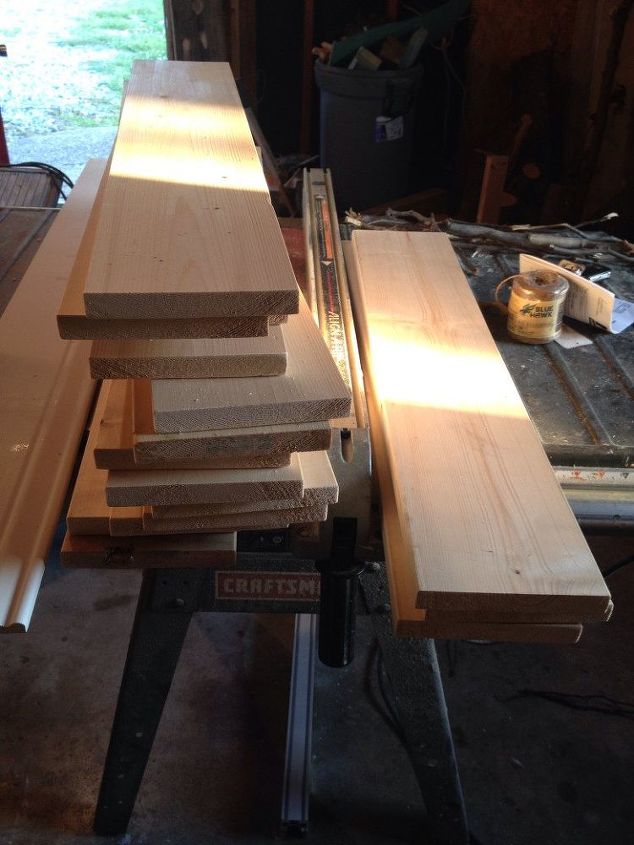
She wanted it to be between 15-18 deep x 25-28 wide x 32 tall (without the lid). So I did the math really quick on what size boards to use that would be the cheapest option. The picture looked like 1x6s, and that turned out to be the cheapest option that got the closest to the right dimensions. I could have used any size, but my table saw is out of order right now, so I couldn't rip any boards down.
Then I assembled the sides with pocket holes and screws. I screwed each side together as one big piece, then attached all the sides together to make a "box" without a bottom.
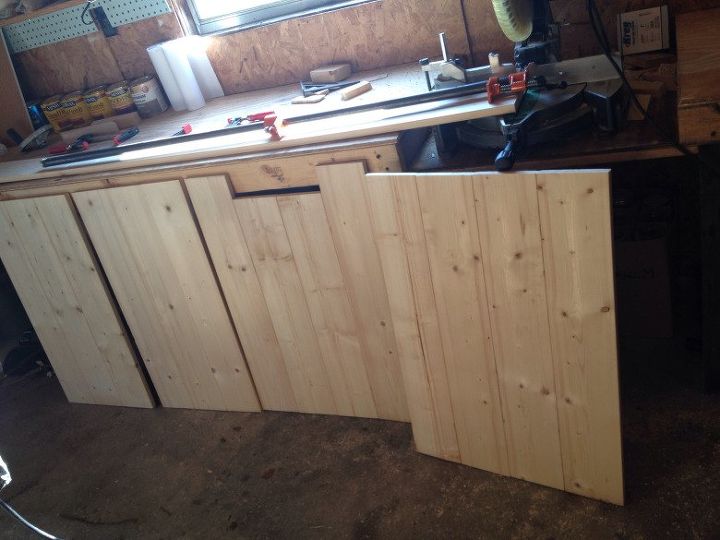

Notice the boards are butted together so that the front and back of the side panels are attached to the sides of the front and back panels. This was because I didn't want to add extra depth to the piece because it couldn't be bigger than 18 deep.
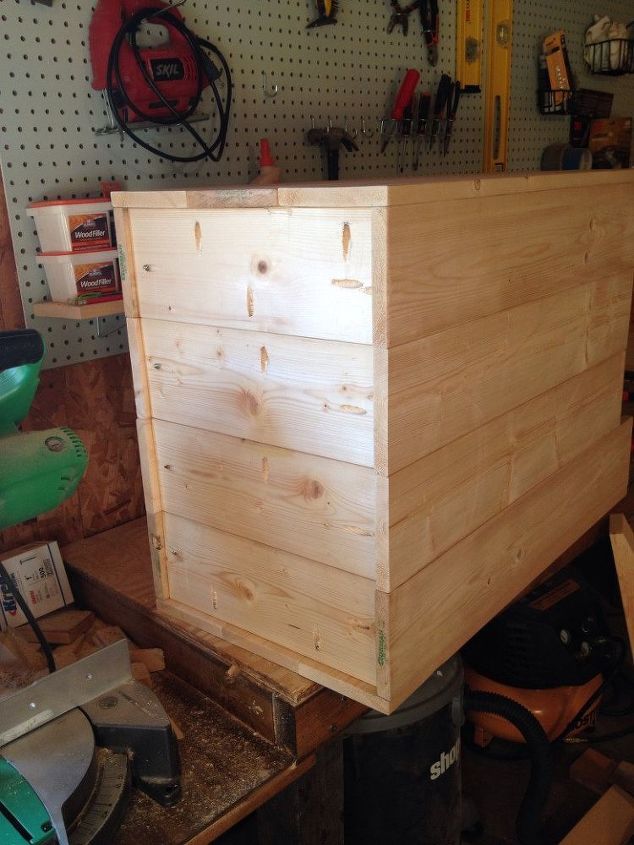
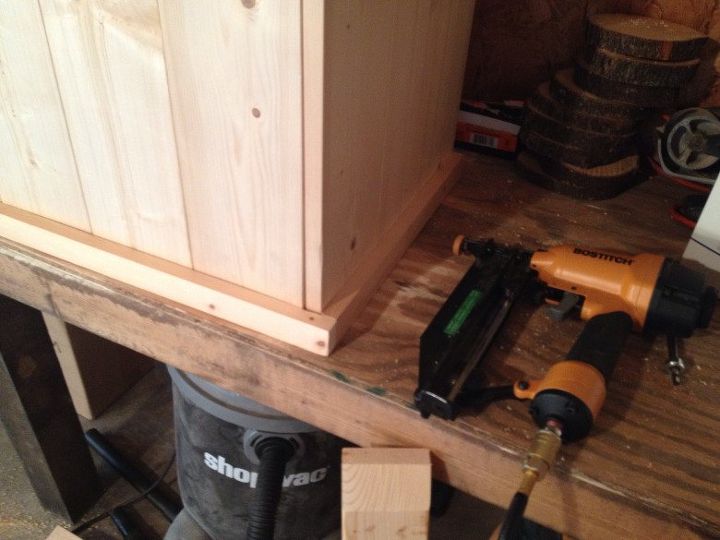
Then I put the base trim on the bottom using a nail gun. I used some scrap 12 that I had. I didn't put it on the back because I assume this will be against a wall and if I put it on the back it would just be a dust collecter haha.
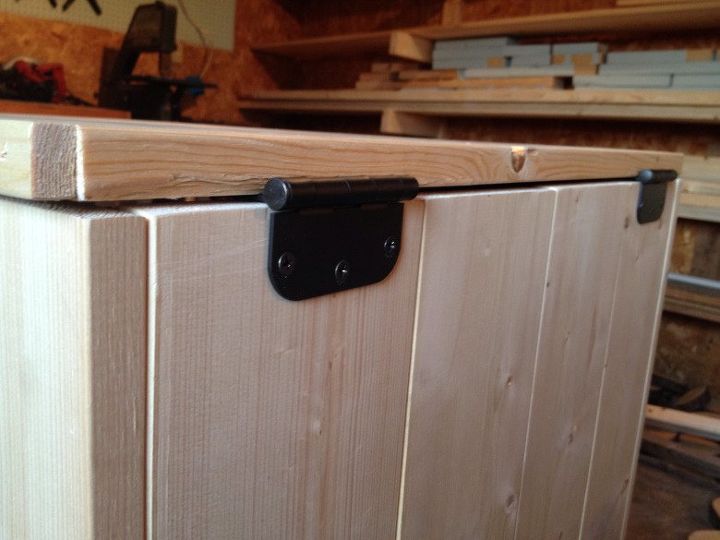
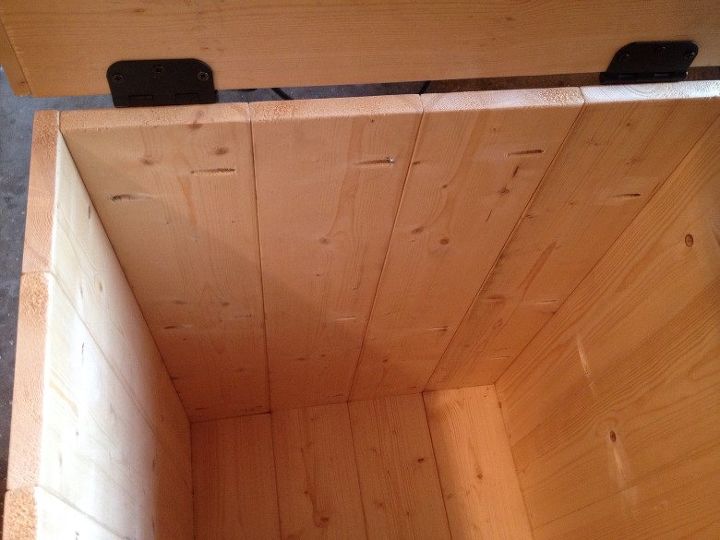
Then I measured for the lid. I cut three 1x6 boards the length of the total width of the top (about 23 1/2). I had some scrap 1x?? (It was thin) so I cut it to length and attached it to the boards around the front and sides using my nail gun again. Then I screwed the hinges to the lid and the back of the box.

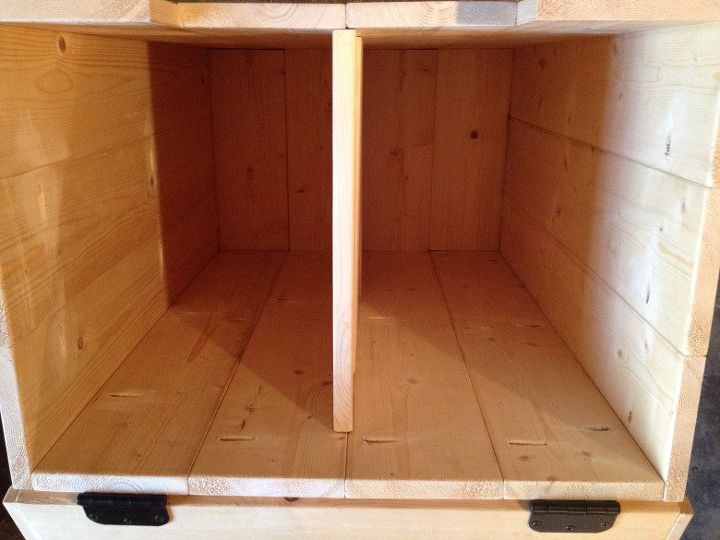
My friend also requested a divider in the box. So I cut five boards the length of the total depth of the opening from front to back (about 15) and used pocket holes and screws to attach them.
And it was complete! I sanded down the insides around all the pocket holes because I didn't want clothes to snag on them since this will be used for laundry.
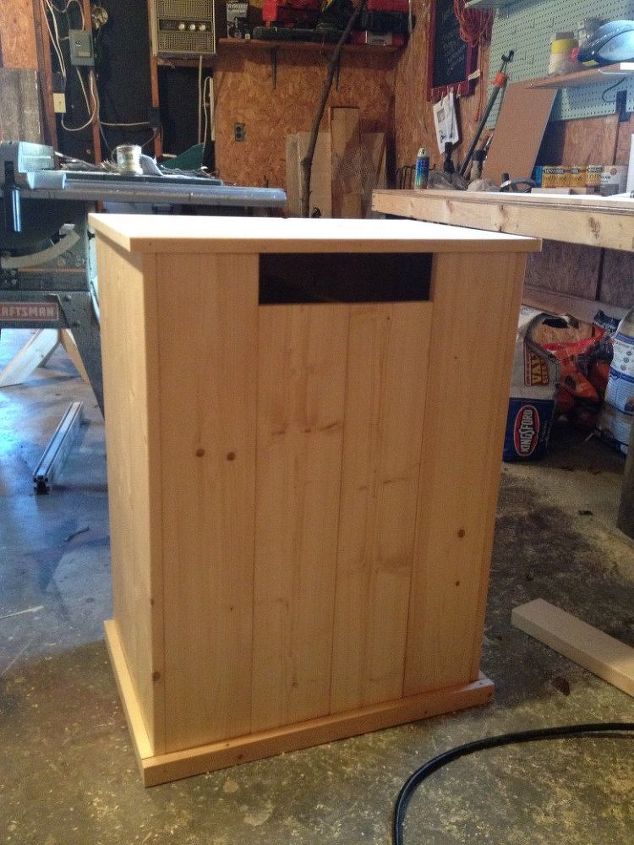
She wanted to finish it, so right now it is just natural, but I kind of like it that way :)
So I took care of that :) Don't tell Danny where I dumped it. Just kidding he already knows. I'm not very sneaky.

Want more details about this and other DIY projects? Check out my blog post!
Comments
Join the conversation
2 comments
-
I SO need one of these! Amazing.
-
Fantastic! Nice job! Hugs


Frequently asked questions
Have a question about this project?