


Hand Painted Nautical Themed Sideboard With Ink Jet Transfers

1 Material
$70
10 Hours
Medium
Found this sideboard on Craigslist and couldn't decide what I wanted to do with it. Had a customer looking for a piece of furniture for her kitchen that could be nautical themed for her newly renovated home after being destroyed during Hurricane Sandy. I clean every piece as soon as it comes into my home with a vinegar, water and original Dawn dish deterdent solution to remove any previously used wood polish and or grime from previous years of use. Next I sand the piece with 60 grit sandpaper to give it some tooth for the paint to hold onto. I went to my palm sander for the top using a 60 grit pad to strip it to bare wood. Shabby Paints is my go to paint I love it for many reasons mostly because it's chemical free. I used their Alaimo (cream) color 3 coats. Next I used their hazlenut revax to give it an antiques/aged look Using a damp sponge to apply and wipe away to highlight areas. The top I used my favorite stain Shabby Paints gelato gel stain using a mixture of two colors dark roast and dark chocolate. I applied using a damp sponge to wipe on 2 coats drying in between each coat easy peasy. Next, road trip... I went to Staples on the graphics fairy website for black and white images of the crab, anchor and Seahorse. The reason I went to Staples was they needed to be printed from a LASER JET printer. I have tried to use my at home Ink Jet and it does not work at least for this technique. Luckily none had to be reversed for this project so this was also easy. I cut them to fit used Liquitex to apply them where I wanted to put them and let dry over night (I have also been told it doesn't take this long but this works for me). In the morning I took a damp sponge and let it sit on the paper until the image could be seen through the paper. Then slowly wiped the paper away this takes some time and patience is a virtue. After all the paper is gone and dried. I distressed the pieces around all the edges and over the images this will also give an aged look using a medium grit sanding block It also gets any of the excess liquitex off. I decided to add the words after the fact so I printed the words Lipton's Marina off my computer and used carbon paper to trace the words on to the piece and shaded in with a paint pen. (This can also be done as a transfer image but you must always remember to reverse or flip the image prior to printing). Then, I sanded the entire piece with a 220 finishing paper for a smooth to touch finish. Next, I sealed my piece for protection using polyvine. I had this beautiful nautical themed fabric left over from another project and decided to decoupage them into the drawers using an even ratio of modge podge and water and used as liners since the drawer bottoms were kind of beat up with age. I think this makes a world of a difference with your final result and doesn't add much time on to your project.
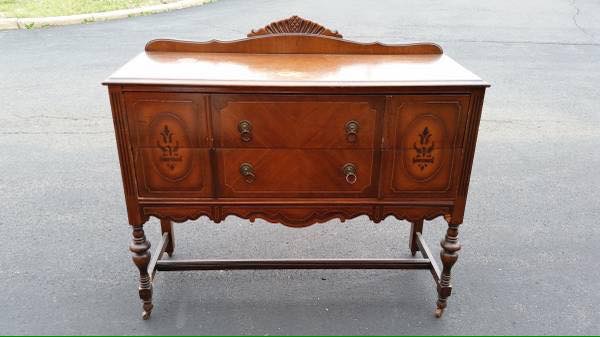
Cleaned with vinegar, water & dawn dish detergent to remove polish and grime. Then lightly sanded with 60 grit paper on the body and legs for some tooth. Top was sanded to bare wood using 60 grit pad on palm sander.
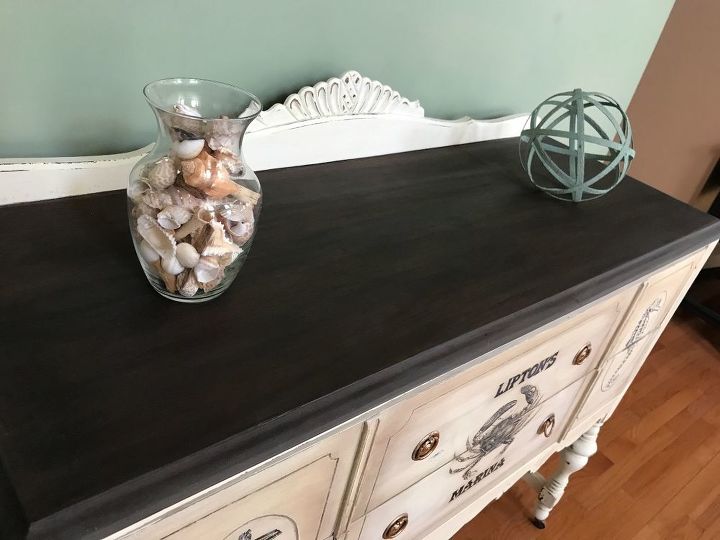
I used Shabby Paints gelato gel stain mixed dark roast and chocolate. Using a damp spone wiped on. 2 coats drying in between. Super easy!

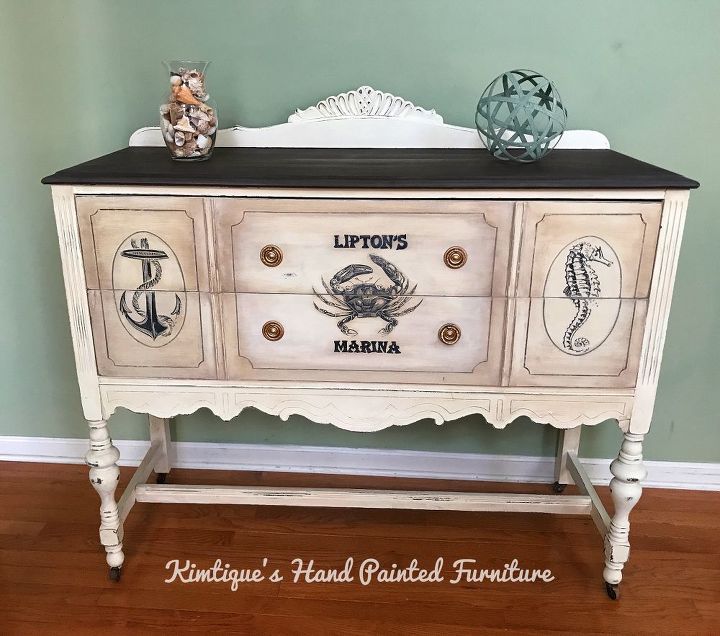
Painted body and legs with Shabby Paints Alaimo (cream color) 3 coats. Next used Shabby paints hazlenut revax wiping on with damp sponge for an antiqued aged look.
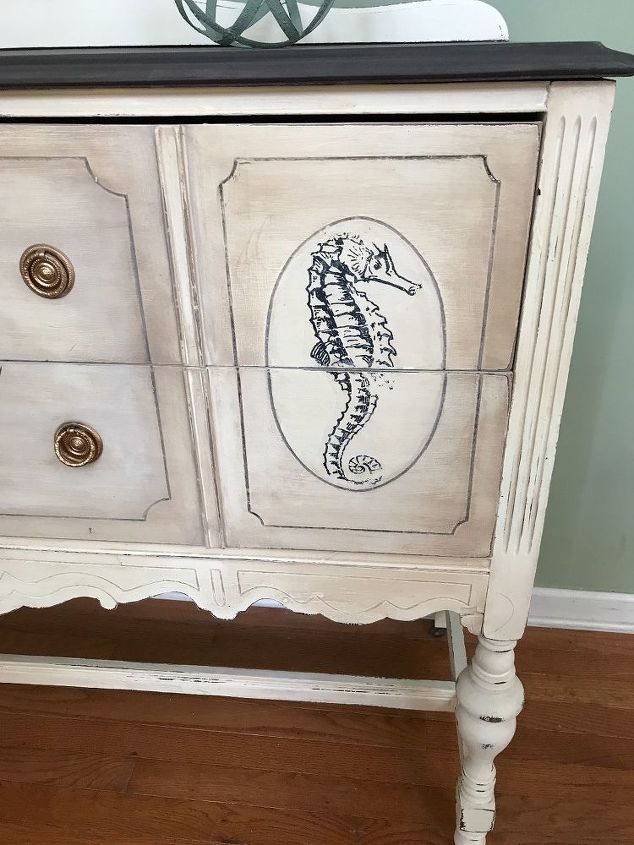
I went to Staples to use their laser jet printer and printed three nautical images I found on The graphics fairy. Tip: I always print 2 of each in case of any mistakes etc. I cut them out and use and artist brush to apply the liquitex even thin coats in the area of the piece I want to apply them and let dry overnight.
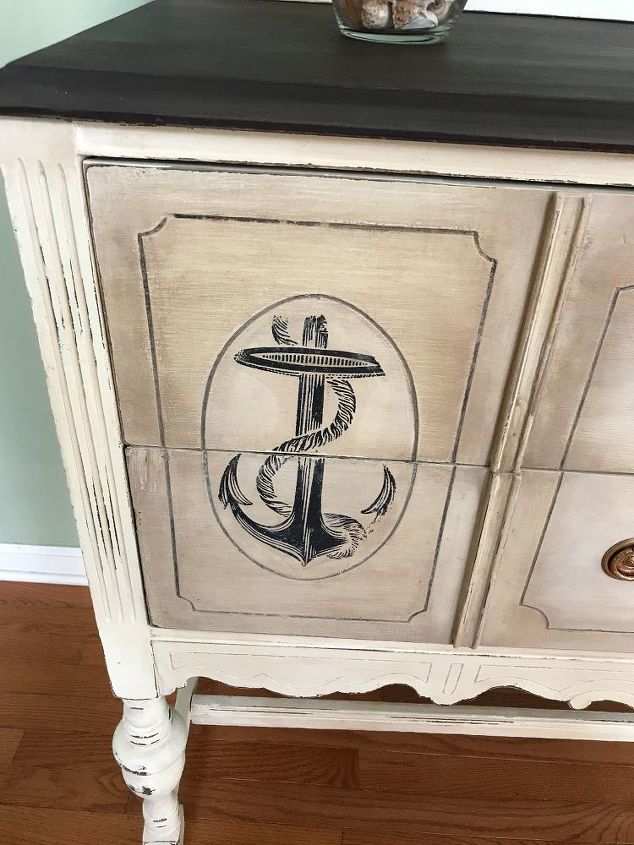
The following morning I used a damp sponge and let sit on paper until the image is completely visible and gently rub the paper off with my finger until all the paper is gone and image is exposed completely. I let dry and sand with a medium sanding block even over the images to remove any paper and dried liquitex. I also distressed the whole piece at this time.
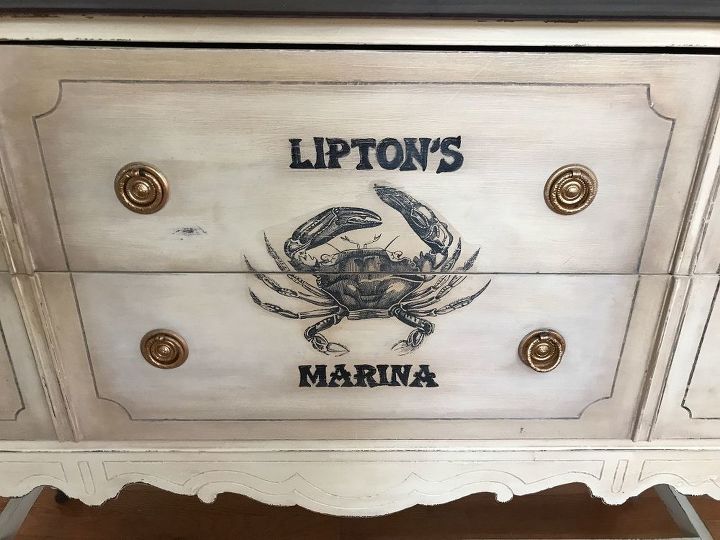
I decided to add the words after the fact so I printed the words out using my computer and used carbon paper to trace the words then filled in with a paint pen. This can also be done as an image transfer however always remember to flip/reverse the words prior to printing out. I also painted the original hardware gold. You can view more of my projects at Kimtique's Hand Painted Furniture on FB
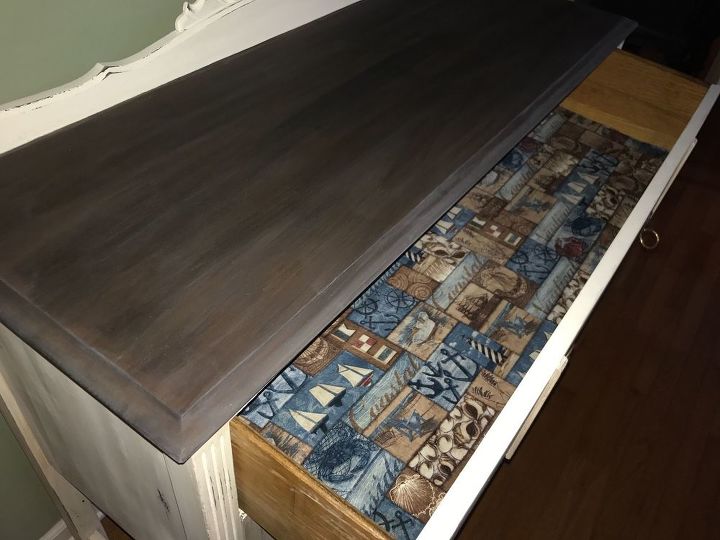
I had some beautiful nautical themed fabric leftover from a previous project and since the age and condition of the drawers decided to line the drawers decoupaging them using an even ratio of modge podge and water. I think this makes a world of a difference and customers always appreciate the added touch. It's super easy too.
Using a 220 grit sanding paper I sanded the whole piece for a smooth to touch finish. Finally sealed with 3 coats of polyvine for protection.
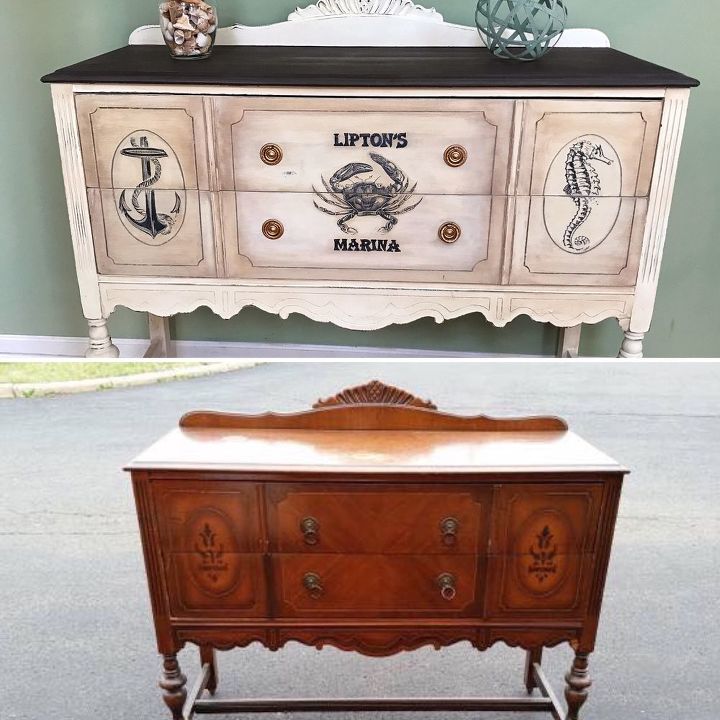
Before and After
Please go to Kimtique's Hand Painted Furniture on FaceBook for more great projects. Thank you, I welcome any questions you may have.


Frequently asked questions
Have a question about this project?