


How to Easily Turn an Old Vanity Into Nightstands
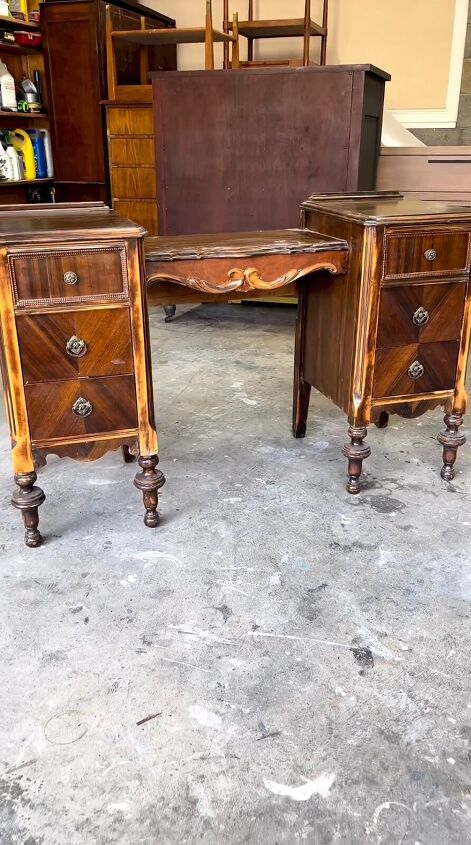
I recently stumbled upon a vintage vanity on Facebook Marketplace and had a light bulb moment – why not transform the vanity into nightstands?
In this step-by-step guide, I'll walk you through the process of splitting the vanity, refinishing the legs, staining, painting, and distressing to create a pair of unique nightstands that will add character to any bedroom.
So, grab your tools, and let's get started!
Tools and materials
- Vintage vanity (Check thrift stores, online marketplaces, or garage sales)
- Screwdriver
- Hammer
- Sandpaper (various grits)
- Gel stains (colors: natural cork and old-fashioned)
- Shellac primer
- Paint (colors: old gray and beige)
- Paintbrushes
- Foam brushes
- Cloth or rags
- Protective gloves and eyewear
- Drop cloth or newspapers
Table of contents
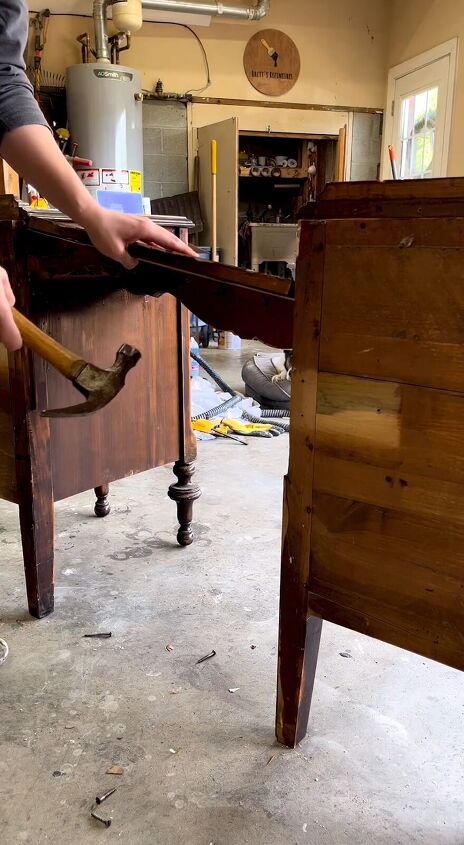
Step 1: Dismantling the Vanity
Begin by disassembling the vanity. Carefully remove all the screws and extra support pieces using a screwdriver. With the components detached, use a hammer to gently separate the two different sides of the vanity. This step might require some patience and finesse, but don't rush it.
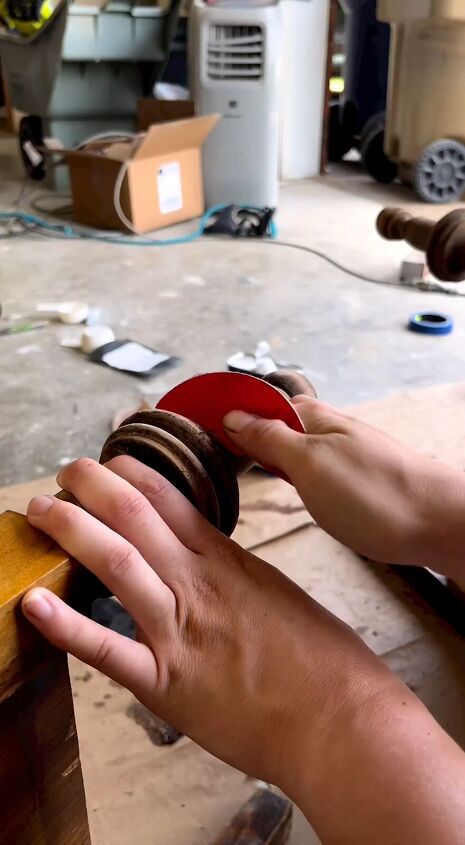
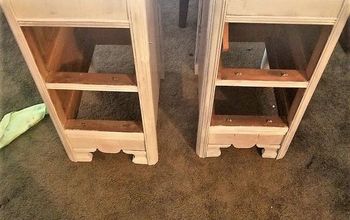
Step 2: Refinishing the Legs
With the two halves of the vanity separated, focus on the legs. Start by stripping down the legs using sandpaper of varying grits. This process might seem tedious, but trust me, it'll pay off in the end. Sand until you reveal the natural wood underneath the old finish.

Step 3: Staining the Legs
Once the legs are sanded smooth, it's time to add a touch of color and depth. Apply gel stains in the colors "natural cork" and "old-fashioned" using foam brushes or a cloth. Experiment with the shades to achieve the desired look – you can go as bold or as subtle as you like. Wipe off excess stain with a cloth for an even finish.
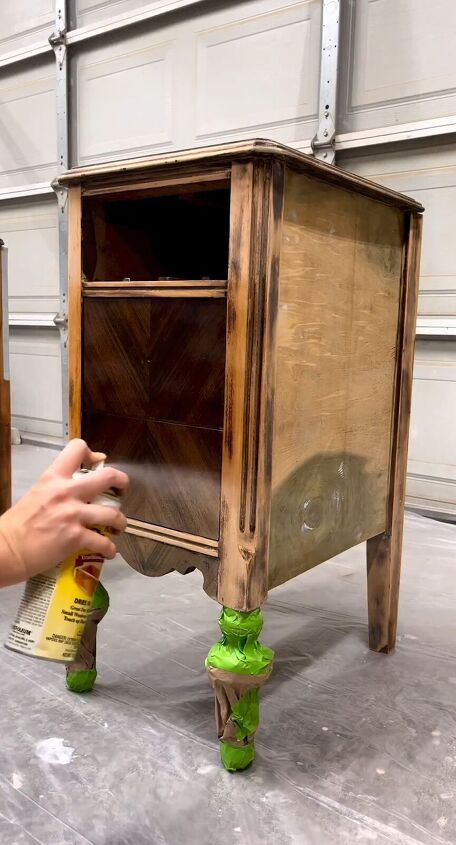
Step 4: Priming the Surface
To ensure a smooth and lasting paint finish, apply a layer of shellac primer to the surface. This step is crucial if you plan to distress the nightstands later. Allow the primer to dry thoroughly before moving on to the next step.
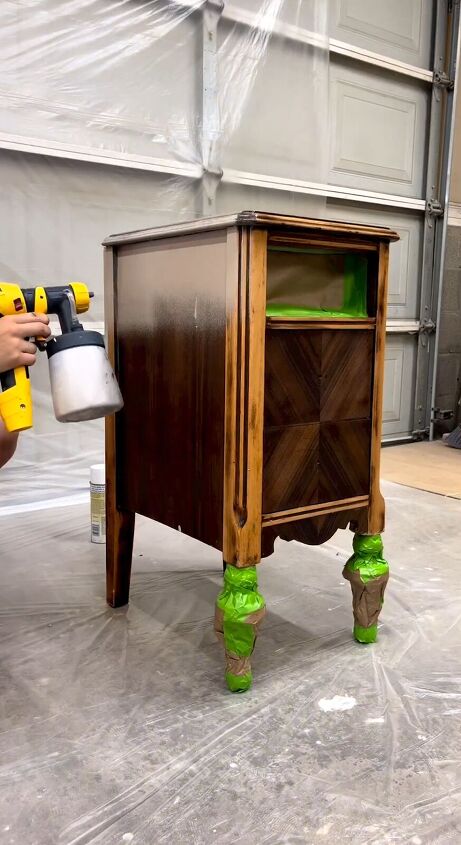
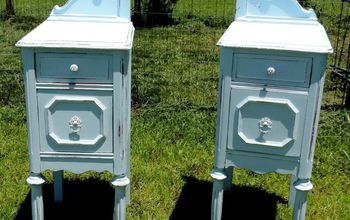
Step 5: Painting and Distressing
Now comes the fun part – painting! Mix your chosen paint colors to create a custom hue. Apply the paint evenly, allowing each coat to dry between applications.
Step 6: Final Touches
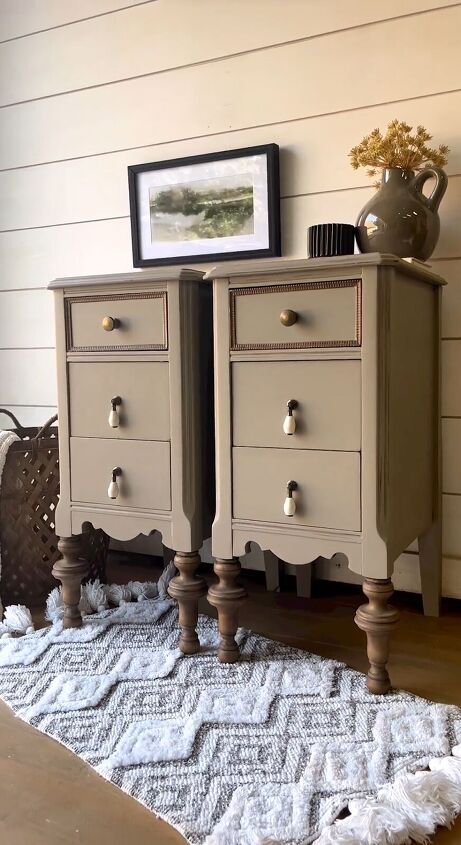
If desired, apply a clear protective finish to seal and protect the painted surface. You can also change out the hardware with new nobs or handles. Now stand back and admire your work – what was once a neglected vanity is now a pair of charming nightstands ready to adorn your bedroom.
Before:
After:
Vanity into nightstands
Congratulations, you've successfully transformed an old vanity into two stunning nightstands that tell a story of creativity and craftsmanship. This project might have involved a bit of elbow grease, but the end result is well worth the effort.
Not only have you saved furniture from ending up in a landfill, but you've also added a touch of your personal style to your living space. So, pat yourself on the back, enjoy your new nightstands, and keep that DIY spirit alive!
Follow @rhettsrefinishes on Instagram for more DIY ideas.


Frequently asked questions
Have a question about this project?