


How to Make a Quick & Cheap DIY Barn Door in a Few Easy Steps

Are you looking for easy DIY barn door ideas? We’ll show you how to build a DIY barn door. We made one quickly and cheaply. Follow these quick steps to making an easy DIY barn door.
Tools and materials
- Old beat-up door
- Shiplap panels
- One by twos (1x2) lumber
- Quarter inch by four inch (1/4" x 4") poplar boards
- Wood filler
- Paint (Sherwin-Williams Tricorn Black or preferred color)
- Sliding door hardware kit
- Ledger board
- Black spray paint
- Tape measure
- Circular saw or table saw
- Hammer or nail gun
- Level
- Screwdriver
- Paint brushes or paint sprayer
- Putty knife
Steps
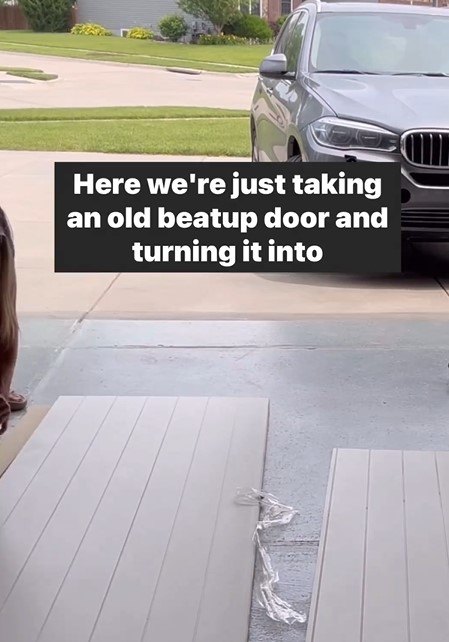
1. Clean and prepare the old door
Ensure the old door is clean and free from any loose debris or paint. Sand down any rough areas to create a smooth surface for the project.

2. Install shiplap panels
Measure the dimensions of the door and cut the shiplap panels to fit its surface. Use a circular saw or table saw for cutting. Apply construction adhesive to the back of the shiplap panels and press them firmly onto the door. Use a level to ensure they are straight. Let the adhesive dry according to the manufacturer's instructions.
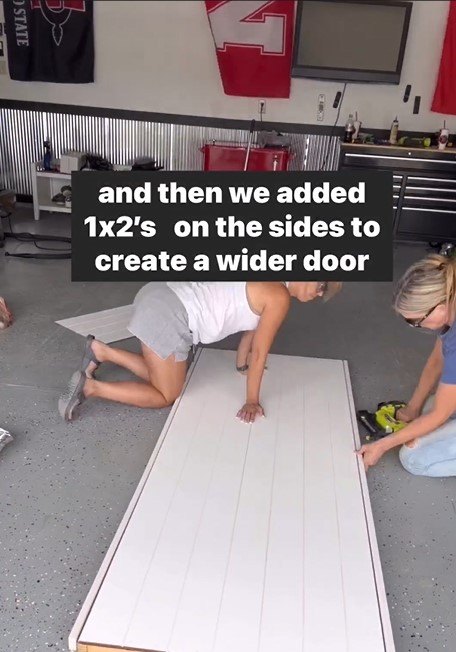
3. Add one-by-twos
Attach one-by-twos to the sides of the door using a hammer or nail gun. These will create a wider appearance for the door, ensuring it covers the desired opening effectively.

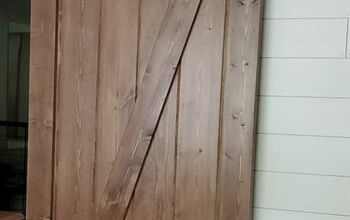
4. Attach ¼-inch by 4-inch poplar boards
Place the quarter-inch by four-inch poplar boards on the face of the door to create the classic "barn door" effect. Position them evenly and use the nail gun to secure them in place.

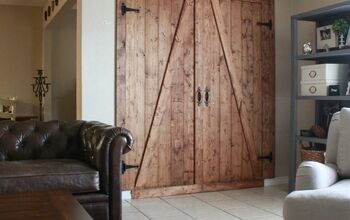
5. Wood filling and painting
Fill any gaps between the boards and shiplap, as well as nail holes, with wood filler. Allow the wood filler to dry and then sand it down to achieve a smooth surface. Paint the door with Sherwin Williams Tricorn Black or the paint color of your choice. Apply as many coats as needed, allowing each coat to dry before adding the next.
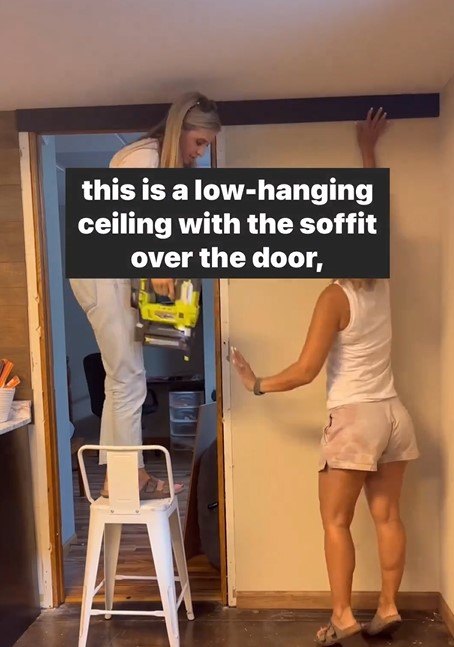
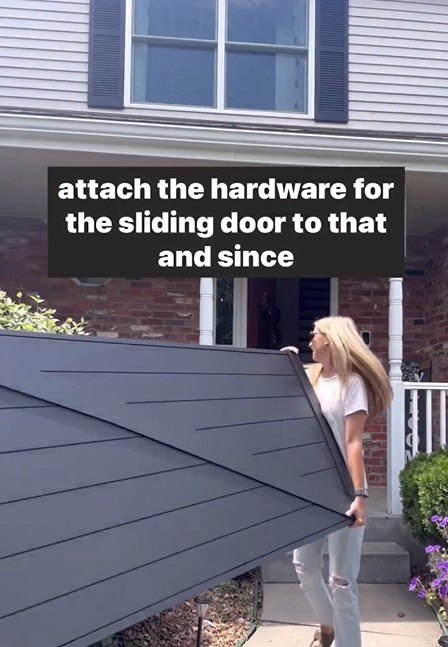
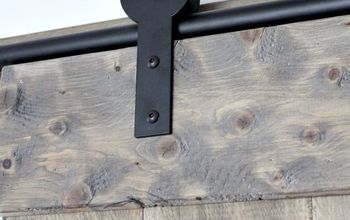
6. Install the sliding door hardware and ledger board
Locate the position where you want the sliding door hardware to be mounted. Attach the ledger board above the door frame using screws and a screwdriver. Make sure the ledger board is level and securely fastened to the wall.
Attach the sliding door hardware to the prepared ledger board according to the manufacturer's instructions. Ensure the hardware is level and secure, as it will bear the weight of the door.

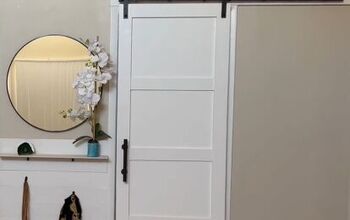
7. Hang the sliding door
Carefully lift the newly transformed sliding door and hang it on the installed hardware. Test the sliding motion to ensure it moves smoothly along the track.
DIY barn door
Congratulations! You've successfully turned an old beat-up door into a beautiful DIY sliding barn door. This rustic and practical addition will enhance the aesthetic of your space while saving valuable floor space. Enjoy your newly upcycled sliding door and let us know in the comments if it was easy to make!
For more ideas, follow @a_bit_unexpected_diy on Instagram


Frequently asked questions
Have a question about this project?