


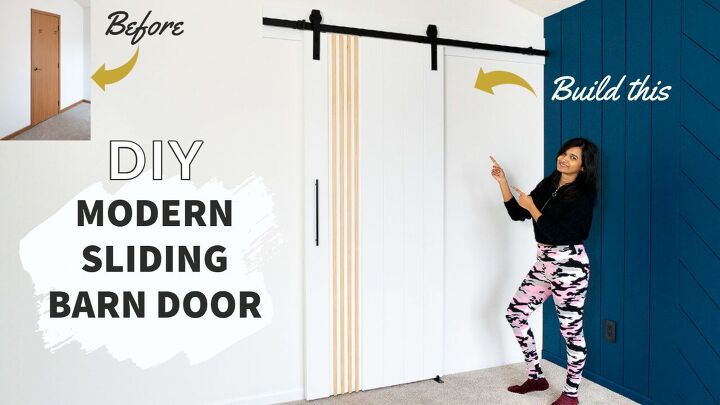
DIY MODERN SLIDING BARN DOOR
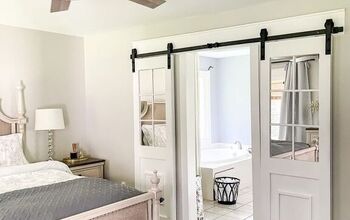
Never thought sliding door build is this easy. I built this DIY Modern Sliding Barn Door for our Master bathroom as a part of the bedroom remodel series. In this article, I have a detailed tutorial on how to build this Modern sliding door. Its very simple and looks elegant!
You can find the links to the products I used in this project at my website https://www.thenomadstudio.com/diy-modern-sliding-barn-door/
or in the description below the video.
Measure & calculate the door size:
This existing door opening is 28 inches wide and 81 inches and there is 2 and half inch trim. For sliding doors like this, consider the final size to be a little more than the trim on all sides. The final size of my door is going to be 36inches by 84 inch.
Hardware selection:
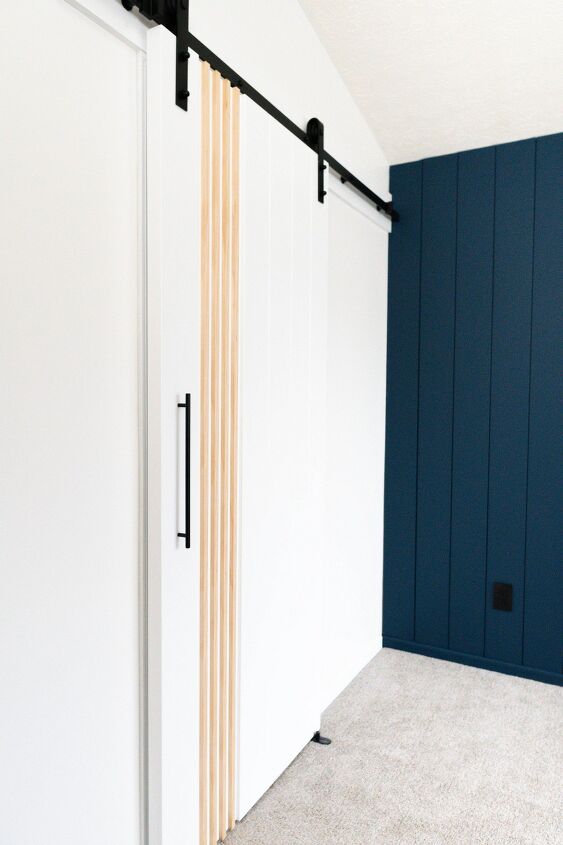
Barn door hardware comes in different styles and colors. Depending upon the width of your final door size, determine which hardware do you need and order accordingly. I bought mine from Amazon for a good deal. They were nearly half the price than the ones I found in local hardware store and very sturdy. Its 6.6 Feet long single track with J style hangers in black that can fit doors up to 40″ wide.
Door material, thickness and pattern:
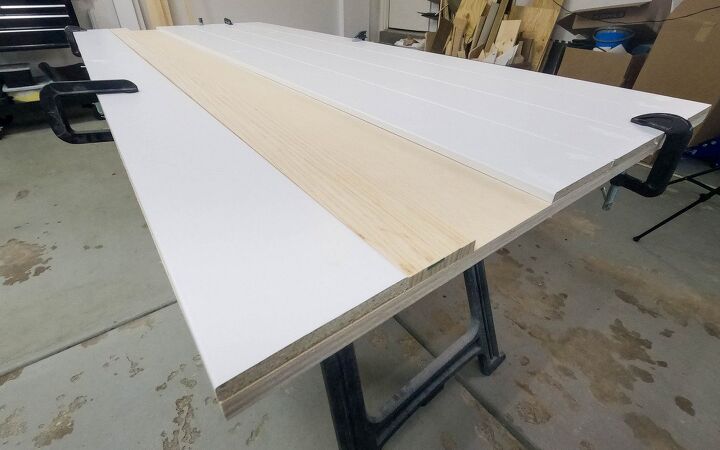
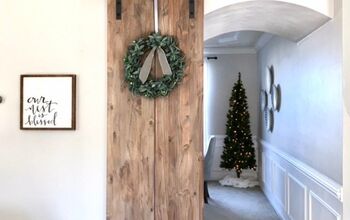
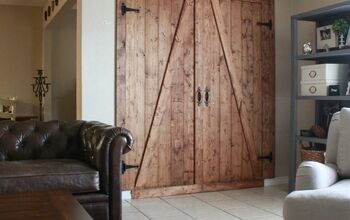
Decide on the material, door thickness and pattern. Since we have a pattern accent wall, I designed this door to be really simple. Also, it should go along with rest of the design elements in the home.
Check out the video for better understanding!
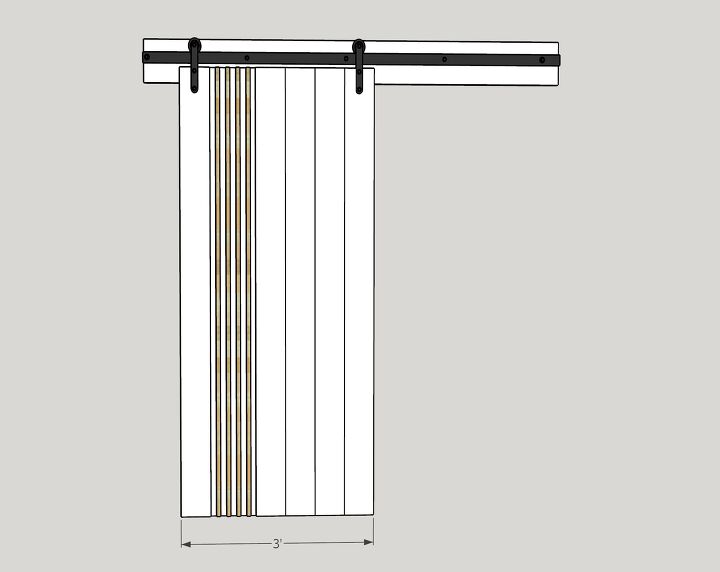
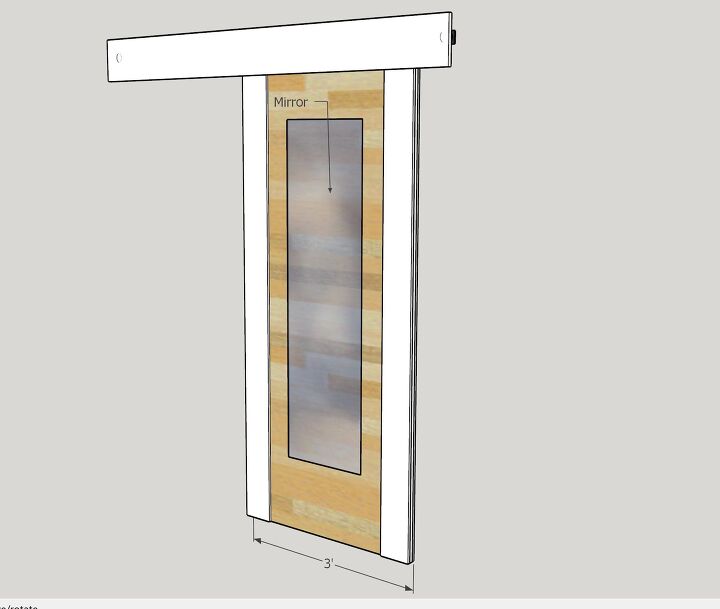
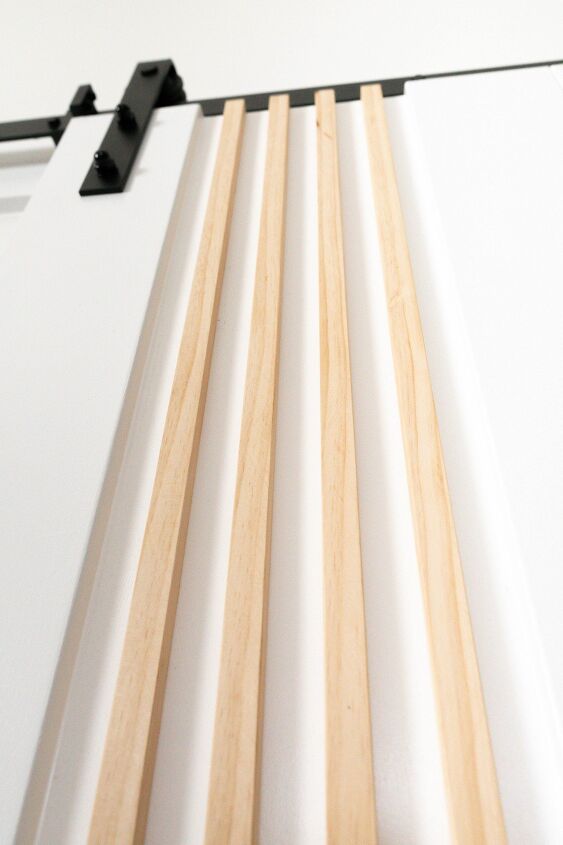
On the front, I went for simple verticals and pine wood strip accent. And on the rear side facing bathroom will have a full height mirror. As per the hardware specification, the door should be 1-3/8 to 1 – ¾ inch thick. So, I used ¾ inch thick plywood as base and on top of it I had ½” thick planks on either side. This will add up to the required thickness.
If your door thickness is less, then you might need to find a relevant size bolt and nut from the local hardware store.
Cut the wood:
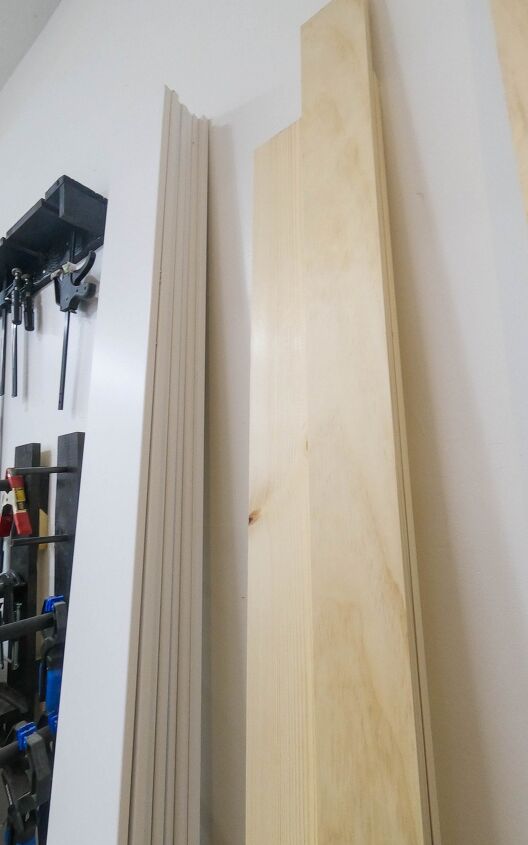
Cut the plywood to required size or get it from the store like I did. Then for the patterns, I bought prefinished 1×6 planks. They already have rounded edges, so it saved me a lot of time from routing the edges
For the accents, I bought pine wood planks and cut them into strips. Cross cut the remaining planks. They can be cut a little longer and then can be trimmed to exact size later.
BUILD THE PATTERN:
Arrange the pattern and glue the planks to the base with construction adhesive. Temporarily secure with brad nails or clamp until adhesive bonds. I will add the pine wood strips after painting.
On the rear side of the door, It’s just two verticals on the ends. At the center, I will fix a full height mirror.
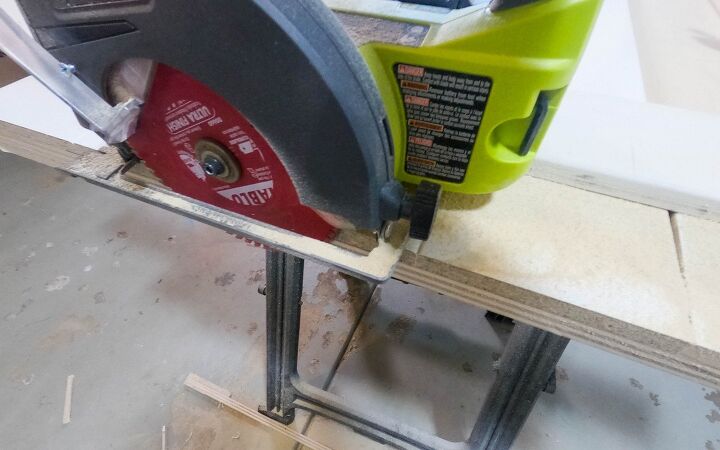
Cut excess
Once fixed, cut the excess with a circular saw or track saw. Since I do not have a track saw, I used a straight edge plank as my guide and cut with circular saw.
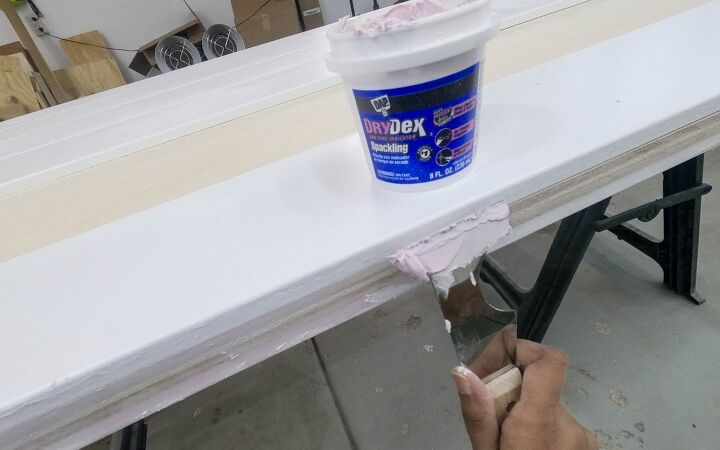
Paint & Finish:
Next step is to paint and finish. Before finishing, we have to cover the plywood edges seamlessly and fill all the nail holes. First sand down everything with 120 grit sandpaper. Then use wood putty to fill the holes and edges. Then sand everything with 220 grit sandpaper.
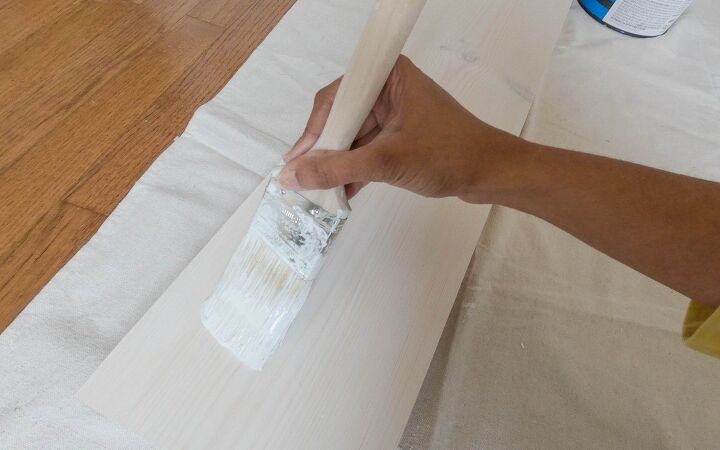
Wipe down the dust thoroughly and prepare for painting. This door is going to be fully white, but with pine wood accents. So, I did one coat primer and finished with ultra white from behr.
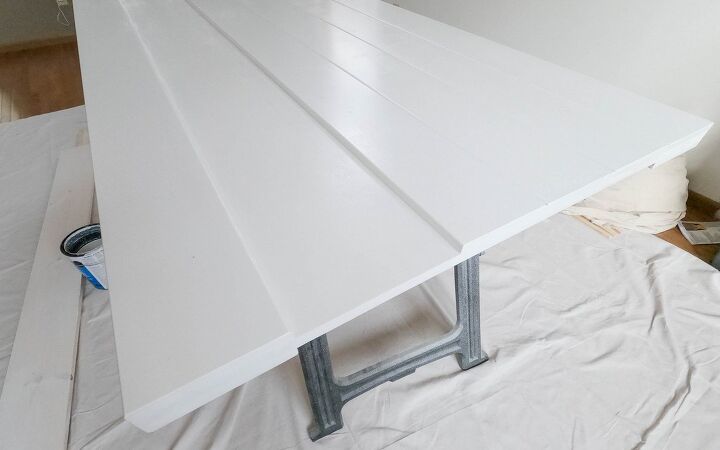
The wood strips also should be sealed. So, I used this poly acrylic clear sealer for the wood. The rear wood area is also finished with this sealer.
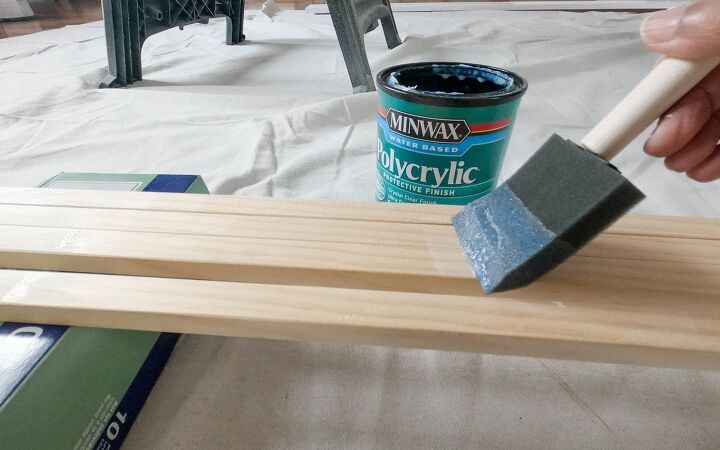
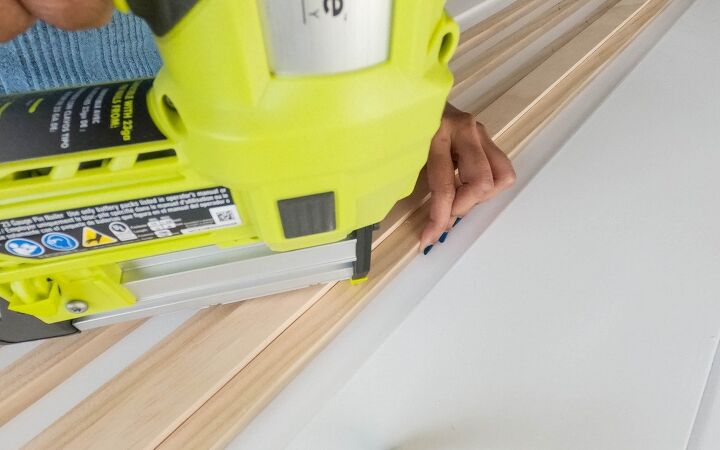
Once everything is dry, fix the wood strips with the help of a spacer. For this, I am using glue and pin nailer.
Mount the door:
The mounting hardware comes with a track, hanging hardware, stoppers and hangers.
To mount on the wall, you will need a header board. Or if you think studs will align correctly with the given hole location on the track, then you can install the track directly to the wall. In my case, it doesn’t align. So, I bought a 1×8 pine board, cut to track length, painted it and used as my header board.
Find the stud, mark locations, and install the board with construction screws..
Next, Follow the instructions given along with the hardware kit to install. Based on that, mark the height to mount the track. Mark the locations of the holes and predrill. Slide door stopper on the rail for one end. Then, install the track on the header board by checking level. Make sure it’s tight & secure..
Remove the existing door and install the hangers on the door according to the dimensions given by the hardware manufacturer.
On a side note, if you would like to just refinish your existing door, check out this full article on how to do that.
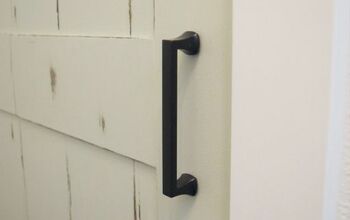
Install Handle
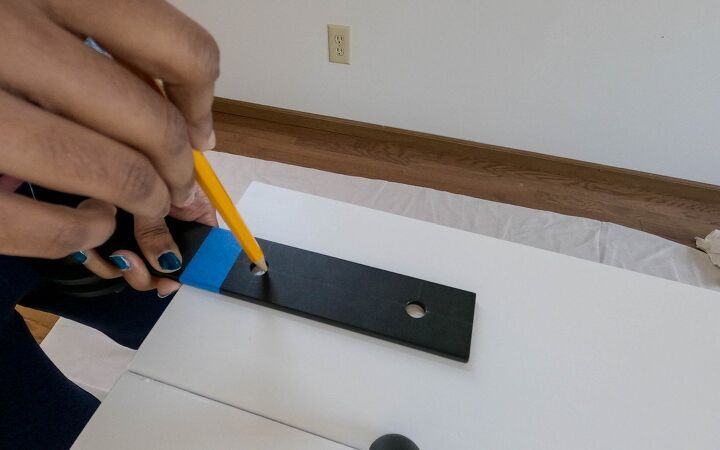
Next, predrill holes for the handle. I bought this 15 inches long pull handle from amazon.
Here is an easy way to figure out where to mount or drill the hole. Take a painters tape and apply it on the back of the handle. Poke a hole where the screw has to go. Then remove and apply on the door. If you like what you see then go ahead and drill the hole. If not, you can remove tape and reapply until you are happy with the location.
And then lift the door and slowly slide into the rail. Add end stopper for the other side. tighten it. and you are good to go. Install the handle too.

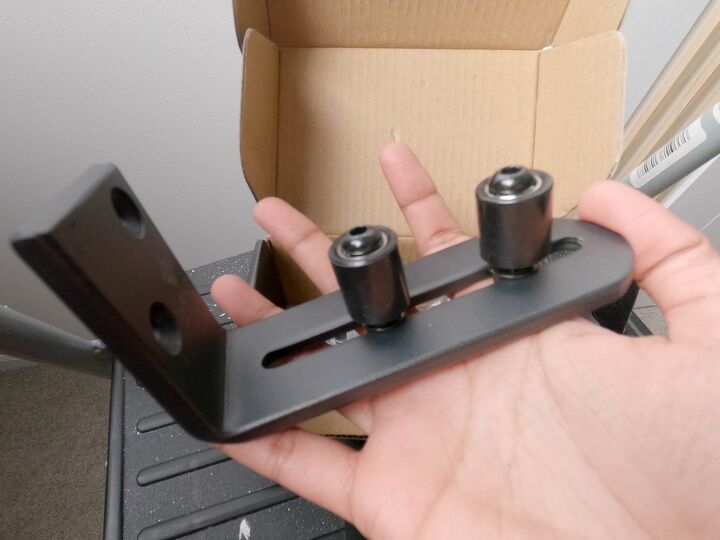
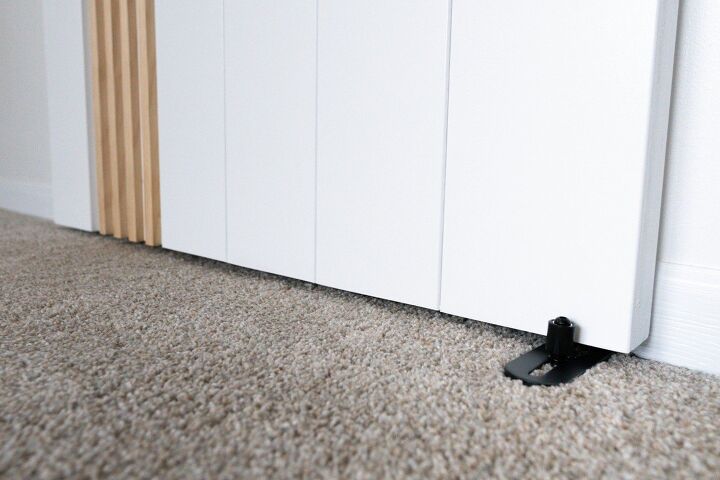
The kit came with a floor guide. For that to work, you need to make a slot on the bottom of the door and it has to be mounted on floor. Since I have a carpet floor, I bought a floor guide that can be mounted on wall or base trim. This made my job much easier to install. You have to just adjust the roller distance according to the door thickness and the door will slide neatly between them
Finally, cover up all the screw heads with paint or a screw cover caps.
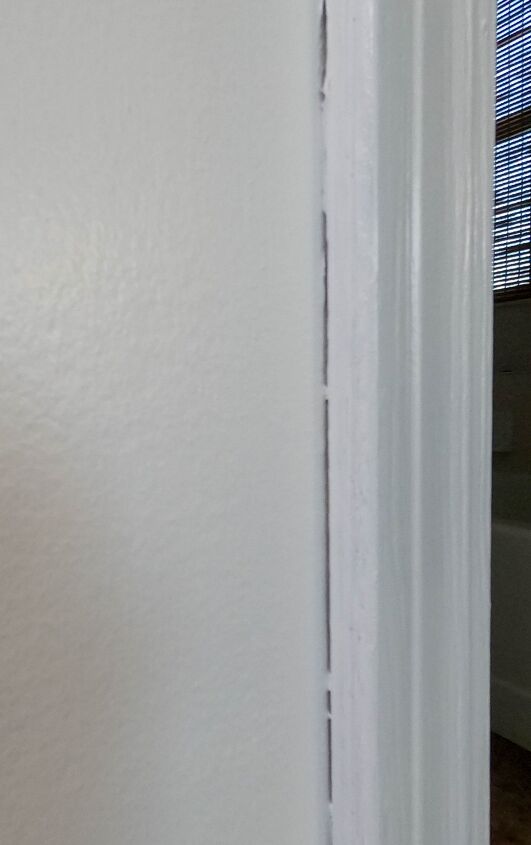
Quick tip: If you see gaps around the trims and frame (shown in below image), seal them with painter’s caulk and paint over it. This is a good trick to have a professional quality finish.
FINAL REVEAL

You can find the links to the products I used in this project at my website https://www.thenomadstudio.com/diy-modern-sliding-barn-door/
or in the description below the video.


Comments
Join the conversation
-
Very beautiful. Never thought barn doors were my thing till I saw your modern version and honestly I’m speechless-this I absolutely love! Great job!
-
You have great vision!! Awesome work.


Frequently asked questions
Have a question about this project?
Very nice 'sliding'door,but it sure doesn't look ANYTHING like all the barn doors that I've seen over my 78 years.Beautiful job,and a real piece of work,even with a well equipped shop.Wonder how many dyi'ers have that kind of equipment?
Love this!! You are very talented. Do you have a picture from the other side? I've never seen a barn door in person. And I've never seen a tutorial that shows the opposite side of the door. I'm so curious!! LOL