


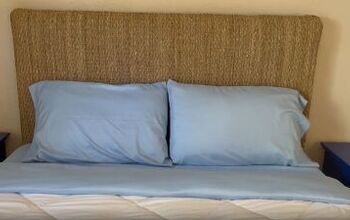
How to Make a DIY Herringbone Headboard on a Budget

Transforming your basic IKEA bed into a stunning Pottery Barn-inspired bed with a DIY herringbone headboard is easier than you think.
In this step-by-step tutorial, I'll guide you through the process of creating a beautiful herringbone headboard using affordable materials and simple tools. Let's get started on this exciting DIY project!
Tools and materials
- IKEA bed frame
- 2x4s
- MDF board
- Wood mosaic panels (approximately 36 square feet)
- 1x4s
- Wood glue
- Nails
- Cutting tools (1x1 and others as needed)
- Board and weights
How to make a herringbone headboard
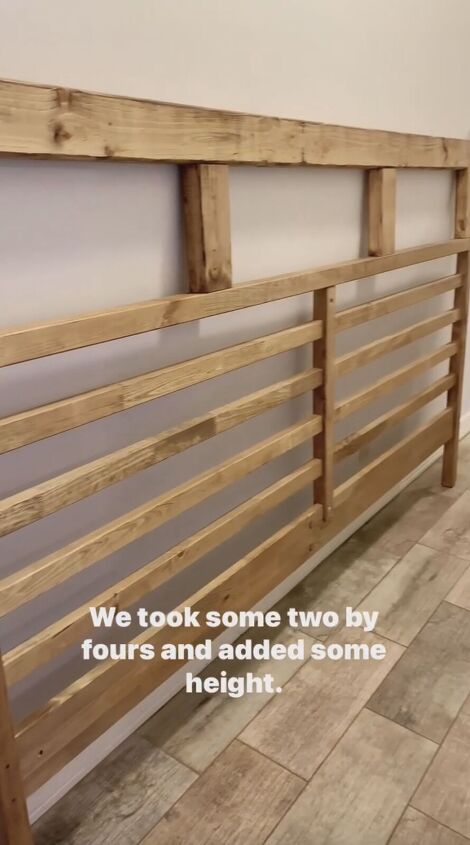
Step 1: Adding Height with 2x4s
To begin, enhance the height of your IKEA bed by attaching 2x4s. This will provide the necessary elevation for the upcoming wood mosaic panels.
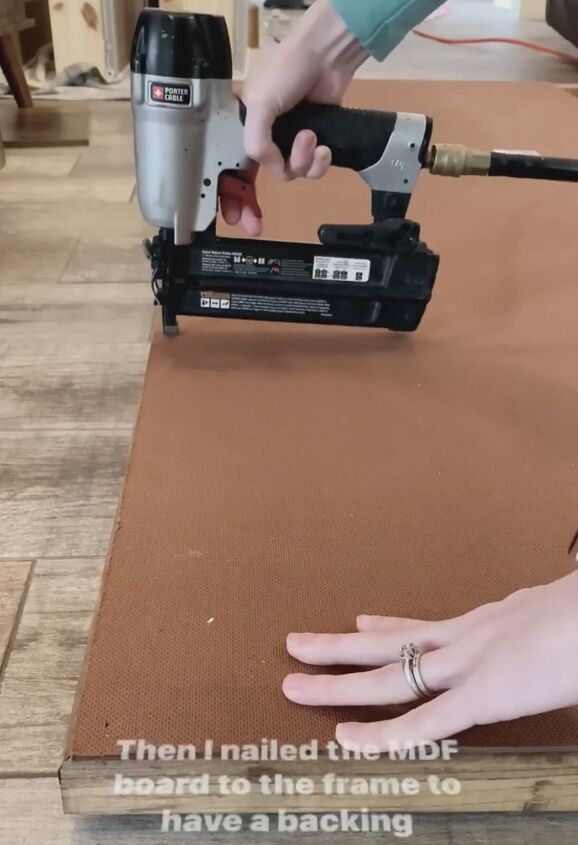
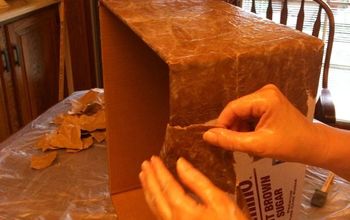
Step 2: Attaching MDF Board
Nail the MDF board to the frame, creating a sturdy backing for the wood mosaic panels. The MDF board serves as the canvas for our herringbone masterpiece.
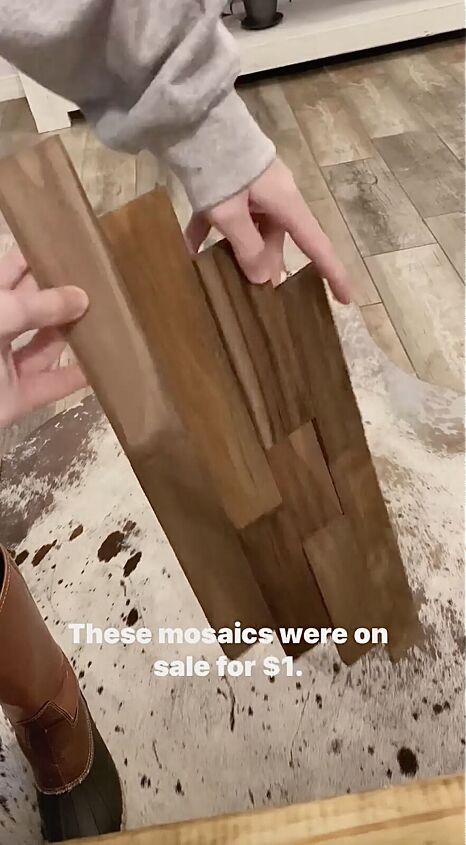
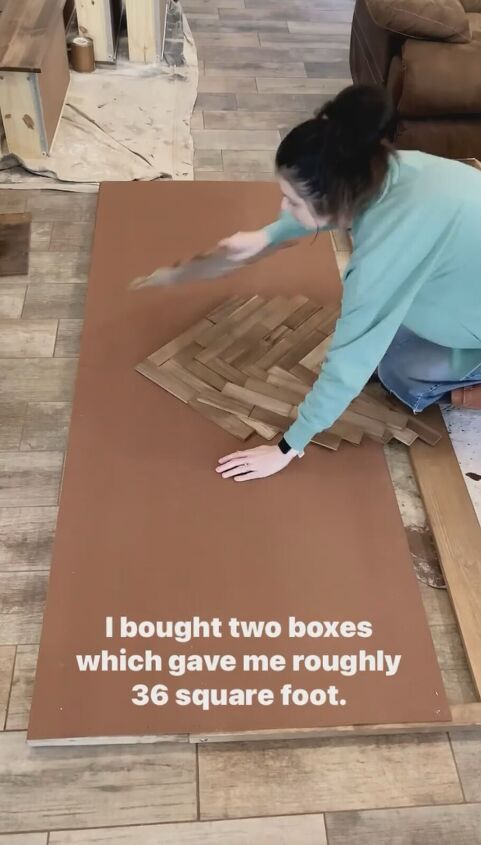
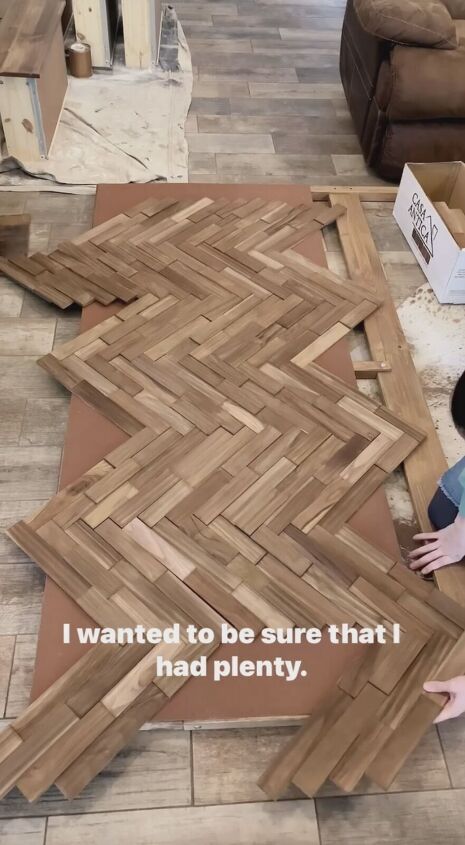
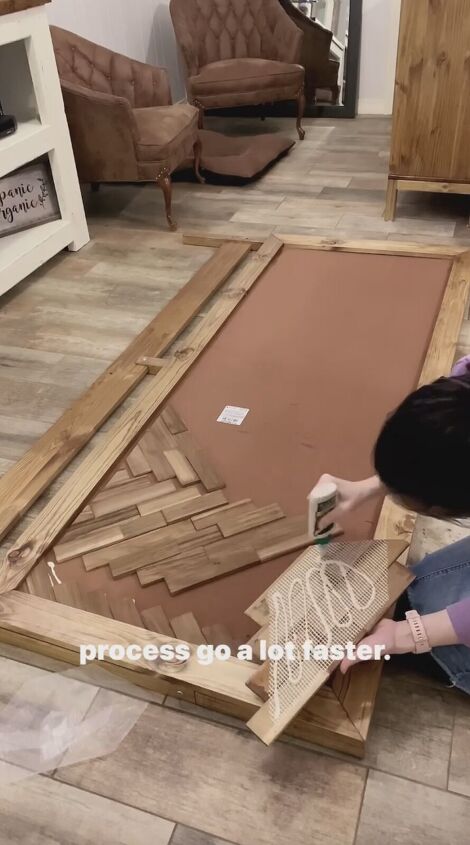
Step 3: Choosing and Cutting Wood Mosaic Panels
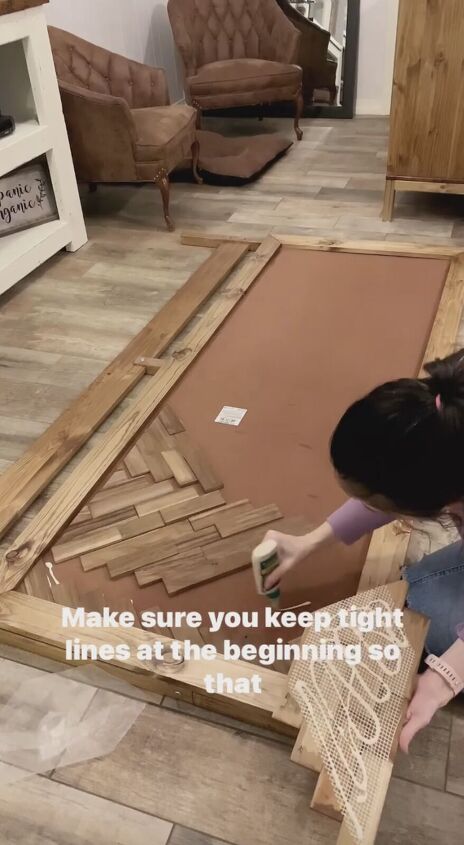
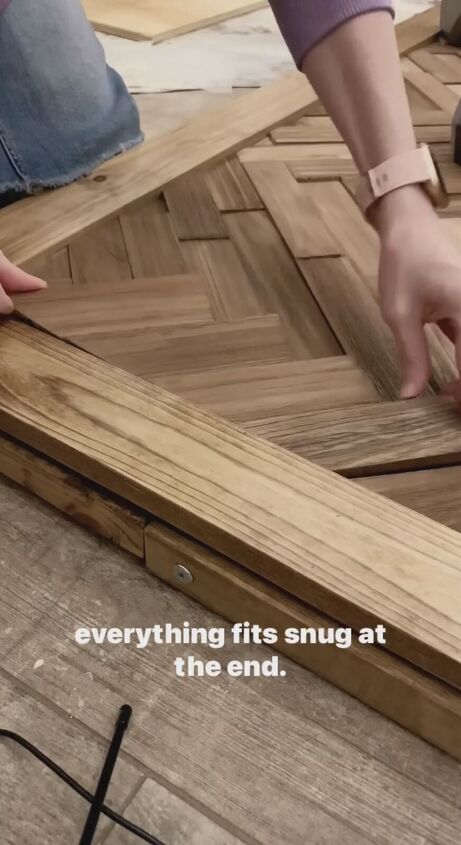
Select wood mosaic panels with a herringbone pattern, ensuring you have enough to cover the entire MDF board. The key is to maintain tight lines for a snug fit at the end. Cut the panels using the 1x1 cutting tools based on the frame's dimensions.
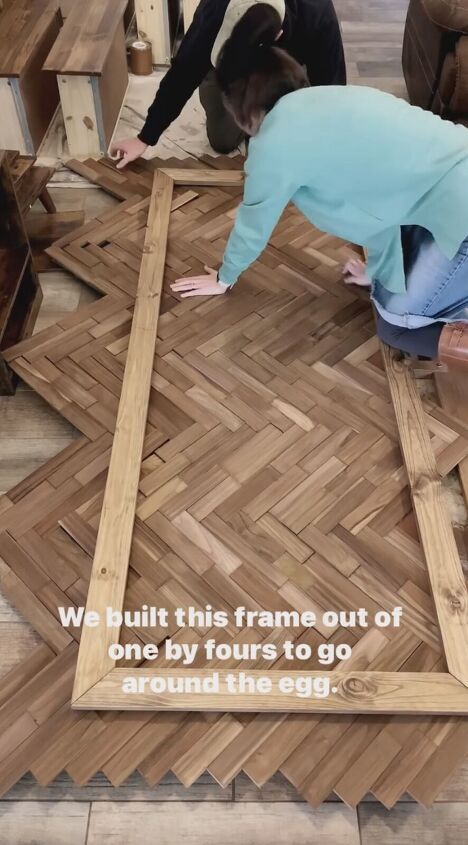
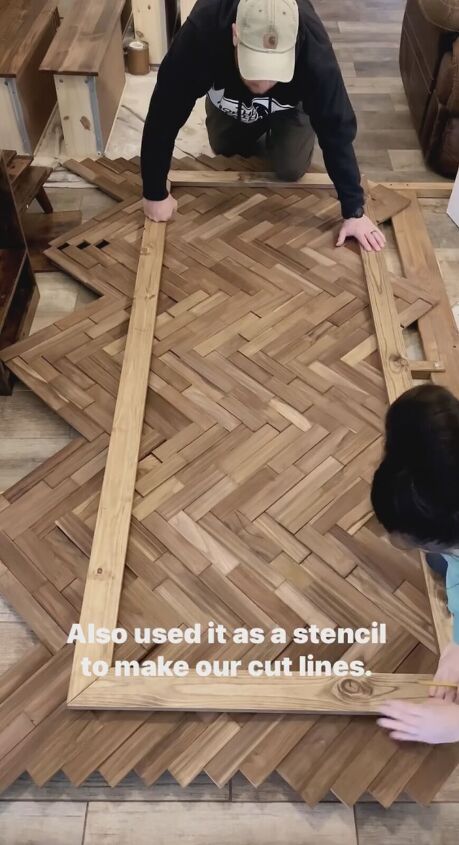
Step 4: Building the Frame
Construct a frame using 1x4s around the edge of the MDF board. This frame not only adds a finishing touch but also serves as a stencil for cutting the wood mosaic panels. Use the frame to mark and guide your cut lines accurately.
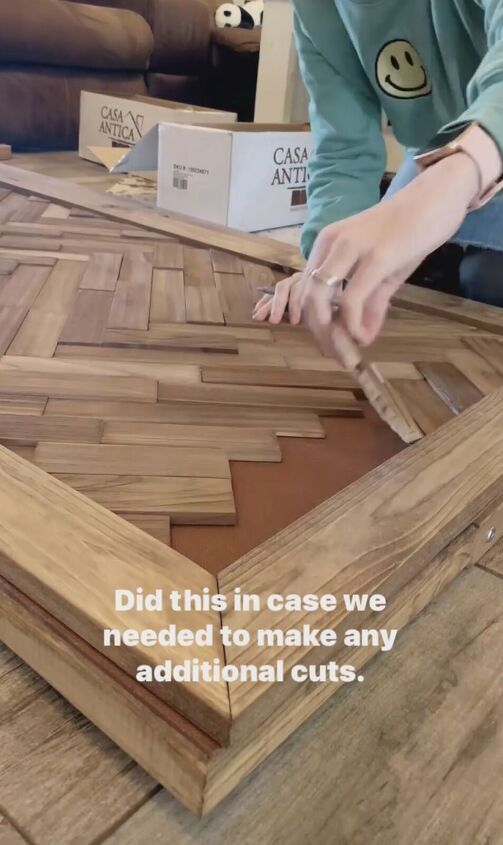
Step 5: Fitting the Pieces
Place the frame on top of the MDF board and start fitting the cut wood mosaic pieces inside. This step allows you to make any additional cuts if necessary.
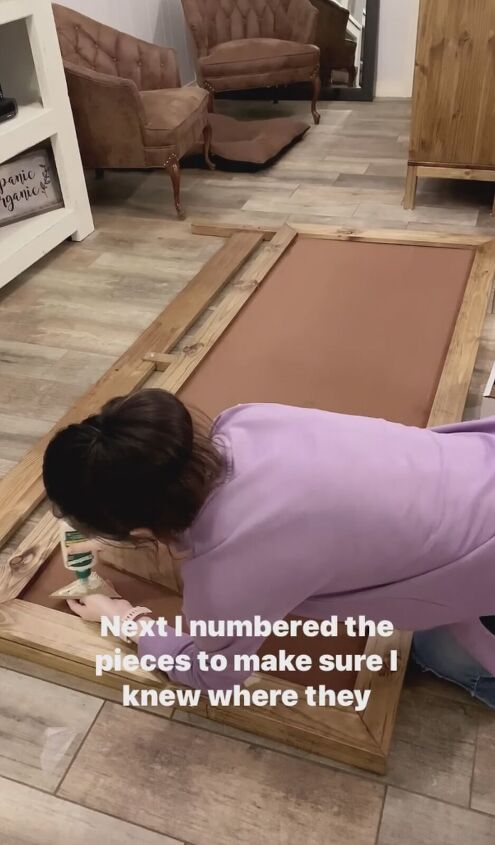
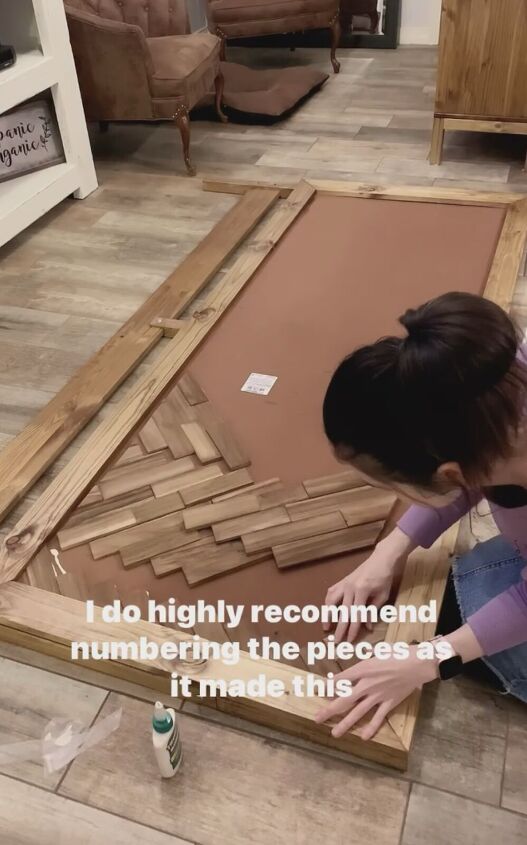
Numbering the pieces is highly recommended to streamline the fitting process.
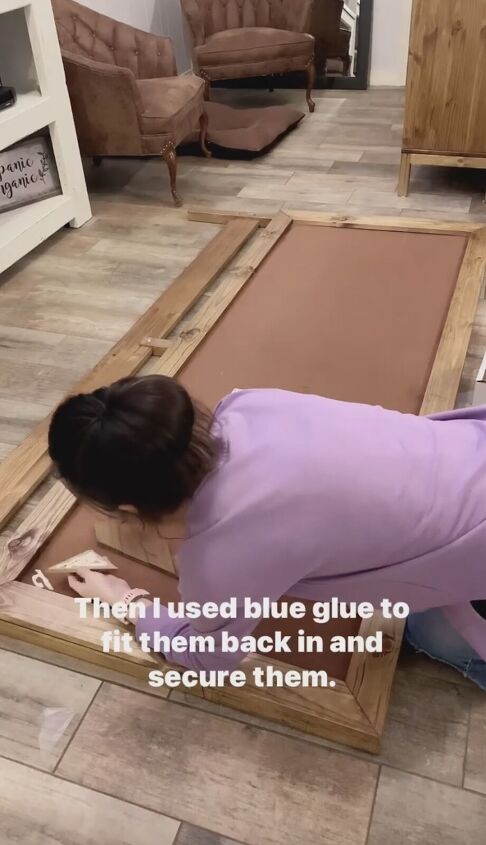
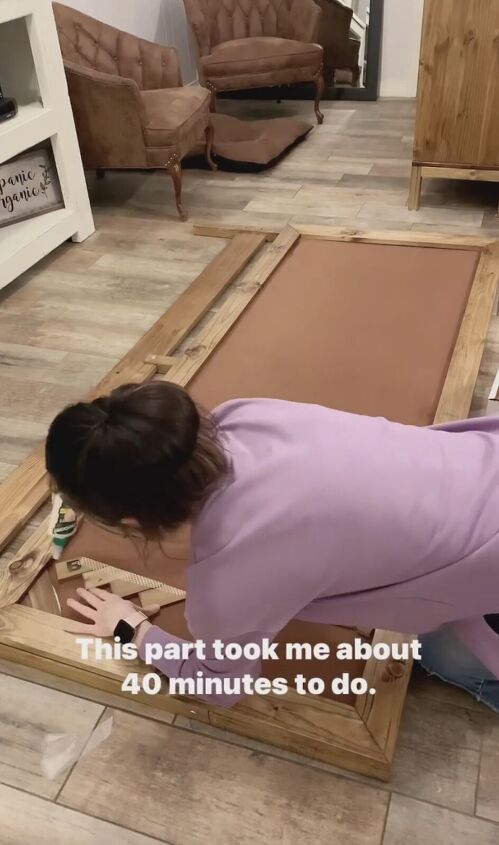
Step 6: Gluing and Securing
Once satisfied with the arrangement, remove the frame and number each piece to keep track of their positions. Apply wood glue to each piece and securely fit them back into place on the MDF board. Take your time to ensure a precise fit, and make any adjustments as needed.
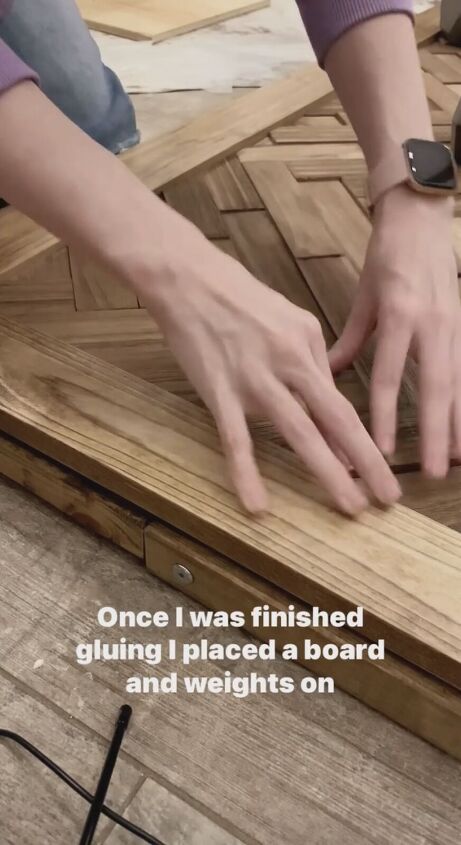
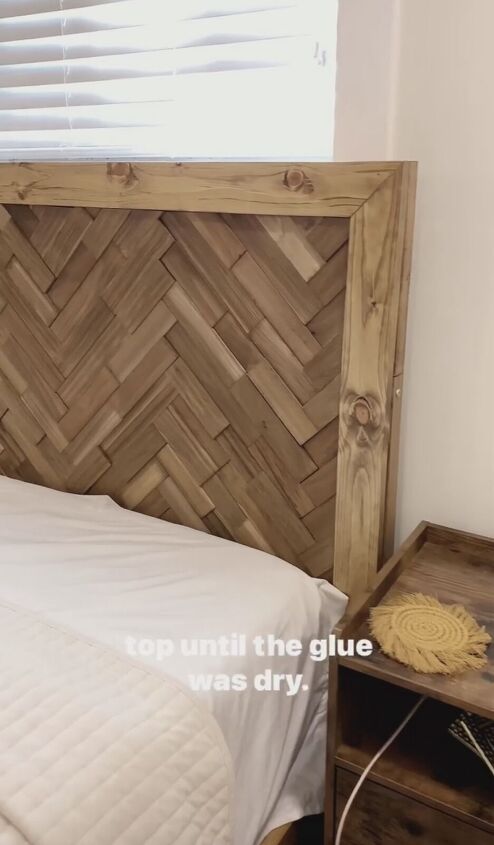
Step 7: Weighing Down for Drying
To allow the glue to set properly, place a board and weights on top of the wood mosaic pieces. This ensures a firm bond and prevents any pieces from shifting during the drying process.
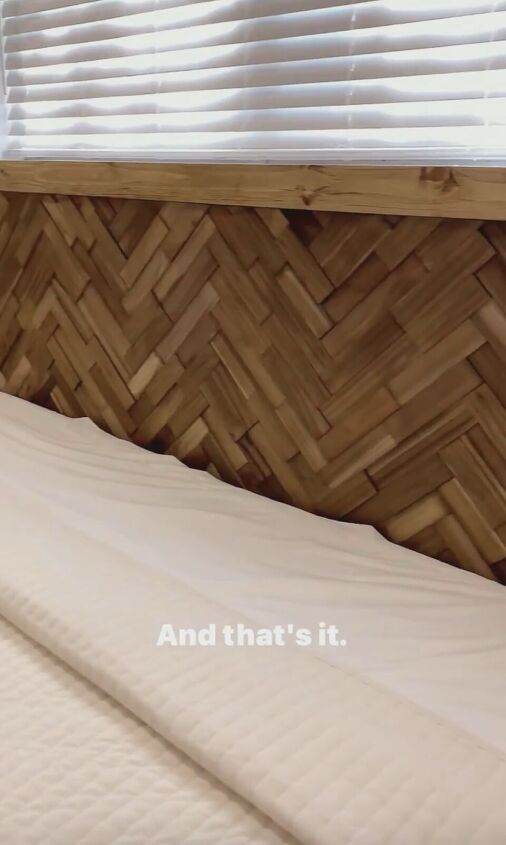
Step 8: Enjoy Your Pottery Barn-Inspired Headboard
Once the glue is completely dry, reattach the frame to the MDF board and secure it to your enhanced IKEA bed.
DIY herringbone headboard
With a bit of creativity and some handy tools, you can elevate your bedroom with a DIY herringbone headboard. This project not only adds a touch of elegance but also allows you to express your unique style.
Let us know in the comments below if you changed your headboard using this tutorial, along with any tips you discovered along the way.
Follow @hannah.is.home on Instagram for more DIY ideas.
Comments
Join the conversation
-
Wow! Quite impressive. Nice job!
-
You did a beautiful job creating your headboard!


Frequently asked questions
Have a question about this project?