


Sustainable Swaps: Reusable Cloth Napkin DIY


If you’re an American using paper towels as napkins at every meal, you could be spending upwards of $450 per year on something you use once then toss. Let me say that again: you could be blowing serious cash on literal trash. Why?! Instead, ditch the waste caused by disposable towels and napkins for a set of gorgeous, handmade napkins. Not only will it save you money, but they’re better for the environment, a great way to use up fabric scraps, and they add a completely customized and unique touch to your dining room table. Plus, sewing your own cloth napkins is a fast and easy project perfect for beginners! That’s why I’m sharing one of my favorite sustainable swaps: this easy reusable cloth napkin DIY tutorial. Keep reading to find out how to sew your own today!


Cloth napkins are a simple way to add a little personality to your dining table and support a zero-waste lifestyle since you’ll no longer need to use disposables (including paper towels or wipes) to keep clean during dinner. The best part about this project is that you can use almost any scrap of fabric and they’re a great beginner project if you’re new to sewing. You can even customize them with thoughtful touches like embroidery, and cleanup is a breeze. Simply throw them in the wash with your kitchen towels and you’re good to go!

I made mine using some scrap linen from an old sewing project. If you don’t have scraps available, I recommend using 100% cotton from the fabric store due to its durability and how easy it is to sew with. Plus, you can find it in almost any color or pattern to suit your personal style and hide stains. Other great materials would be linen, flour sack, or unbleached cotton muslin.
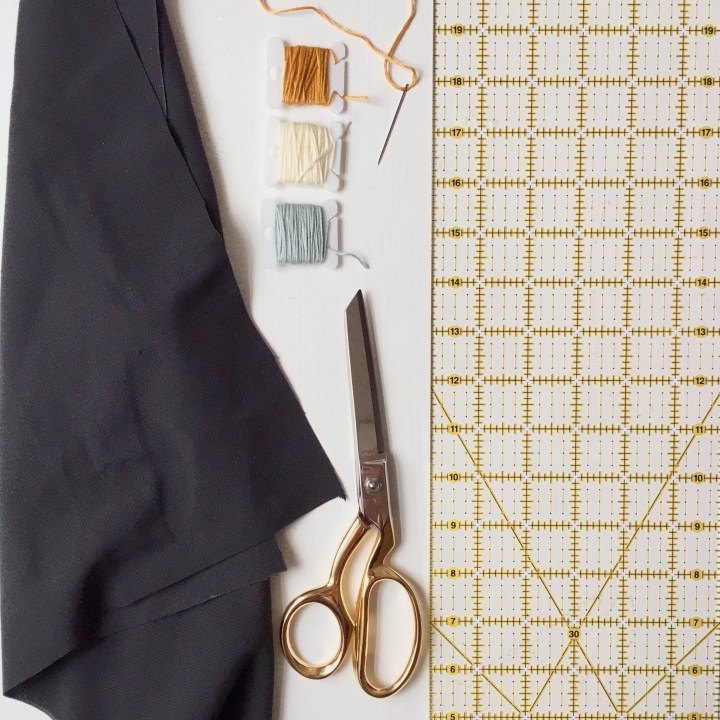
Supplies:
- Cotton Fabric
- Thread
- Scissors or rotary cutter (and cutting mat if using rotary cutter)
- Sewing machine
- Pins or clips
- Iron & ironing board (to press)
- Ruler
- Tailor’s chalk or any fabric marking tool
- *optional* embroidery thread, fabric paint, iron-on transfers, etc. to customize
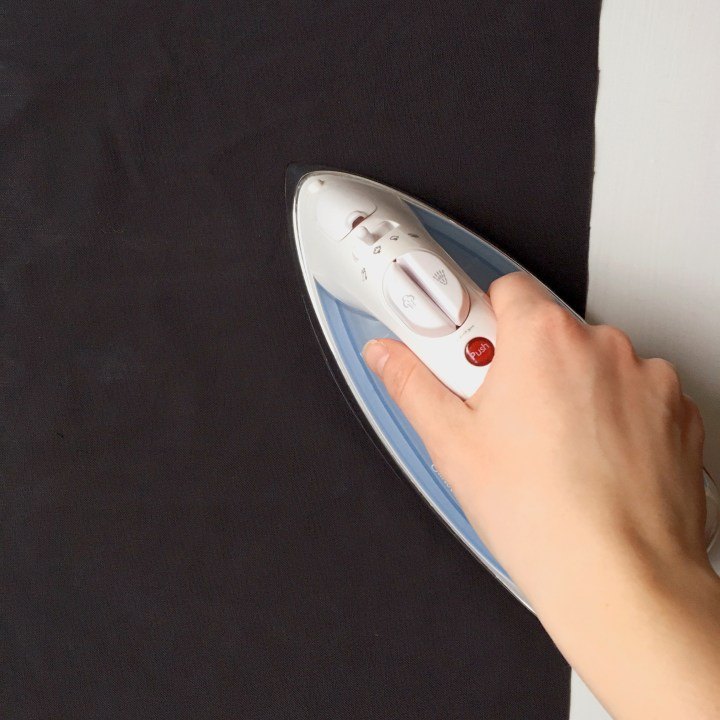
Step 1: Prepare your fabric (pre-wash, dry, and press if needed).
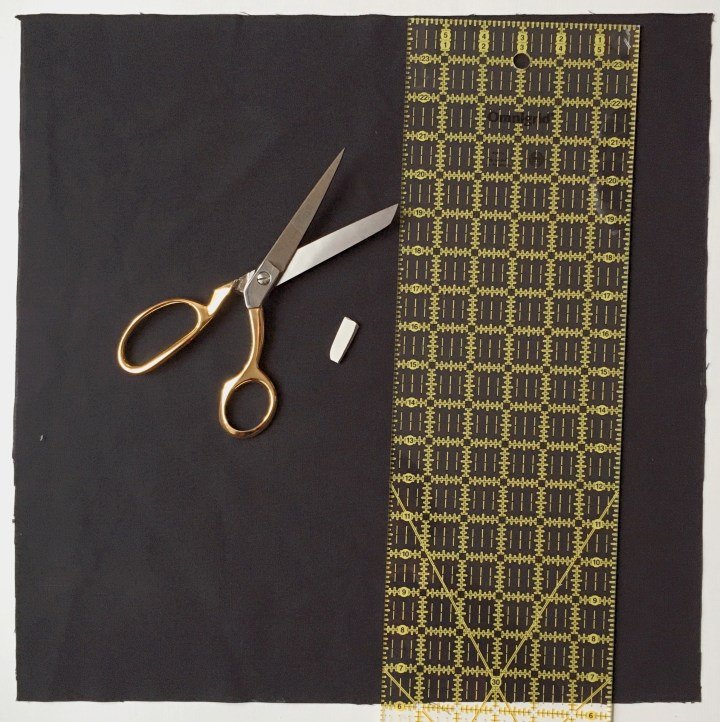
Step 2: Use your ruler and tailor’s chalk to measure and mark the size you want your napkin to be. I measured mine at 17.5″ x 17.5″ to get a 17″ x 17″ napkin, leaving a 1/2″ seam allowance for sewing on each side. Then, cut out your fabric using scissors or a rotary cutter on a mat to protect your work surface.
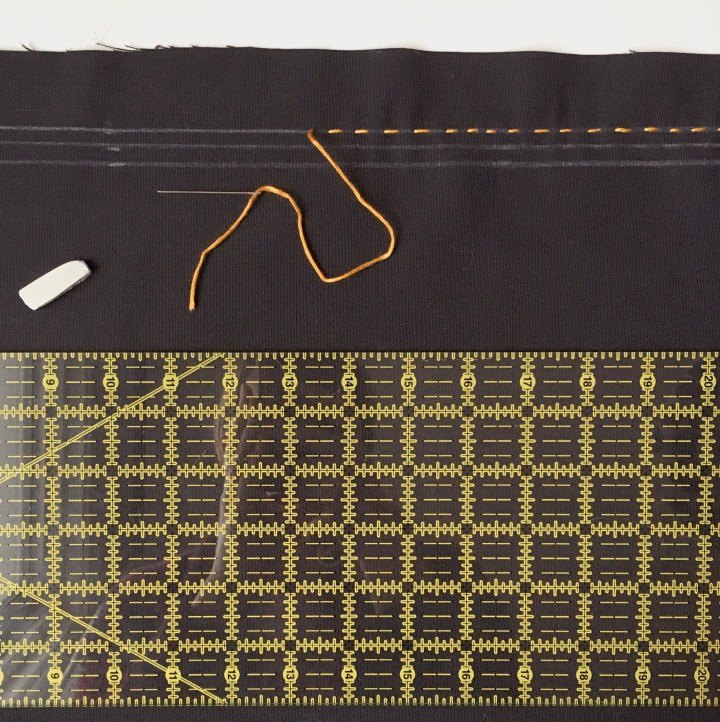
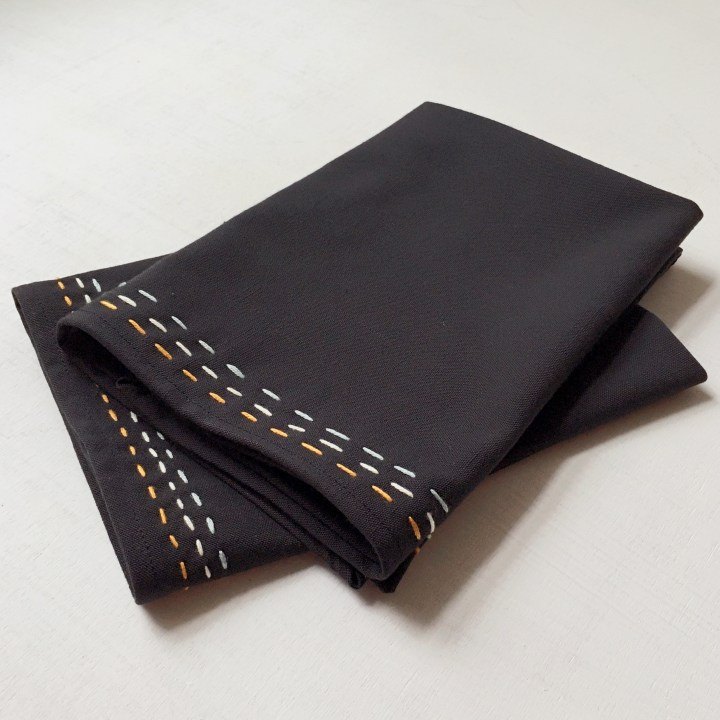
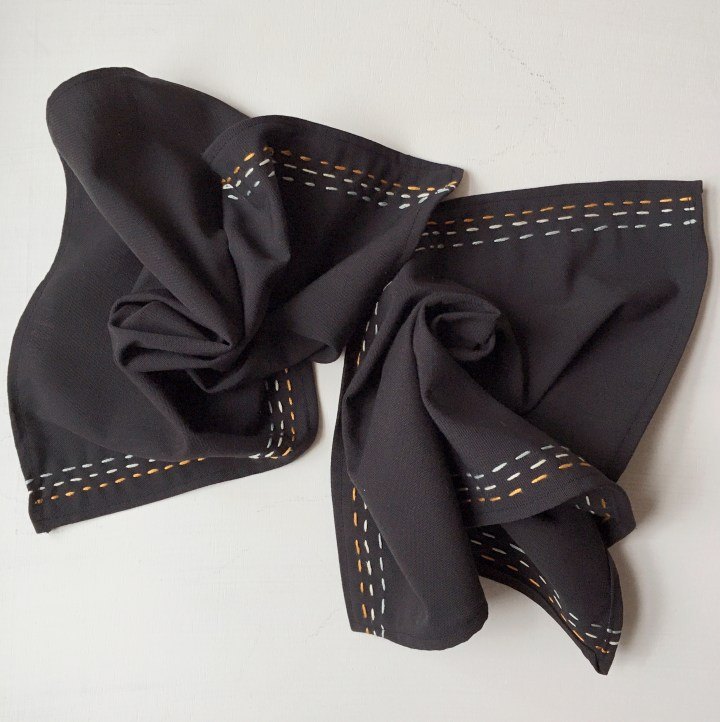
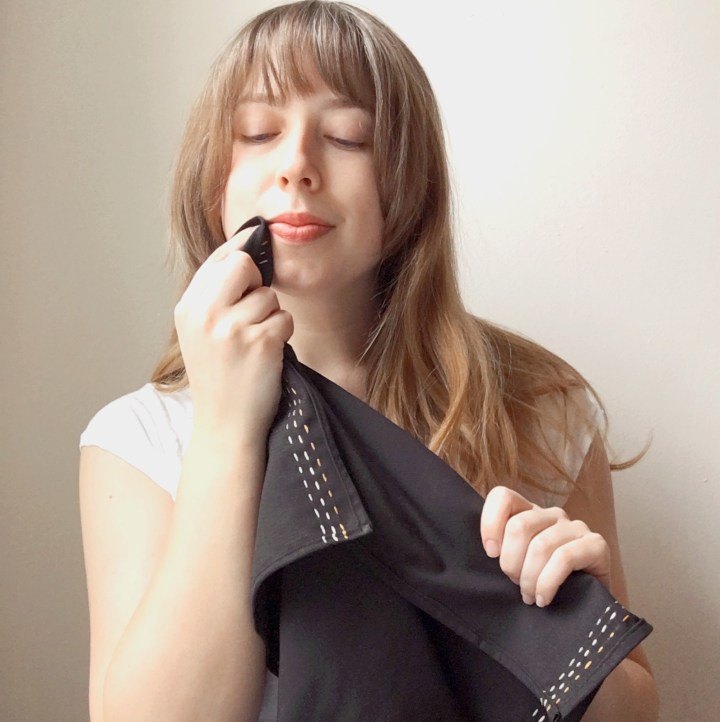
Step 3: *optional* Add any embellishments. I chose to do some quick and easy embroidery using different pretty colored thread and a running stitch on the top and bottom of the napkin.
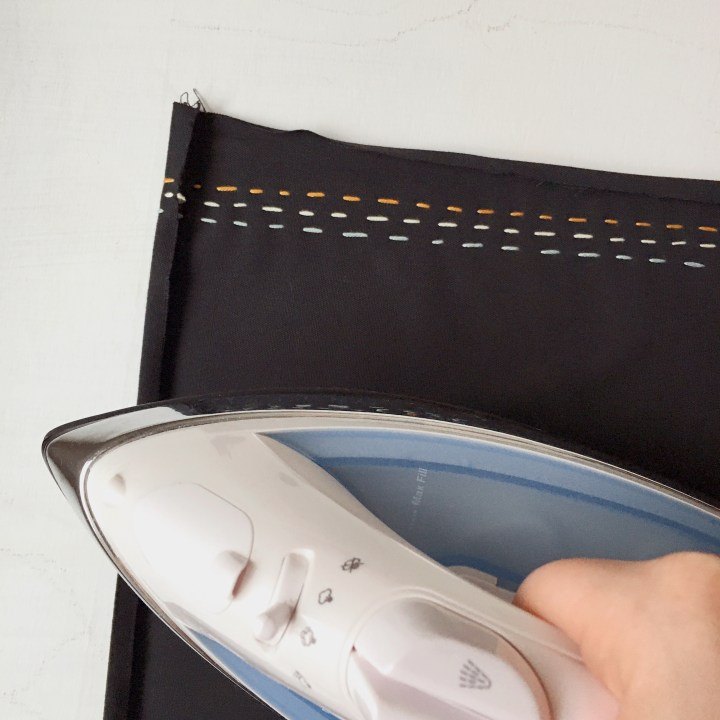
Step 4: Fold the edges of your fabric over 1/4″ and press. Fold over 1/4″ again and press.
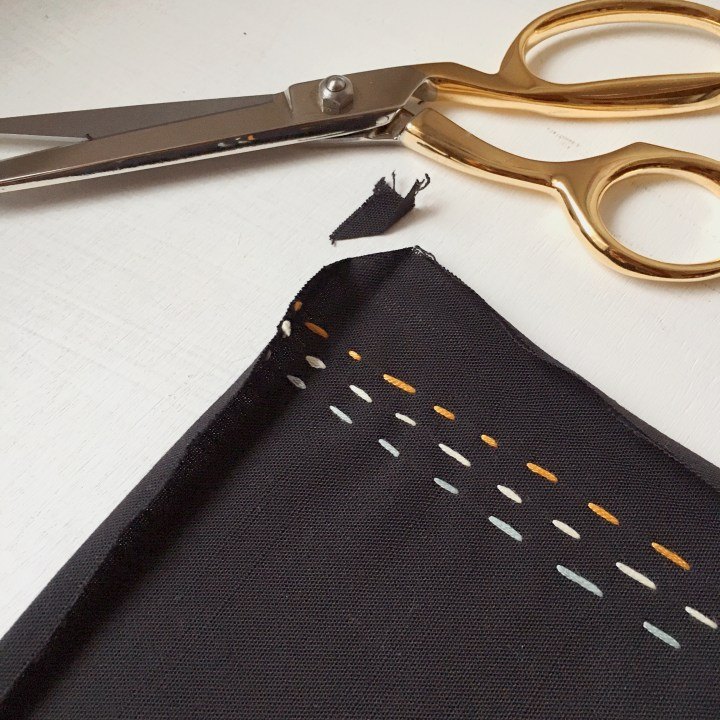
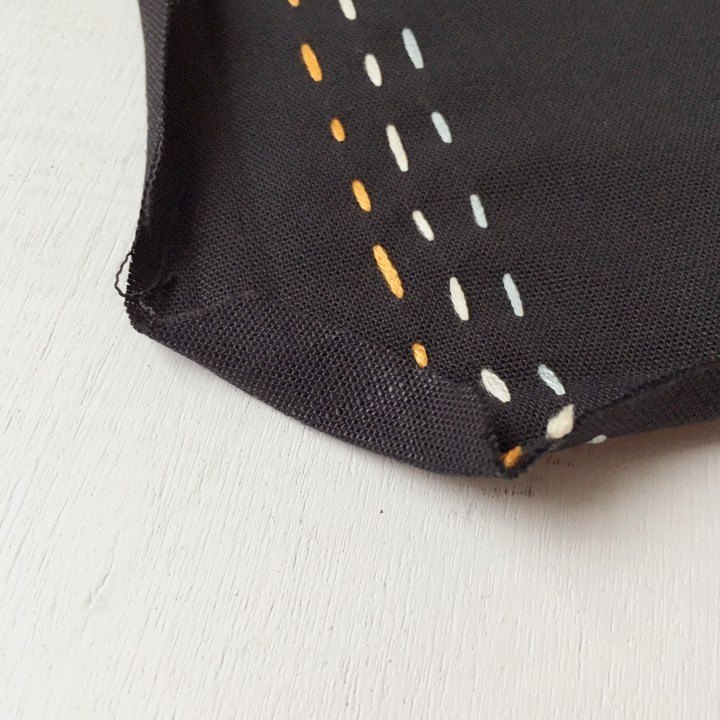
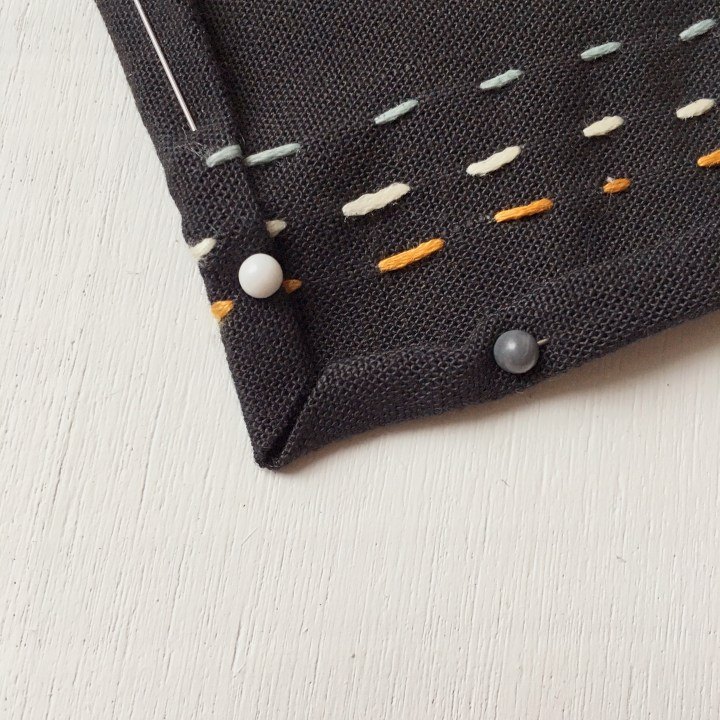
Step 5: Unfold your edges and trim your corners a bit to remove any bulk. To do a mitered corner, cut the corners from second crease line to second crease line. Fold the corner down 1/4″. Then, refold the edges of the fabric 1/4″ and press, then fold 1/4″ again. Press and pin in place.
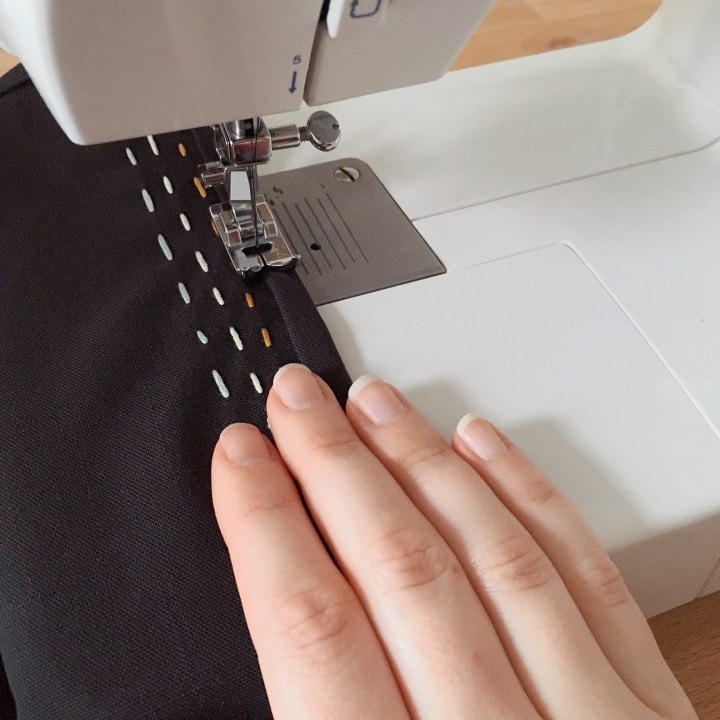
Step 6: Sew along the edge of the fold around all 4 sides of the napkin. If your fabric needs a final pressing, do so now. After that, you’re good to go!

That’s it! These napkins rock as a first sewing project. They rock as a first zero-waste project. They rock even harder as both.
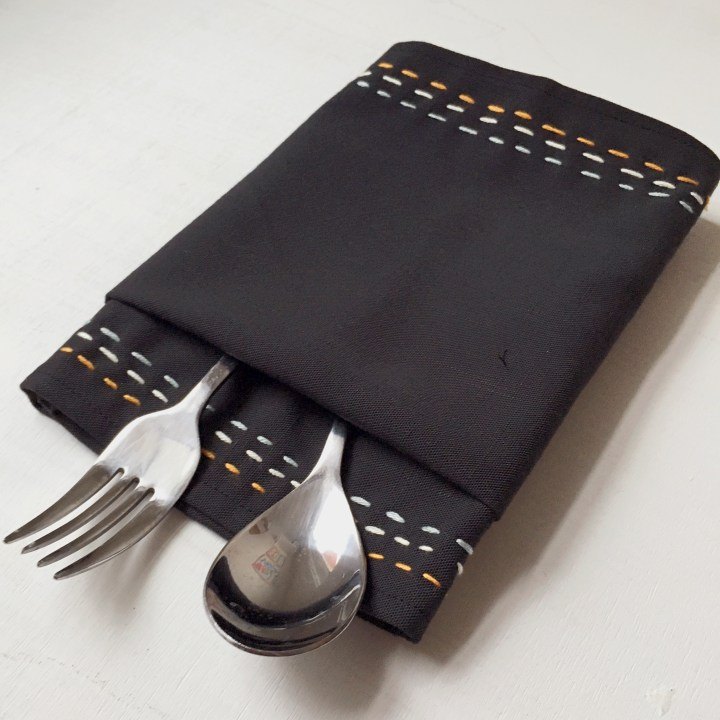
Now go forth and enjoy feeling like you’re forever dining at a fancy-ass restaurant with your adorable new napkins! These would also make a wonderful hostess or holiday gift, especially if you added an extra special monogram detail! Make a whole set or do like me and just whip up a couple any time you just happen to have a few too many scraps laying around. You can never have too many napkins, amiright?!?
If you have a go at making these DIY reusable cloth napkins for yourself, be sure to tag me @happymakes_me on Instagram so that I can take a peek at what you’ve made! Also, make sure you check here to see other easy sustainable DIYs for your home like this one! Until next time,
Happy making!
-XO-
C


Frequently asked questions
Have a question about this project?