


Dollar Store Light Up Halloween Skull DIY

Here is a quick and easy Halloween decor DIY. All you need is a cheap Dollar store plastic skull, some spray paint, string lights or tea lights, and a utility knife.
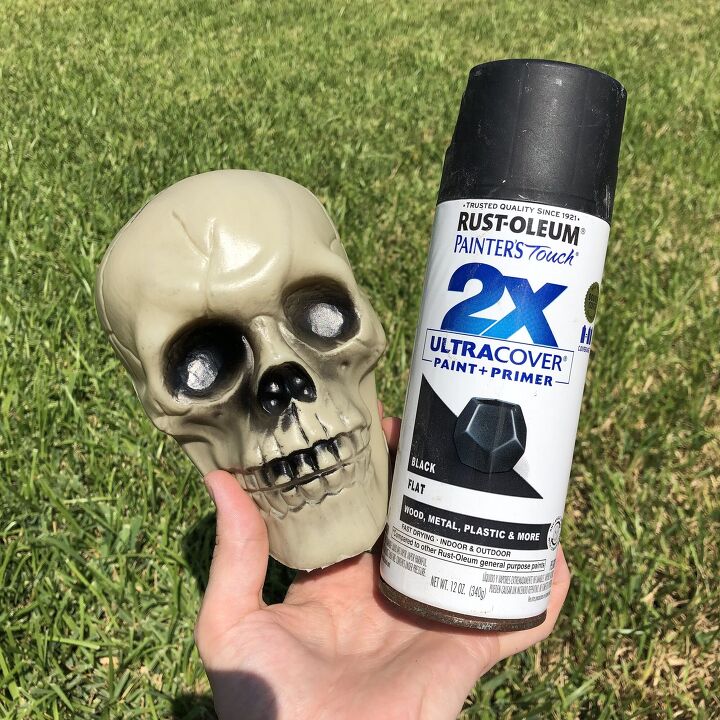
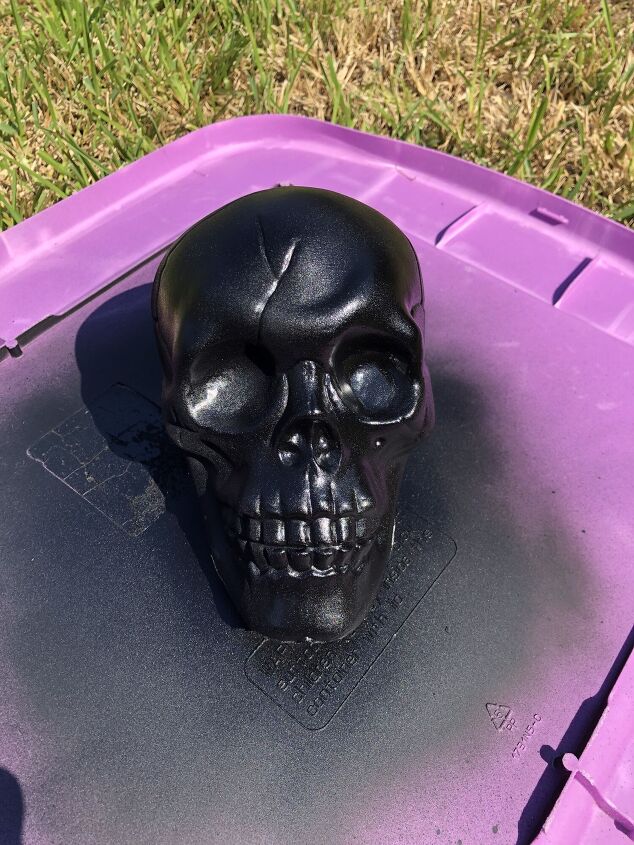
I got this cheap plastic skull from Dollar Tree and gave it a few coats of black spray paint. Here is a linked spray paint. Not the one I used, but will work just the same.
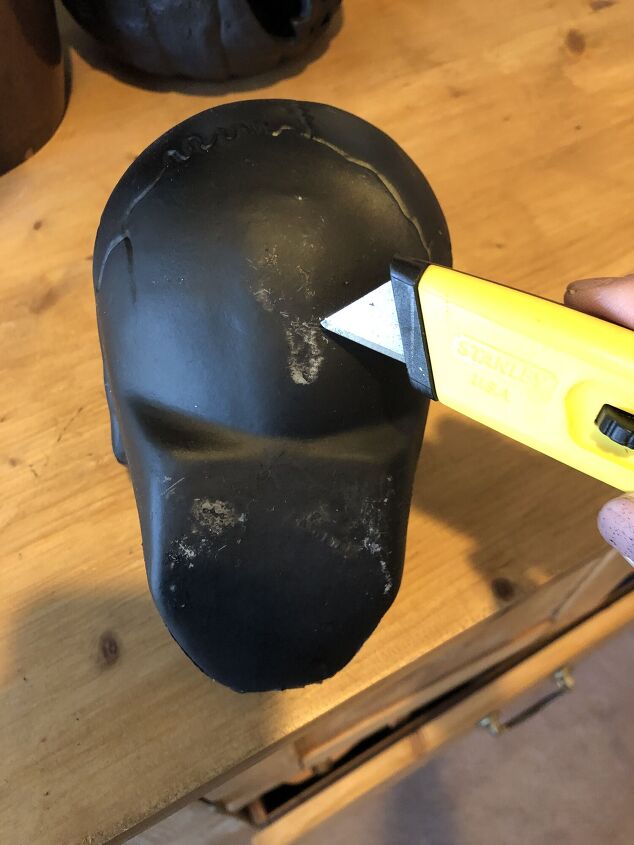
Once the paint was dry, I cut a "t" shape on the back at the base of the skull using a utility knife.
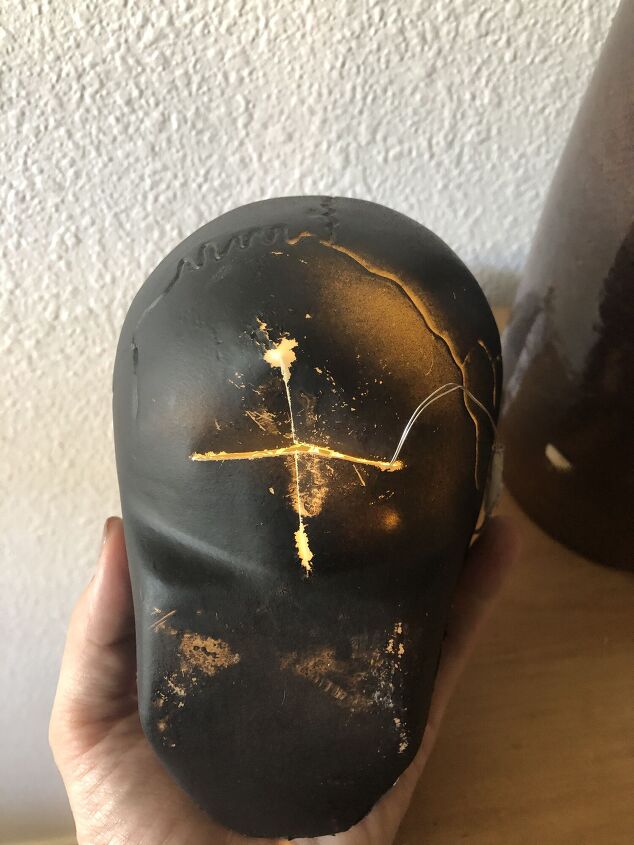
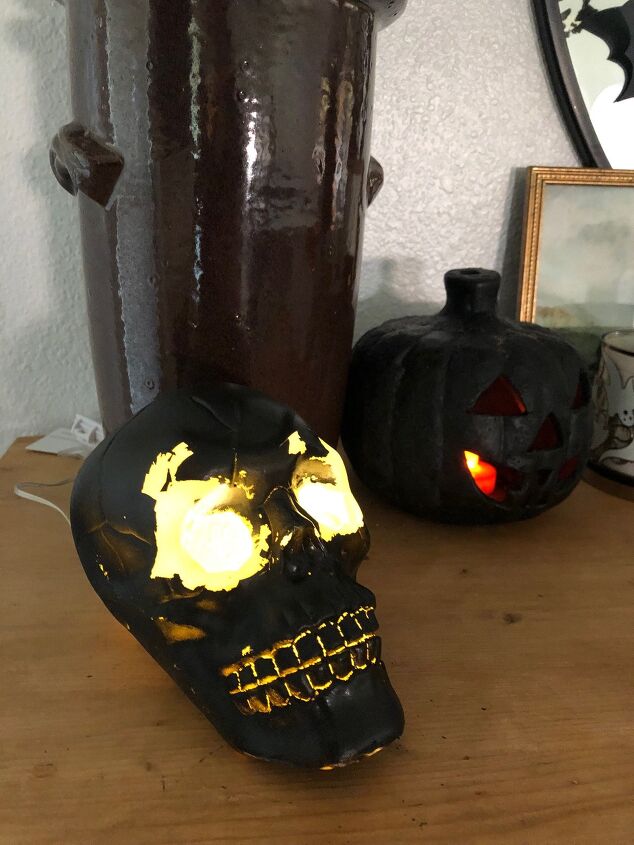
Using the opening, you simply shove in the string lights into the opening you created.
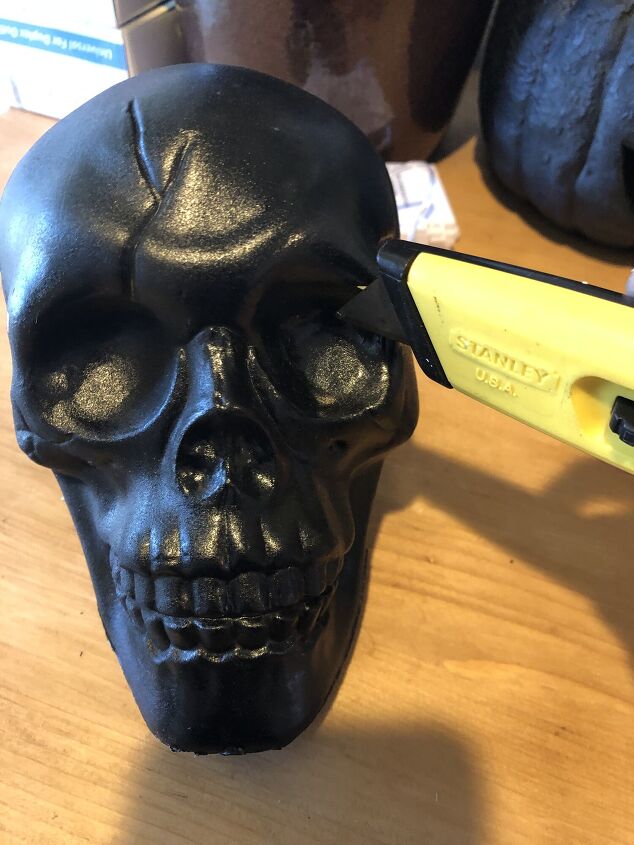
Next, cut around the outline of the eyes of the skull.
*When I cut mine, it caused the paint to peel around the eyes. I decided I liked the character and worn out look it gave it so I left it as-is. If you don't like that, you can either cut out the eye holes before you paint, or just go over it again with a quick coat of pray paint once your done cutting.
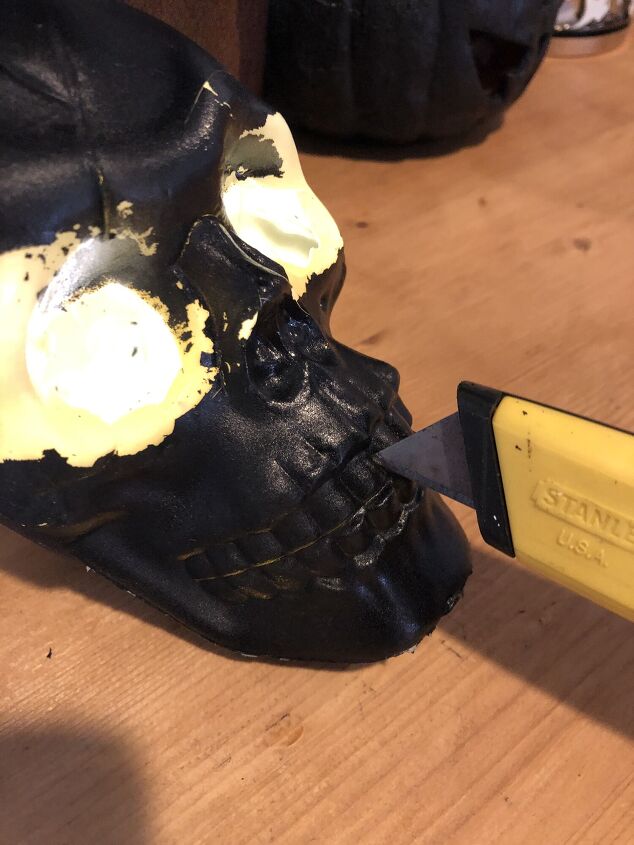
After that, I took the utility knife and scratched it along the outline of each of the teeth so the lights would shine through the teeth outline.

And just like that you've got a spooky light up skull decoration for Halloween.
Happy Halloween!


Frequently asked questions
Have a question about this project?