


Thanksgiving Table Decor: Setting the Stage for a Feast to Remember

Thanksgiving is a time for gratitude, togetherness, and delicious food, and it's the perfect opportunity to create a warm and inviting atmosphere for your guests.
One of the most effective ways to set the mood for your Thanksgiving celebration is by making your own homemade table decor.
Whether you're hosting a large family gathering or an intimate dinner with friends, here are some creative Thanksgiving table decor ideas to ensure your holiday feast is extra special.
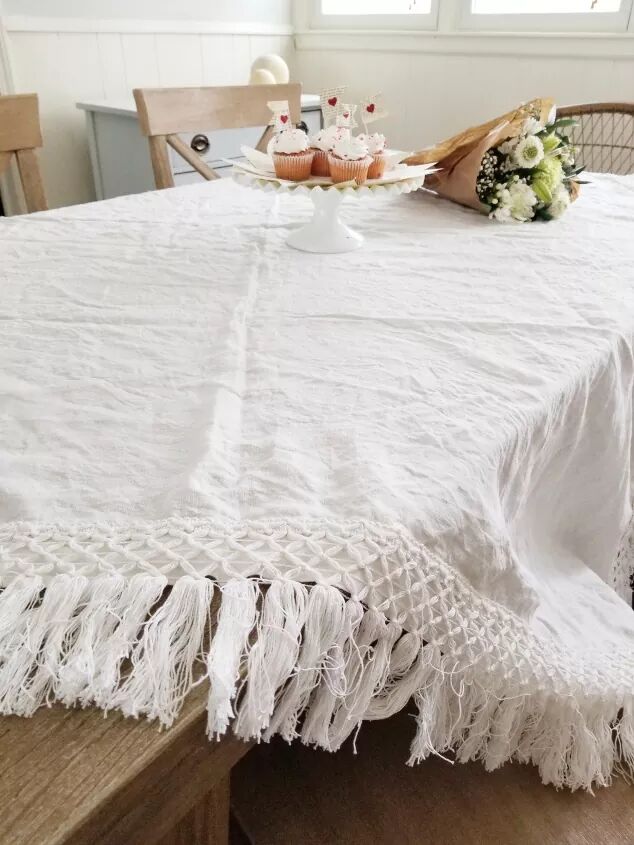
Table of contents
Thanksgiving Tablecloth Ideas: Start with a Solid Foundation
To set the stage for your Thanksgiving Table Decor, it all begins with the right choice of tablecloth. Consider opting for a neutral foundation to create a versatile and timeless backdrop for your holiday feast.
Here are some ideas:
1. Sew a Patchwork Tablecloth
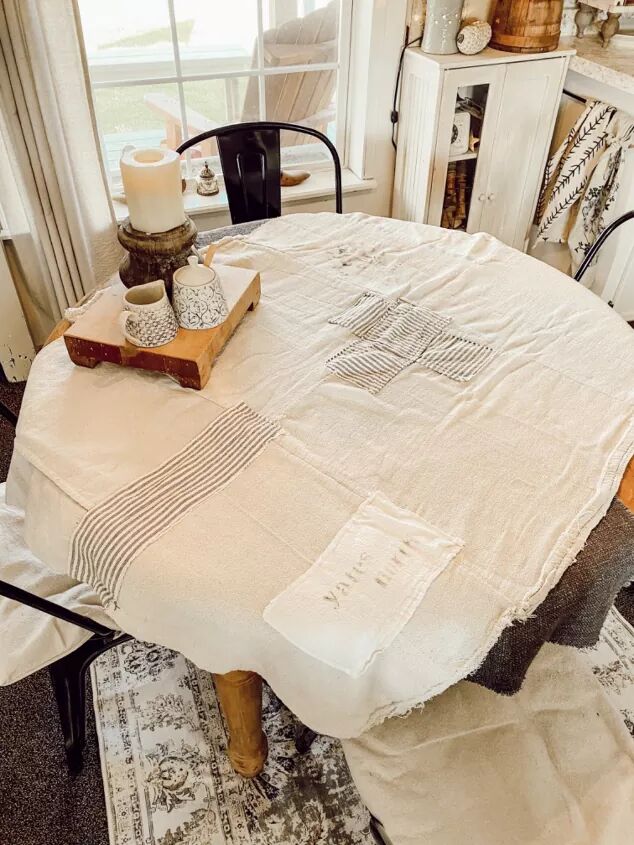
Laura, the creative genius behind this project," found inspiration from a vintage patchwork drop cloth on Instagram.
She ingeniously repurposed scraps of drop cloth and neutral fabrics, adding vintage charm with ticking stripe fabric and stenciled accents. After sewing pieces together and adding patches, she trimmed the edges and squared it up, keeping some raw edges for a rustic touch.
The result? A delightfully Vintage Tablecloth perfect for a rustic Thanksgiving table, and a great example of DIY creativity using leftover fabrics.
2. Update a Thrifted Tablecloth
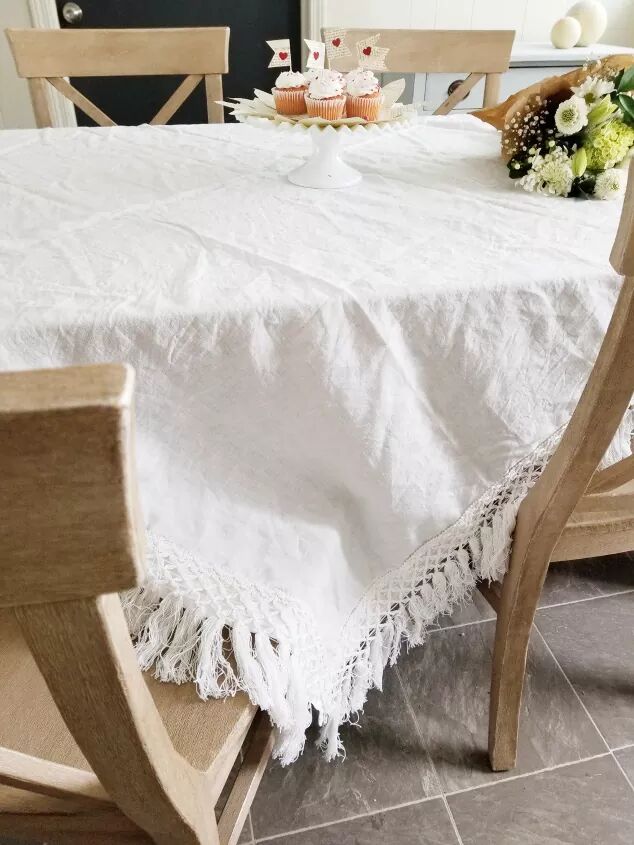
Jennifer from SimplePrairieLife discovered a cream-colored linen tablecloth at a thrift store and transformed it with a bohemian twist using clearance fringe from Hobby Lobby.
After washing the tablecloth, she carefully pressed the edges flat to provide a smooth surface for attaching the fringe. Jennifer measured and attached the fringe with fabric glue, ensuring it dried evenly.
She ended up with a stunning, budget-friendly Boho Tablecloth that breathed new life into her dining area.
3. Stamp a Plain Tablecloth
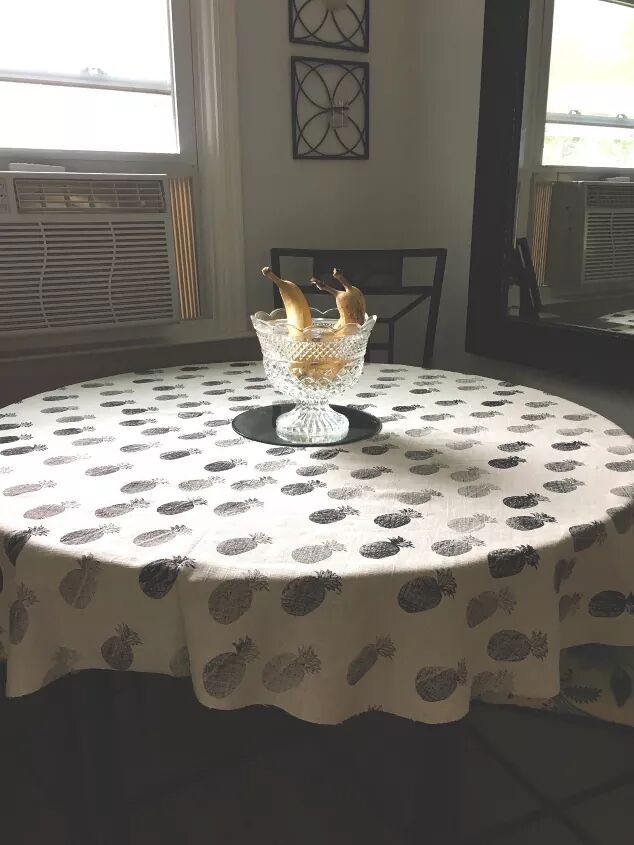
Rob and Courtney M created a personalized and budget-friendly Thanksgiving Tablecloth using a neutral linen blend fabric and a pineapple stamp symbolizing Southern hospitality.
They embraced spontaneity during the stamping process, resulting in a charmingly imperfect yet meaningful design.
This project highlights the beauty of personalized decor and adds a special touch to a Thanksgiving celebration.
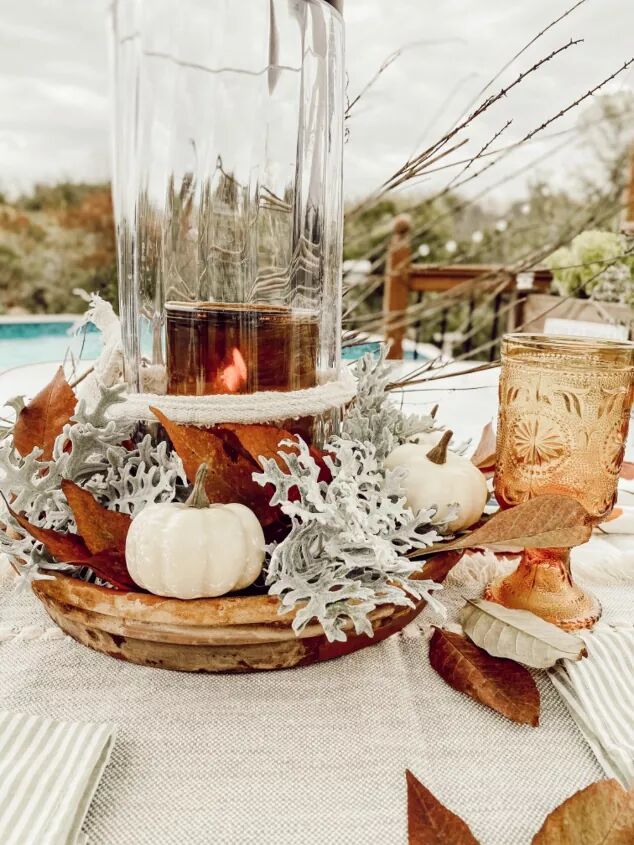
Photo: Laura mobilehome_cottage
Thanksgiving Centerpieces: Add a Wow Factor
Centerpieces are the heart of your Table Decor. They are the true showstoppers that draw attention and add a touch of magic to your dining experience.
Here is some inspiration:
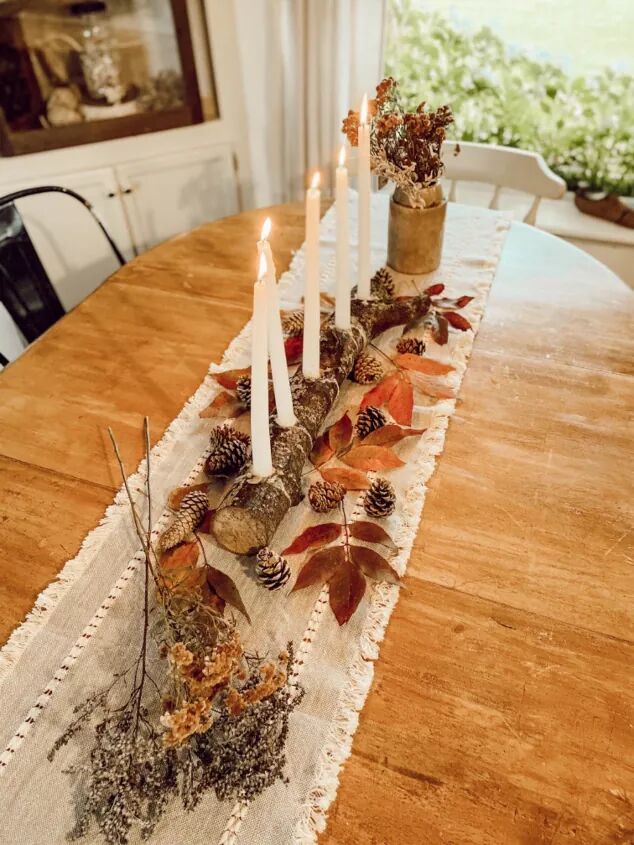
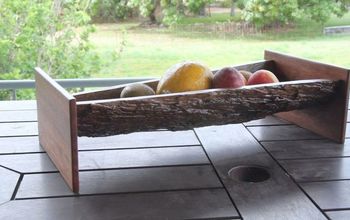
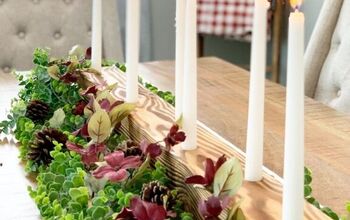
1. Build a Rustic Log Candle Holder
Laura, from mobilehome_cottage, shares affordable centerpieces to illuminate your dining table. She's all about bringing the outdoors inside and utilizing natural elements and items from her home. In this project, Laura presents three unique Fall Centerpieces.
The first centerpiece features a log candle holder, an expensive find in stores, but Laura shows you how to create it for a fraction of the cost. She crafts it from a log, drilling holes for candles and sealing it to preserve the natural beauty. Adorned with leaves and pinecones, it's a rustic delight.
Laura's second centerpiece, perfect for the back deck, doesn't require building anything. She uses a terra cotta plate as a base, a glass vase, a jar candle, and foliage from her garden. With the addition of leaves and mini pumpkins, it exudes a thrifty charm.
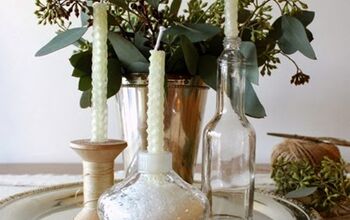
Her third creation exudes a cottage feel, featuring a vintage-looking garden pot, antlers, dusty Miller, mini pumpkins, and a flameless candle. It's a softer and more feminine option that complements any décor.
These centerpieces will surely inspire your inner decorator!
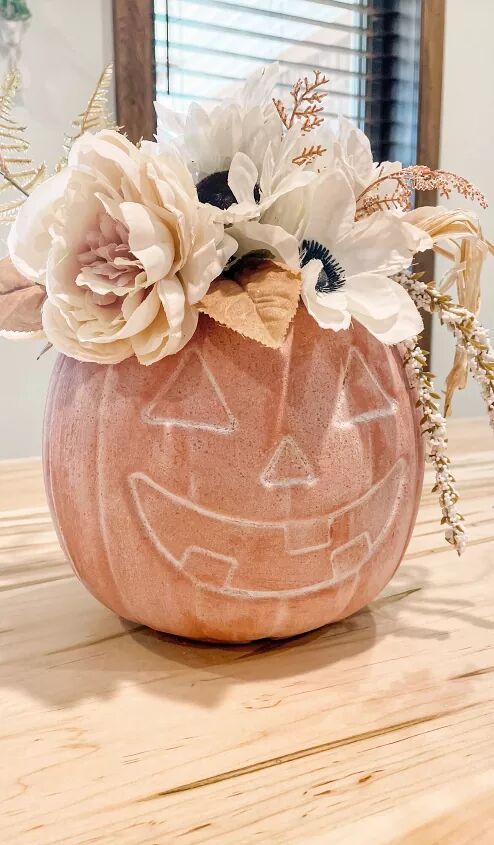
2. DIY Chic Terra Cotta Pumpkins
Rachel, from Faith Hope Home, unveils her clever take on a beautiful Terra Cotta Pumpkin Centerpiece inspired by the pricey Pottery Barn versions. Her project only requires five materials and a mere $10.
She starts with a basic plastic pumpkin bucket, commonly found during this season, and removes the plastic handle. Rachel then mixes acrylic paint to achieve a terra cotta color and gives the pumpkin two coats for a flawless finish.
To add a special touch, while the top coat is still wet, she sprinkles flour or baking soda and brushes off the excess, giving the pumpkin a powdery look. For longevity, Rachel seals it with a light spray of polyacrylic. Finally, she decorates it with floral picks.
Make a few of these chic pumpkins to adorn your Thanksgiving table.
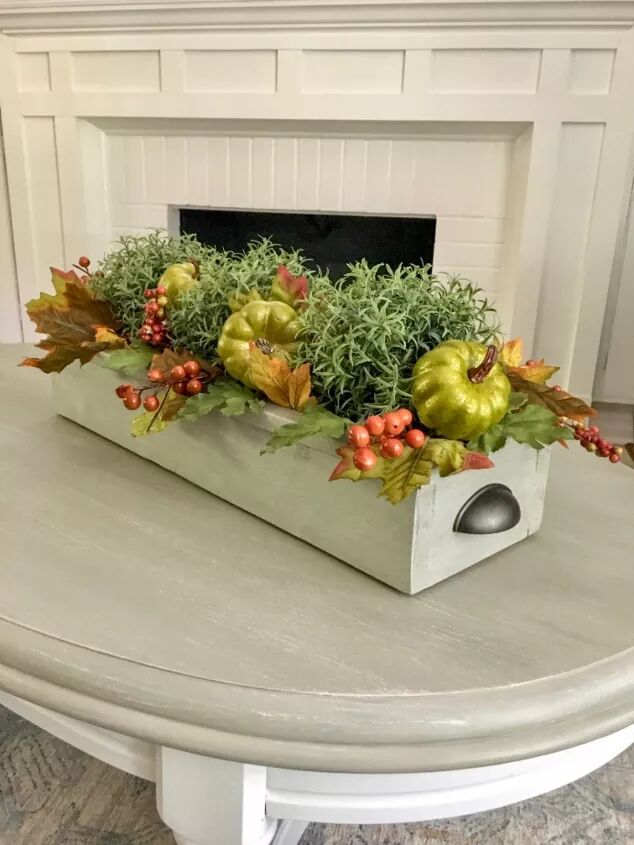
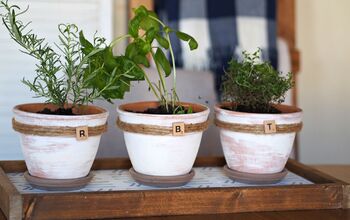
3. Design a Quick Fall Planter
Wren’s Little Nest shares a quick and cost-effective way to create a charming Fall Planter Box Centerpiece. With only four materials and $10, you can complete this project in just 15 minutes.
With a less is more approach in mind, she began the project with a wood planter box. Next, she evenly spaced three faux rosemary plants in the planter and wrapped the vines around them in opposite directions. To finish, she filled any gaps with extra leaves and mini pumpkins.
The result is a texture-rich, colorful arrangement that's easy to create and perfect for welcoming the fall season.
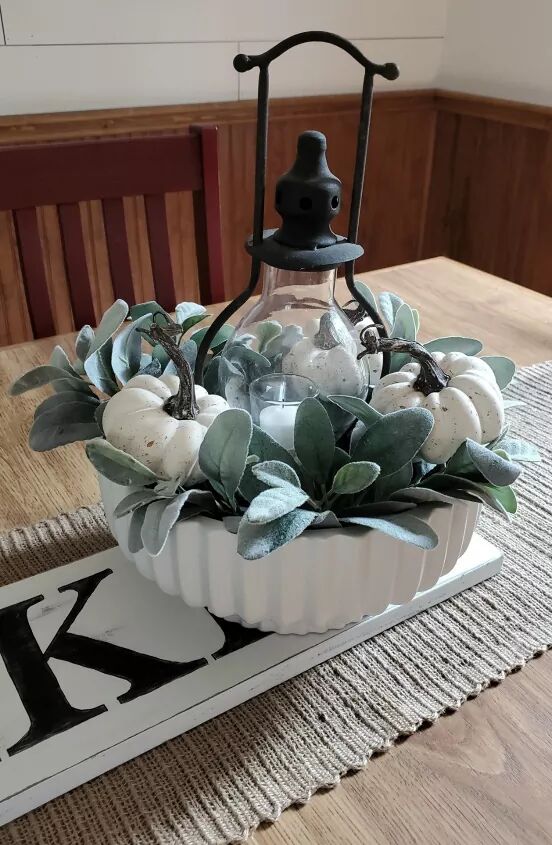
4. Create a Seasonal Centerpiece
Staci Marie offers a Versatile Centerpiece that's both budget-friendly and customizable.
The essential materials include a large planter pot or bowl, assorted floral stems or greenery, a spacer object like a ramekin, and a centerpiece object such as a candle or mini tiki torch.
Staci suggests placing the ramekin in the center of the ceramic planter to add height and safety for open flames. She then arranges greenery, such as lambs ear, around the ramekin to fill the space, offering a soft, seasonal touch.
The centerpiece object can vary, from a mini tiki torch for outdoor dining to a real or faux candle. The choice depends on your preferences. Staci even demonstrates how to adapt the decor for fall by adding pumpkin picks to the greenery.
You can change the decorations for various seasons or moods and even use items you already have at home.
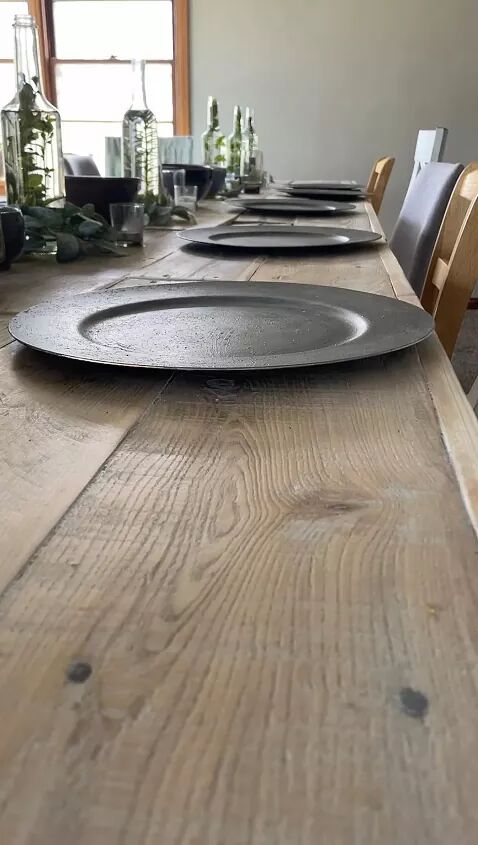
Photo: Determined_diy
Thanksgiving Placemat Craft: Adding Texture and Depth
Creating a Thanksgiving table that truly stands out involves careful consideration of not just the decor, but also the elements that add depth and character to your setting. Handmade Placemats and chargers are an ideal choice to accomplish this.
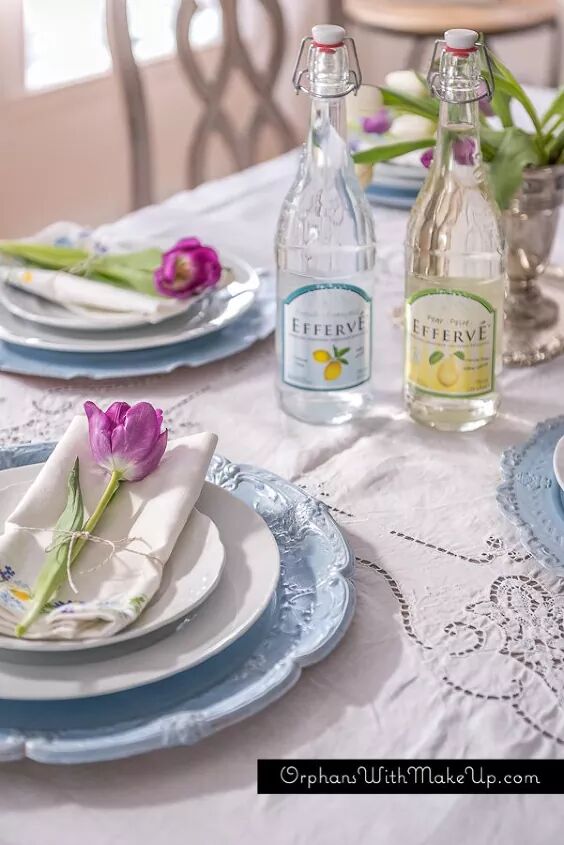
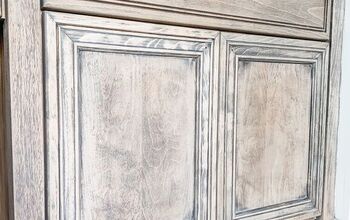
1. Create Stylish DIY Charger Plates
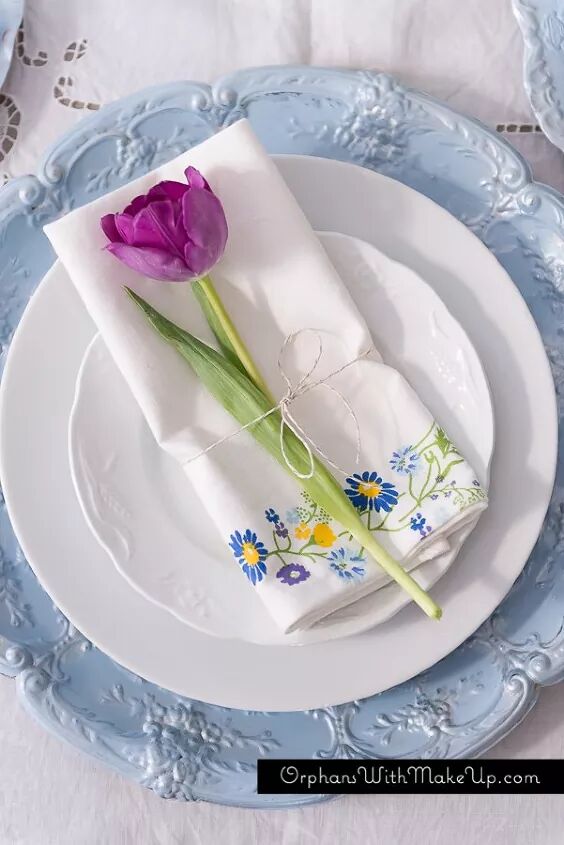
Mary Vitullo from Orphans With Makeup shares a simple DIY Charger Plate project to glam up your table setting.
Mary upcycled thrifted metal serving trays with different patterns. She began by painting them in soft blue, followed by light distressing and sealing them with wax. To accentuate the raised details on the platters, she applied the silver metallic cream, mainly around the raised edges.
This straightforward DIY project takes about 1-1/2 hours to complete, including drying time.
The result is chic and distinctive plate chargers that bring interest to the table.
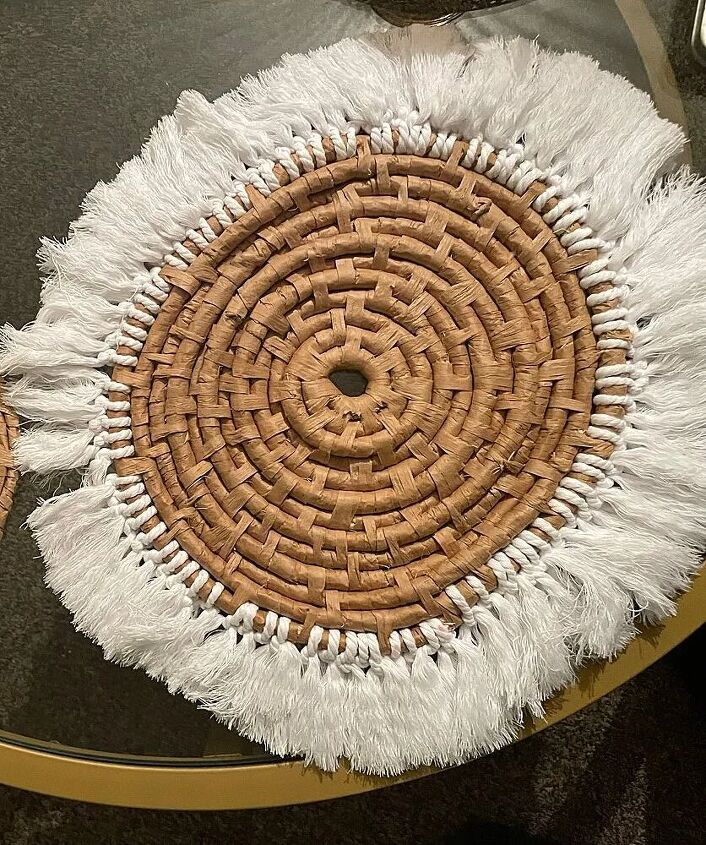
2. Weave Beautiful Placemats
Amanda from Determined_diy, wanted stylish place settings for her dinner party without breaking the bank.
Opting for a DIY approach, she crafted Woven Placemats with an upscale appearance. Using materials like thick rope, raffia, and macrame, she embarked on a two-day, hands-on project. The method involved coiling and wrapping the rope with raffia, creating intricate patterns. Amanda also added optional fringe for a unique touch.
After combing out the threads, trimming the edges, and securing the ends, she had stunning woven placemats for her table.
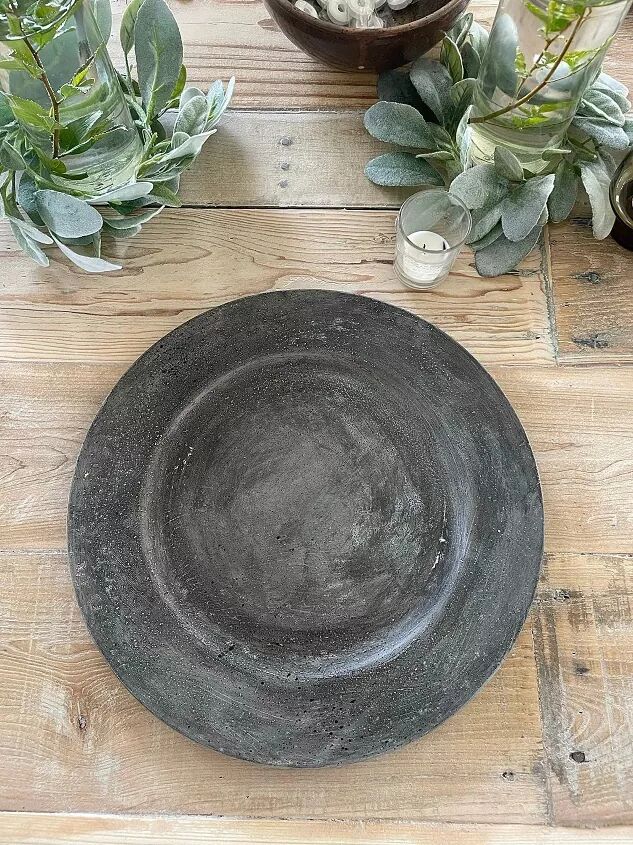
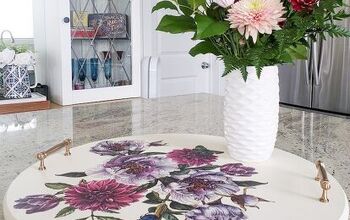
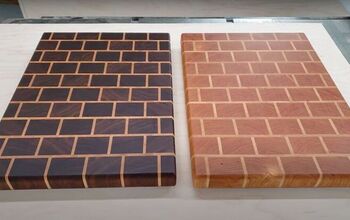
3. Craft Faux Stone Chargers
Amanda from Determined_diy shares another great place-setting idea, elegant Faux Stone Chargers.
Using plastic charger plates, she primed and textured the surface. Next, drywall compound was mixed with grey paint to achieve a stone-like appearance. A glaze was added for depth, giving the plates a sophisticated look. These plates aren't food-safe but work beautifully as chargers to add depth to place settings.
Make these stylish and unique faux stone plates for your Thanksgiving dinner.
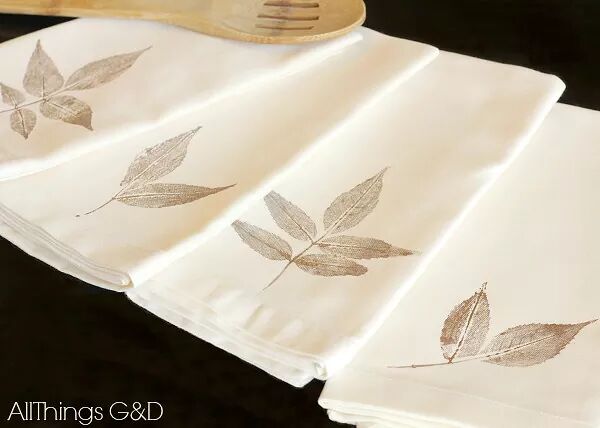
Photo: All Things G&D
Thanksgiving Napkin Ideas: Infusing Personality and Style
As you craft your perfect Thanksgiving table, don't forget the magic of napkins. Take your table to the next level by designing your own distinctive napkins, perhaps wrapping them in a gorgeous DIY napkin ring or exploring a clever Thanksgiving napkin folding idea:
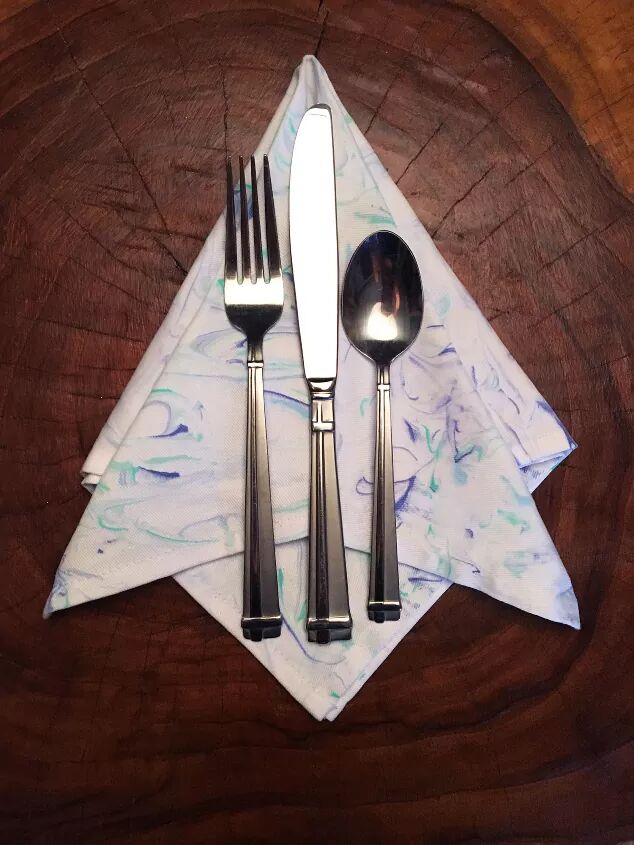
1. Marble Fabric Napkins
Learn how to create personalized Marbled Dinner Napkins with the talented Amanda!
Transform regular paints into fabric-ready acrylics by mixing them with the fabric medium. Swirl drops of this paint on a layer of shaving cream to create a beautiful marbled effect. Place the napkins on the mixture, scrape off the shaving cream, let them dry, and set.
The result is a set of eye-catching, custom-designed dinner napkins to impress your guests.
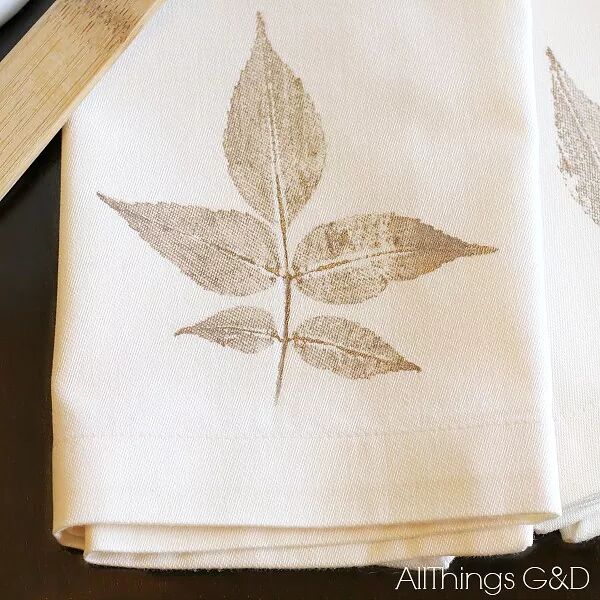
2. Stamp Leaves on Napkins
All Things G&D presents a delightful DIY project for the fall and Thanksgiving seasons with Leaf-Stamped Napkins.
Using supplies as simple as leaves, napkins, craft paint, a paintbrush, and a rolling pin, you can bring a touch of nature to your dining table. Select a leaf, apply craft paint to the veiny side, and brush it onto a cloth napkin. A rolling pin, covered with a paper towel, helps transfer the leaf's design to the napkin. Lift the leaf gently, and voilà! You've got your unique leaf-stamped napkins.
Make your table settings truly special this Thanksgiving.
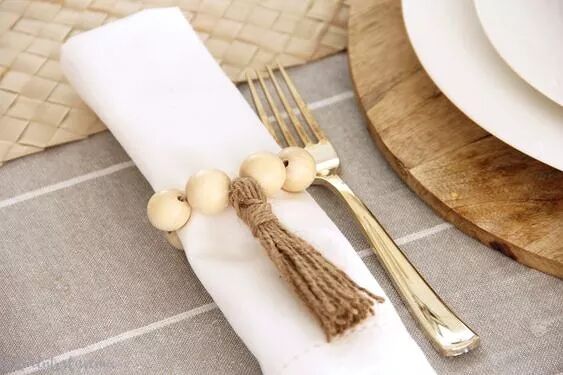
3. Bead a Napkin Ring
Rebecca from Hello Central Avenue shares a simple DIY project for creating Wooden Bead Napkin Rings. These versatile napkin rings can be customized to match any table setting and are an affordable addition to your dining decor.
You'll need wooden beads, twine, an upholstery needle, and a piece of cardboard to get started. The process involves stringing beads onto twine, creating tassels, and assembling the napkin rings. The step-by-step instructions are easy to follow, making this a quick and enjoyable project.
Add a unique touch to your tablescapes with these boho wooden bead napkin rings
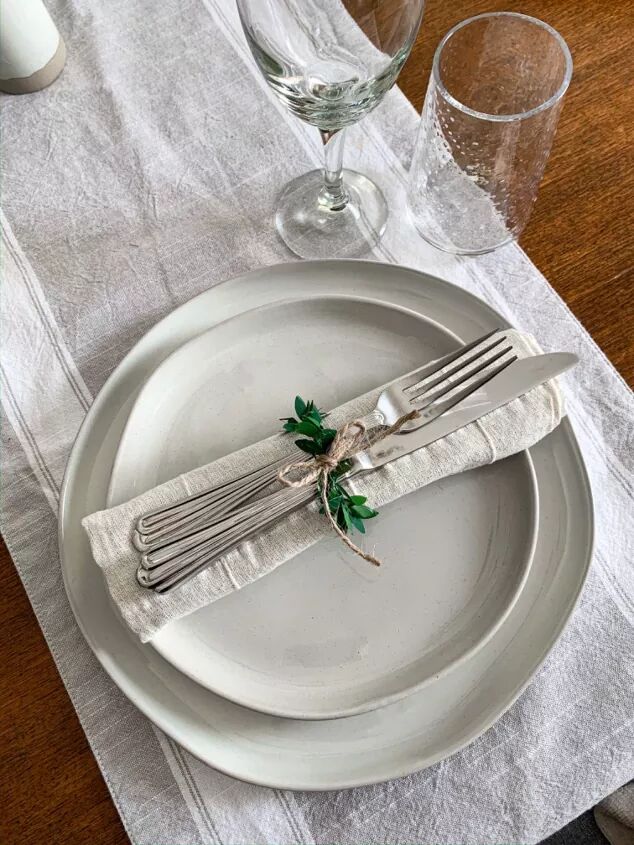
4. Wrap Napkins in Garlands
Laura from @HartLaneHome shares a quick and budget-friendly DIY project for making your own 10 Minute Napkin Rings.
Rather than splurging on expensive faux greenery napkin rings, she uses wire costing just $1, to create eight rings with leftovers.
Any wired faux garland can be used as long as it holds its shape, allowing for a variety of design options. For materials, all you need is wired garland, twine, and scissors. Simply shape the garland into a ring, secure it with wrapped wire, tuck away any sharp edges, and add decorative twine or other embellishments.
Laura's DIY napkin rings offer a cost-effective and stylish solution for your table settings.
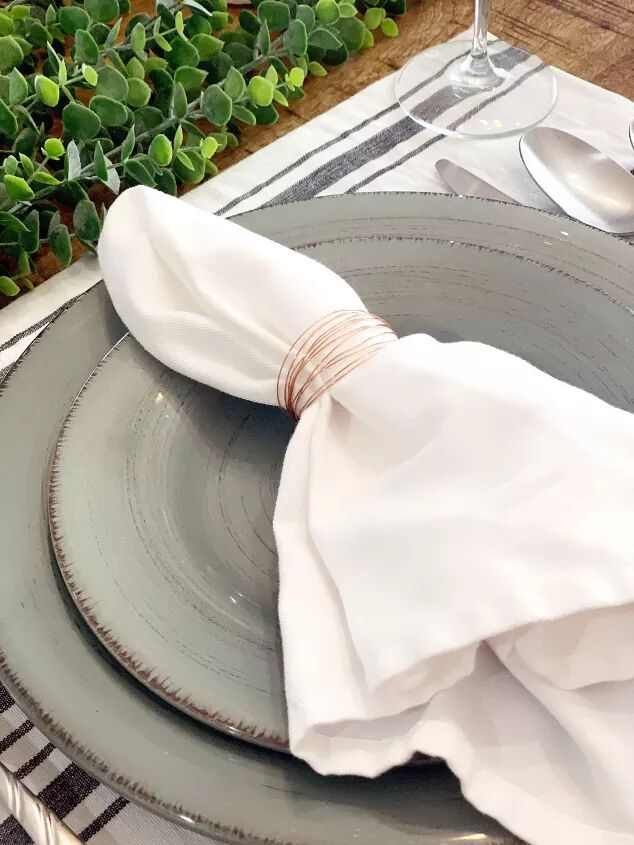
5. Design Gold Napkin Rings
Holly from The Rustic Desert presents a quick and budget-friendly DIY project for creating fancy Gold Napkin Rings.
You'll need 20-gauge copper wire, a baking roller, and wire cutters. Start by wrapping the wire around a rolling pin, leaving a short end. Wrap it ten times, cut, and twist the excess. Remove the wire, wrap the remaining around the ring, and secure it.
Then, separate the wire, and your chic DIY Gold Napkin Rings are ready to grace your table.
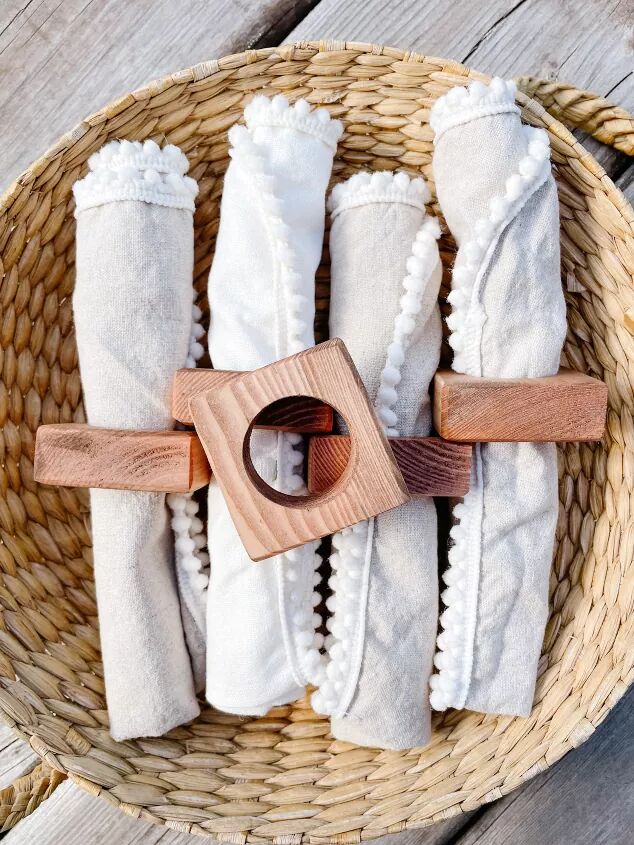
6. Craft Wood Napkin Rings
Jackie from Sew Bright Creations provides a cost-effective project for crafting DIY Designer Napkin Rings using materials from home.
To start, she used scrap board cut into 2" squares and drilled a hole in the center of each square. After trimming and sanding the rough edges, she applied stain to the napkin rings. Jackie offers tips for creating stylish cloth napkins, emphasizing that you can save money by sewing your own or finding thrift store treasures.
The final result: designer napkin rings that add elegance to your table setting without breaking the bank. It's a creative and budget-friendly approach to elevate your dining decor.
7. Master Easy Napkin Folding Techniques
Susie Robb Brinck presents several charming Napkin-Folding Techniques to enhance your table settings. She emphasizes that cloth napkins, whether formally placed to the left of the forks or more casually on the plate, provide a beautiful touch.
Susie introduces different methods like using napkin rings, folding napkins into glasses, or employing a quarter-fold or tri-fold for versatility. She demonstrates a graceful accordion fold for formal occasions and a double roll technique that pairs well with two-toned napkins. Susie also offers an envelope fold for a unique presentation and a simple pocket fold for starched cloth napkins.
These creative napkin-folding ideas will elevate your dining decor with style and simplicity.
8. Design Beautiful Napkin Settings
Eloisa Latorre brings us more Napkin Folding Ideas that impress your guests before the meal.
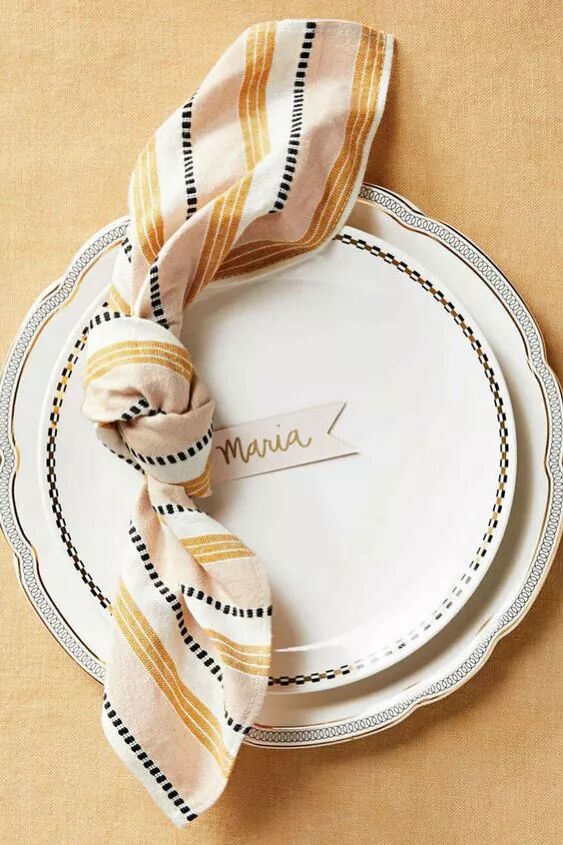
The "Knotted Napkin + Name Tag" is effortless; knot a cloth napkin's center, place it off-center on a plate, and add a name tag.
The "Bow Tie Fold" involves folding a napkin into a rectangle, wrapping twine or ribbon around the center to create a bow tie.
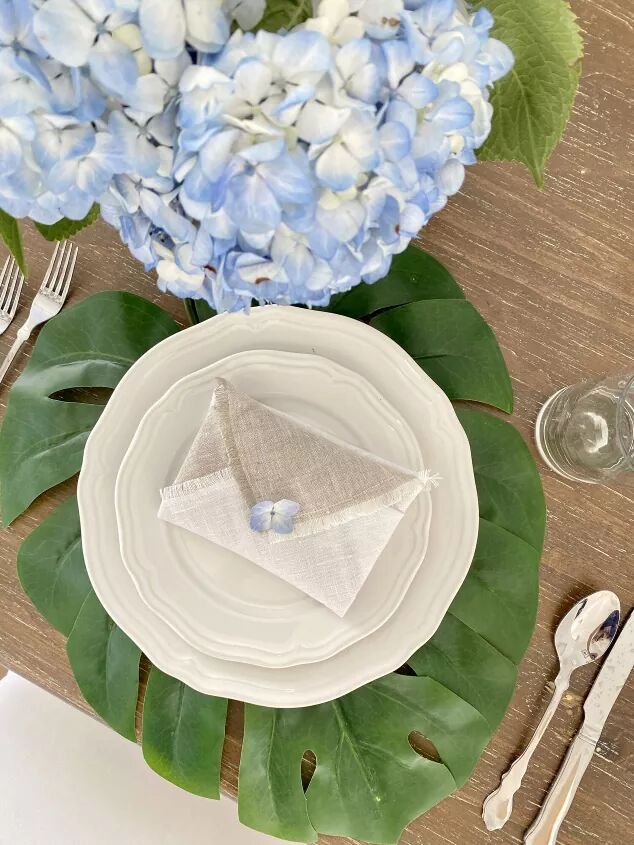
The "Single Pocket Napkin Fold" is perfect for elegant gatherings. It allows for menu or silverware placement.
Give your dining table a charming touch with these easy napkin folding techniques today!
Make Seating Special with Thanksgiving Place Cards
As you orchestrate your Thanksgiving table, the attention to detail truly matters. Personalized place cards are an excellent way to make your guests feel valued and add a personal touch to your table decor.
Here are some DIY Thanksgiving Place Cards to consider:
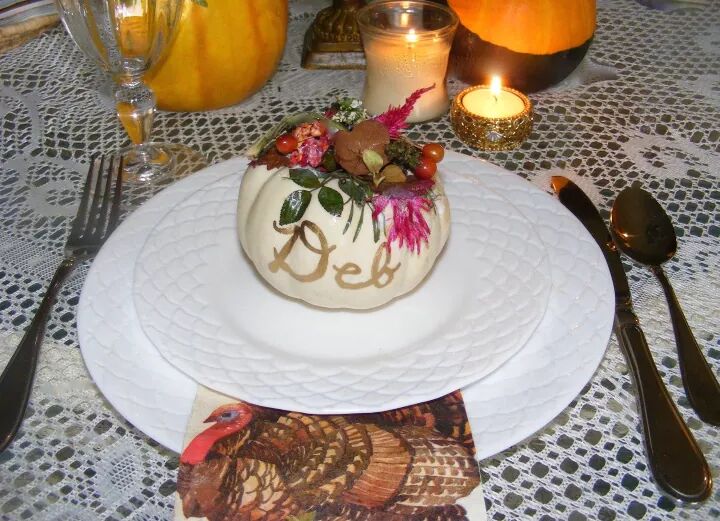
1. Craft Pumpkin Place Cards
Get inspired by Mickey Baron's Mini Pumpkin Place Cards.
To make these charming place cards, gather materials like Mod Podge, paintbrush, mini pumpkins, scissors, toothpicks, and florals you've collected. Apply Mod Podge to your chosen piece and gently attach leaves using a toothpick. Get creative and have fun with the design. Once it's dry, personalize it with a gold leaf pen.
These mini pumpkin place cards will delight your guests and make a lovely takeaway gift.

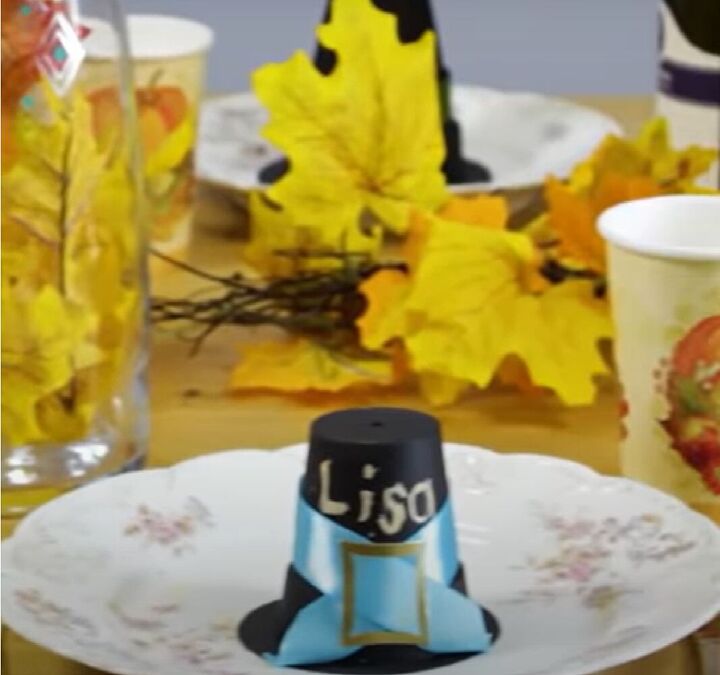
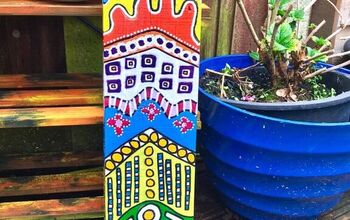
2. DIY Pilgrim Hat
Shawna Bailey, a Thanksgiving enthusiast, shares a creative DIY project: making adorable Pilgrim Hat Place Cards.
With just a few materials, including terra cotta pots, chalkboard paint, black paper, ribbon, craft glue, and gold stickers, you can craft these charming additions for your holiday table. After spray-painting the pots, add ribbons and "buckle" stickers for a stylish touch. Personalize the hats with guests' names using chalk or chalk markers.
These pilgrim hat place cards not only enhance your table but can be reused for future Thanksgivings. They're a fun and practical addition to your holiday traditions.
Find inspiration for your Thanksgiving celebration
With all your elements in place it’s now time to add glassware and tableware that compliment your theme and finish the look with small decorative items like pinecones, seasonal fruits, and gourds to add warmth and character to your Thanksgiving table setting.
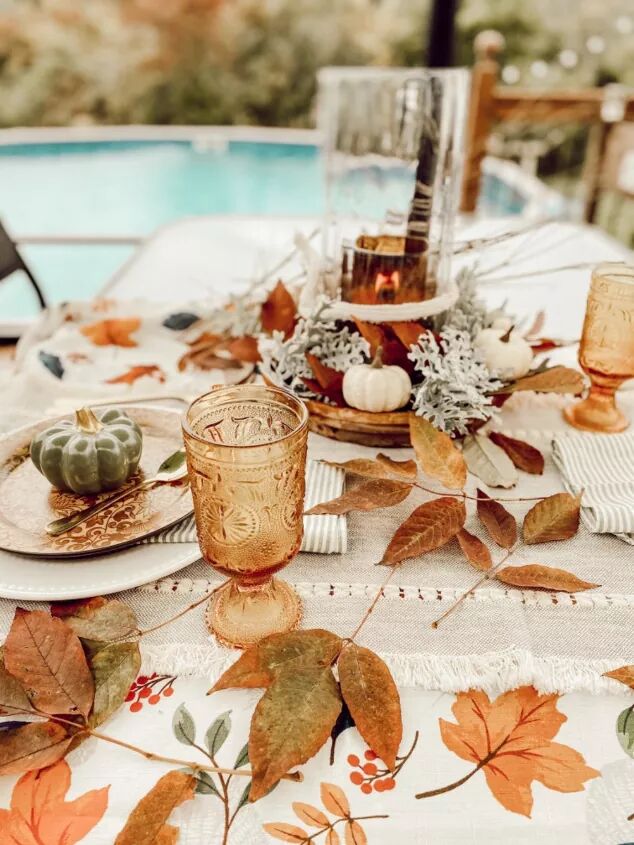
Photo: Laura | mobilehome_cottage
Thanksgiving Table Decor Ideas
Remember, Thanksgiving is not just about the food; it's also about the love and care you put into creating a beautiful and welcoming environment for your loved ones.
Enjoy the process of decorating your table, and have a wonderful Thanksgiving celebration!


Frequently asked questions
Have a question about this project?