


How I Made Fall Garland With Felt!

I love me some seasonal garland, especially when I can make it on the cheap and involve my little one for some kid crafts! I made two fun Fall garlands with mini! Here's how:
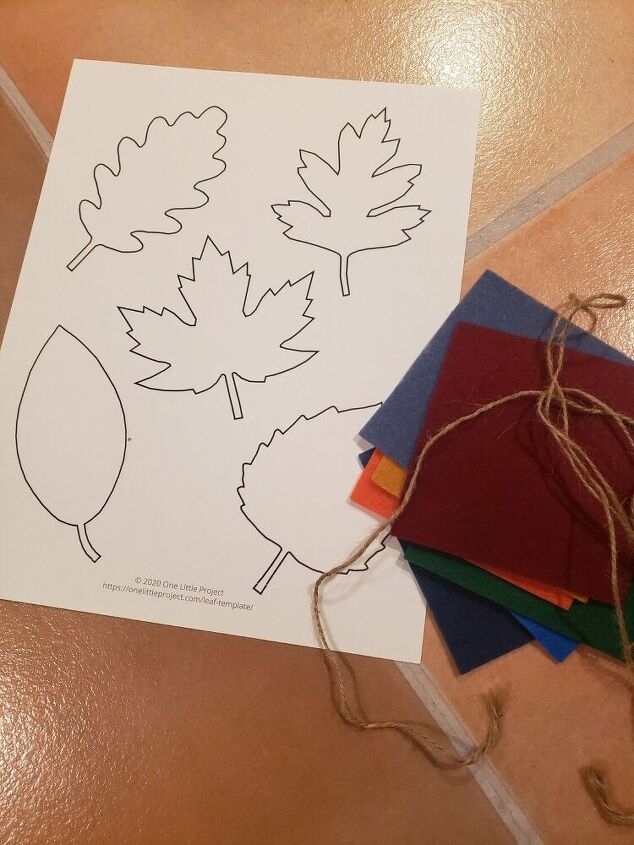
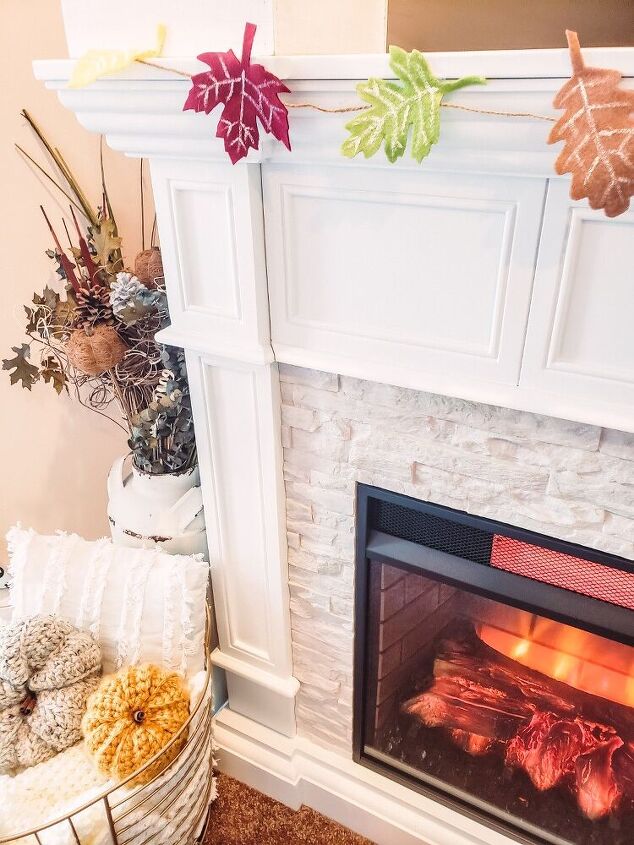
I downloaded some outlines of leaves from Google and printed them on thick stock paper. I find the thick paper easier to use as a stencil.
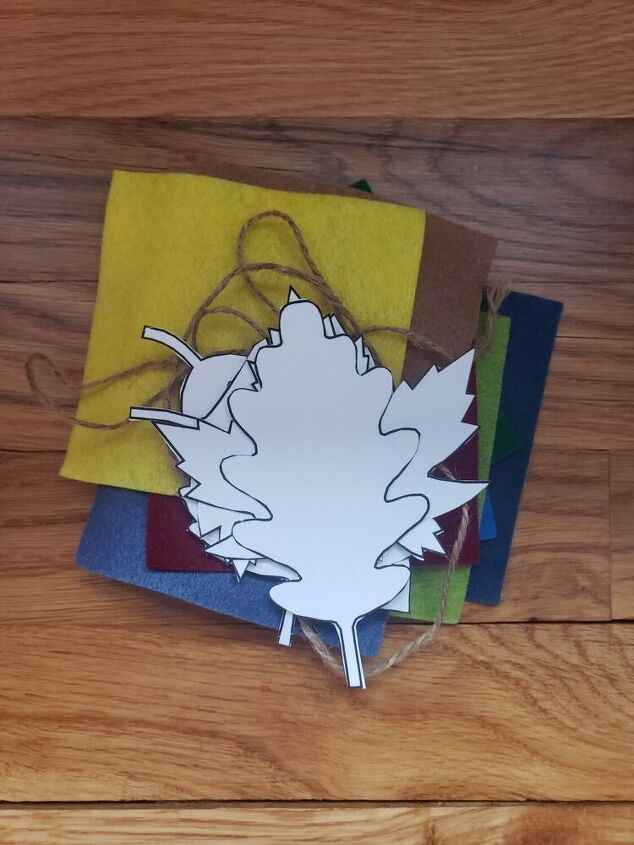
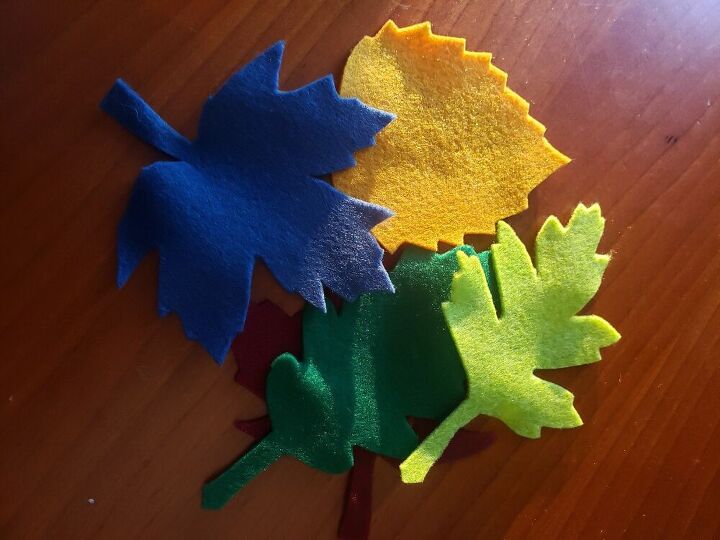
I also ordered 4x4 felt squares from amazon and chose fall leaf colors.

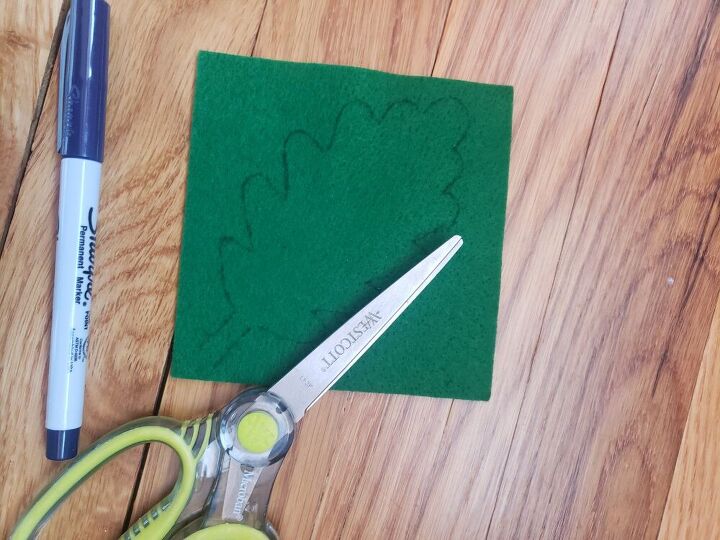
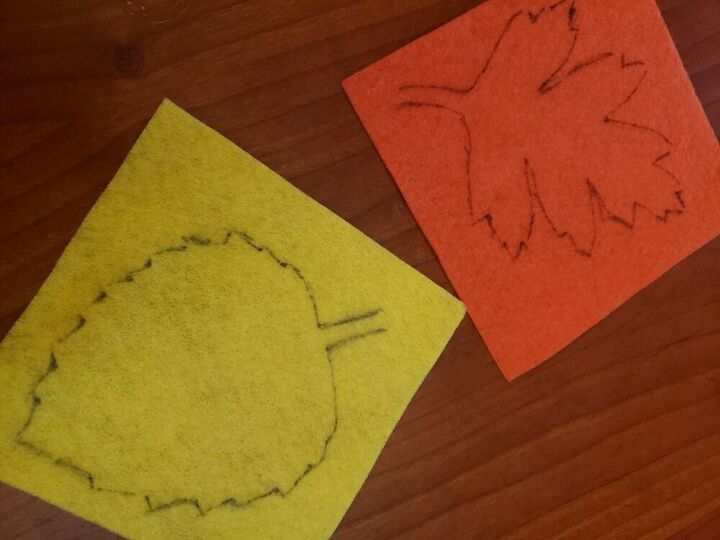
Using a thin sharpie marker, I decided on which leaf would go with which color and traced the pattern.
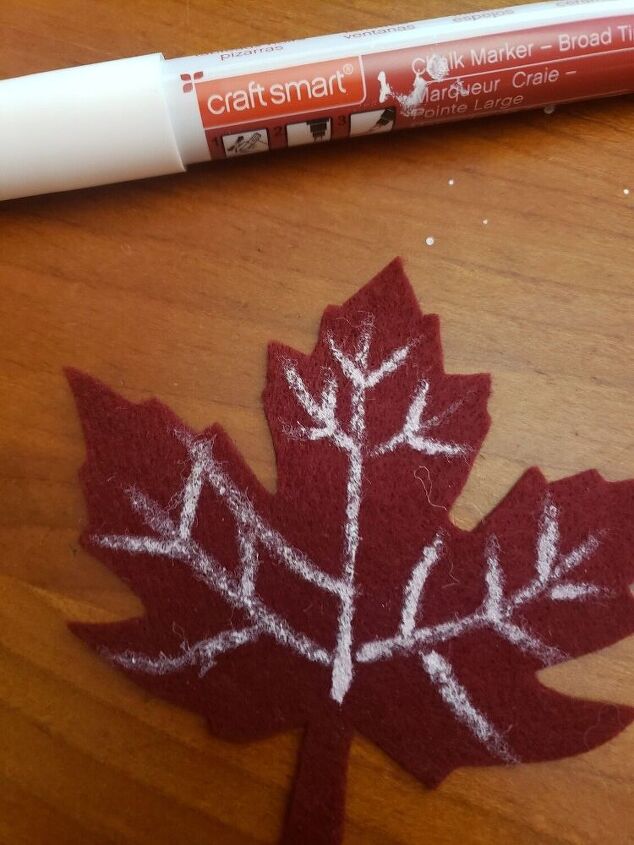
After cutting out all my leaves (I used 8) I decided I wanted to draw veins on the leaves using a chalk pen to give the leaves more definition.
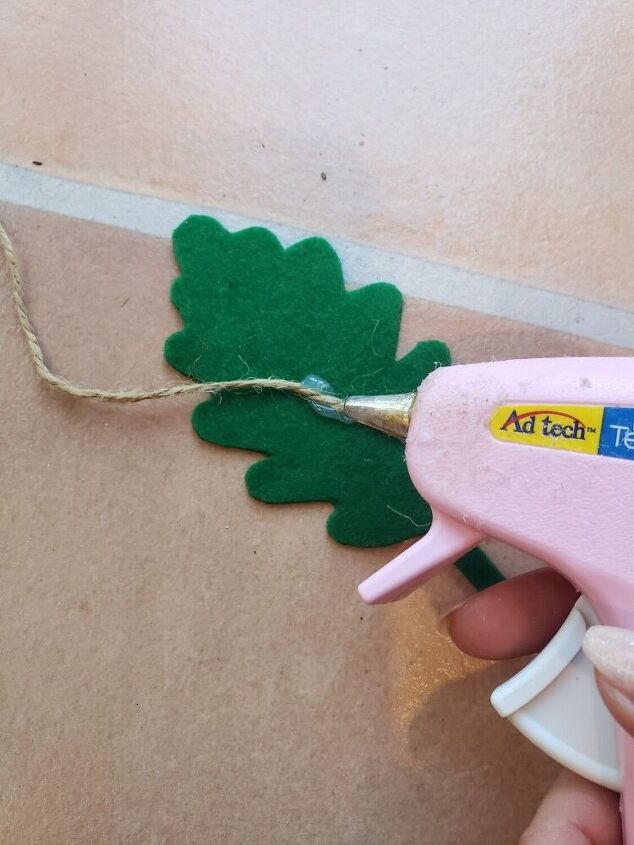
Then I used hot glue to secure them to a string of twine.
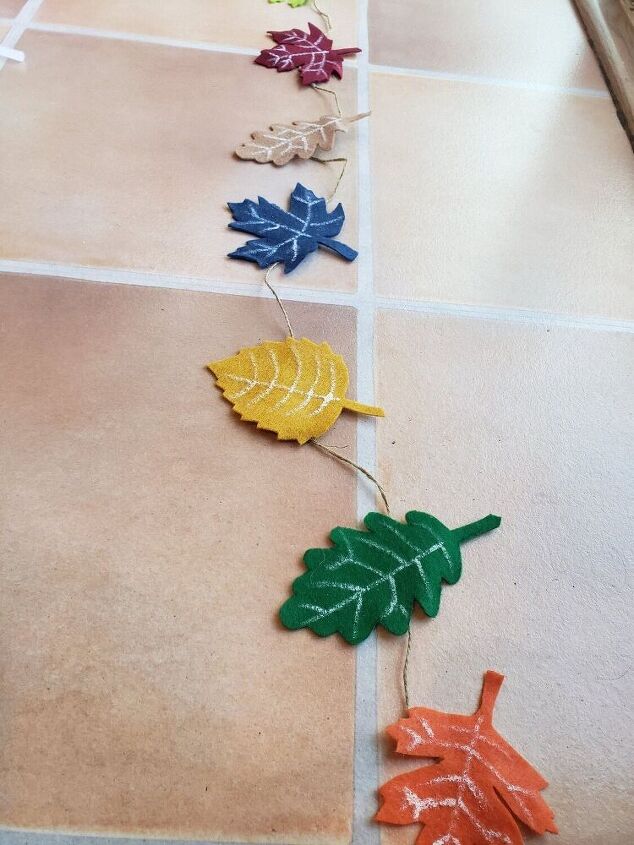
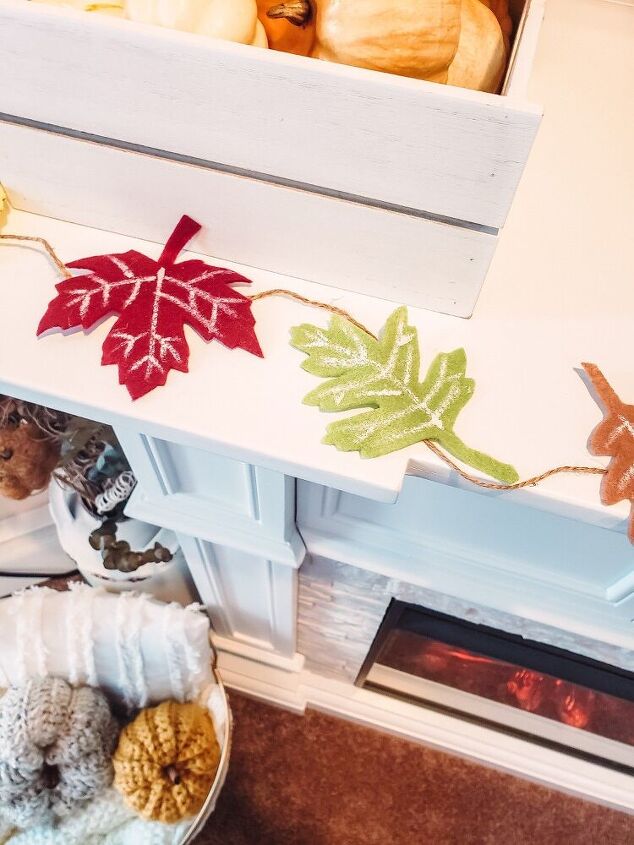
And then I hung it up! Easy and fun and of course my 3 year old had fun throwing the leaves in the air 

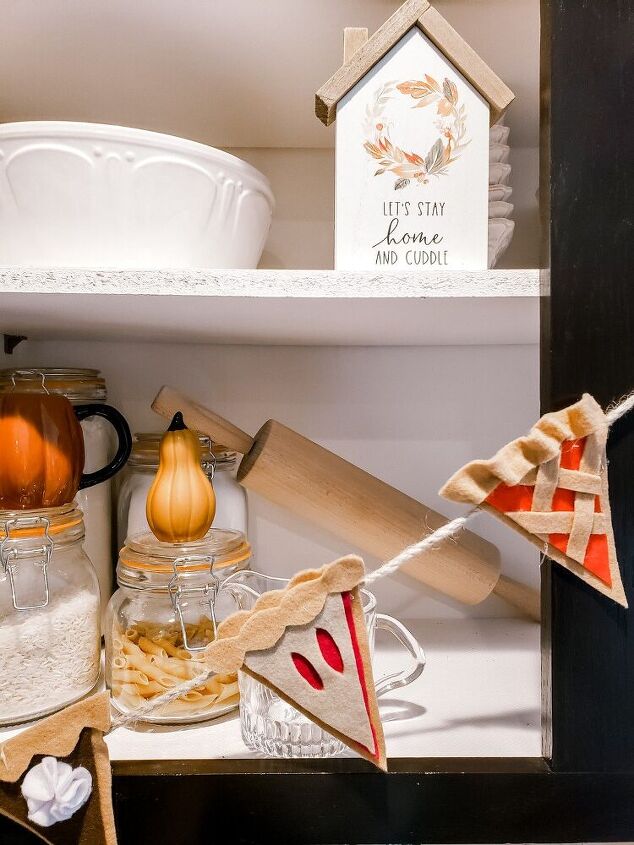
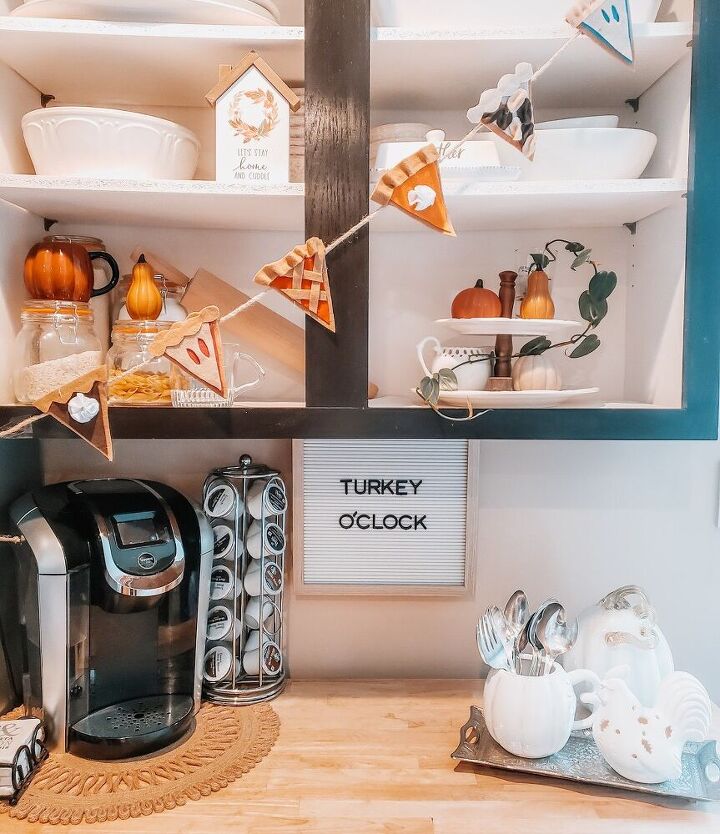
Next I made pie garland, perfect for Turkey season! Who doesn't love pie?

I found another print out on Google, but all you really need is 2 equilateral triangles, one being slightly larger then the other.
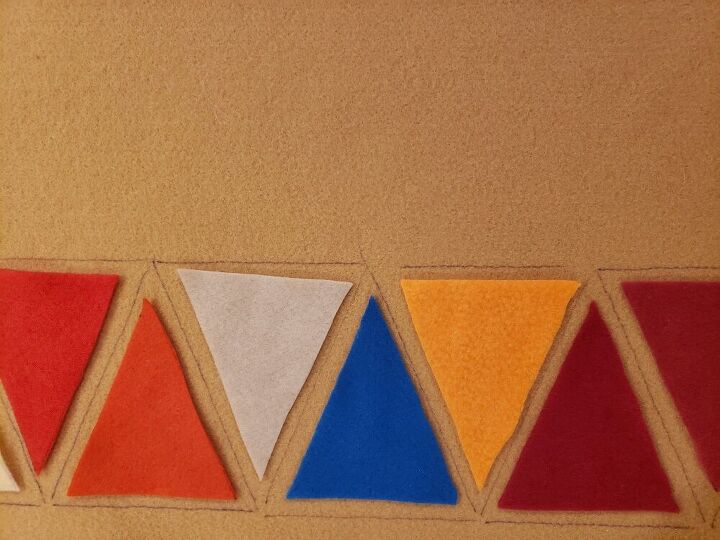
Using the thin sharpie, I cut 7 small triangles from different colored felt squares for the filling and traced 7 large triangles from the same large sheet of tan felt for the base.
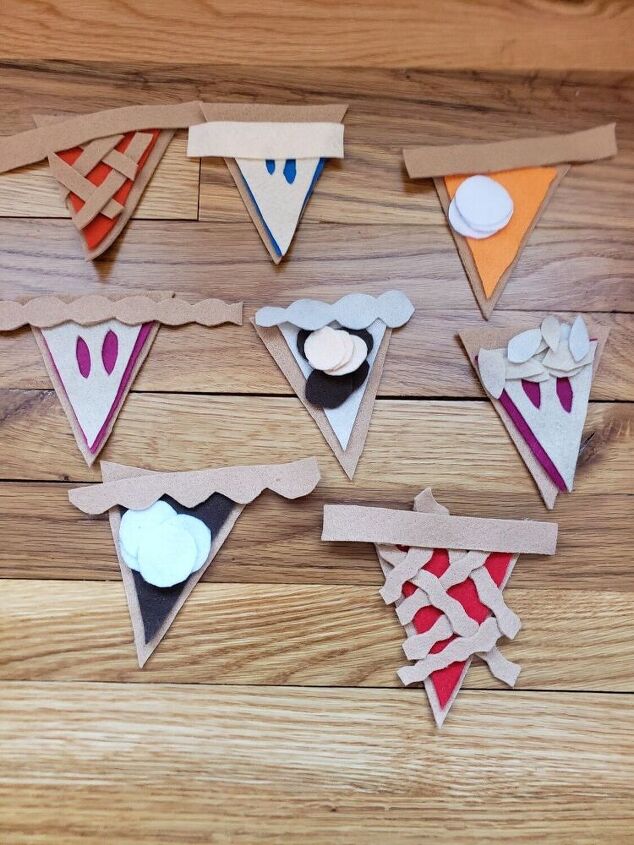
Then I just played around with the rest. I didn't follow a specific pattern I just cute of things out of the felt that I thought looked "pie like". For the blueberry and cherry pies, I cut out a 3rd equilateral triangle just slightly smaller then the pervious one and cut two almond shaped holes in it. Then for the apple pies, I used scrapes to make a grid pattern. For the pumpkin and cholate pie, I cut 3 circles out of white felt and for the pecan I cut out 8 oval shapes from a light and a dark felt color (4 from each). I lay it all out before gluing.
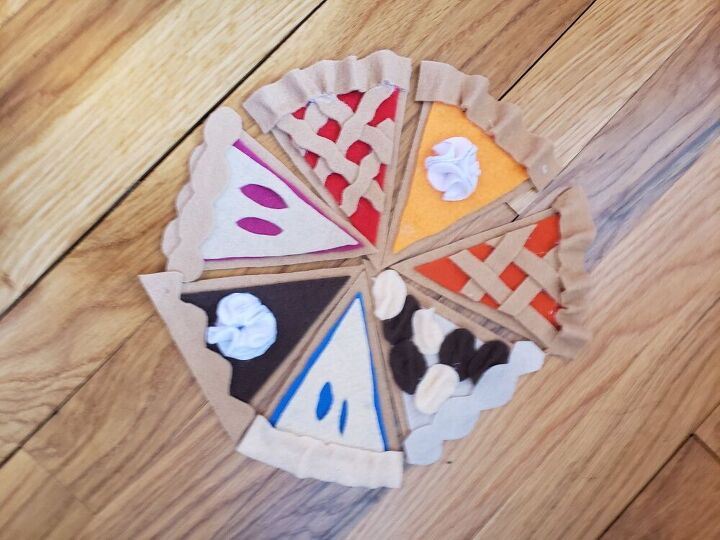
Using hot glue again, I glued each pie and trimmed the excess. For the whip cream, I folded each circle in 2 and glued in in the corner to make it stand up. For the pecans I pinched each oval to give it the nut shape. Finally, I mad the crust different, just what ever I was feeling for each pie, some I cut semi circles and for others I just glued the fabric and pinched it ever centimeter or so.
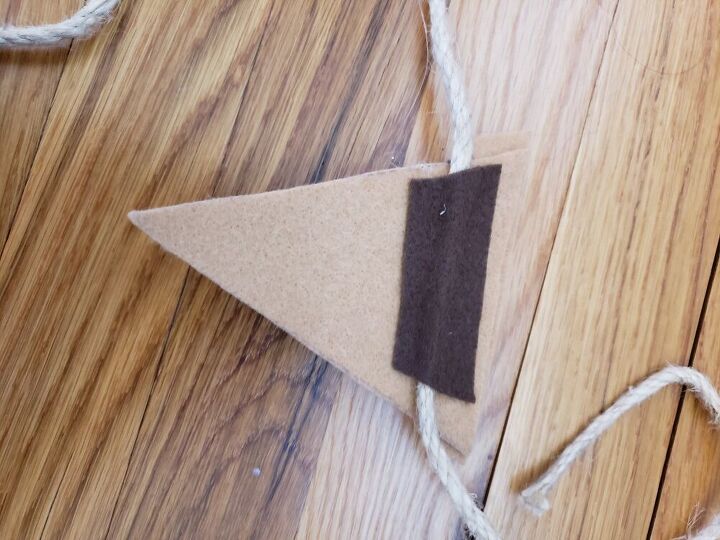
Last, I glued some scrapes and the twine on to the back.
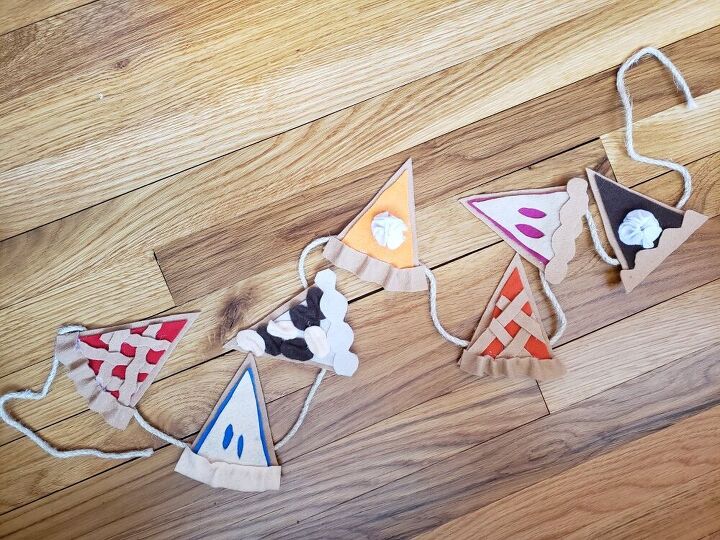
Don't they just look good enough to eat?!

Resources for this project:
See all materials


Comments
Join the conversation
-
Cute ideas! I saw felt leaves at the dollar store if anyone wants to cut corners. I just love the pie pieces. I think I would make all pumpkin with different pie crusts. So creative of you!


Frequently asked questions
Have a question about this project?