


How to Make a Wood Snowflake Decoration Out of Wood Shims

This beautiful wood snowflake decoration is easy to make. Just pick up a pack of wood shims and a few other supplies from the hardware store to get started. Let's go!
How To Make a Wood Snowflake Decoration - Video from Craftidly.com
Below are the steps to make a wood snowflake. If you'd like to check out the full post, you can link to it by clicking here.

Here are the supplies I used to make this beautiful snowflake. This decoration looks complicated to make but it really goes together quickly once you have the pieces cut.
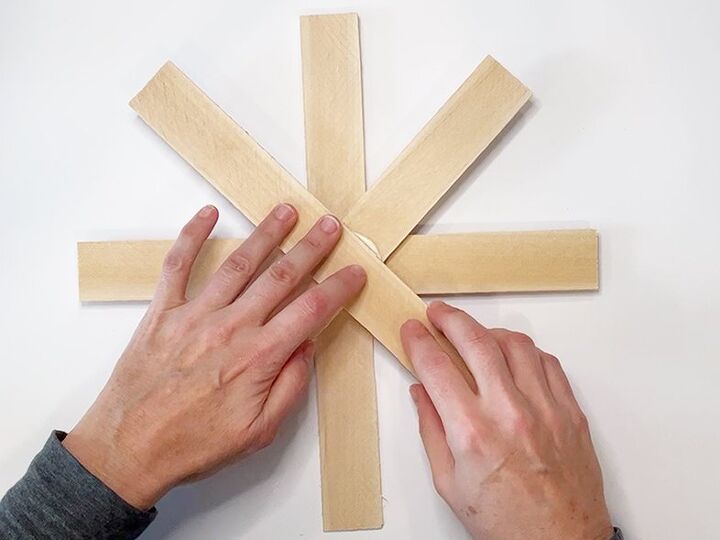
1. Glue the wood shims in a star-shape
To get started, you'll need to glue four 12-inch wood shims at the center as shown above. If you have shorter shims, just glue the short- end to the short end to make the four 12-inch pieces needed.
Note: If you'd like to make this decoration for outdoor use, use a few tack nails with wood glue for a better hold, or try a silicone adhesive like GE GE500 Silicone 2+ Window and Door Caulk.
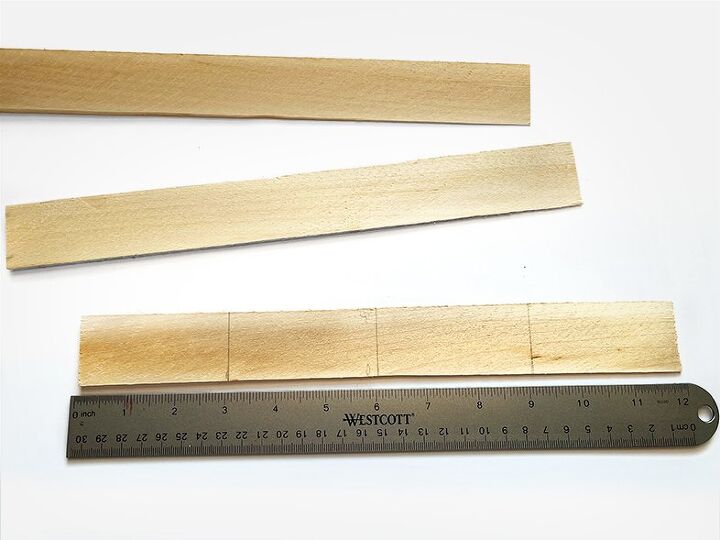
2. Measure more wood shims
Next, measure out 3-inch pieces with a pencil and ruler onto your shims. You'll need sixteen of these to make the decorative ends of your snowflake.
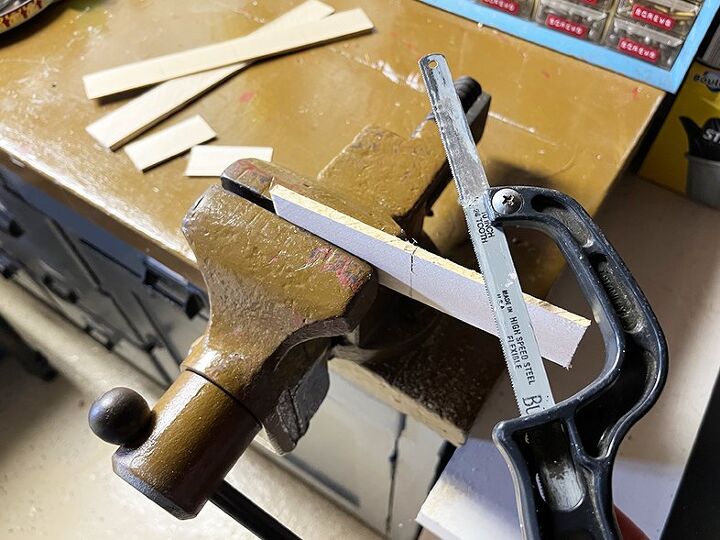
3. Cut the wood shims
Use a small hand saw and a vice to cut the pieces out and don't worry if the edges are rough. You can always go back with a little sandpaper to smooth the ends later.
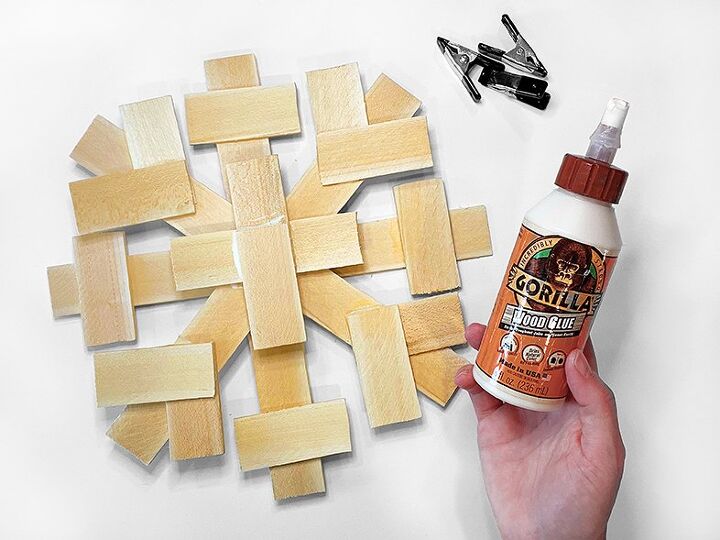
4. Glue the pieces with wood glue
Glue all your 3-inch pieces onto your snowflake base using a good amount of wood glue using the design above as a guide.
There are four 'V' overlapped pieces on four alternating ends and cross pieces on the other four. In the center are four overlapped pieces that look like a plus sign to give the design a little more depth.
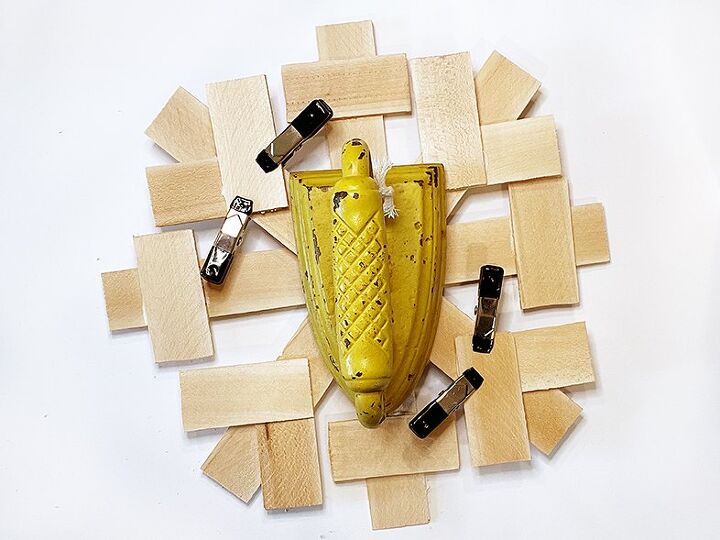
5. Apply weight or clamp
Once all of your pieces are in place, use a heavy weight or clamps to hold things in place as the glue sets. I really think the weight in the center helped but the smaller pieces were fine without clamps when adding a generous amount of wood glue, so just use your judgment on this.
6. Paint white and silver
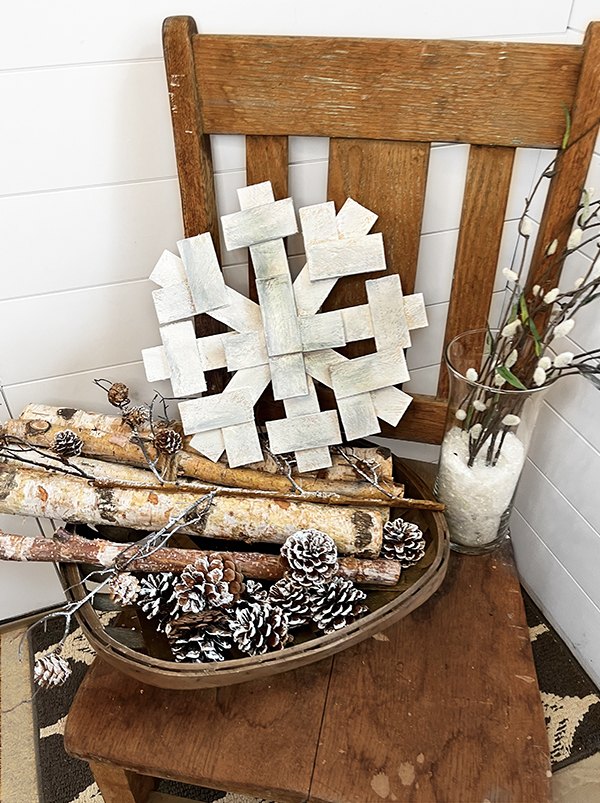
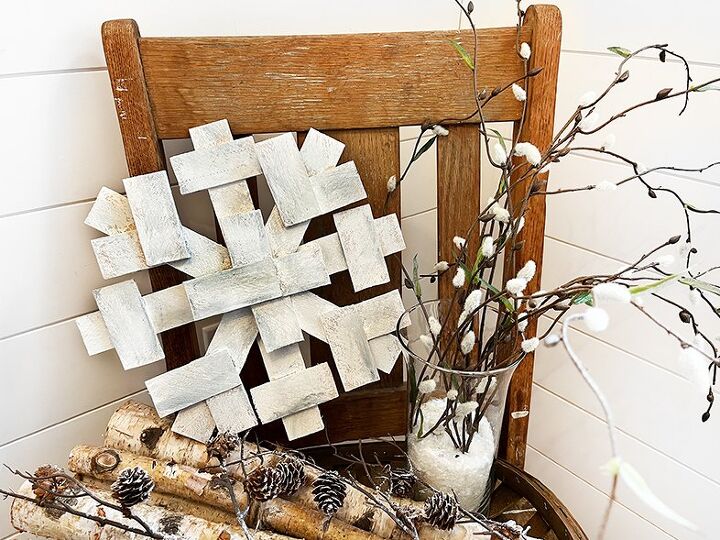
Here's another photo of my finished snowflake. I painted mine with white chalk paint (just dry brushed on) and then went back in with acrylic silver paint to accent and add depth to the edges.
Use whatever color paint you like. Decorate them with glitter or other decorations to match your decor.
If you'd like to hang your snowflake up, hot glue a loop of twine to the back.
DIY wood snowflake
If you're looking for winter decor that you can keep up during Christmas and through all of the winter months, try making a few rustic wood snowflakes.
This snowflake decoration is large, twelve inches in diameter, and looks beautiful on a mantel, in a basket on the porch, or in place of a wreath on the front door.
If you’re having a winter wedding, make these beautiful snowflake decorations for the reception.
DIY Christmas Decorations
Comments
Join the conversation
-
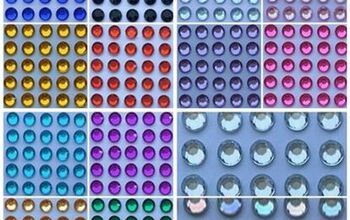
If you wanted to bling up your snowflakes a little more, I would suggest to add some diamante stickers. The self-adhesive types are inexpensive, easy to work with, and do not shed the way glitter does.

-
This is such a good idea!


Frequently asked questions
Have a question about this project?