


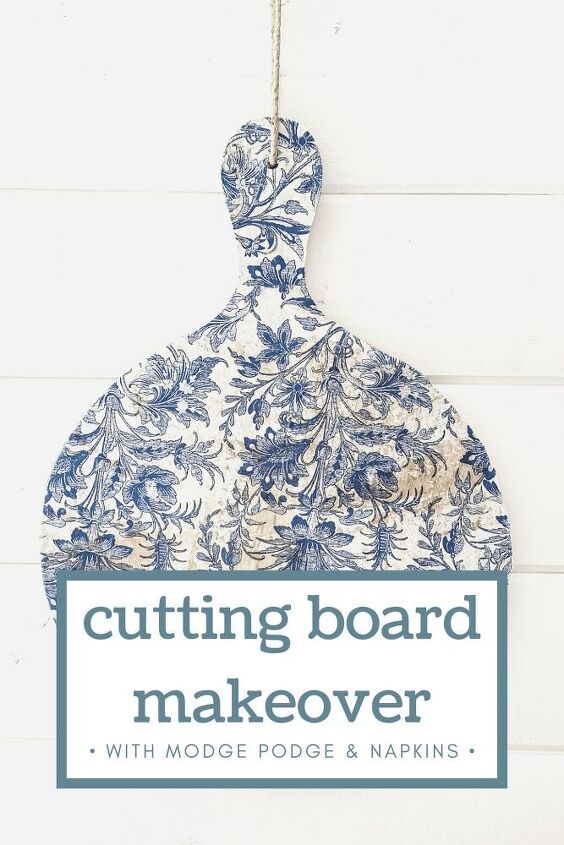
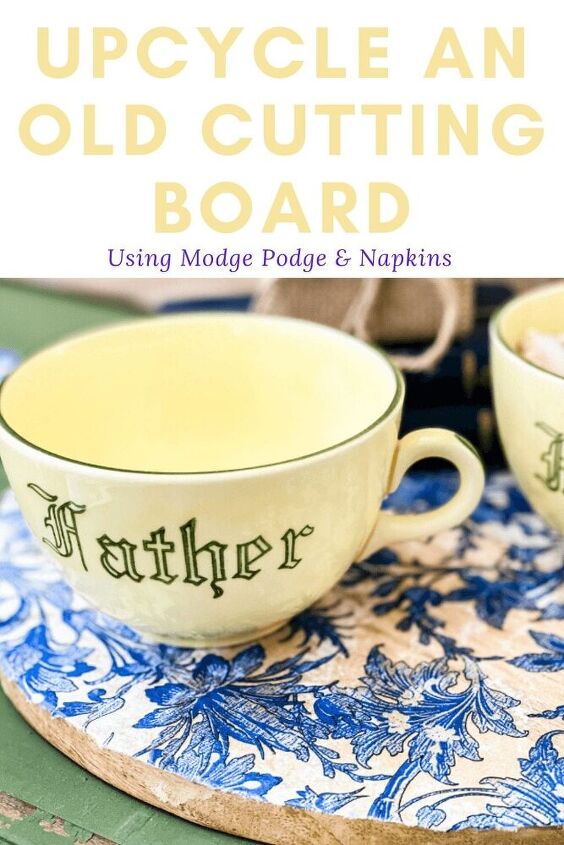
How to Upcycle an Old Cutting Board Using Modge Podge
Hi friends how are you holding up? I don’t know about you but some days feel crazy busy while other days are slow and boring. On those days I like to dig through my drawers and closets and come up with DIY projects that involve things I already have on hand. Sometimes they turn out and sometimes they don’t. Today’s project turned out pretty cool! I’m sharing how to upcycle an old cutting board using some Modge Podge and napkins.
How to Upcycle an Old Cutting Board Using Modge Podge
I knew one day that hoarding napkins and cutting boards would come in handy! 🙂 If you saw my Spring Kitchen Tour then you know I love decorating with cutting boards. They are perfect for creating vignettes anywhere in your home and serve as a great base. The one I used for today’s project I actually had forgotten all about!

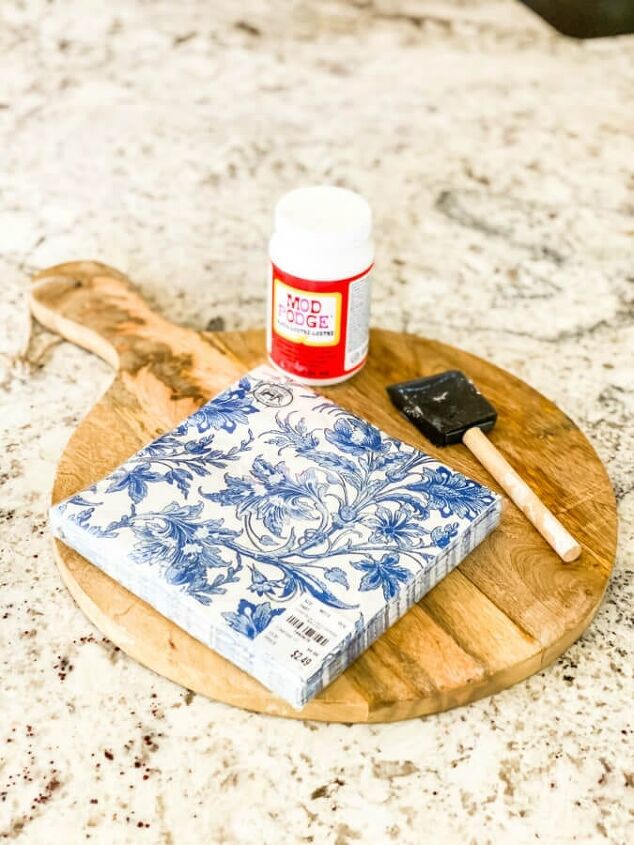
Materials Needed for Upcycling a Cutting Board
Here is what you will need! (Just like me, you most likely have everything in your home for this fun and quick DIY.)
- Modge Podge
- decorative napkins or paper ( I find mine usually at Home Goods or Tuesday Morning)
- cutting board
- utility knife
- sponge brush or paint brush
- painters tape
- clean and flat surface
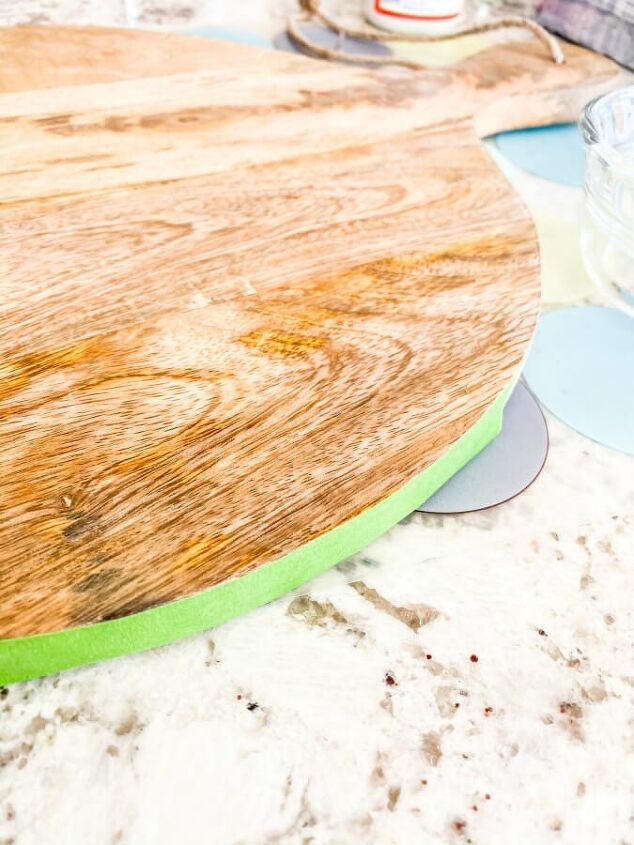
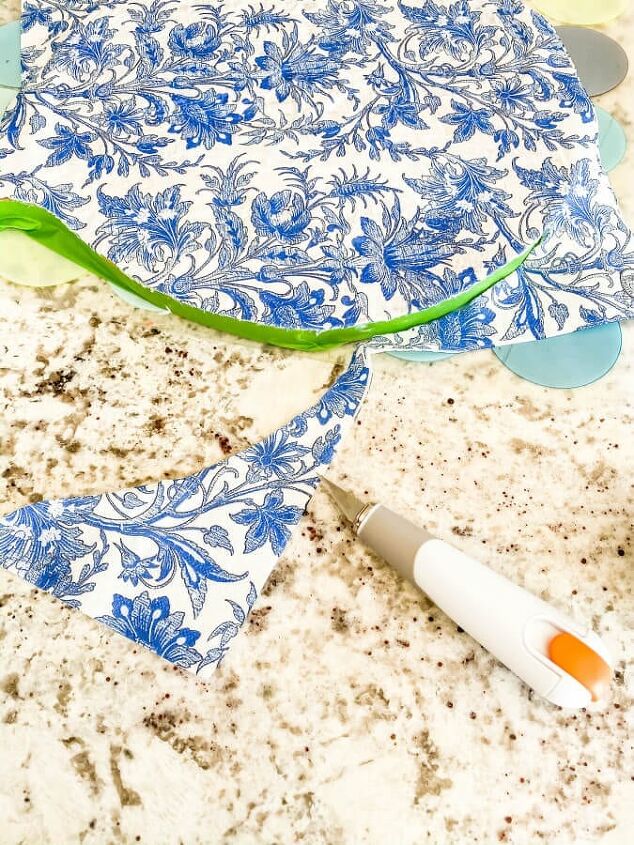
Once you have your supplies make sure you have a flat surface and make sure to cover it because the Modge Podge can get messy. I used an old placemat to cover my kitchen counters. Next, add painters tape around the edge. This is only necessary if you plan to only add the Modge Podge design to the top of your board’s surface like I did.
Then generously brush the Modge Podge on to the top of your cutting board. I prefer to use a sponge brush but any brush will work.
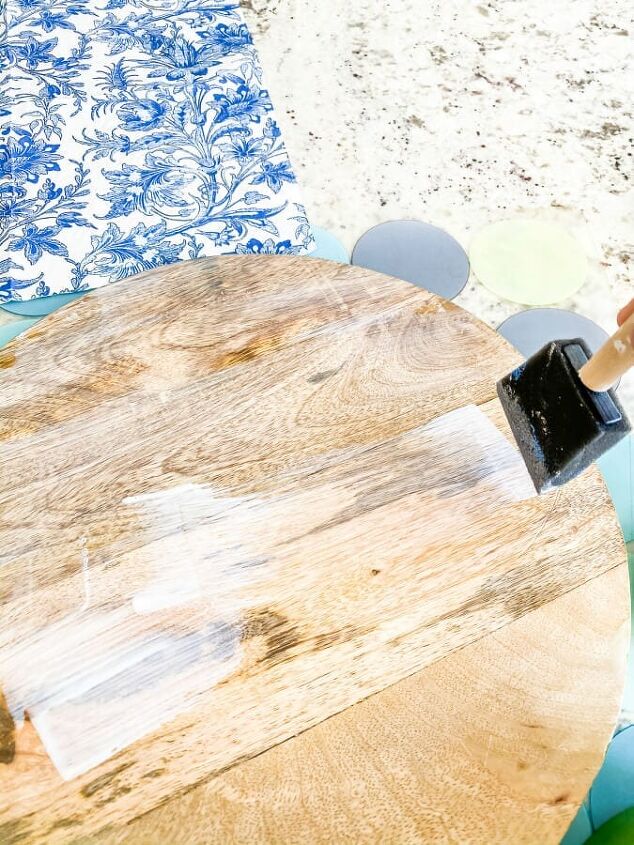
Directly after you apply it to the wood surface make sure you apply some of your Modge Podge to the back of your napkin or paper. Tip: Modge Podge dries quickly so don’t wait to long to apply it!

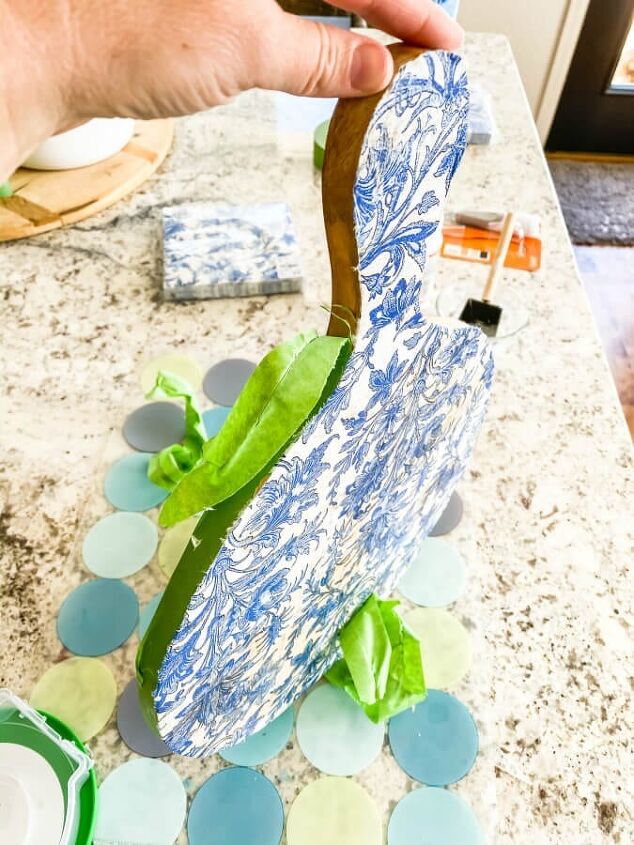
Turn the napkin over and flatten it on the top of your cutting board. Apply a top coat of Modge Podge. Be careful and soft with your brush strokes because the napkin is fragile. Use your hands to flatten it out and push out the wrinkles towards the edges. There will be some wrinkles and my tip for this is to choose a napkin or paper with an overall design and pattern which will hide any imperfections. Wait 15 minutes and add a second top coat for extra durability.
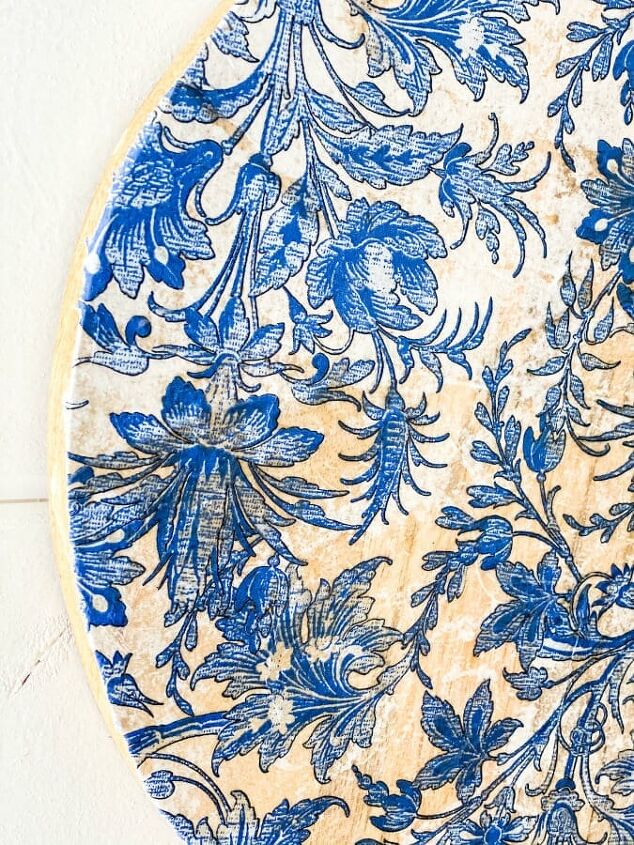
Trim off the excess and edges with your sharp utility knife. Also remove the tape.
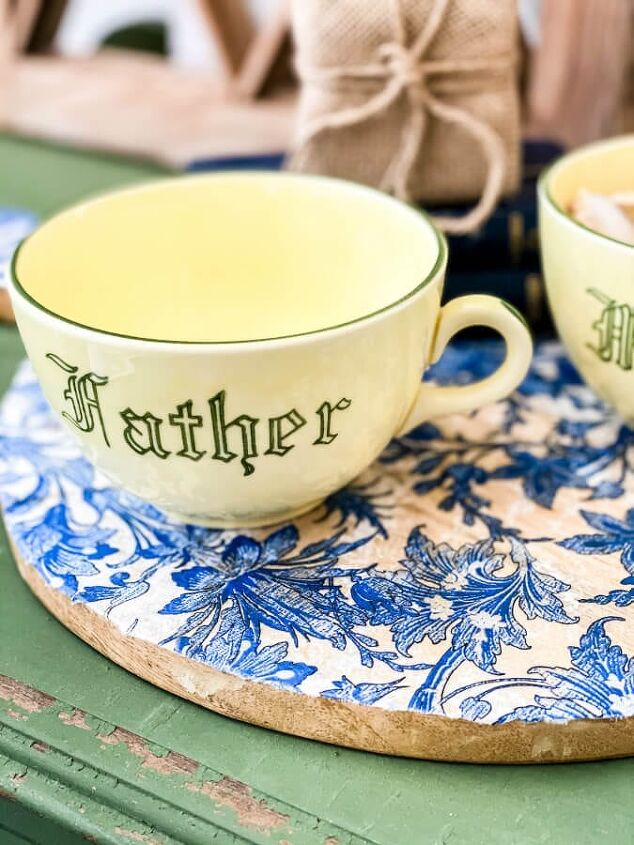
Now your cutting board has a brand new stylish look and is ready to be styled!
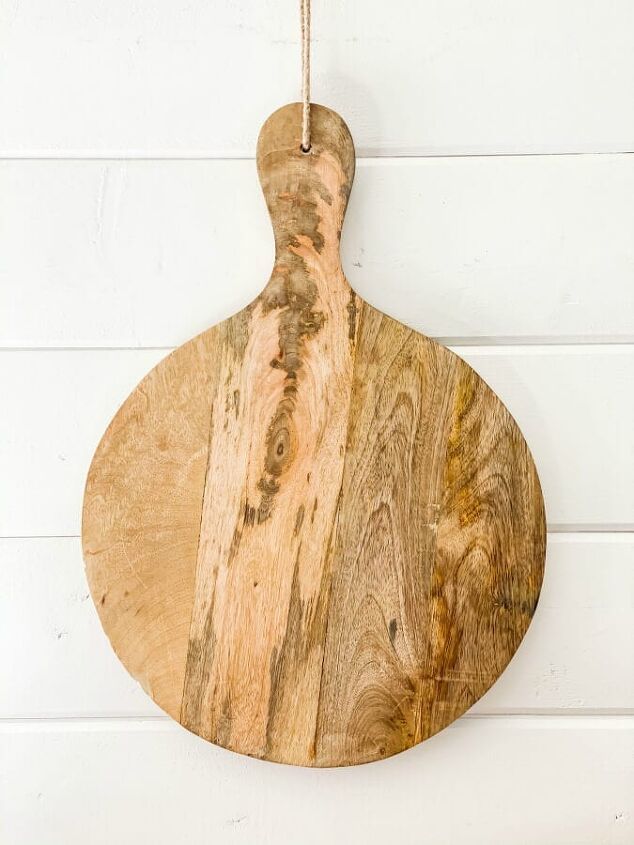
Before
After

A Thrifty Way To Upcylce an Old Cutting Board
Not bad for a last minute project, right? Overall I think this whole project was less than $10 if I had to add it all up. Luckily, I already had it all and luckily I love how it turned out. It has a vintage vibe that I am loving!
Thanks for stopping by today and checking out how I upcycled my old cutting board using Modge Podge napkins ! Now I’m all ready dreaming up what I can Modge Podge next! How about you, have you used Podge Podge in a fun and creative way? Make sure to visit my blog, The Tattered Pew, for more fun DIY projects!
xoxo,
Kelly
Resources for this project:
See all materials


Comments
Join the conversation
-
Make sure you remove the 2 extra plys of the napkin, you only want to use the decorative sheet, Also, to help smooth the wrinkles, lay a piece of Saran Wrap over the napkin once you apply it to the board, and gently smooth out the wrinkles, starting in the center and working towards the edges. And do not apply the Mod Podge directly to the napkin, you will tear it. A thin coat on the board is all you need. The more MP, the more wrinkles and tearing.
-
It's beautiful! I have done some things very similar and what I have found works best, on a flat surface like that, is to apply mod podge and let it dry completely before you lay down your napkin. Then iron it with an iron on low heat. Voila, no wrinkles and no ripping! Then add another layer of mod podge.


Frequently asked questions
Have a question about this project?
Can you use this to serve food like cheese and crackers on
Didn’t you remove the plain under sheet of the napkin before doing the project? I always use only the decorated top sheet in mod lodge projects.
So is the design face down on the board??