


How to Install Shiplap Paneling: a Simple Step-by-Step Guide

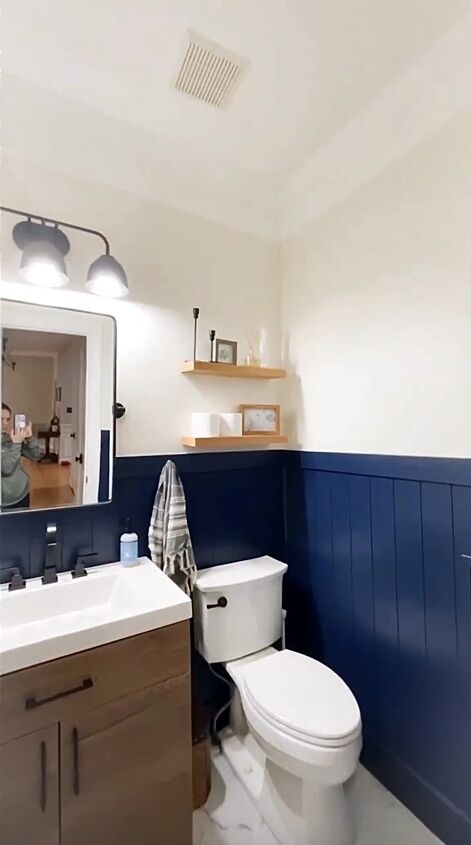
I'm excited to share with you a step-by-step guide on how to use shiplap paneling to transform your bathroom. Shiplap is not only easy to work with but also adds a stunning impact to any room. Let's dive into the details!
Tools and materials
- Shiplap paneling sheets (96 inches)
- Jigsaw
- Liquid Nails adhesive
- Nailer with additional support
- Trim for top and bottom
- Caulk
- Wood filler
- Paint in your chosen color
- Painting supplies (brushes, rollers, etc.)
How to install shiplap paneling
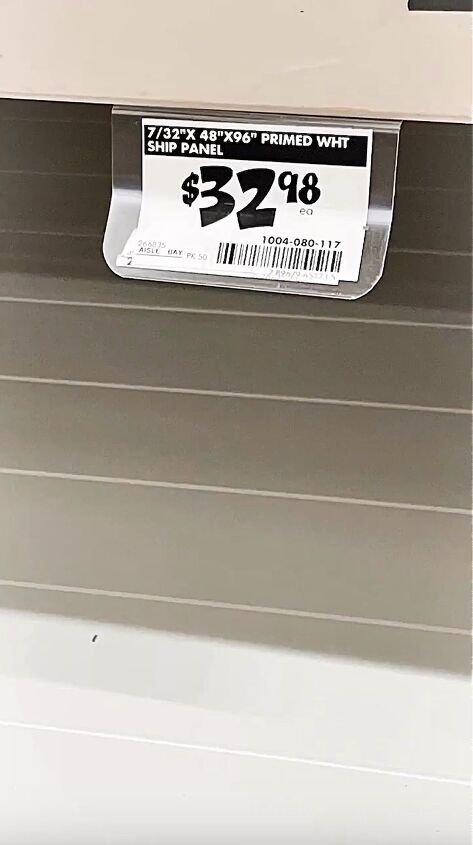
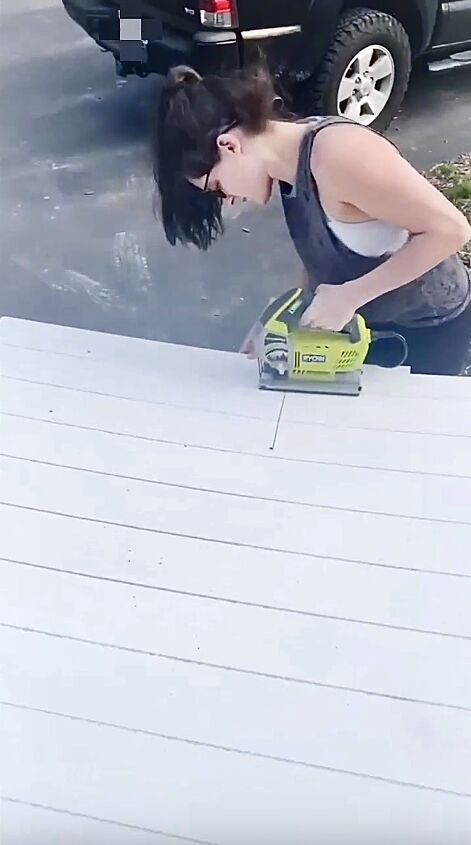
Step 1: Measure and Cut Shiplap Sheets
Start by measuring your bathroom walls and cutting the shiplap sheets accordingly. Since they come in 96 inches, I opted to cut them in half for my bathroom renovation. A jigsaw works wonders for making any necessary cutouts in the panels.
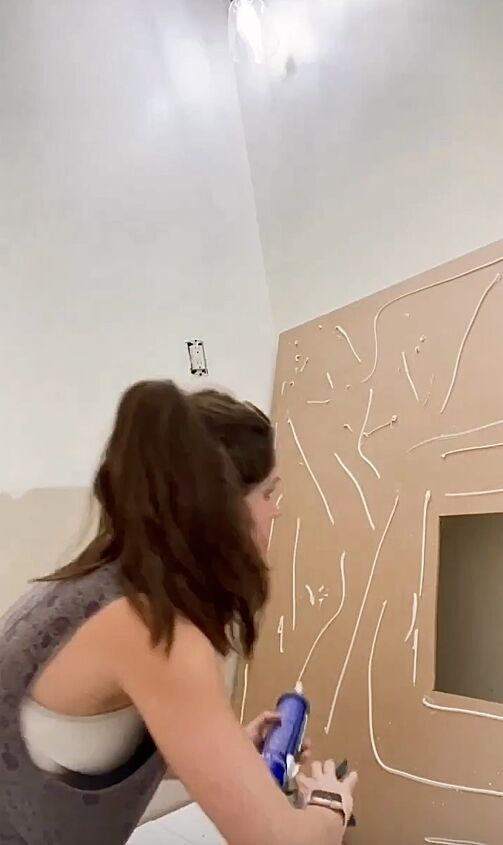
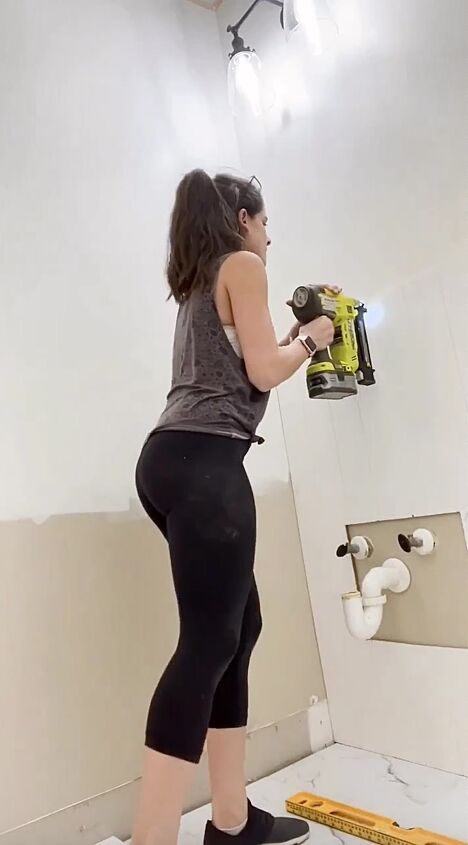
Step 2: Adhere Shiplap Panels to the Wall
Apply Liquid Nails adhesive to the back of each shiplap panel and carefully attach them to the wall. Ensure a secure fit and use a nailer to add additional support. This step not only guarantees a strong bond but also speeds up the installation process.
9
Step 3: Add Trim for a Polished Look
To give your shiplap paneling a finished appearance, add trim to the top and bottom of each panel. This step not only enhances the visual appeal but also conceals any imperfections or gaps in the installation.
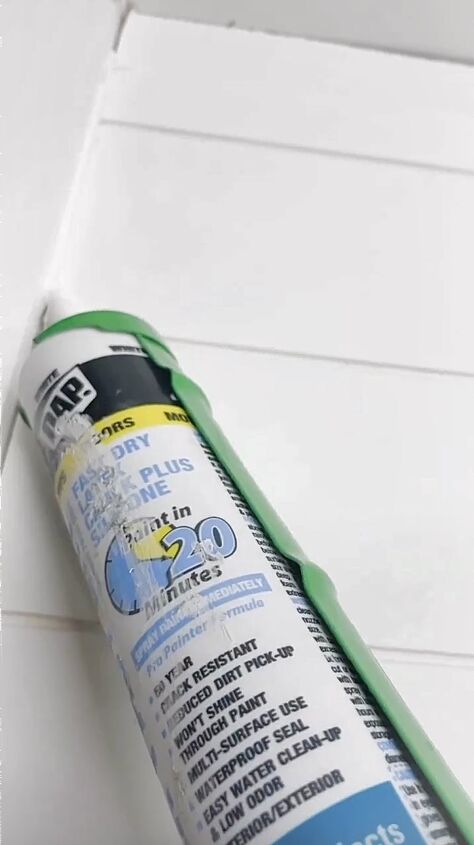
Step 4: Fill Nail Holes and Seal Gaps
After attaching the trim, fill all nail holes with wood filler for a seamless finish. Add a bead of caulk where the trim meets the panel to ensure a tight and polished look. This step is crucial for achieving a professional result.
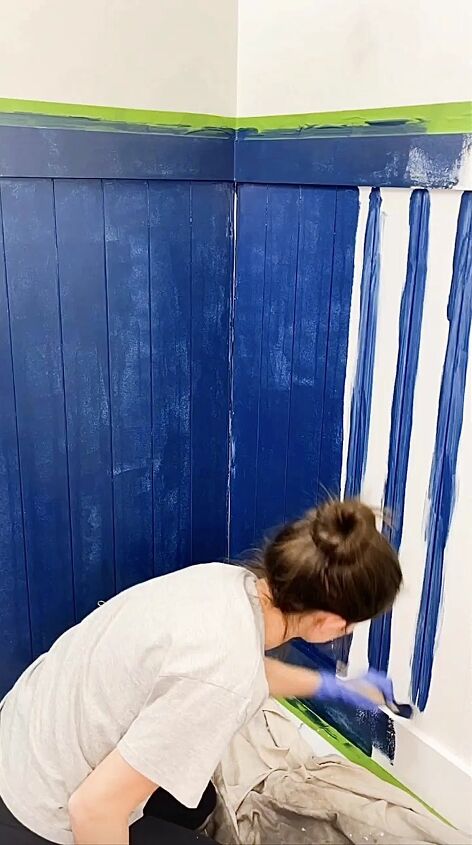
Step 5: Paint Your Shiplap Panels
Now comes the fun part - painting! Choose a color that suits your style and complements your bathroom decor. I went with a deep blue for a bold statement, but feel free to get creative and choose any color that resonates with you.
How to install shiplap paneling
I hope you found this step-by-step guide to transforming your bathroom with shiplap paneling helpful. I’d love to hear from you! Drop your questions or thoughts about using shiplap paneling in the comments below.
Follow @well_shetried on Instagram for more DIY ideas.


Frequently asked questions
Have a question about this project?