


Furniture Flip: How to Replace a Glass Door on a Piece of Furniture
Hey there, DIY enthusiasts! Welcome to my step-by-step tutorial on how to replace a glass door on a furniture flip. I bought a piece of old furniture to flip and accidentally broke the glass. In this guide, I'll walk you through the process I followed to give my piece a stunning makeover with a brand-new piece of glass. So, grab your tools, and let's dive into this exciting project!
Supplies You'll Need
- Old furniture piece with a glass door
- Large frame with glass
- Glass-cutting tool
- Flathead screwdriver
- Marker or pencil
- Safety goggles
- Work gloves
- Measuring tape
- Soft cloth or paper towels
Table of contents
- Step 1: Assessing the Situation
- Step 2: Finding the Perfect Glass
- Step 3: Getting the Right Tools
- Step 4: Removing the Glass From the Frame
- Step 5: Tracing the Template
- Step 6: Making the Cuts
- Step 7: Refining the Edges
- Step 8: Removing Excess Glass
- Step 9: Installing the New Glass
- Step 10: Finish it off
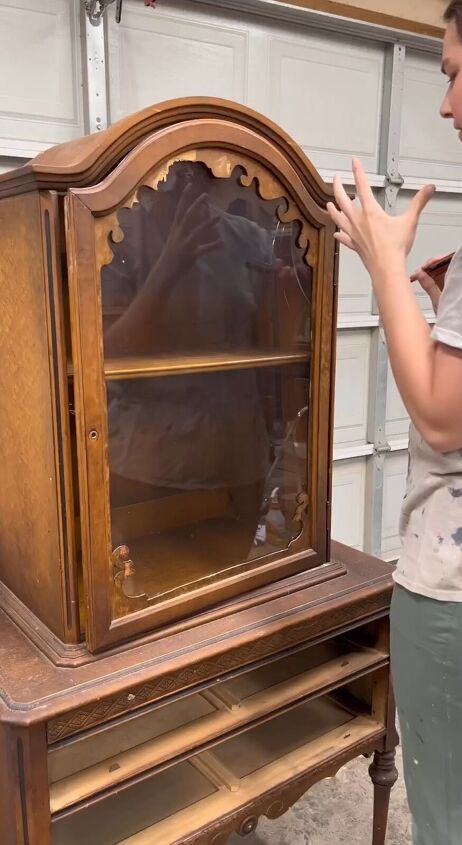
Step 1: Assessing the Situation
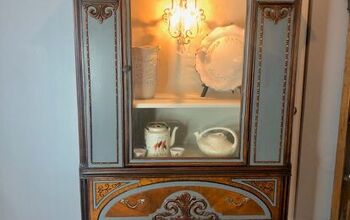
I bought this amazing furniture piece from Facebook Marketplace, and while cleaning it, I accidentally cracked the glass door. No worries, though – this setback turned into an opportunity for an awesome makeover!
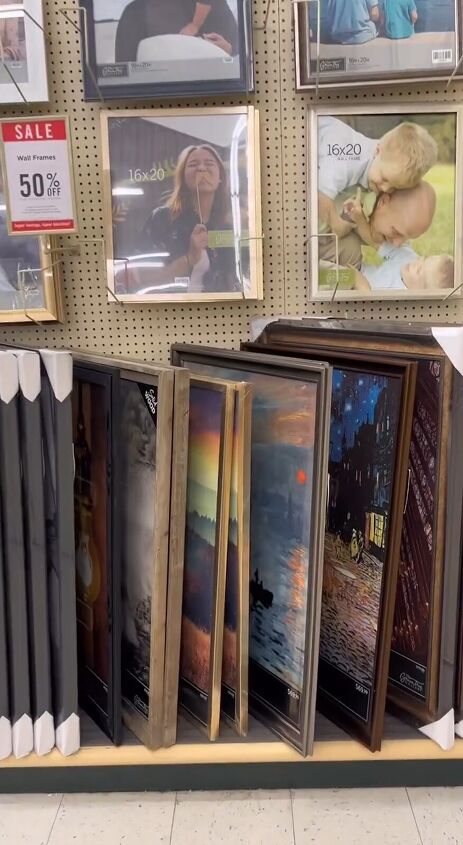
Step 2: Finding the Perfect Glass
For the replacement glass, I headed to Hobby Lobby, where I snagged a large frame at a whopping 50% off! This frame would serve as the source of my new glass door.
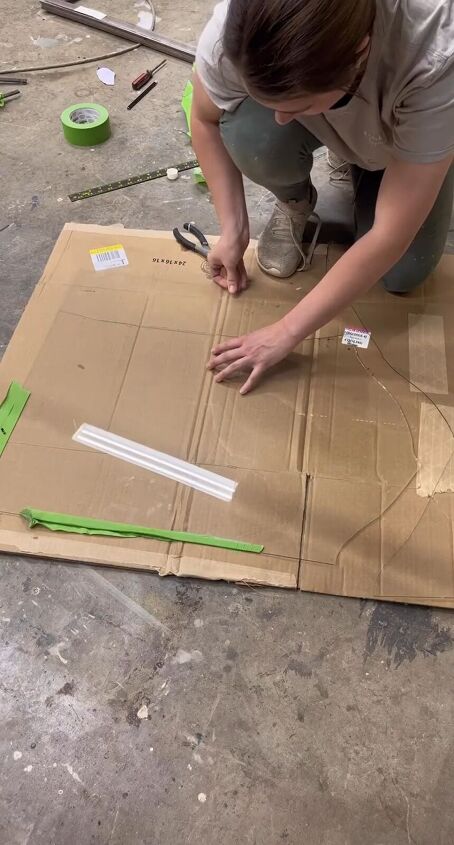
Step 3: Getting the Right Tools
To cut the glass to size, I made a trip to Home Depot and found a suitable glass-cutting tool. Having the right tools is essential for a successful DIY project.
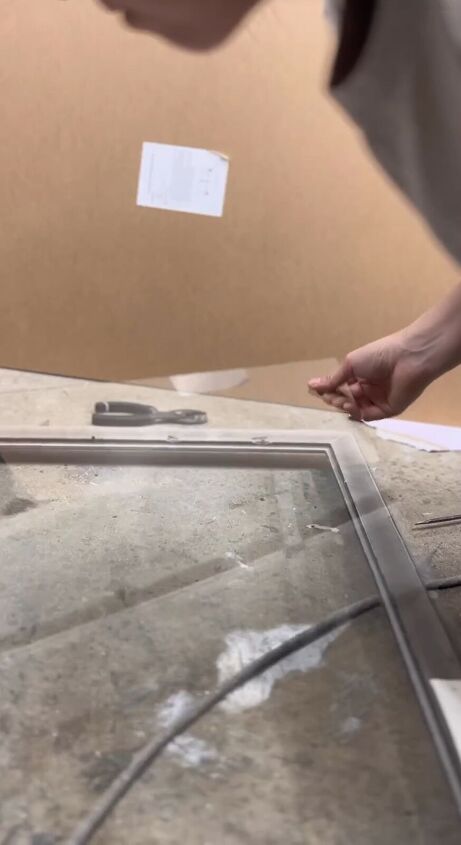
Step 4: Removing the Glass From the Frame
Using a flathead screwdriver, I carefully removed the glass from the picture frame. Patience is key here, as you don't want any more broken glass.
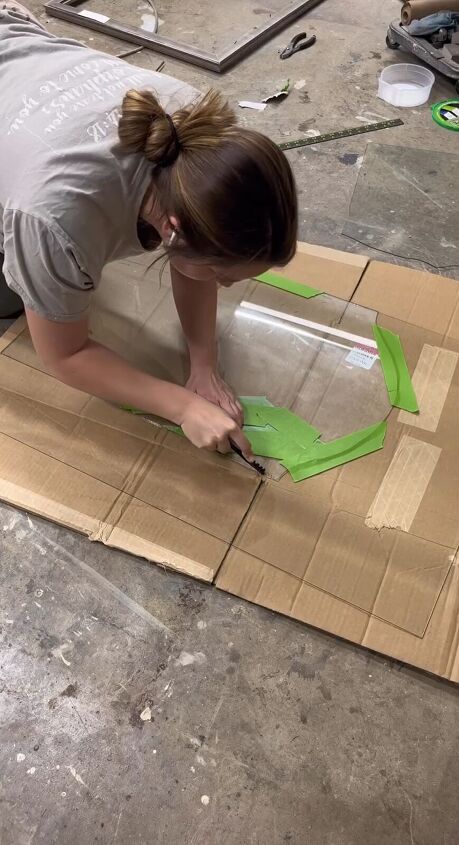
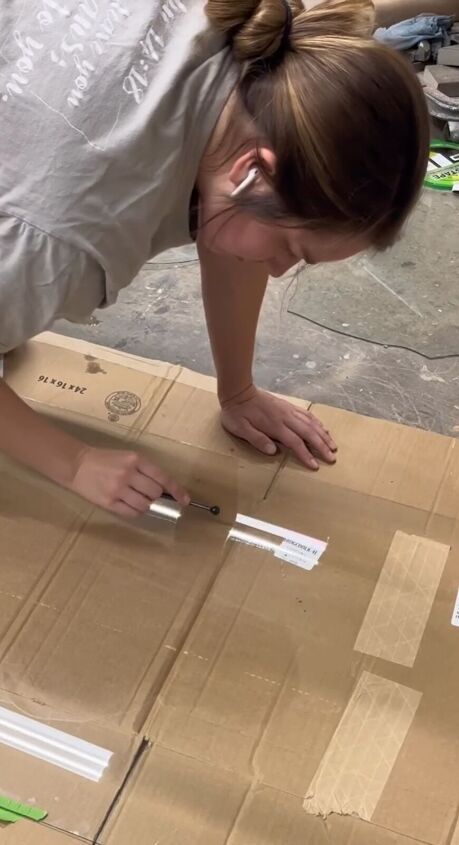
Step 5: Tracing the Template
I used the original glass insert as a template. Placing it over the new glass, I traced around its edges using a marker or pencil. This ensures that the replacement glass will fit perfectly.
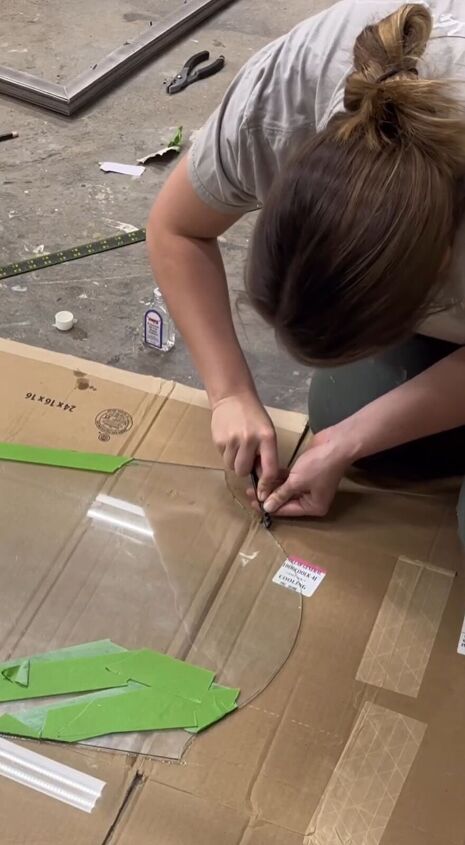
Step 6: Making the Cuts
Using the glass-cutting tool, I followed the traced lines, applying steady pressure to create the cut. Remember to wear safety goggles and work gloves to protect yourself from glass shards.
Step 7: Refining the Edges
With the cuts made, I used the opposite rounded end of the cutting tool to lightly tap along the cut lines. This helps refine the edges and ensure a smoother finish.
Step 8: Removing Excess Glass
To remove the excess glass, I gently pulled up against the outer edge of the glass. Be cautious and gentle to avoid any accidental cracks or chips.
Step 9: Installing the New Glass Door
With the custom-cut glass ready, I carefully inserted it into the frame where the old glass used to be. A perfect fit!
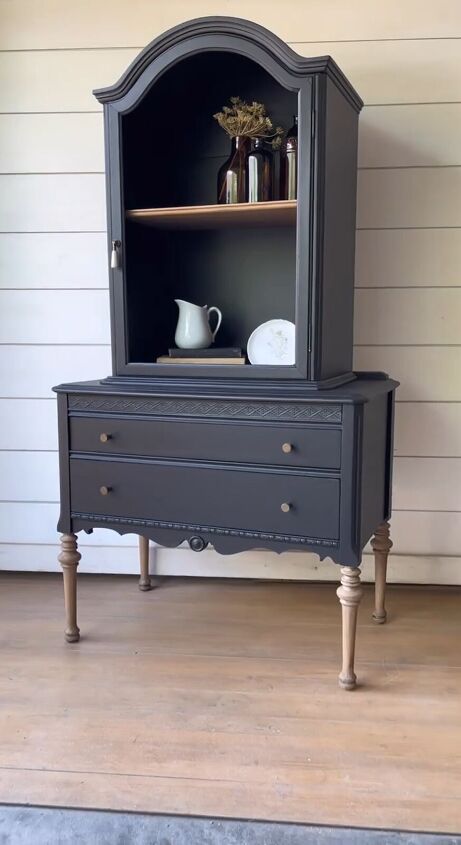
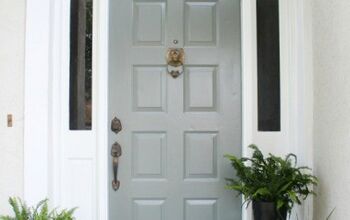
Step 10: Finish it off and Admire Your Handiwork
Once you have replaced the glass you can paint the wood and replace the hardware. Now you can stand back and marvel at your accomplishment! You've successfully given your furniture piece a new lease on life with a beautiful glass door replacement.
Furniture flip
And there you have it! With a bit of creativity, resourcefulness, and determination, I was able to turn a mishap into a stunning makeover. I'm thrilled with the results, and I can't wait to see what you all think. Feel free to leave your thoughts in the comments, and don't forget to follow me for more exciting furniture flips and handy DIY tips. Happy crafting!
Follow @rhettsrefinishes on Instagram for more DIY ideas.
Comments
Join the conversation
-
Looks great. Cutting glass does take patience and sometimes practice. Cutting the top rounded part takes some skill. You did an amazing job and a perfect tutorial.


Frequently asked questions
Have a question about this project?