


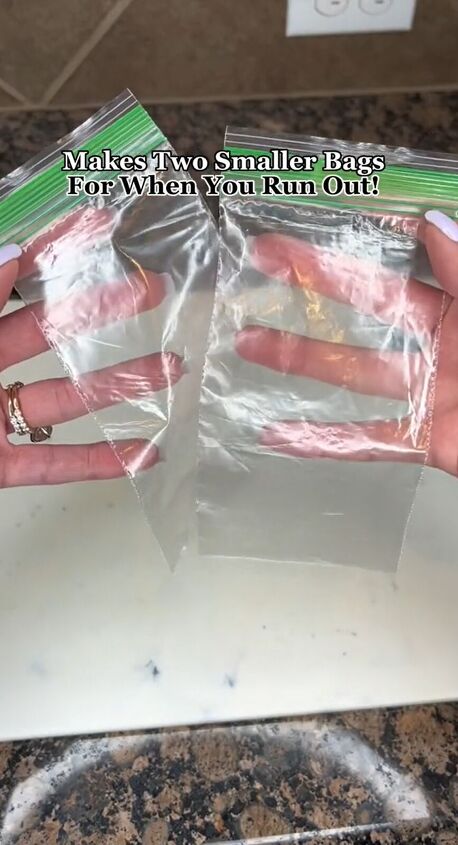
How to Easily Cut Down Sandwich Bags & Reseal Them

Here's a simple and ingenious hack that allows you to cut down sandwich bags by using a knife and some heat. Running out of small Ziplock bags can be frustrating, especially when you need a smaller bag in a hurry. This step-by-step tutorial will guide you through the process, providing you with a cost-effective solution for your snacking and storage needs.
Tools and materials
- Ziplock bags (standard or larger size)
- Sharp knife
- Stove with an open flame (gas stove preferred)
- Tongs or heat-resistant gloves
- Cutting board or heat-resistant surface
Ziploc bags for all!
Steps
1. Gather materials
Before you begin, make sure you have all the necessary materials ready. Ensure your stove is clean and clear of any potential hazards, and have your knife, tongs or heat-resistant gloves, cutting board or heat-resistant surface, and Ziplock bags at the ready.
2. Prepare the flame
Turn on your gas stove and adjust it to a medium flame. It's important to use a gas stove for this method, as the open flame is crucial to achieving the desired result. If you're using an electric stove, unfortunately, this method may not be suitable.
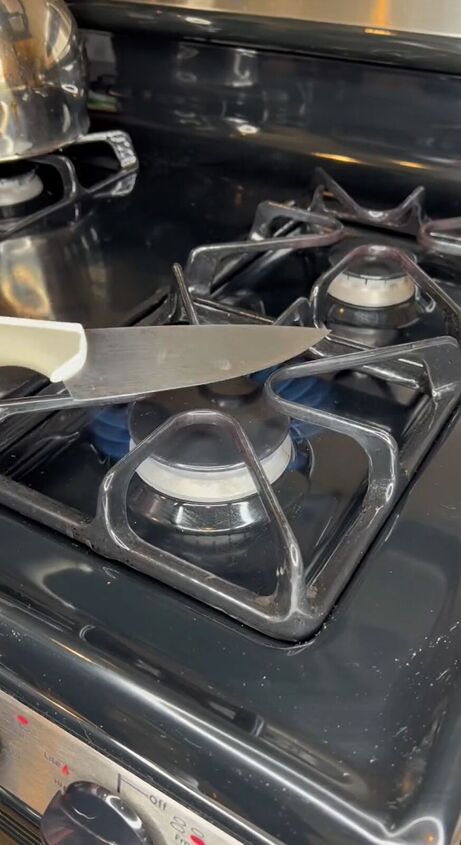
3. Warm up the knife
Hold the sharp knife using tongs or heat-resistant gloves and carefully place the blade over the flame. Allow the knife to heat up for about a minute. Heating the knife will help create a smoother cut through the plastic, preventing jagged edges.
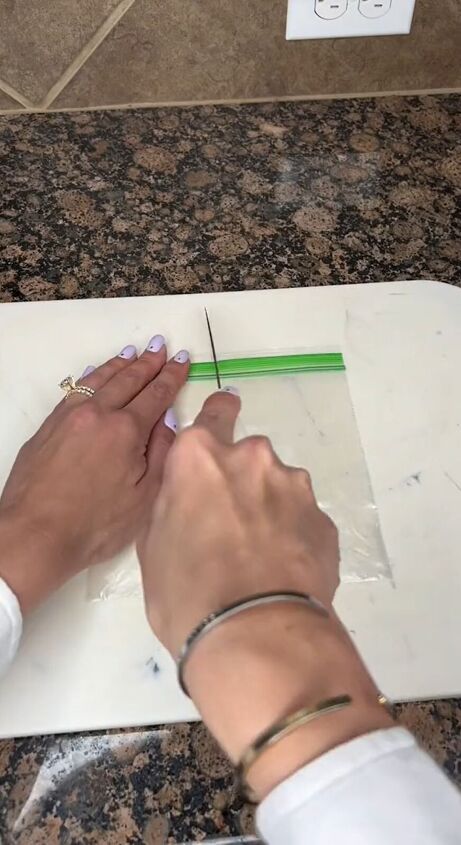
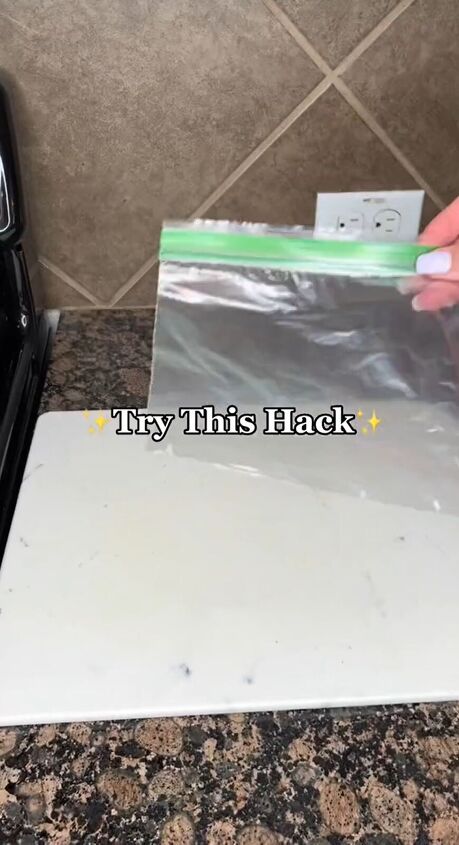
4. Cut the Ziplock bag
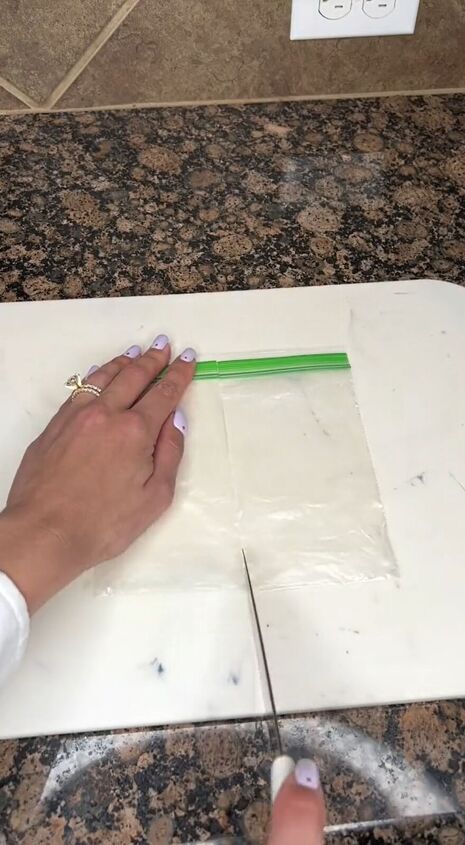
Lay the Ziplock bag flat on a cutting board or heat-resistant surface. With the heated knife, carefully cut the bag in half along the desired line. The heat from the knife will melt the plastic as it cuts, fusing the edges together and creating two smaller bags.
5. Seal the edges
After cutting the bag, press down gently along the cut edges using the heated knife. This step helps ensure a proper seal between the two newly created bags. Be cautious while doing this to avoid any accidental burns.
6. Allow to cool
Give the newly created smaller bags a few moments to cool down and solidify. The melted plastic will quickly harden, forming a secure seal along the cut edge.
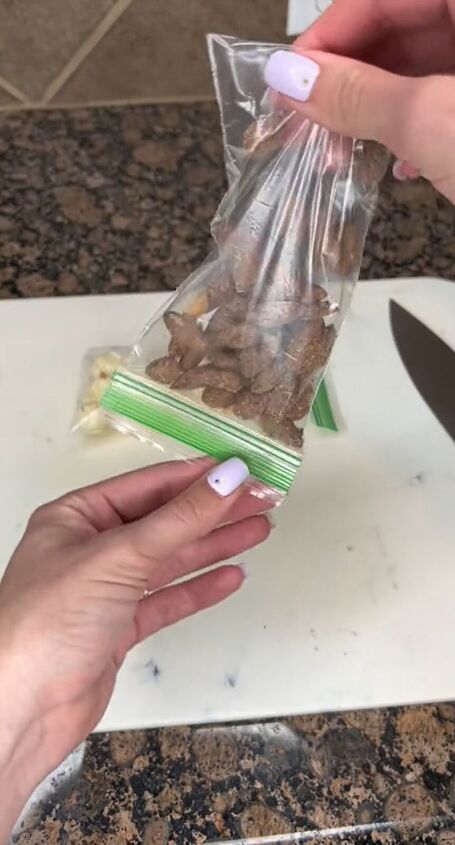
7. Test and use
Once the bags have cooled and solidified, you can test their functionality. Open and close each bag to ensure the seal is secure. These smaller bags are perfect for storing snacks, organizing small items, or any other purpose you may need.
How to cut down sandwich bags
And there you have it! A simple and practical solution to creating smaller Ziplock bags using just your stove flame. This hack can save you money and provide you with the right-sized bags when you need them most. Remember to exercise caution while working with an open flame and heated objects, and enjoy your newly crafted smaller bags for all your storage needs.
Did you find this helpful? Let us know in the comments below.
Follow @home_reimagined on TikTok for more DIY ideas. And find free cleaning guides, products, and more here!
Comments
Join the conversation
-
Yes I keep snack size baggies. But this works on gallon sized too, which was perfect for my needs. I just overnighted cookies for Christmas to sister. I make loads in all flavors. Anise, Almond, coconut, chocolate, peppermint, rum, vanilla. Plus fudge, carmels and toffee. By cutting gallon bags in half I was able to fill lengthwise to fit in box each flavor alone so that flavors stay separate and powdered sugar isn’t everywhere. This is great if you need it. Btw I pack baggies in popcorn and grocery bags. Secure and no weight added. Sis said arrived with no breakage and delicious. Point open your imagination when addressing a problem; this answers one how to question
-
Wow, that's not just a great use of the sandwich bag trick, but also a brilliant packaging idea! Thanks for sharing, and happy to hear the cookies arrived intact and tasty! 🍪✨


Frequently asked questions
Have a question about this project?