What is the best way to repair textured ceilings?
by
Cli3760563
+8
The ceilings in my home are textured and due to a roof leak are separating from the drywall at the drywall seam. What is the best way to repair these?
Thank you! 
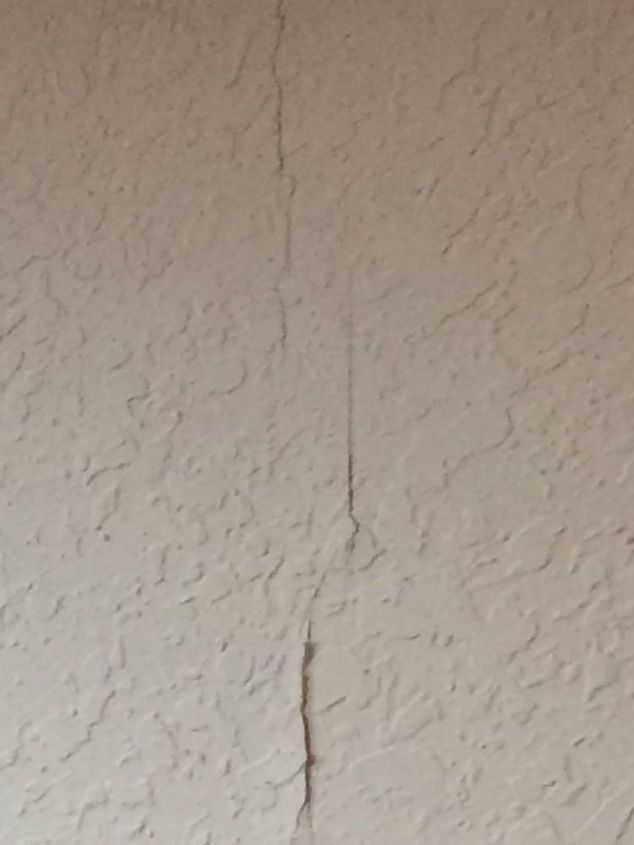


Been there done that!! Gently remove old paper tape. Replace the tape with fresh tape. With a wet sponge wet the dry edges of the old edges of plaster. This can be done while smoothing in new tape. Let it dry. Next use a plaster hopper or repair hopper to spray wet crumbles of wet plaster. Splatter in large chunks, and for the pattern you show in your picture use a large “blade” another name can be a trowel. Gently drag your splattered chunks to match existing chunks you already have. Then let it dry. The tape is now covered and the finish should match with what you have. 3D
They are so small, I'd try to squeeze glue and caulk behind seem, tape it down until dry, touch up with caulk and paint. If that doesn't work, you'll have to do more. You have to cut away the old tape, chip some of texture away, retape and add drywall mud and do best to match texture. Look to YouTube for tutorials .
There is a product that you can purchase in paint dept that can fix cracks but you can use spackle and your finger to smooth over the spot.
Place a bit of dry wall mud to patch the seam. If you need it, they sell textured ceiling in a spray can in the paint department at Lowe's & Home Depot to cover the patch work.
Dem has the proper and lasting way to do it. Don't take short cuts like trying to glue it. Make sure you smooth the tape as flat as you can. You don't need a spray hopper for such a small job though.
Go to your hardware store and pick up a rectangular plastic bucket that you can hold in your hand. Also a nice trowel to smooth it with. It's nice if you can use a large one but because I'm a small woman, I go with smaller ones so my arms and wrists don't take a beating. That means it'll take longer but I have more control.
Also, put several light coats of the mudding (bought in a plastic tub) you are using on. Thick coats take longer to dry and can crack. If it's a cool day, you can use fans to circulate the air and help the drying process. Fans also work on hot/warm days. Just don't put them real close or it'll dry too fast and crack. Patience is a virtue with this task.
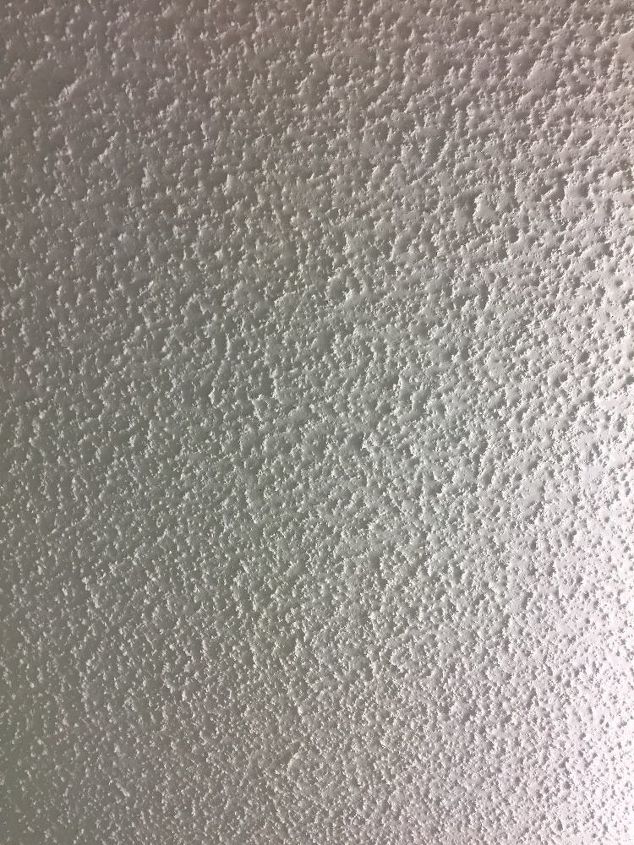
Buy your texturing compound in the spray can at the Hardware store. Home Depot has around 3 different thicknesses to choose from. Grab an old piece of Sheetrock or plywood and practice the affect you want on prior to doing your ceiling. Also two or three light coats applied allowing each coat to dry before putting on the next one will give you a more even professional look. It comes out of the can blue and will dry to white. You need to knock down (flatten with a trowel) each layer.
Finally, prime before painting. To get it not to look like a new patch, put as many coats of paint on until you feel it blends. Each coat will soften the affect.
We sold our home in June but took months to remove all the popcorn ceilings. What is under them is shoddy workmanship. I think popcorn ceilings were created to cover unskilled workers screw ups. We got very good at repairing cracked ceilings and walls. My husband had a professional hopper gun which we rarely pulled out and used. The spray texturing was overall more expensive but worked well and was neater on the medium/small jobs. It was also quieter because his big gun needs the air compresser to work.
Good luck. Be patient and put down lots of drop cloths. Also remove your shoes each time you leave the room you are working in or you'll track texturing compound throughout the house thinking your shoes are clean. The stuff gets into everything depending on how extensive your job is.
Oh....almost forgot. When you buy the mudding compound you'll be troweling on, make sure you put a nice big piece of Susan Wrap on top of the mixture that's left in the bucket before you put the lid on. That will keep the compound from drying out and chunking up on you between uses.
Are you sure there's no mold behind that dry wall if it was caused by water?
I have fixed small cracks as others described except when I retextured, I have used bubble wrap or carpet remnant. I lightly pushed it in the plaster then used the trowel to flatten it as the others did. I tried the spray texture and unless they have improved the products, it went everywhere and made a huge mess.
Ughness!! I'm having the same problem! I'm thinking I will put wood slats up on my ceiling to get that farmhouse look, good luck!
What is Susan Wrap?
Home improvement stores have patching materials in a bucket with good instructs to patch over it so it does not show. We did ours and you could not tell it had been done at all.