« View Post
Photos

Oops! Leave without saving?

If you leave this page, the information you have entered will not be saved!
Are you sure you want to leave this page?

Leave this page Stay on this page

Hometalk.com

  • Sign Up
  • or
  • Log In
  • Professionals
  • Community
    • All Members
    • Professionals
    • Bloggers
  • About
    • About Hometalk
    • Blog
    • FAQ
    • Guidelines
    • Resources
    • Support
    • Press
    • Contact
    • Terms of Use
    • Privacy Policy
  • Following
  • All Topics
    • Cleaning & Organization
    • Crafts
    • Design & Décor
    • DIY Projects
    • Gardening
    • Home Maintenance & Repairs
    • Outdoor Living
    • Painting
    • Remodeling
    • Repurposing & Upcycling
    See More Topics »
  • Questions
    • All Questions
    • Open Questions
    • Unanswered Questions
  • Clips
Post & Ask
Join Now Log In

Hometalk is where people share and help with everything home & garden

I Play Outside The Box

Rock Hill, SC
11 Followers 12Likes
  • Overview
  • Posts1
  • Q&A1
  • Comments12
  • Boards7
  • Clips39
  • Likes16
  • Following25
  • Send a Message

My Recent Boards

  • From Junk to Treasure
  • Crafty
  • Clever ideas!
See All »

Featured Photos

About Me:

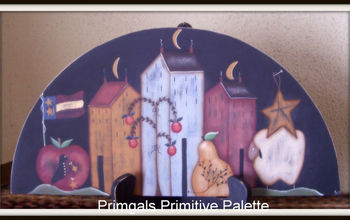
I love primitive items...wish my home was filled with them. I also like items that are painted and distressed! I'm a wanna be decorative painter who finally decided to hang up her brushes and let a pro do it for me.


Recent Activity


  • uk customized Diy tutorial: Crown jar swag light
  • you need: screw-lid glass jar, swag cord kit and a light bulb, a drill with a suitable hole-cutter bit....
  • find the centre of the lid and cut out a hole (the size of bulb-end cord kit)using the drill
  • Fit the cord kit through the hole in the lid, secure, then add light bulb...you are now ready to screw onto jar....
  • that's it...now its ready to be suspended from ceiling in your chosen spot....visit my blog for a useful link on how to do this...thanks for looking!
  • See 2 more photos

DIY Tutorial : Jar Pendant Swag Light

I know we've all seen these before, but I've included some great supply links if you, like me, live in the uk. Also includes a link on how to suspend your swag light....
30 Minutes 25 Easy
Juneolsen
Juneolsen United Kingdom
10 Comments | Post Comment | 2495 Views
  • I Play Outside The Box
    Liked Yesterday
  • Share 590
  • Like 27
  • Clip 38
Clipped to:
  • Home Decor
  • repurposed
  • that's it...now its ready to be suspended from ceiling in your chosen spot....visit my blog for a useful link on how to do this...thanks for looking!
Liked a photo from:

DIY Tutorial : Jar Pendant Swag Light

Juneolsen
Juneolsen United Kingdom
Comment on this photo
  • I Play Outside The Box
    Liked Yesterday
  • Share 1
  • Like 2
  • Clip 1
Clipped to:
  • Home Decor
  • repurposed
  • Ants lying in Windex. 2

ANTS? Easy, Safe Solution!

An exterminator told my friend that when you begin to see ants, they are the scouts. Stop these and you won't have ants. My son discovered that if you spray them with Windex (or any other glass cleaner), they are exterminated. Keep after it for a while and you won't have ants. We have used this for years. 2 days ago our humming bird feeder leaked onto the concrete front porch...the liquid got down in the crack between brick and concrete so there was not way to flush it out. Ants ...»
appeared quickly, I sprayed them with Windex. Watched through the day and kept spraying them. Now ant free! Safe for kids, pets and environment! It is worth a try before you spend hundreds.

Jeanette S
Jeanette S Atlanta, GA
132 Comments | Post Comment | 45526 Views
  • I Play Outside The Box
    Clipped 2 days ago to Clever ideas!
  • Share 5K
  • Like 202
  • Clip 139
Clipped to:
  • Home Repairs
  • garden & yard
  • so pretty! 1
  • using a clean glass jar, apply removable adhesive labels of your choice (i used round labels from the office supply store)
  • turn your jar upside down to prevent paint overspray + apply several light coats
  • once dry, gently remove the labels
  • add a layer of glass floral beads or sand. this protects your surface from heat damage from a long-burning candle
  • i love the playfulness of the dotted design 1
  • but he's even prettier as the sun sets! 1
  • See 4 more photos

Mason Jar Luminary

Looking for a modern design for your space? This luminary is a fresh + modern spin on the Mason jar. Visit the blog at the link below for a more detailed tutorial.
1 Hour Easy
Sarah Krouse
Sarah Krouse Murrayville, GA
26 Comments | Post Comment | 8051 Views
  • I Play Outside The Box
    Clipped 2 days ago to DIY to Try
  • Share 3.5K
  • Like 120
  • Clip 121
Clipped to:
  • Amazing Projects
  • Kitchen Décor
Joyce rhodenizer
  • I Play Outside The Box
    Followed 1 person 3 days ago
Zornitsa Atanasova
  • I Play Outside The Box
    Followed 1 person 7 days ago
  • a regular ole curb find--4 chairs
Liked a photo from:

Repurposed chairs into a cute corner bench

Gail--My Repurposed Life
gail--My Repurposed Life Louisville, KY
Comment on this photo
  • I Play Outside The Box
    Liked on May 12, 2013
  • Share 4
  • Like 1
  • Clip 0
Clipped to:
  • DIY/Furniture
  • Design on a dime
  • a regular ole curb find--4 chairs
  • Betty figured out they fit so perfectly to make a curve
  • Voila!   So sweet! 2

Repurposed chairs into a cute corner bench

A new friend (Betty) shared her bench with me on Facebook. Betty doesn't have a blog, but you don't need a blog to be featured on My Repurposed Life. I love great repurposed items. Betty repurposed 4 chairs into this oh so cute bench!

Gail--My Repurposed Life
gail--My Repurposed Life Louisville, KY
6 Comments | Post Comment | 1750 Views
  • I Play Outside The Box
    Liked on May 12, 2013
  • Share 68
  • Like 59
  • Clip 60
Clipped to:
  • DIY/Furniture
  • Design on a dime
  • May 28th 2012 4
  • End of June toping the 3 ft cage 1
  • July 9th after a week of record high temps and very little rain...the plants here are loaded with tomatoes inside the cage and full of blooms too!

Tomatoes and their need for water

I started may 28th planting 4 tomatoes around a garbage can with holes drilled in the bottom rim and a second row up about 10 inches... buried the can to where the top holes just barely ...»
were above the ground... put in two shovels full of compost... then I fill the can up with water ever 2 days and try not to water the leaves... these four plants are now 5 ft 4 inches in less that a month and a half and loaded with green tomatoes and about a hundred sets of tomato blossoms...

James Bryan C
James Bryan C Crab Orchard, KY
90 Comments | Post Comment | 104724 Views
  • I Play Outside The Box
    Liked on May 12, 2013
  • Share 22K
  • Like 489
  • Clip 579
Clipped to:
  • Gardens
  • Gardening
  • Finished Floor. When paint streaks are dry, create the lines with a black permanent Sharpie pen that represent the boards. I did 6"x3' boards. stagger the boards approx 12" like wood floors. Darken a few boards for natural variation. 13
Clipped a photo from:

painting concrete floors

Linda Fraine
Linda Fraine Naples, FL
13 Comments | Comment on this photo
  • I Play Outside The Box
    Clipped on Apr 22, 2013 to Chalk & Faux Painting
  • Share 62
  • Like 29
  • Clip 15
Clipped to:
  • Paint Paint Paint
  • OUTSIDE
Loading
Back
to top
Feedback