


Easy DIY PVC Outdoor Dog Shower

**Scroll down to see the video**
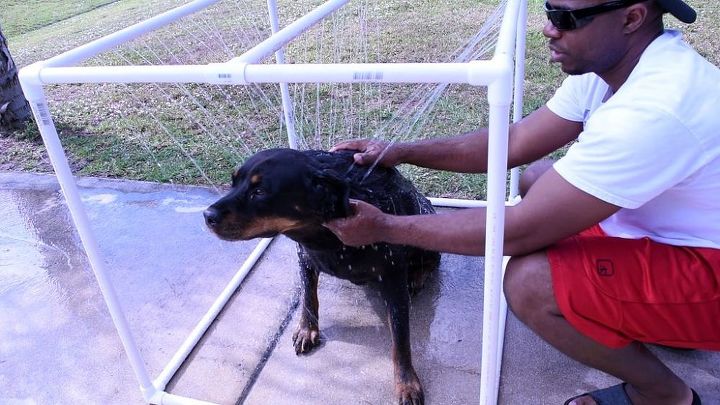
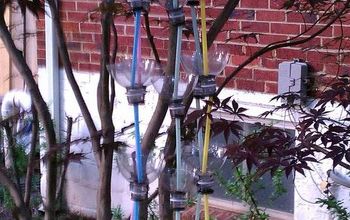
I have struggled at times when it was shower time. My dog is pretty good when she needs a shower. If the water stops for a split second she is ready to walk away. Making this shower helps free up both hands and pretty much wet her entire body at one time. If this seems like something you'd like to make I’ll take you through the steps I took to make his shower. Be sure to check out the video for more details. No glue was used for this rig it’s all dry fit, this way you can break it down and store it.
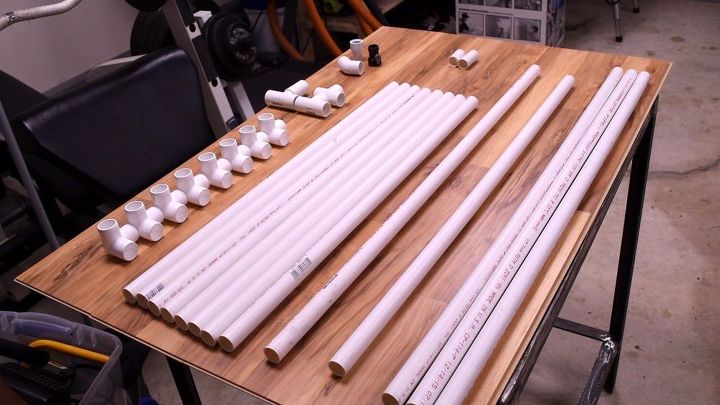
Here is a list of materials used:
Parts for my dog wash
42.5 W X 33.5 H X 33.5 W
(8) 3 way elbow http://amzn.to/1WPUT3w
(1) ¾ Hose swivel adapter
(1) ¾ 45 elbow
(1) Hose cut off
(3) ¾ tee
(5) 10 foot PVC
- 8 cut to 31 inches
- 3 cut to 40 inches
- 1 cut to 39.5 inches
- 1 cut to 36.5 inches
- 1 cut to 2.25 inches
(1) cut to 1.75 inches PVC Cutter http://amzn.to/21b4q5y
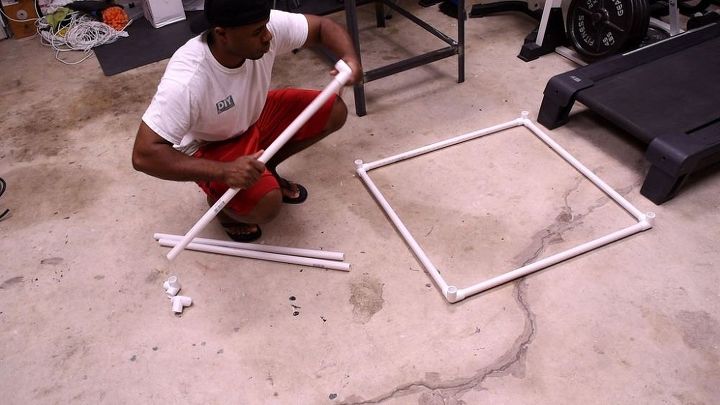
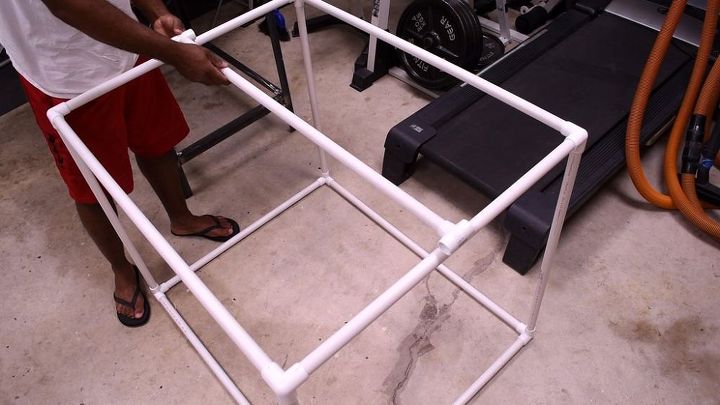
For this step you need
- (8) 3 way elbow
- (8) PVC pipes cut to 31 inches
- (1) PVC Pipe cut to 36.5 inches (this piece will take the hose adapter)
- (2) PVC pipes cut to 40 inches
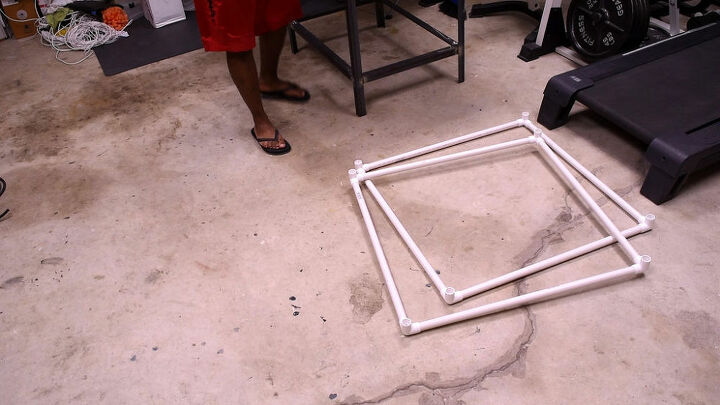
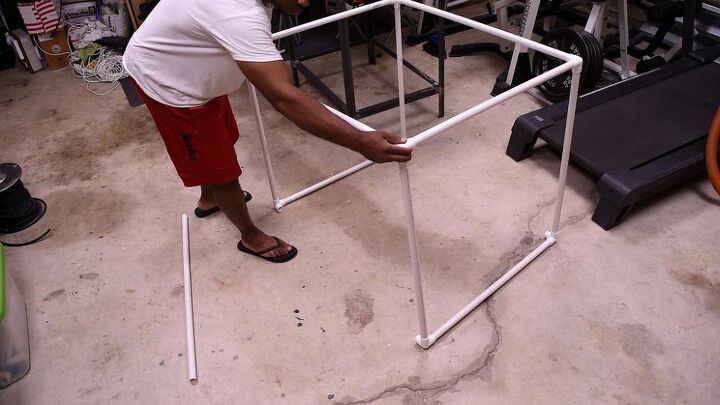
After forming the two squares. You want to then attach the two with the 40inch pieces.
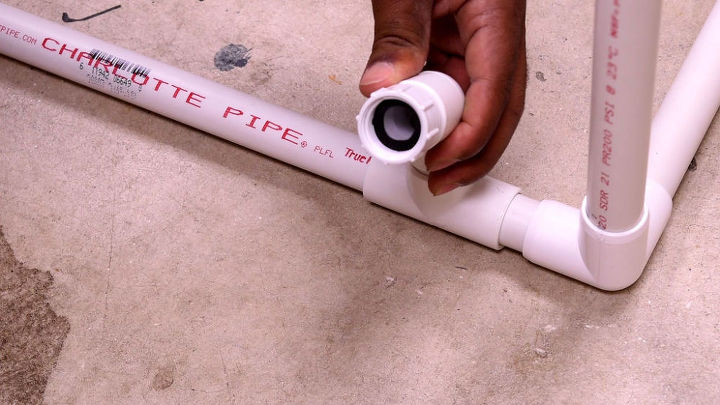
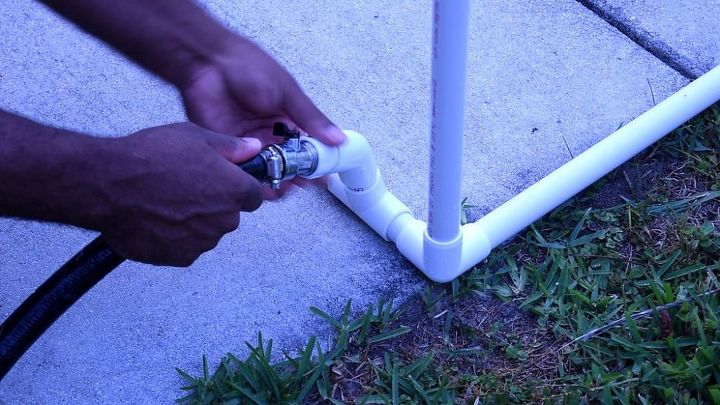
1. Insert your 2.25 in cut pvc into the 3 way elbow.
2. Add the 3/4 in Tee
3. Add the 1.75 in Cut PVC facing up.
4. install the 45 elbow
5. Add the swivel hose adapter
6. Last the hose adapter.
Parts
- (1) PVC pipes cut to 40 inches
- (2) 3/4 in Tee
Mark, cut and install this pipe in the top. Place it in the center.
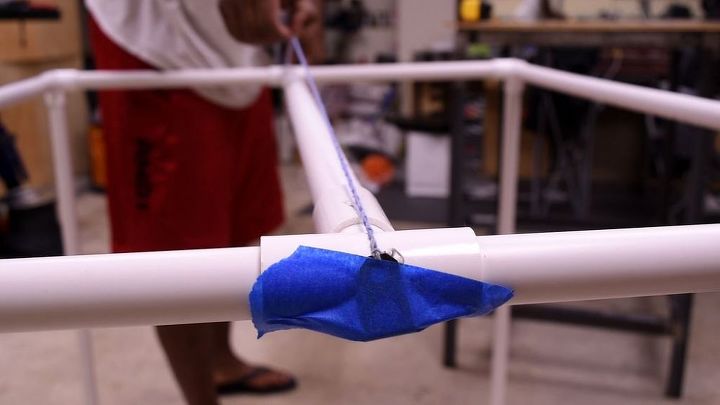
I use a chalk line to make a straight line on the pipes.
To mark where the holes are going I went three inches from the ends in. Then make my first mark. From the first mark, I made every mark 2 inches apart.
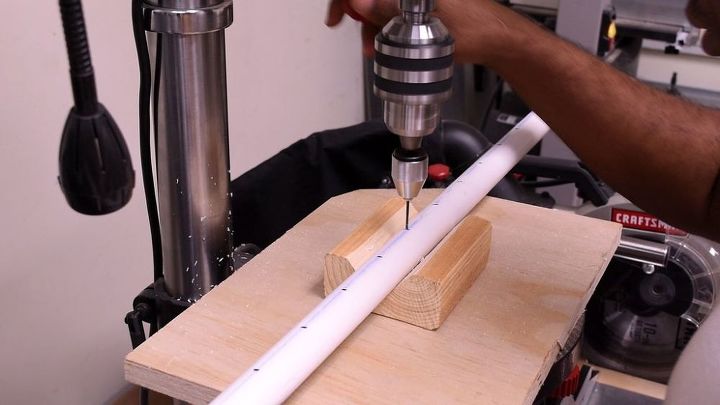
I use a small drill bit to make the holes. I have a drill press so I made a quick jig to hold the pipes as I drill.
You can use a hand drill only things all your holes may not be as straight. For the use of this rig its not too critical.
Hook up the water hose and turning it on.
Since the pipes are not glued it make is easy to swivel and aim the dispenser where you'd like.
If there is any leak as the joints the make sure the joints are tight.
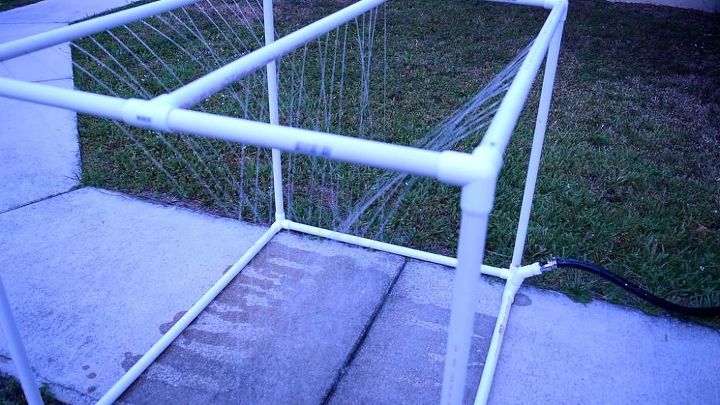
It worked!
This worked as I envision
1. Turn on water wet your pet
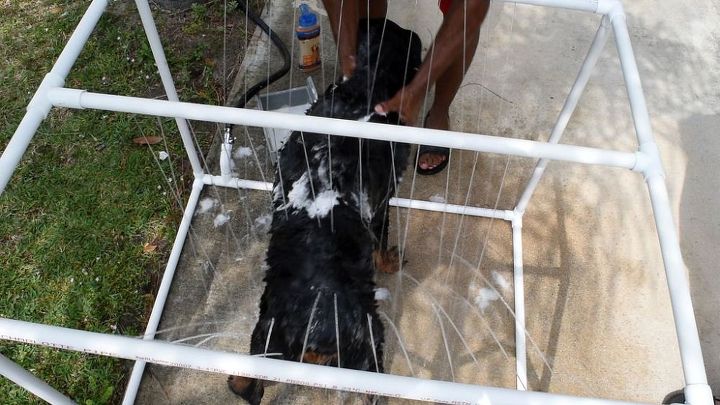
2. Turn off the water soap and wash
3. Turn the water back on when time to rinse
Comments
Join the conversation
-
I love this! Great job easy instructions!
-
Im going to try this I have 4 dogs!


Frequently asked questions
Have a question about this project?
No question but just a comment... you’re brilliant! How cool is this! I have 2 large dogs & since my husband passed away;I cannot bath the huge girls myself.. have to keep chasing em down! This is perfect... now you want to come build it for me? lol
Where do you get the guy to hold the dog. lol
Absolutely genius!! Thank you for all the sizes and very thorough instructions.